14 Balcony Railing Planter Ideas for Apartment Gardeners
The railing planter solved a problem I had accepted as permanent: no yard, no ground, no soil to actually plant into. Not the indoor windowsill pots. Not the single container squeezed into a corner. Not the hanging basket competing for the same few square feet of floor space.
The railing.
Because a railing is space nobody else is using. Before it: a balcony with a small side table and two chairs, every inch of floor already accounted for. After it: an entire second layer of growing space, running the full width of the balcony, taking up no floor at all.
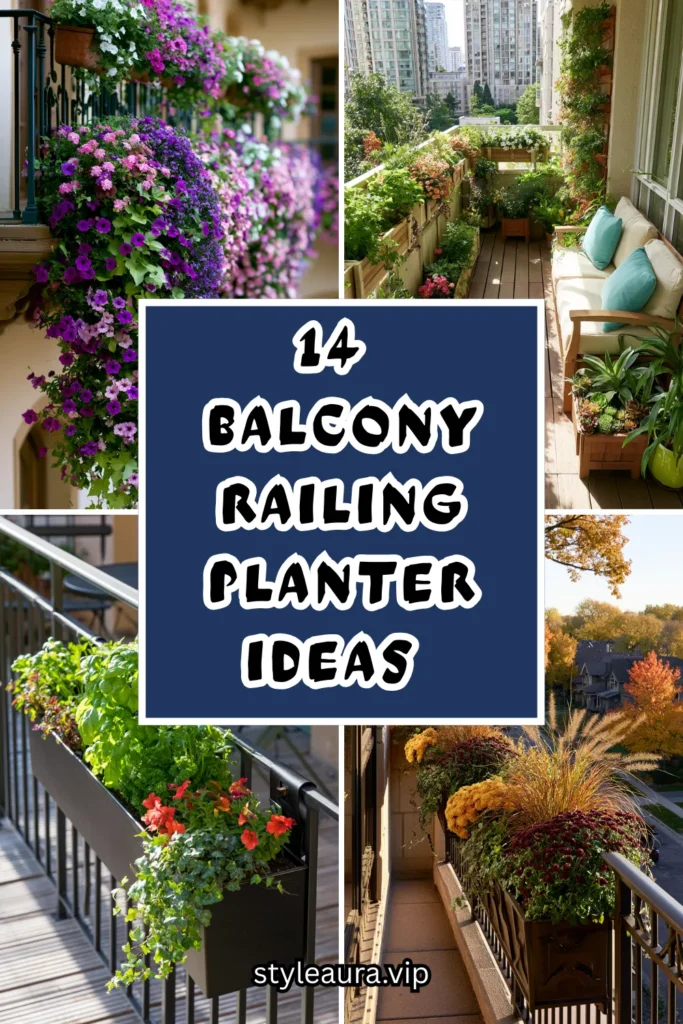
A railing planter is not a smaller, sadder version of a garden bed. It is the correct solution to the actual constraint an apartment balcony presents — plenty of railing length, almost no usable floor. The garden: no longer competing with the seating for space, but occupying a surface that was previously doing nothing.
Here are 14 balcony railing planter ideas for apartment gardeners — from the simplest clip-on box to the most fully planted railing garden — built on that understanding.
Why the Railing Is the Best Growing Space Most Balconies Have
The floor space math
A typical apartment balcony floor holds a small table, two chairs, and little else. The railing, by contrast, often runs 6 to 10 feet with almost nothing occupying it.
The light advantage
Railing planters sit higher than floor-level pots, often catching more direct sun than anything placed on the balcony floor, especially on lower-floor units shaded by the building itself.
The weight consideration
Railing planters must be lightweight and properly secured, since they hang or clip beyond the balcony’s structural edge rather than resting on a floor built to bear that load. This is the one constraint that shapes nearly every decision on this list.
The rental-friendly case
Most railing planter systems clip or hook onto the rail without drilling into the balcony structure at all, making this one of the few forms of real gardening fully compatible with a rental lease.
The Four Railing Planter Mounting Types
Before choosing any design:
The clip-on planter box
A rectangular box with adjustable clips or hooks gripping the top and bottom of the rail.
The most common and most secure everyday option.
Sits on the outside, inside, or straddling the rail depending on the model.
The hanging pocket system
Fabric or plastic pockets hung over the rail like a shoe organizer.
The lightest-weight option and often the cheapest.
Best suited to smaller, shallow-rooted plants.
The over-the-rail saddle planter
A planter shaped to straddle the rail, with weight distributed on both sides.
Good for wider or unusually shaped rails that standard clips do not fit.
Often the most visually seamless option.
The freestanding rail-adjacent stand
A planter stand positioned just behind the rail rather than attached to it at all.
Avoids any question of rail load capacity or landlord restrictions.
Requires a strip of floor space directly behind the railing.
1. The Clip-On Trough Box
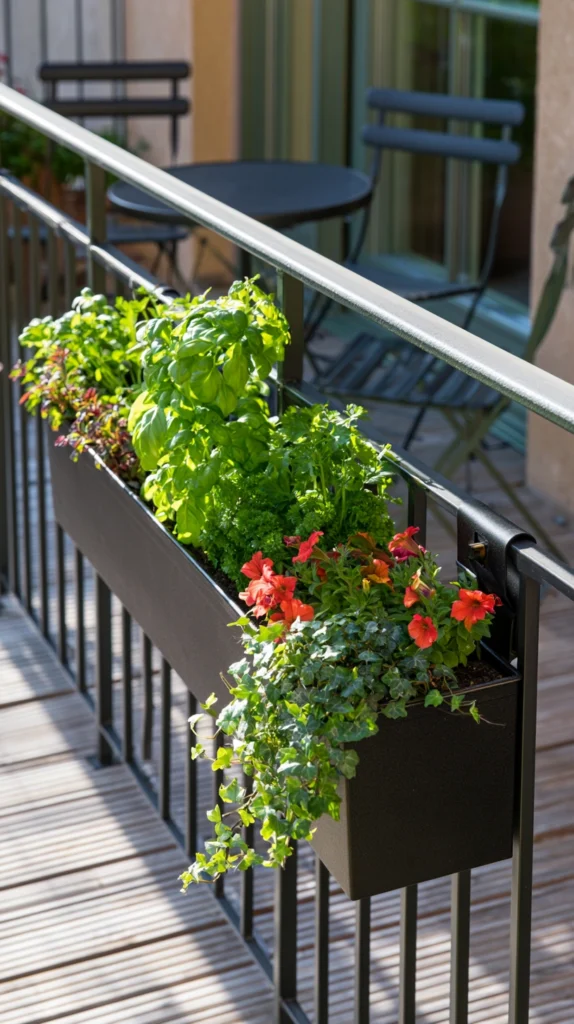
A rectangular planter box with adjustable metal or plastic clips, gripping the top of the railing and hanging down on the outside face.
Why the clip-on trough is the standard starting point
It requires no drilling, fits most standard railing widths, and holds enough soil volume for a genuine mixed planting rather than a single small plant.
The box
A trough at least 6 to 8 inches deep, giving root systems enough room without the excess weight of an oversized planter.
The clips
Adjustable metal brackets, sized to the railing’s actual width, checked before purchase since balcony rail dimensions vary significantly between buildings.
The weight
Filled with a lightweight potting mix rather than garden soil, and positioned toward the center of the box’s clip range rather than at either extreme, for the most secure hold.
The orientation
Hung on the outside of the rail for the most sun exposure, or the inside if building rules restrict anything extending beyond the balcony’s edge.
The drainage
A drip tray or saucer beneath, since water running off an outside-mounted planter falls directly onto whatever is below the balcony.
Cost breakdown: Clip-on trough planter: $25–50 Potting soil: $8–15 Plants: $15–30 Total: $48–95
2. The Fabric Pocket Hanging Organizer
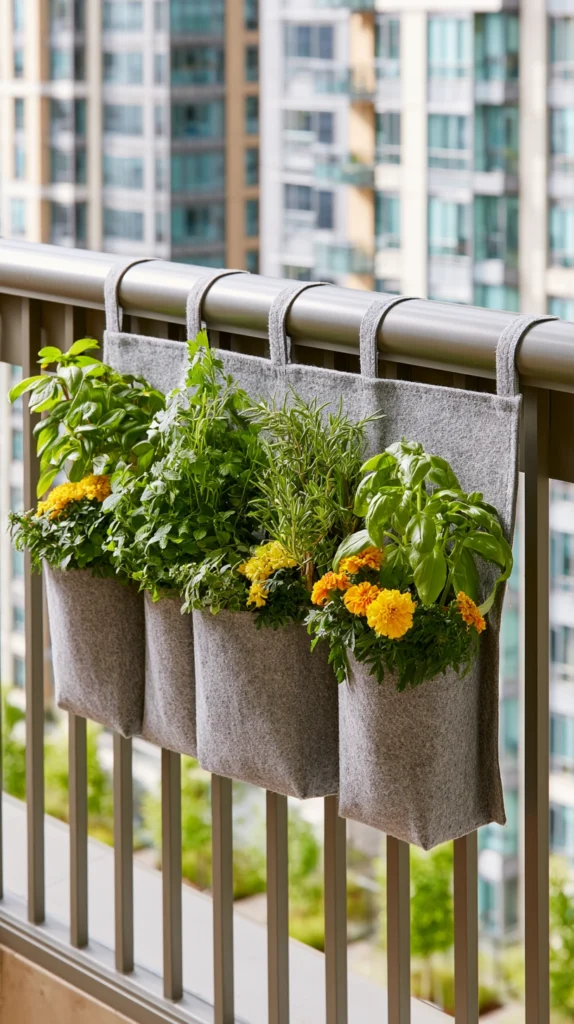
A multi-pocket fabric planter, similar in structure to an over-door shoe organizer, draped over the railing and filled pocket by pocket with small plants.
Why fabric pockets suit the lightest-weight installations
This is among the lightest railing planting methods available, making it a strong option for balconies with strict weight limits or railings not rated for a heavier clip-on box.
The material
Felt or heavy-duty woven fabric, treated or lined for water resistance, since the pockets hold soil and moisture directly against the fabric.
The pocket count
Typically six to twelve pockets per organizer, each sized for a single small plant rather than a full grouping.
The plant selection
Shallow-rooted herbs and small flowering annuals — thyme, alyssum, small marigolds — suited to the limited soil volume each pocket provides.
The watering
Individual pocket watering is more time-consuming than a single trough, worth factoring in for a household without much daily gardening time.
The mounting
Draped over the rail and secured with the organizer’s own straps or ties, requiring no additional hardware.
Cost breakdown: Fabric pocket organizer: $20–40 Small plants (6–8): $20–40 Potting soil: $8–15 Total: $48–95
3. The Saddle-Style Straddle Planter
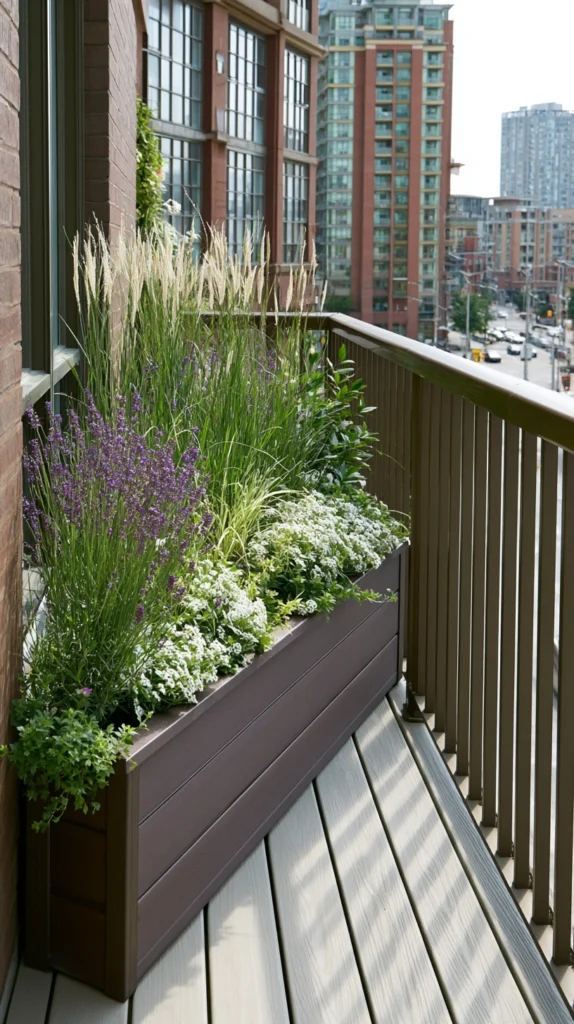
A planter molded or built to straddle the rail directly, with soil space and drainage on both the inside and outside faces of a single unit.
Why a saddle planter suits unusual or wide railings
Standard clip-on boxes are designed for common rail widths and shapes. A saddle planter, built to sit over the rail like a saddle on a horse, accommodates wider, rounded, or otherwise non-standard railings that clips do not fit well.
The design
A single molded planter, typically resin or powder-coated metal, with a center channel shaped to sit securely over the rail’s top edge.
The weight distribution
Balanced soil volume on both sides of the rail is important here, since an unevenly filled saddle planter can tip or shift more easily than a properly clipped box.
The material
Lightweight resin, which weighs meaningfully less than ceramic or concrete alternatives and reduces the overall load on the rail.
The security
Many saddle designs include a strap or screw-secured band beneath the rail for additional stability, worth checking for and using even if the planter’s weight alone seems sufficient.
The plant capacity
Generally holds more total soil volume than a single-sided clip-on box of similar length, since planting space exists on both faces.
Cost breakdown: Saddle-style planter: $35–70 Potting soil: $10–20 Plants: $20–40 Total: $65–130
4. The Railing Herb Garden
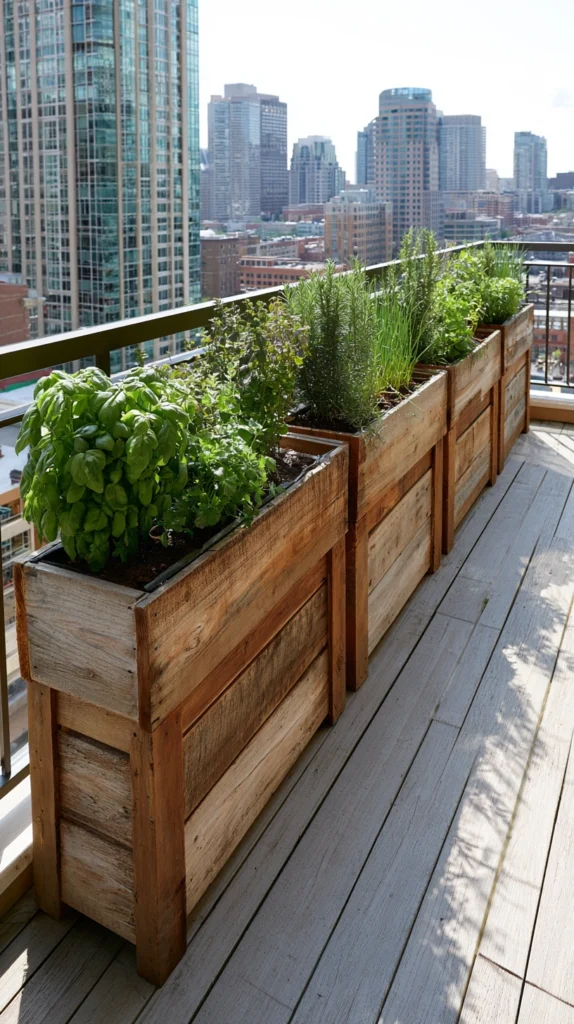
A row of clip-on or saddle planters along the railing, planted entirely with culinary herbs positioned close to the kitchen-adjacent side of the balcony.
Why herbs are especially well suited to railing planting
Most culinary herbs have relatively shallow, compact root systems, matching well with the limited soil depth a railing planter can support without becoming too heavy.
The herb selection
Basil, thyme, oregano, chives, and parsley, all performing well in the modest soil volume railing planters typically offer.
The placement
The section of railing closest to the balcony door leading into the kitchen, minimizing the distance between growing and cooking.
The grouping
Herbs with similar water needs planted together in the same box — basil and parsley in one section, thyme and oregano (which prefer drier soil) in another.
The harvesting habit
Positioned at an easy reaching height and distance from the door, so the herbs actually get used rather than becoming purely decorative.
The seasonal rotation
Hardier herbs like thyme and rosemary left in place through cooler months, while more tender herbs like basil are replaced or brought indoors before the first frost.
Cost breakdown: Clip-on planters (2–3): $50–120 Herb starts: $25–50 Potting soil: $15–25 Total: $90–195
5. The Trailing Flower Cascade
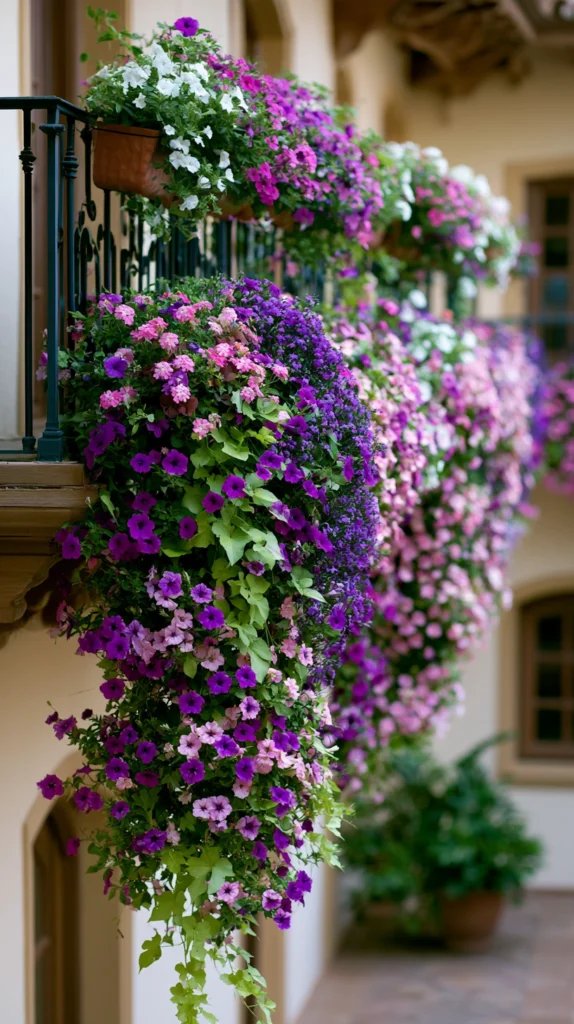
Railing planters filled with trailing flowering plants — petunias, lobelia, verbena — allowed to spill down over the edge for a cascading, full effect.
Why trailing plants suit the railing’s vertical position
Unlike a floor-level planter where growth spreads outward across the ground, a railing planter’s height allows trailing growth to hang and cascade, creating a fuller visual effect from both inside and outside the balcony.
The plant selection
Petunias, lobelia, sweet potato vine, and trailing verbena, chosen specifically for their tendency to spill over a container’s edge rather than grow upright.
The container fill
Planted more densely than an upright arrangement would allow, since the cascading habit means less risk of overcrowding as the plants mature and drape downward rather than competing for width.
The deadheading routine
Regular deadheading of spent blooms keeps trailing annuals producing new flowers throughout the season rather than going to seed and slowing down.
The color coordination
A single dominant color with one or two accent colors, rather than a fully mixed rainbow, for a more cohesive cascading effect when viewed from below.
The seasonal peak
Cascading annuals typically reach their fullest, most dramatic display by mid-to-late summer, continuing into early fall before the first cool nights slow growth.
Cost breakdown: Railing planters (2–3): $50–120 Trailing flower starts: $25–50 Potting soil: $15–25 Total: $90–195
6. The Vegetable Railing Garden
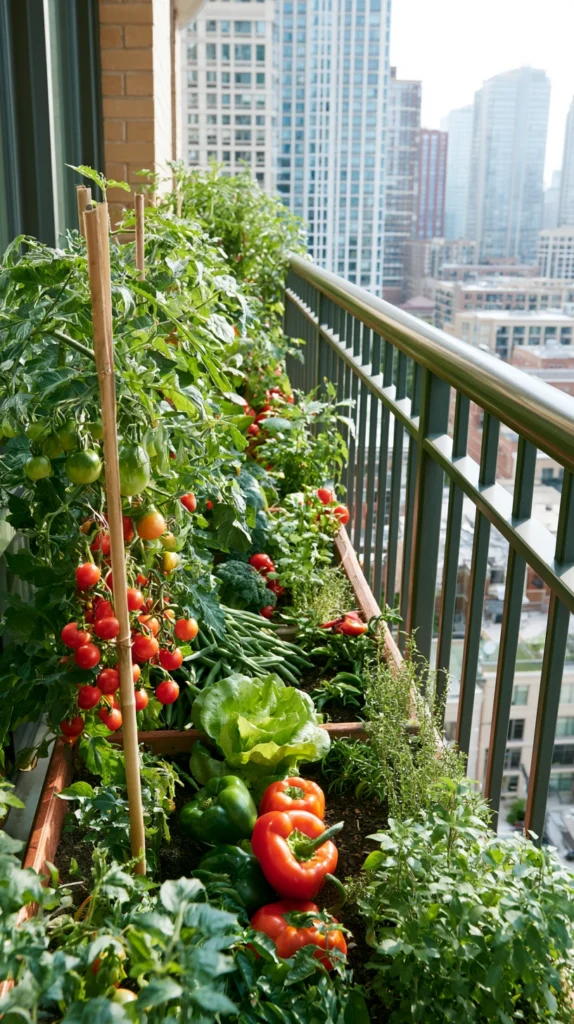
Compact vegetable varieties — cherry tomatoes, bush beans, lettuce, peppers — grown in railing planters for a genuine, if modest, food-producing balcony garden.
Why vegetables can work in a railing planter despite the limited depth
Compact and dwarf varieties bred specifically for container growing perform meaningfully better in shallow railing soil than standard full-sized varieties would.
The variety selection
Cherry or patio tomatoes, bush beans, loose-leaf lettuce, and compact pepper varieties, all bred or naturally suited to container-scale root systems.
The support
A small trellis or stake clipped to the railing itself for climbing or top-heavy plants like tomatoes, since the planter alone may not provide adequate support once fruit sets.
The soil depth requirement
Vegetables generally need a deeper planter than flowers or herbs — a minimum of 8 to 10 inches for most compact varieties, worth confirming before selecting a specific planter model.
The feeding schedule
Container vegetables deplete available nutrients faster than in-ground plants, requiring more frequent feeding with a diluted liquid fertilizer through the growing season.
The yield expectation
Modest but real — a handful of cherry tomatoes or a few servings of lettuce leaves weekly, framed as a genuine if small supplement to grocery produce rather than a replacement for it.
Cost breakdown: Deep railing planters (2–3): $60–140 Vegetable starts: $20–40 Potting soil and fertilizer: $20–35 Small trellis or stakes: $10–20 Total: $110–235
7. The Succulent and Sedum Low-Maintenance Row
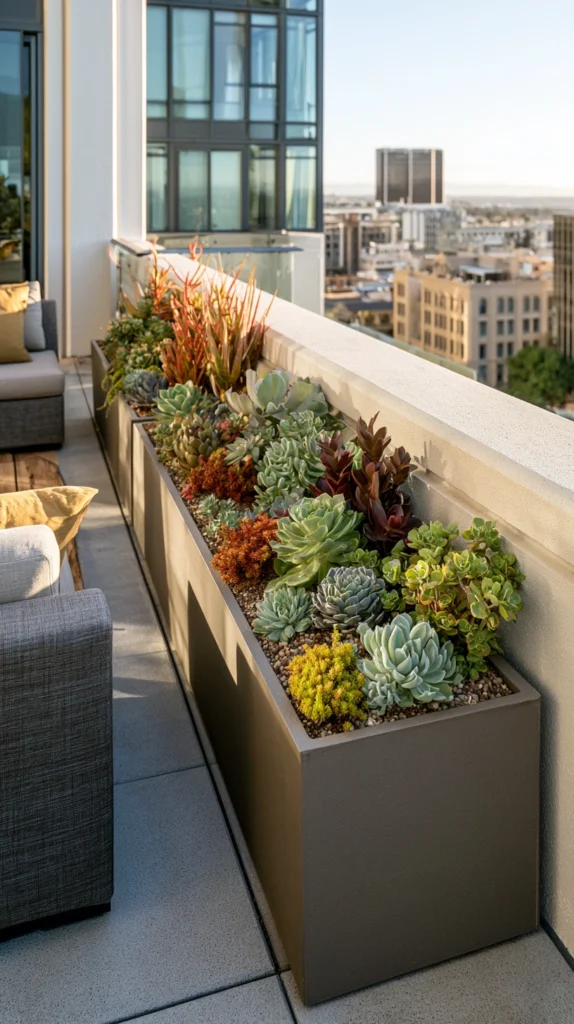
A row of shallow railing planters filled with succulents and sedum, chosen specifically for their tolerance of inconsistent watering and their suitability to a hands-off gardening approach.
Why succulents suit a lower-commitment railing garden
Succulents and sedum tolerate missed waterings far better than flowering annuals or vegetables, making this option well suited to a busy schedule or frequent travel.
The plant selection
Sedum, echeveria, and hardy sempervivum, all performing well in shallow soil and requiring minimal supplemental water beyond natural rainfall in most climates.
The soil
A fast-draining cactus or succulent-specific mix, rather than standard potting soil, since these plants are highly sensitive to consistently wet roots.
The container depth
Shallower planters work fine here, since succulent root systems are naturally compact, allowing for a lighter overall planter than herbs or vegetables would need.
The drainage
Extra drainage holes if the planter does not already include enough, since standing water is the primary risk to this plant selection’s health.
The seasonal hardiness
Many sedum and sempervivum varieties tolerate cold well and can remain on the railing through winter in most climates, unlike more tender flowering annuals.
Cost breakdown: Shallow railing planters: $30–70 Succulent and sedum plants: $20–45 Fast-draining soil mix: $10–18 Total: $60–133
8. The Mixed Color-Themed Planter Row
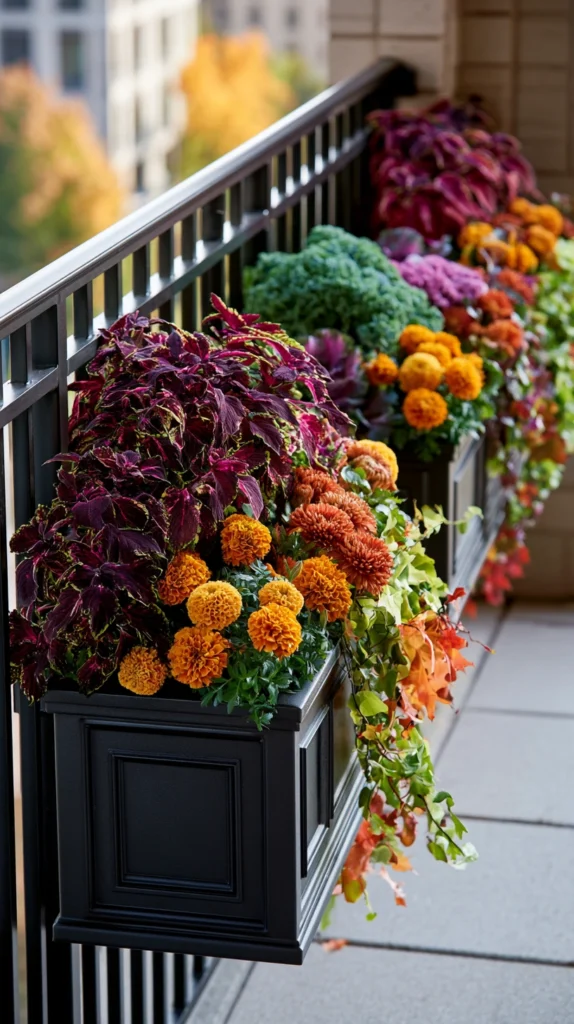
Several railing planters coordinated around a single seasonal color palette — rust, mustard, and burgundy for fall, for example — rather than a random mix of whatever is available.
Why a color theme elevates a simple planting into a design statement
A row of mismatched, randomly colored flowers reads as casual. A row planted deliberately around one seasonal palette reads as intentional, elevating the balcony’s overall look considerably.
The palette selection
A three- to four-color family drawn from the season — for fall, rust mums, mustard marigolds, and burgundy coleus, for example.
The plant selection within the palette
Mixing bloom shapes and foliage textures within the chosen colors, rather than repeating the same single plant across every container, for visual variety within the cohesive palette.
The container coordination
Planters in a single material and color, rather than mismatched styles, so the color story reads clearly without competing with the containers themselves.
The seasonal swap
The entire row reworked each season around a new palette — pastels for spring, deep jewel tones for fall — treating the railing as a changing seasonal display rather than a static planting.
The viewing angle
Planned with both the from-inside and from-outside view in mind, since a railing garden is visible from the street or courtyard below as much as from the balcony itself.
Cost breakdown: Matching planters (3–4): $60–150 Seasonal plants (coordinated palette): $30–60 Potting soil: $15–25 Total: $105–235
9. The Vertical Pocket Planter Wall Adjacent to the Rail
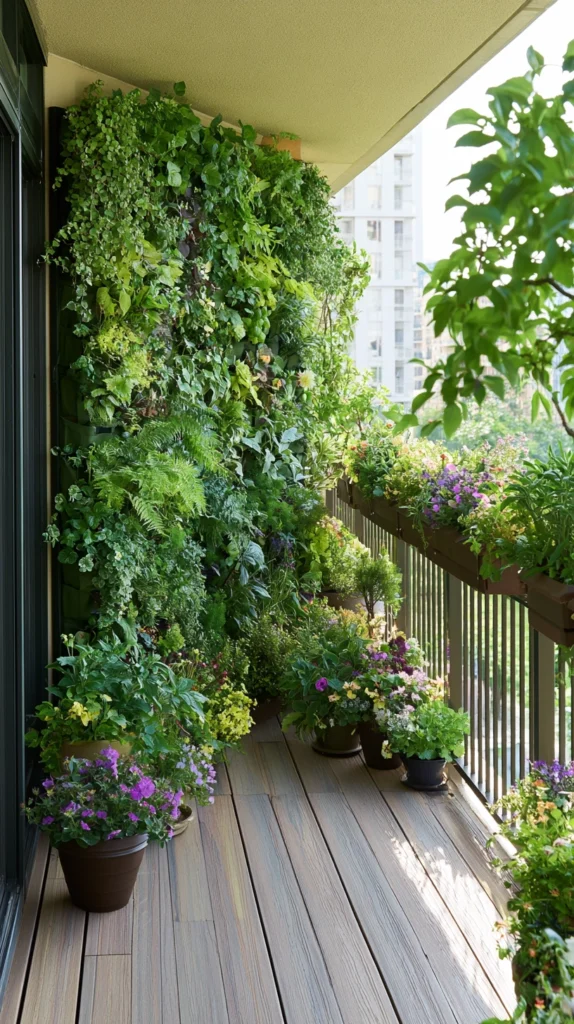
A fabric or modular vertical planter mounted on the wall directly beside the railing, extending the growing space upward in addition to the horizontal run along the rail itself.
Why combining rail and wall planting maximizes a small balcony
A railing alone offers one linear run of growing space. Adding a vertical wall planter beside it introduces height as a second growing dimension, without consuming any additional floor space.
The wall system
A modular pocket planter or a set of small individual pots on a wall-mounted grid, positioned on whichever balcony wall receives adequate light.
The plant coordination
Plants chosen to complement, rather than duplicate, whatever is already growing along the railing, avoiding redundancy between the two growing zones.
The watering separation
A wall-mounted system typically needs its own watering routine, separate from the railing planters, since the two are rarely positioned for one single watering pass to reach both efficiently.
The mounting
Secured to the wall with appropriate anchors for the specific balcony material, checked against any lease restrictions on wall penetrations before installation.
The overall effect
A balcony that reads as fully planted from multiple angles, rather than a single line of color along the rail alone.
Cost breakdown: Wall-mounted pocket planter or grid: $30–70 Additional plants: $20–40 Total: $50–110
10. The Self-Watering Railing Planter
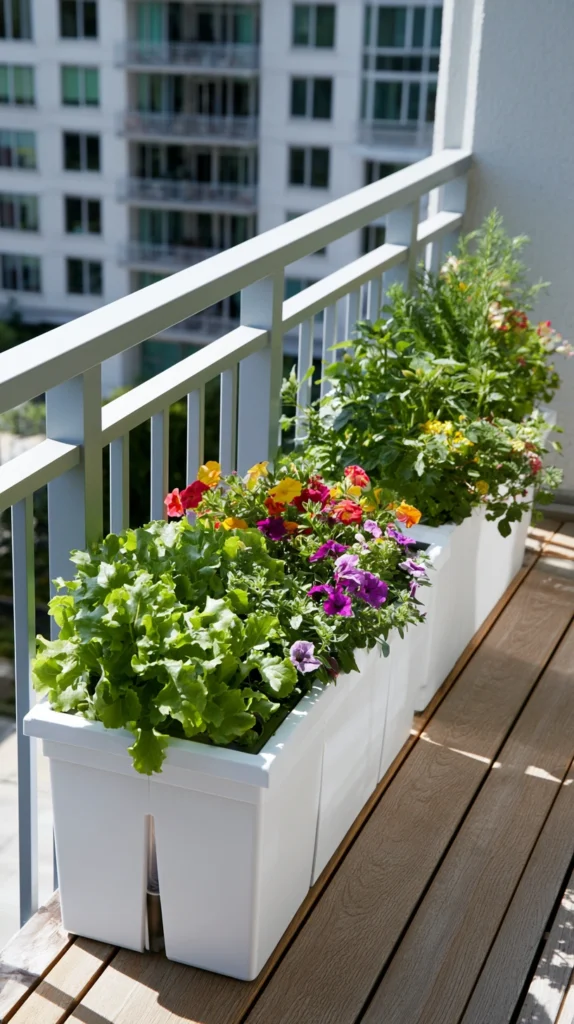
A railing planter fitted with a built-in water reservoir, reducing the frequency of manual watering and buffering against the faster drying that elevated, wind-exposed railing planters typically experience.
Why self-watering matters more for railing planters than ground-level ones
Railing planters, elevated and often more exposed to wind and sun, dry out faster than floor-level containers of the same size. A reservoir system directly addresses that specific disadvantage.
The mechanism
A water reservoir integrated into the planter’s base, with a wicking system drawing moisture upward into the soil as needed.
The refill routine
Typically once every one to two weeks, rather than daily, depending on the specific planter’s reservoir size and the plants’ individual water needs.
The weight consideration
A filled reservoir adds meaningful weight compared to a standard planter — worth confirming the railing’s load capacity accommodates the fully watered weight, not just the dry planter and soil.
The plant suitability
Works particularly well for consistently moisture-loving plants such as petunias or leafy vegetables, less critical for succulents or drought-tolerant herbs that prefer to dry out between waterings.
The indicator
Many self-watering models include a visible water-level gauge, useful for a railing planter that may be harder to physically lift and check than a ground-level pot.
Cost breakdown: Self-watering railing planter: $35–80 Plants and soil: $25–50 Total: $60–130
11. The Autumn Ornamental Grass and Mum Row
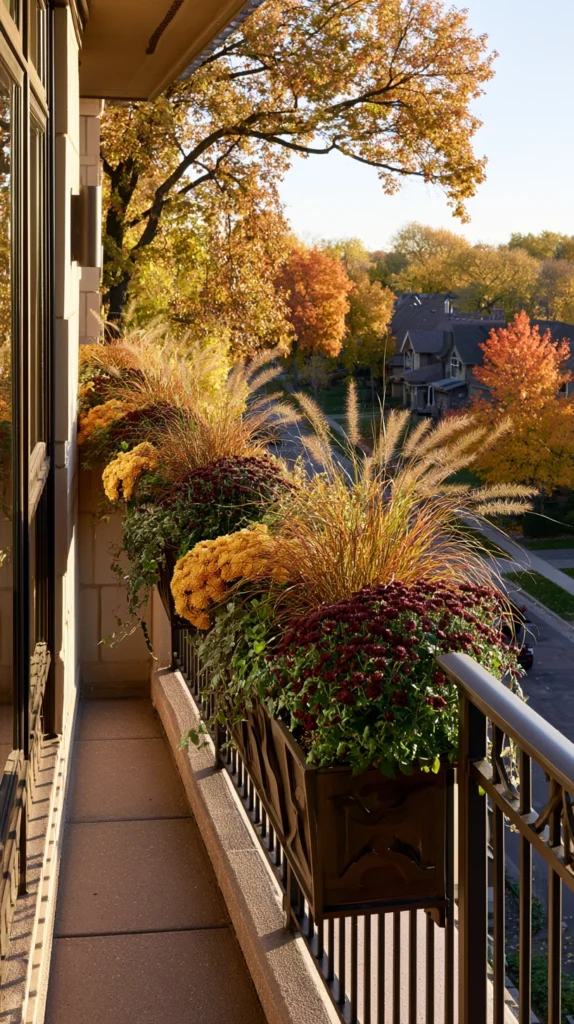
Railing planters filled specifically with fall ornamental grasses and chrysanthemums, timed to peak through the autumn months rather than the summer growing season most planter guides focus on.
Why fall deserves its own dedicated planting rather than a leftover summer display
Many balconies simply let summer annuals fade through September rather than replacing them, missing a full season of color the railing could otherwise provide.
The grasses
Dwarf varieties of fountain grass or feather reed grass, chosen for their compact size relative to full garden-scale ornamental grasses.
The mums
Chrysanthemums in rust, burgundy, and deep gold, planted densely for immediate fall color rather than started from smaller nursery plants that take weeks to fill in.
The combination
Grasses providing height and movement, mums providing dense color at a lower level within the same planter, echoing a layered garden bed arrangement in miniature.
The longevity
Mums typically bloom for four to six weeks, worth planning the display’s timing around a specific occasion or the peak of local fall color if the display is meant to coincide with it.
The transition
Grasses often remain attractive well after the mums fade, allowing the planter to shift into a more subdued winter display without a full replant.
Cost breakdown: Railing planters (2–3): $50–120 Ornamental grasses: $20–40 Chrysanthemums: $20–40 Total: $90–200
12. The Repurposed Container Railing Garden
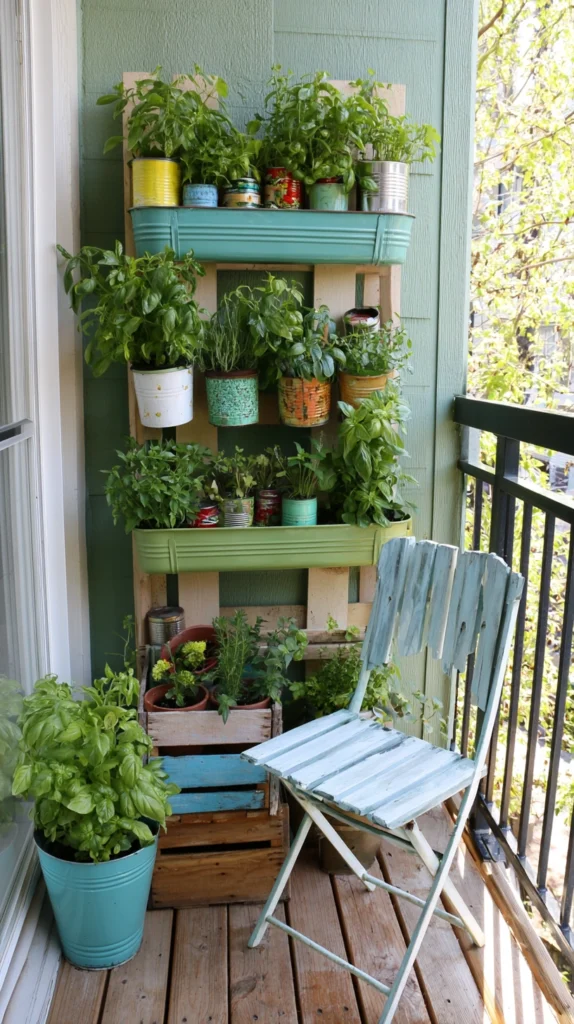
Railing planters improvised from repurposed materials — rain gutter sections, tin cans, or wood crates fitted with rail brackets — for the lowest possible material cost.
Why repurposed containers suit a budget-conscious balcony garden
Purpose-built railing planters, while not expensive, still cost more than many households want to spend on a first attempt at balcony gardening. Repurposed materials bring that cost close to zero.
The gutter option
A capped length of vinyl or metal rain gutter, drilled with drainage holes and fitted with simple bracket hardware to hang from the rail.
The tin can option
Large tin cans, cleaned and drilled with drainage holes, wired together in a row and hung from the rail with sturdy wire or a mounted rod — best suited to small individual plants rather than a continuous planting.
The crate option
A small wood crate, lined with a plastic liner and fitted with hooks or brackets, following the same repurposing principle used for cold frames and other budget garden structures.
The finishing touch
A coat of paint on any repurposed metal container both improves appearance and helps prevent rust from developing where drainage holes have exposed bare metal.
The security check
Repurposed containers still need to be securely and properly mounted, since improvised brackets carry the same risk of failure as any other railing attachment if not sized and installed correctly.
Cost breakdown: Repurposed containers (gutter, cans, or crate): $0–15 Brackets or mounting hardware: $10–25 Plants and soil: $20–40 Total: $30–80
13. The Privacy Screen Combined With Planting
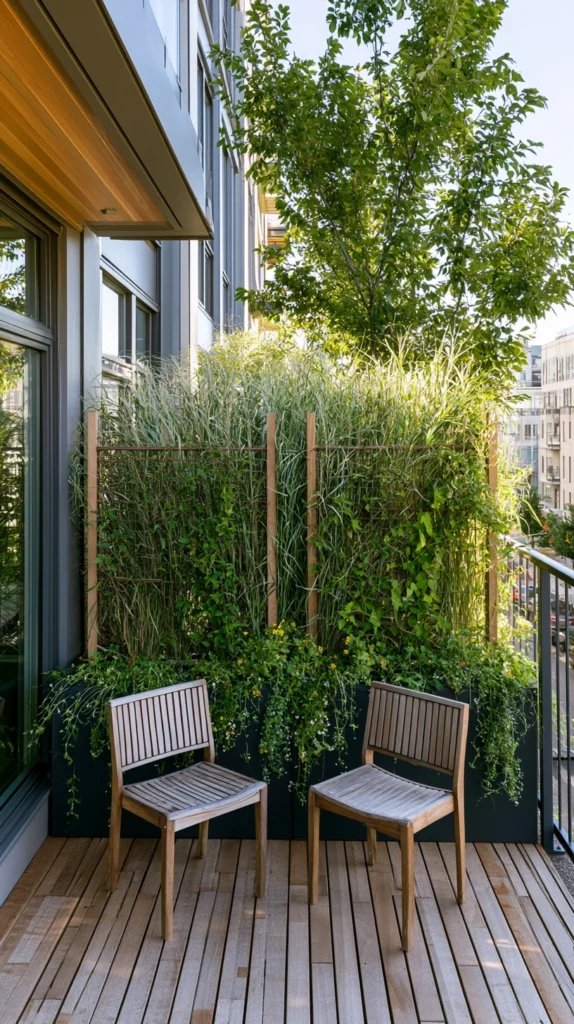
Tall, dense plantings along the railing specifically chosen and positioned to create a degree of privacy screening from neighboring balconies or the street below.
Why railing planting can serve a functional purpose beyond decoration
Many apartment balconies face directly toward a neighboring unit or a busy street, and a densely planted railing row addresses that lack of privacy without requiring a separate screen or curtain structure.
The plant selection
Taller, denser growers — ornamental grasses, ornamental millet, or climbing vines trained up a small trellis — chosen for height and fullness rather than low, spreading habits.
The trellis addition
A slim trellis clipped to the railing behind the planter box, giving climbing plants like morning glory or a compact clematis a vertical structure to fill in for additional screening height.
The placement strategy
Concentrated along the specific stretch of railing facing the sightline needing screening, rather than spread evenly across the whole balcony if privacy is the primary goal.
The density
Planted more closely together than a purely decorative arrangement would call for, prioritizing fullness and coverage over individual plant spacing.
The seasonal gap
Deciduous climbing vines lose their screening effect in winter — worth pairing with an evergreen grass or a second planting for year-round coverage if privacy matters through the colder months too.
Cost breakdown: Railing planters and trellis: $60–140 Tall or climbing plants: $25–50 Potting soil: $15–25 Total: $100–215
14. The Complete Balcony Railing Garden (The Fully Planted Rail)
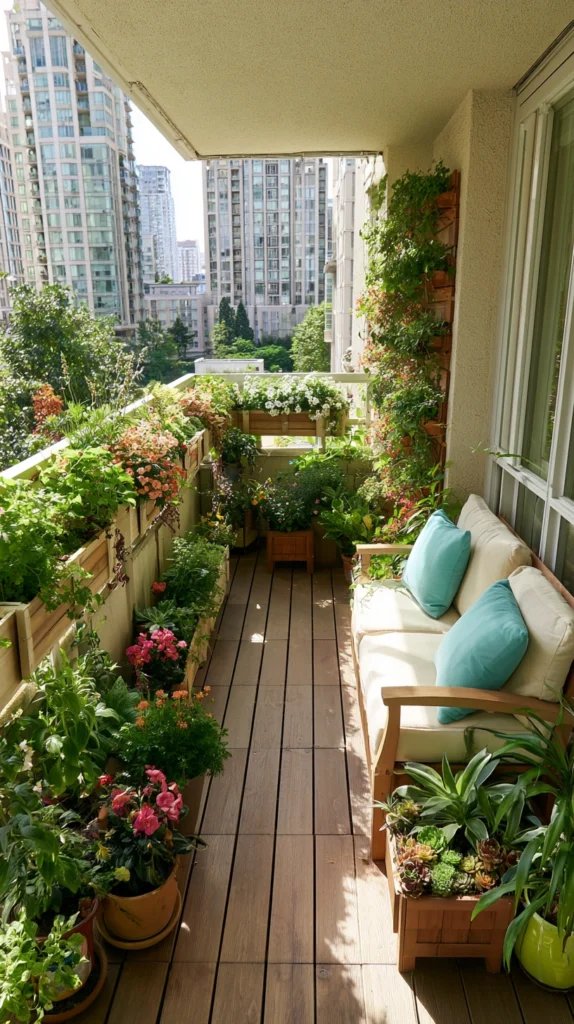
A complete railing garden combining several of the approaches above — herbs near the kitchen door, flowering color along the main viewing stretch, and a self-watering or low-maintenance section for the busiest weeks — running the full usable length of the rail.
What separates the complete railing garden from a single planter box
A single clip-on box: a start. A complete railing garden: the rail’s full length considered as one continuous, purposefully zoned growing space, matched to how the balcony actually gets used.
The elements of the complete balcony railing garden
The herb zone
Positioned nearest the door into the kitchen, planted with the herbs used most often in everyday cooking.
The color zone
The stretch of railing most visible from the seating area, planted with a coordinated seasonal palette of trailing or upright flowers.
The low-maintenance zone
A section of succulents or self-watering planters, providing a buffer for weeks when watering the full length of railing is not realistic.
The mounting
A consistent bracket or clip system throughout, checked against the specific railing’s width and the balcony’s weight allowances before full installation.
The drainage management
Drip trays beneath every planter facing outward, protecting whatever is below the balcony from runoff.
The vertical layer
A small wall-mounted addition beside the rail, if space and light allow, adding a second growing dimension beyond the railing itself.
The complete design in action
A Saturday morning in early fall:
8am: A snip of chives and thyme from the kitchen-end planters, straight into the morning’s eggs.
8:15am: The color-zone mums and grasses catching the low morning light, visible from the coffee table on the balcony.
8:30am: A quick check of the succulent section, untouched and thriving despite not being watered in over a week.
The complete balcony railing garden: proof that a genuine, purposeful garden does not require ground at all, only the right length of rail and a plan for how to use it.
Cost breakdown for the complete railing garden: Assuming a starting point of an empty rail: Herb zone planters and plants: $90–195 Color zone planters and plants: $90–235 Low-maintenance zone (succulents or self-watering): $60–133 Wall-mounted vertical addition: $50–110 Drip trays: $15–30 Total: $305–703
Phased over two or three seasons:
Season one ($90–195): The herb zone alone, nearest the kitchen
Season two ($90–235): The color zone, coordinated to the current season’s palette
Season three ($75–265): The low-maintenance zone and any wall-mounted addition
The balcony railing garden: not a weekend project in its fullest form, but a genuinely productive and decorative growing space built with intention, section by section.
The Question Before Any Railing Planter Design
Before choosing a mounting type, a plant selection, a placement:
What is the primary reason for wanting a railing garden on this balcony?
If the answer is: fresh herbs for cooking — the railing herb garden positioned nearest the kitchen door.
If the answer is: the lowest possible cost — the repurposed container garden.
If the answer is: minimal ongoing maintenance — the succulent and sedum row or the self-watering planter.
If the answer is: more privacy from neighbors or the street — the tall, dense privacy screening planting.
The design follows the balcony’s actual constraints — rail width, weight limits, sun exposure — more than any single style preference. Every idea on this list solves those constraints differently. The question is which combination fits this particular balcony and this gardener’s routine.
The single clip-on herb box: still changes how often fresh herbs make it into a meal. The complete railing garden, planned with intention: a genuinely full growing space where none seemed to exist before.
That growing space: the whole point of looking at the rail differently in the first place.
Getting Started This Weekend
The immediate railing planter solution:
Measure the railing’s width and check the building’s weight guidance before buying anything.
The single detail most likely to be skipped, and most important to get right before mounting anything.
Start with one small clip-on box, not the full length of rail.
A single herb planter near the door, tested for a few weeks before expanding further.
Choose plants suited to the actual sun exposure, not the plants that looked best at the store.
A balcony’s specific light pattern, checked over a full day, matters more than any single plant’s popularity.
Add a drip tray from day one.
The detail most likely to be forgotten and most likely to cause a problem with a neighbor below.
The rest of the design: the elaboration of this moment.
The rail: the beginning. The balcony garden: what grows along it.