12 Vertical Garden Ideas to Maximize Patio Space
Ask someone how much space their patio has and they’ll give you a square footage, length times width, as if the only usable dimension were the floor itself.
That measurement misses most of what a small patio actually has to offer. Walls, railings, and the open air above eye level go almost entirely unused in most patio gardens, even though that vertical space is often larger than the actual floor footprint available for pots and planters.
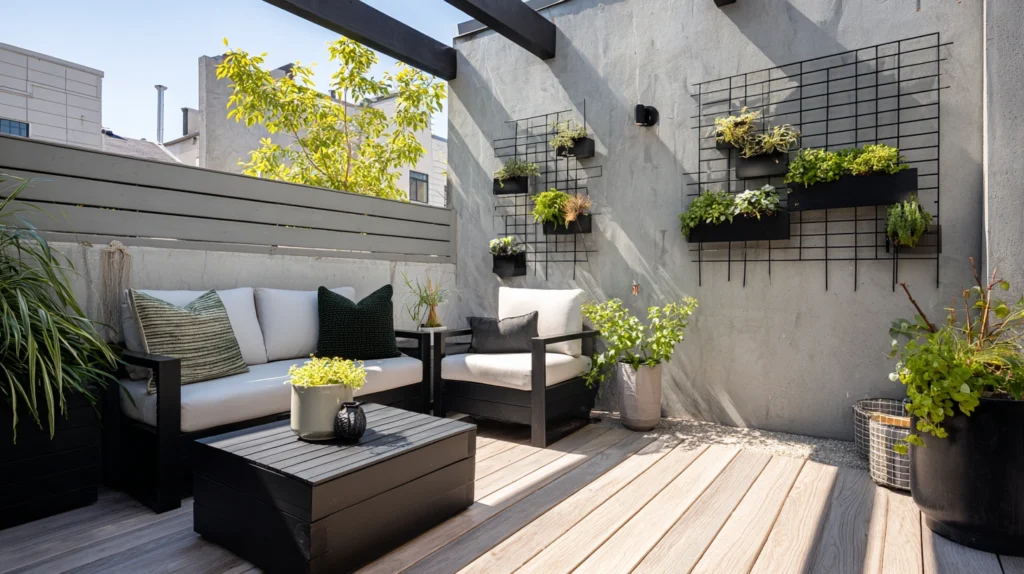
A vertical garden doesn’t just add greenery to a small patio. It effectively multiplies the growing space available, using height instead of floor area to fit considerably more plants than the square footage alone would ever suggest is possible.
Here are 12 ways to build a patio garden that grows upward, not just outward.
Why vertical growing matters more on a patio than almost anywhere else
Limited floor space makes height the one dimension most patios have genuinely left to work with.
- A single wall can hold considerably more planting capacity than the equivalent floor footprint of pots would allow
- Vertical arrangements keep the patio’s actual walking and seating area clear, rather than crowding it with floor-standing containers
- Plants grown vertically often get better airflow and light exposure than those crowded together at ground level, sometimes genuinely improving plant health alongside the space savings
Once you start treating the patio’s walls and railings as legitimate growing surfaces, the space available for plants expands considerably beyond what the floor plan alone suggests.
1. Install a Modular Wall-Mounted Planting System
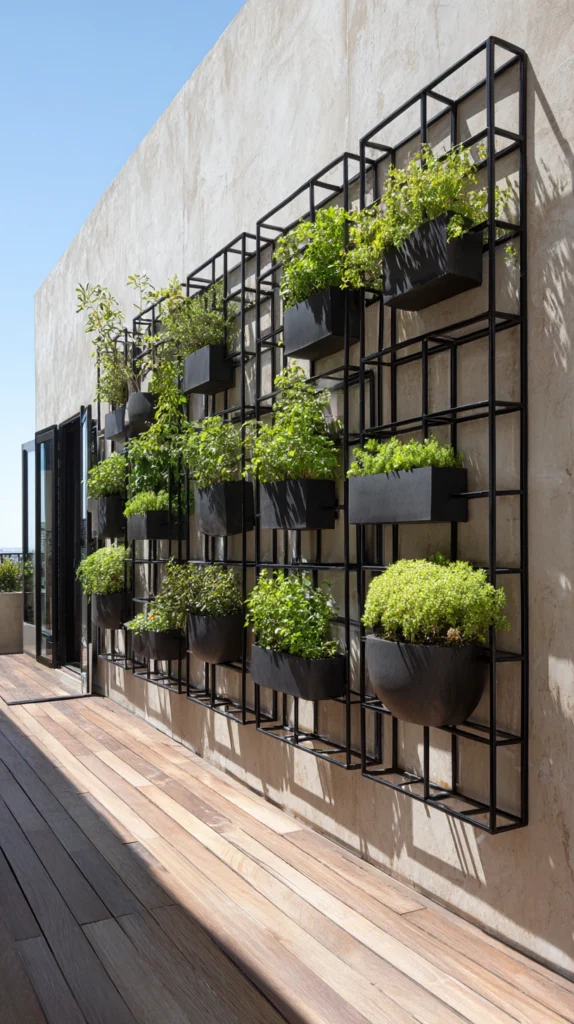
The most direct way to convert a blank wall into genuine growing space.
Build it:
- A modular grid or panel system, either purchased as a prefabricated kit or built from a simple wood frame with individual planting pockets
- Mounted securely to a sturdy exterior wall or fence, using anchors rated for the combined weight of the system, soil, and mature plants
- Filled with a mix of trailing and upright plants, chosen based on the wall’s specific sun exposure
Why a modular system delivers more growing capacity than any single large planter could:
- Multiple individual planting cells allow for genuine variety, growing several different plant types in the same footprint a single large pot would occupy
- It uses wall space that would otherwise remain entirely bare, effectively adding square footage of growing area without expanding the patio’s actual floor plan
- Individual cells can be replanted or rearranged without disturbing the whole system, offering more flexibility than a single large planted bed
Why weight-rated mounting hardware deserves genuine attention before installation begins:
A fully planted modular wall system, once soil and mature plants are factored in, can weigh considerably more than the empty frame alone suggests, and mounting hardware rated only for the system’s dry weight can fail once the whole thing is watered and established. Confirming the mounting hardware’s weight rating against the system’s fully loaded weight, not just its empty weight, prevents a genuinely dangerous and messy failure once the garden is established.
Cost breakdown: A modular wall planting system runs $80 to $250 depending on size and the number of individual planting cells.
2. Build a Ladder-Style Plant Stand for Tiered Display
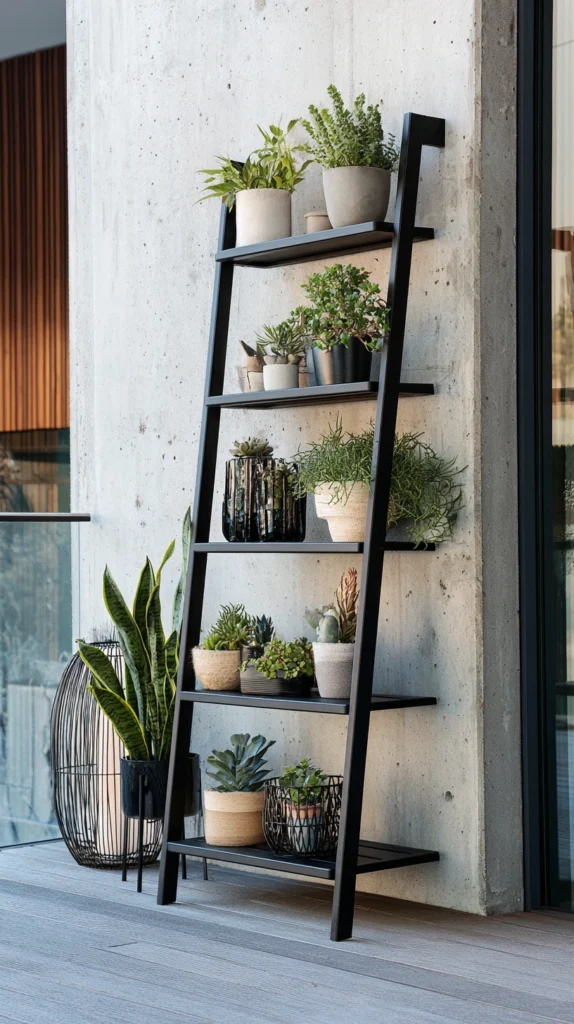
Using a leaning, tiered structure to stack multiple pots vertically in a small footprint.
Build it:
- A wooden or metal ladder-style stand, either purchased or built from simple lumber, leaned against the wall at an angle
- Individual potted plants placed across each rung, sized to fit securely without overhanging precariously
- Taller plants positioned on lower rungs and trailing varieties on upper rungs, allowing growth to cascade downward without shading the plants below
Why a ladder stand suits a patio corner particularly well:
- It occupies a genuinely small floor footprint while displaying considerably more plants than the same floor space could otherwise support
- The tiered rungs naturally stagger sun exposure across different plant heights, since each rung sits at a slightly different angle relative to the light source
- It’s easy to rearrange, remove, or store flat for winter, unlike a permanently mounted wall system
Why the specific angle of the ladder affects both stability and plant health:
A ladder leaned too vertically can become genuinely unstable, especially once loaded with several full pots, while one leaned too shallowly can shade the lower rungs excessively, limiting which plants will actually thrive there. Testing the stand’s stability empty first, then adjusting the lean angle before fully loading it with plants, helps confirm the structure is both safe and positioned to give every rung adequate light.
Cost breakdown: A ladder-style plant stand runs $30 to $80 depending on material and size.
3. Use Hanging Baskets Suspended From an Overhead Structure
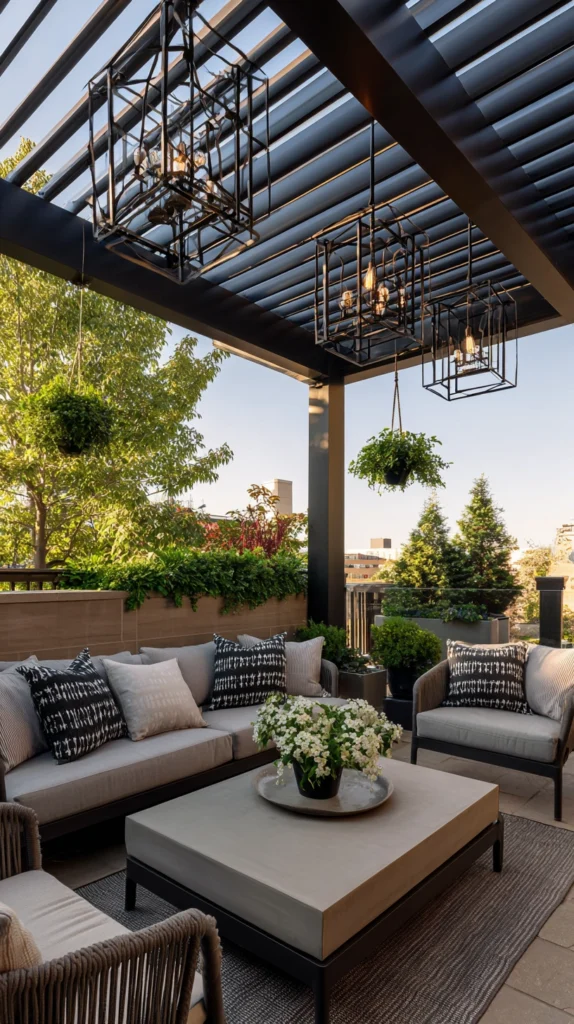
Taking advantage of a pergola, overhang, or ceiling beam already present above the patio.
Build it:
- Hanging baskets suspended from S-hooks attached to an existing overhead structure, like a pergola beam or a covered patio ceiling
- Spaced with enough clearance between baskets and from head height, avoiding a hazard for anyone walking beneath them
- Filled with trailing plants specifically chosen for their cascading growth habit, like petunias, ivy, or a trailing succulent variety
Why overhead hanging baskets use space that ground-level planters never touch:
- It occupies the airspace above the patio entirely, adding a genuine planting layer without using any floor footprint at all
- Trailing plants specifically benefit from this elevated position, since their growth habit is designed to cascade downward rather than needing to climb or spread outward
- It draws the eye upward, making a small patio feel taller and more layered than its actual floor dimensions would suggest
Why hook and hardware weight ratings matter as much here as they do for wall-mounted systems:
A fully watered hanging basket, especially a larger one with mature trailing growth, can weigh considerably more than expected, and a hook or mounting point not rated for that weight risks a genuinely dangerous fall, particularly given these baskets typically hang directly above where people walk and sit. Checking the specific weight rating of both the hook and whatever it’s anchored into, and erring toward a higher-rated hardware option than seems strictly necessary, is a worthwhile precaution given the location directly overhead.
Cost breakdown: Hanging baskets with hardware run $15 to $35 each, typically needing three to five for a meaningful overhead display.
4. Train Climbing Vines Up a Trellis Against the Patio Wall
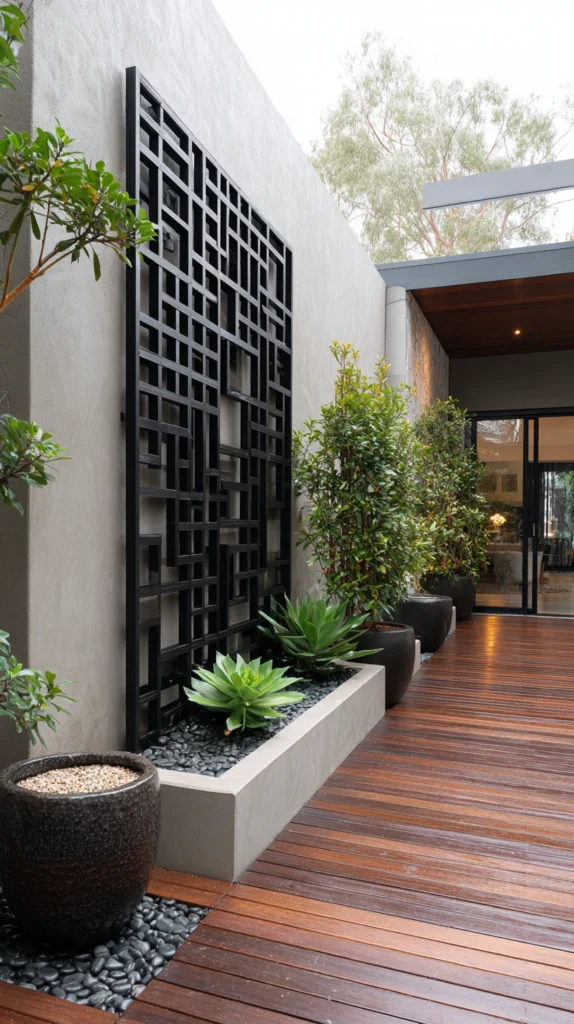
Using living, growing structure rather than a static planter system.
Build it:
- A simple wood or wire trellis mounted against the patio’s wall or railing
- A climbing plant, like jasmine, clematis, or a climbing rose, planted at the trellis base and trained upward as it grows
- Ties or clips used periodically during the growing season to help direct the vine’s growth evenly across the trellis
Why climbing vines deliver a different kind of vertical coverage than potted or modular systems:
- A single well-established vine can eventually cover a considerably larger area than an equivalent number of individual potted plants, once it fully matures
- It requires only one planting location at the trellis base, rather than multiple individual pots needing separate watering and care
- The living, growing coverage continues to expand and fill in over multiple seasons, unlike a static planting arrangement that stays essentially fixed in appearance
Why choosing a vine suited to the trellis’s specific material and the patio’s climate prevents a common early setback:
Different climbing plants attach to structures in different ways, some twining naturally around narrow supports while others need a flatter surface or additional tying to climb effectively, and mismatching the vine’s natural climbing habit to the trellis’s actual structure can result in disappointing, uneven growth. Researching the specific vine variety’s climbing method and confirming it suits both the trellis material and the patio’s typical seasonal temperatures prevents this frustration during the crucial early growing period.
Cost breakdown: A trellis runs $20 to $60 depending on size and material, with a climbing vine plant adding $15 to $40.
5. Install Gutter Planters in Stacked Horizontal Rows
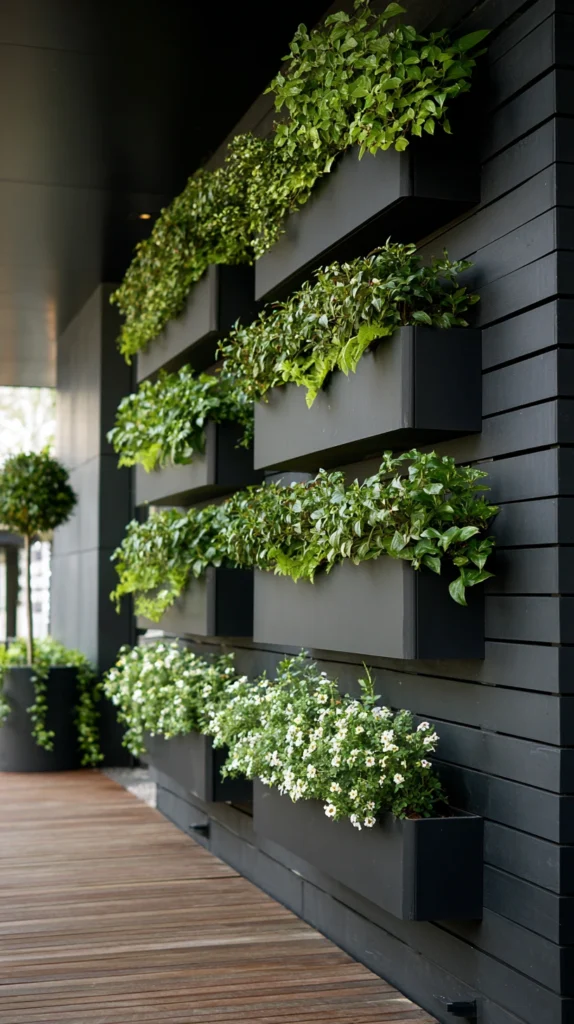
Repurposing an inexpensive material into a space-efficient vertical planting system.
Build it:
- Sections of vinyl or metal rain gutter, cut to fit the available wall width, with end caps sealed on both sides
- Drainage holes drilled at intervals along the gutter’s length, positioned over a bed or gravel area that can handle the runoff
- Mounted in evenly spaced horizontal rows using simple wall brackets, stacked from waist height up to just above reach
Why gutter planters maximize vertical space particularly efficiently for shallow-rooted plants:
- Multiple rows stacked closely together create considerably more planting area within a narrow wall footprint than any single planter box would provide
- The material is inexpensive and widely available, making this one of the more budget-friendly vertical growing options on this entire list
- It suits shallow-rooted plants like herbs and lettuce particularly well, since the gutter’s limited depth doesn’t constrain these specific plant types
Why drainage planning deserves consideration before installation, not as an afterthought:
Water draining from multiple stacked gutter rows needs somewhere to go that won’t create a puddling mess on the patio floor or damage nearby structures, and failing to plan for this before installation often results in a messy, water-damaged wall after just a few waterings. Positioning the whole system over a gravel bed, a floor drain, or at minimum away from the home’s foundation, and confirming the drainage path before finalizing placement, avoids this entirely preventable problem.
Cost breakdown: Gutter sections run $8 to $15 per 10-foot length, with mounting brackets and end caps adding $10 to $20 for a full multi-row installation.
6. Build a Pallet Garden Leaned Against the Wall
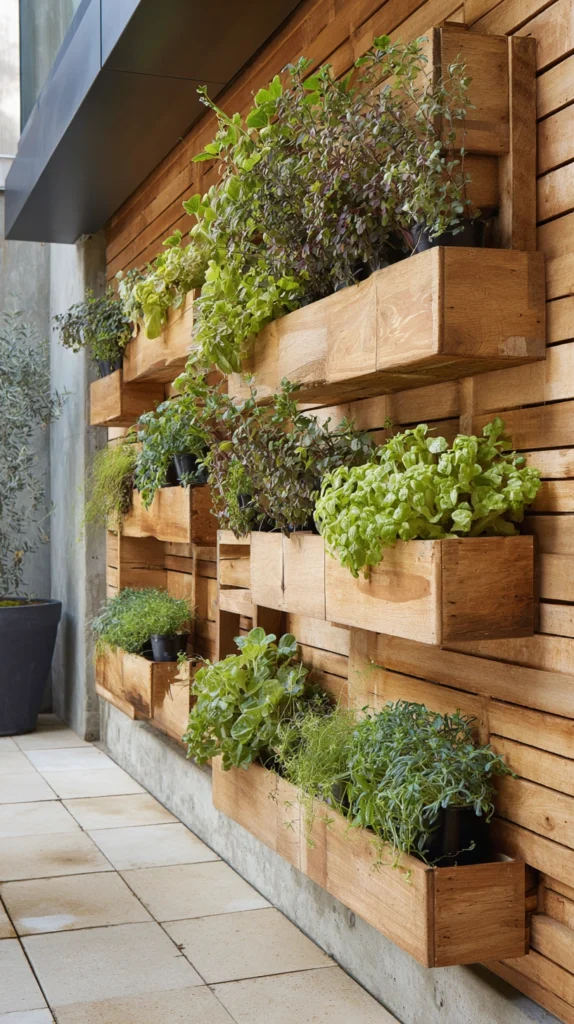
Using an inexpensive, widely available material for a rustic vertical growing structure.
Build it:
- A wood shipping pallet, sanded and sealed with a food-safe, weatherproof finish
- Landscape fabric stapled across the back and bottom of each slat gap to contain soil within each individual planting row
- Leaned against the wall at a slight angle initially, allowing soil to settle for a season before mounting it fully vertical
Why a pallet garden delivers genuine growing capacity at one of the lowest possible costs:
- Pallets are often available free or very cheap from local businesses looking to dispose of them, making this one of the most budget-friendly vertical options available
- The slat spacing naturally creates individual planting rows without requiring any additional carpentry beyond the basic sealing and fabric lining
- It has genuine rustic character that suits a casual, cottage-style patio particularly well
Why sourcing a pallet marked for heat treatment rather than chemical treatment matters for anything growing food:
Pallets are typically stamped with a code indicating whether they were heat-treated or chemically treated during manufacturing, and chemically treated pallets can leach residue into soil used for growing edible plants. Specifically seeking out heat-treated pallets, identifiable by their manufacturing stamp, for any garden intended to grow herbs or vegetables avoids introducing an unwanted chemical exposure risk into food-producing soil.
Cost breakdown: A pallet runs free to $15 depending on the source, with landscape fabric and sealant adding $15 to $30.
7. Use Stacked Terracotta Pots on a Central Post
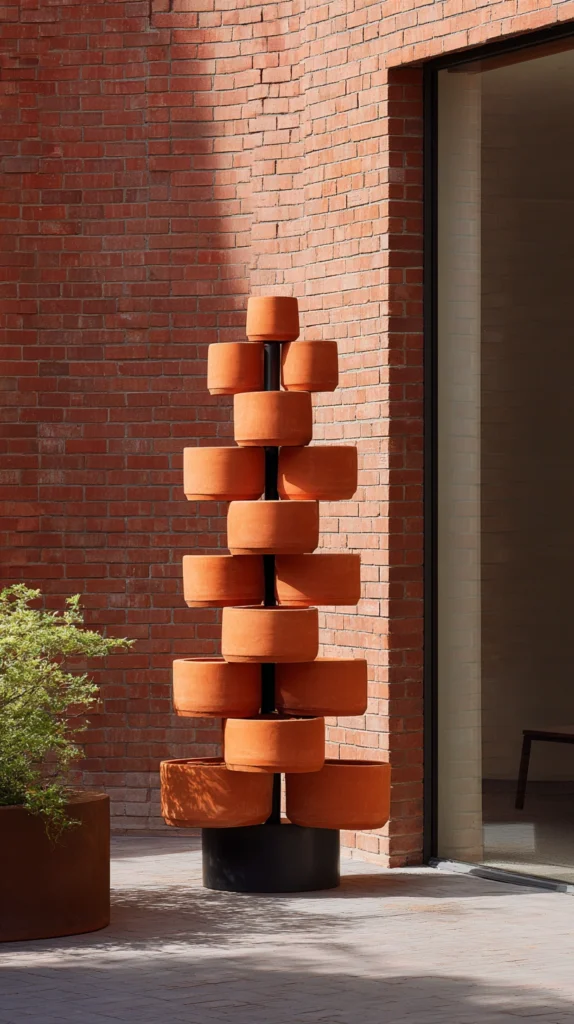
Creating a vertical tower using individual pots rather than a built structure.
Build it:
- A sturdy wood or metal stake driven securely into a large base planter
- Progressively smaller terracotta pots threaded onto the stake, each offset slightly to allow sun access to the pot below it
- Soil added to each pot individually as the tower is assembled, rather than filling the entire structure at once
Why a stacked pot tower suits a small patio corner especially well:
- It occupies a genuinely minimal floor footprint, essentially just the base pot’s diameter, while displaying multiple plants at varying heights
- Individual pots can be swapped or replanted without disturbing the rest of the tower, offering flexibility a built-in system doesn’t provide
- Terracotta’s natural porousness helps prevent overwatering, a genuinely useful trait for a tower structure where drainage between levels matters
Why the offset positioning between stacked pots matters more than simply centering each one directly above the last:
Stacking pots in a perfectly straight vertical line means each lower pot receives shade from the one directly above it for a significant portion of the day, considerably limiting which plants can actually thrive in the lower positions. Offsetting each pot slightly to one side as the tower rises ensures every level receives at least some direct light throughout the day, meaningfully expanding which plants can be successfully grown at each height.
Cost breakdown: A stacked terracotta tower of five to six pots runs $30 to $60 depending on pot sizes.
8. Add a Vertical Herb Garden Near the Kitchen-Facing Patio Door
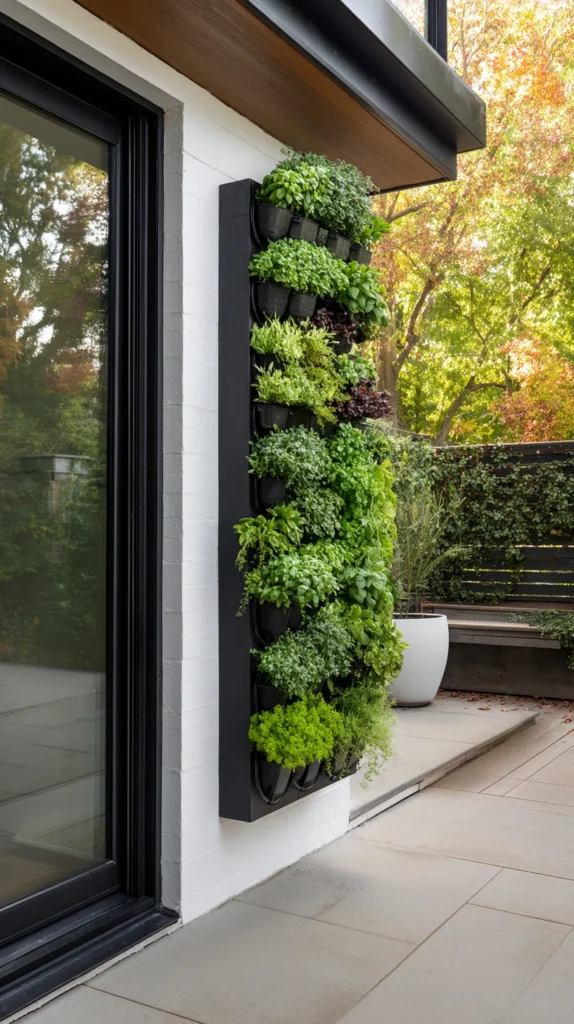
Combining space efficiency with genuine daily culinary function.
Build it:
- A wall-mounted planter system, felt pocket planter, or a series of small individual pots arranged vertically near the patio’s kitchen-facing entrance
- Herbs like basil, thyme, oregano, and chives planted specifically for their compact growth habit and suitability to container life
- Positioned within easy reach for snipping, ideally at a height that doesn’t require bending or stretching to access
Why proximity to the kitchen door specifically matters for this particular vertical garden application:
- Herbs positioned far from the kitchen tend to get used considerably less often than those within easy, immediate reach while cooking
- A vertical arrangement near the door keeps floor space clear right at a high-traffic entry point, avoiding the tripping hazard floor-level pots might create in this specific location
- It combines the space-saving benefit of vertical growing with genuine everyday function, rather than existing purely as decoration
Why choosing compact herb varieties specifically, rather than any herb regardless of mature size, matters for this vertical application:
Some herb varieties, like certain mint types, spread aggressively and can quickly overwhelm a compact vertical planting system, while more naturally contained varieties like thyme or chives stay within their allotted space far more reliably. Selecting herbs specifically known for compact, contained growth habits, rather than any herb simply because it’s commonly used in cooking, keeps a vertical herb garden manageable over time rather than requiring constant aggressive pruning.
Cost breakdown: A vertical herb garden setup runs $25 to $60 depending on the specific system chosen and the number of herb plants included.
9. Install a Living Wall Panel With Integrated Irrigation
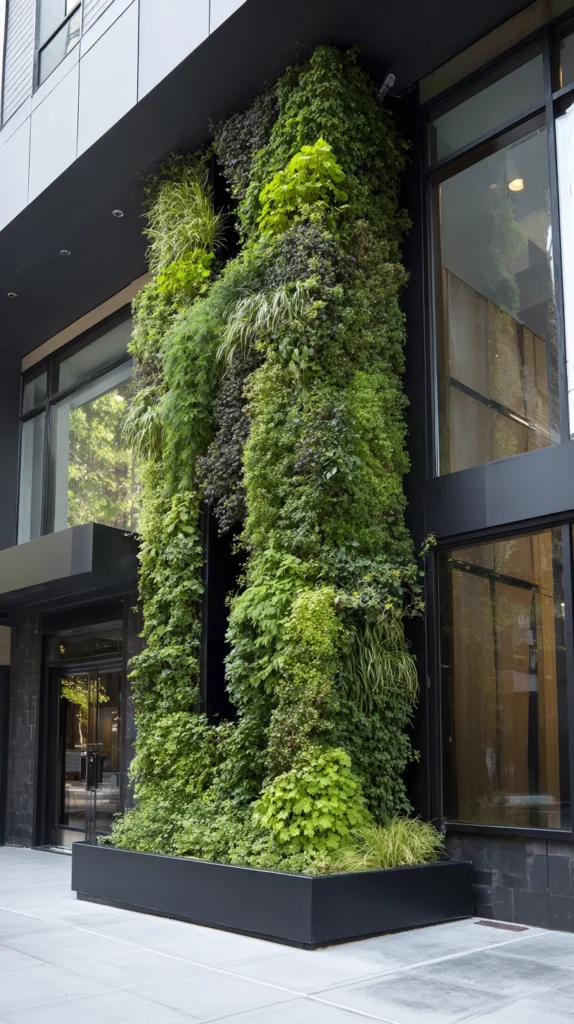
A more sophisticated, fully self-watering vertical growing system for a larger patio investment.
Build it:
- A prefabricated living wall system with integrated drip irrigation, typically connected to a small timer and either a rain barrel or a standard outdoor spigot
- A dense mix of plants, often including both ornamental and edible varieties, filling the system’s individual planting pockets
- Positioned against a wall with reliable access to both water and, ideally, some direct sunlight for at least part of the day
Why integrated irrigation solves the single biggest challenge of maintaining a dense vertical garden:
- Manually watering a large, dense vertical planting system evenly can become genuinely time-consuming and difficult to do consistently well
- Integrated drip irrigation delivers water evenly across every planting pocket, considerably reducing the daily maintenance burden compared to hand-watering
- It allows for a considerably denser planting arrangement than would be practical to maintain through manual watering alone, since the system handles the most labor-intensive part of upkeep automatically
Why this option represents a larger investment relative to the other ideas on this list, and when that investment genuinely makes sense:
A fully irrigated living wall system costs meaningfully more upfront than the simpler options covered elsewhere in this list, making it a better fit for someone planning to keep a dense vertical garden long-term rather than experimenting with vertical growing for the first time. For a patio that will clearly benefit from ongoing, substantial vertical greenery, the reduced daily maintenance burden this system provides can genuinely justify its higher initial cost over time.
Cost breakdown: A living wall system with integrated irrigation runs $150 to $400 per square foot of coverage including plants and the irrigation components.
10. Use Over-the-Railing Planter Boxes on a Balcony or Patio Fence
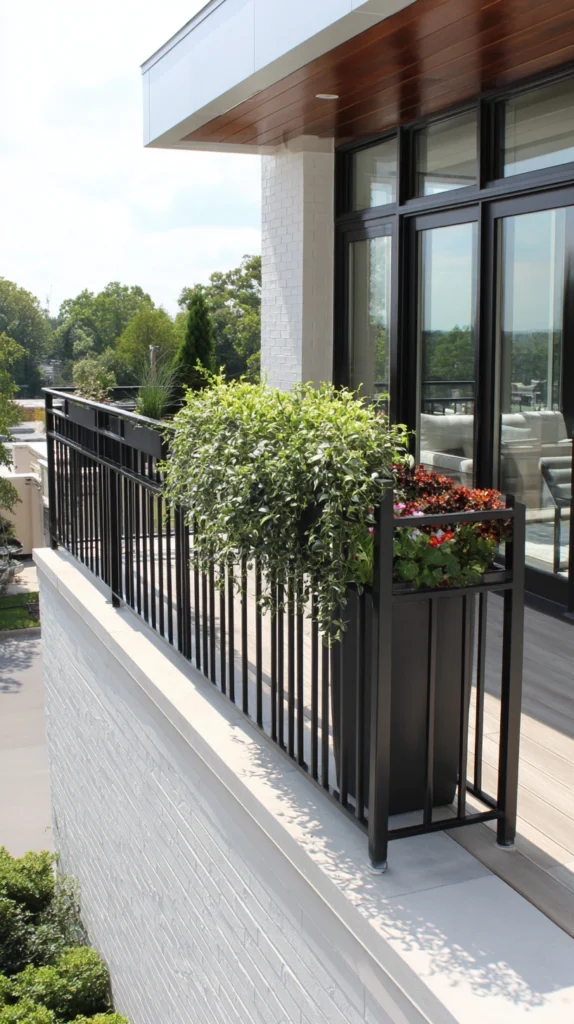
Making use of an existing railing rather than requiring any new mounting structure.
Build it:
- Planter boxes specifically designed to hook or clamp over an existing railing or fence top, rather than requiring drilled mounting holes
- Filled with a mix of trailing and upright plants, balanced against the box’s specific weight capacity and the railing’s own load rating
- Positioned along the railing’s outward-facing side, adding greenery visible from both inside and outside the patio space
Why railing-mounted boxes use space many patios already have but rarely utilize:
- Most patios and balconies already include a railing or low fence, representing genuine unused planting real estate that requires no additional structure to access
- Hook or clamp-style mounting avoids drilling into the railing itself, making this a fully reversible option suited to rental properties as well as owned homes
- It adds visible greenery from both the patio side and the outward-facing side, effectively doing double visual duty
Why confirming the railing’s actual load capacity matters before adding a fully planted, watered box:
Not every railing, particularly on older properties or lighter-weight balcony fencing, is necessarily rated to support the additional weight of a fully soil-filled, watered planter box hanging from its edge. Checking the railing’s condition and, when in doubt, consulting the property’s construction details or a professional before adding a heavy planter box prevents a structural failure that a simple weight check could have caught in advance.
Cost breakdown: Railing planter boxes run $20 to $50 each depending on size and mounting style.
11. Create a Vertical Succulent Frame for Low-Maintenance Coverage
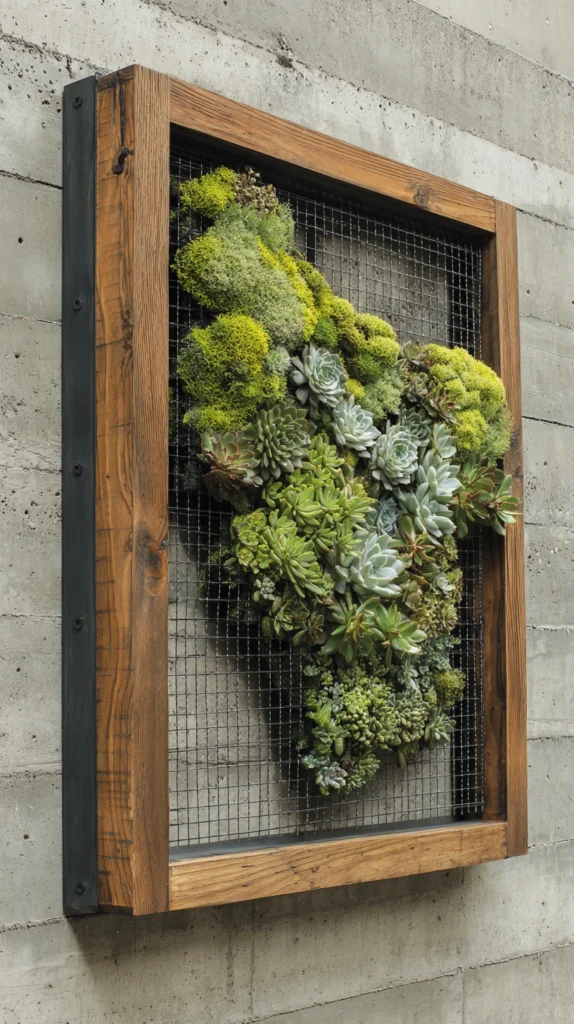
Building a shallow, wall-mounted frame specifically suited to succulents’ minimal soil and water needs.
Build it:
- A shallow wood frame, backed with wire mesh and lined with sphagnum moss, mounted flush against the wall
- Small succulent cuttings planted directly into the moss through the wire mesh, given time to root in place before the frame is hung fully vertical
- Watered infrequently once established, since succulents specifically tolerate and often prefer this drier growing style
Why a succulent-specific frame suits low-maintenance vertical gardening better than a soil-based system:
- Succulents require considerably less water and general maintenance than most other plant types, making this frame style genuinely low-effort once established
- The shallow depth needed for succulent roots means this frame can be considerably thinner and lighter than a soil-based vertical planter, simplifying mounting
- It creates a genuinely striking, tapestry-like visual effect once the succulents fill in, distinct from the more traditional potted-plant look of other vertical gardening methods
Why allowing adequate rooting time before hanging the frame vertically prevents plants from falling out early on:
Succulent cuttings need several weeks to develop enough root structure to stay securely in place once the frame is turned fully vertical, and hanging the frame too soon after planting often results in cuttings falling out before they’ve had a chance to properly establish. Keeping the frame flat or only slightly angled for at least three to four weeks after planting, checking that cuttings have developed visible root growth before moving to a fully vertical position, considerably improves the success rate of this specific method.
Cost breakdown: A succulent frame build, including the wood frame, wire mesh, and moss, runs $30 to $70, with succulent cuttings adding $15 to $40 depending on quantity and variety.
12. Add a Tiered Corner Shelf Unit for Layered Plant Display
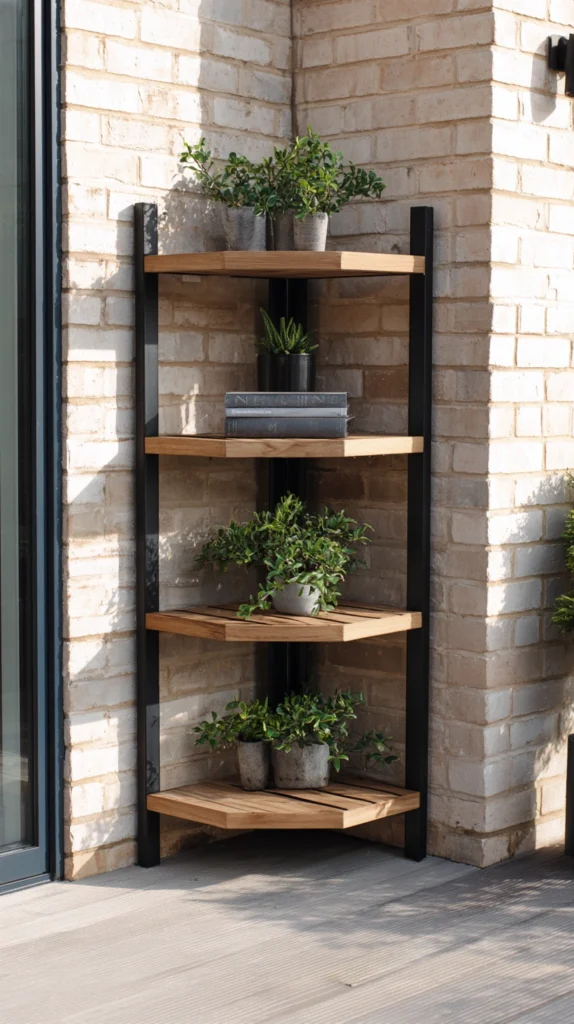
Using furniture-style shelving rather than a wall-mounted system for flexible vertical display.
Build it:
- A tiered corner shelf unit, either purchased or built from simple lumber, positioned to fit a patio’s often underused corner space
- Potted plants arranged across each tier, with taller specimens on lower shelves and more compact or trailing plants on upper tiers
- Positioned to take advantage of whatever light the specific corner receives, adjusting plant selection accordingly
Why a corner shelf unit specifically addresses one of the most commonly wasted areas of a small patio:
- Corners are frequently left entirely empty on small patios, since furniture and walking paths rarely extend fully into these awkward angles
- A tiered shelf fits this specific underused space efficiently, adding considerable planting capacity without interfering with the patio’s main usable floor area
- It’s fully freestanding, meaning it requires no wall mounting or drilling, making it one of the simplest options on this list to install and later relocate if needed
Why choosing a shelf material rated for outdoor moisture exposure matters more here than for typical indoor furniture:
A shelf unit built or purchased without adequate weatherproofing can warp, rot, or rust considerably faster than expected once exposed to regular watering and outdoor humidity, undermining the investment within just a season or two. Choosing a material specifically rated for outdoor use, whether a sealed wood, powder-coated metal, or weather-resistant resin, and reapplying sealant periodically if using wood, considerably extends how long this piece stays functional and attractive.
Cost breakdown: A tiered corner shelf unit runs $40 to $120 depending on material and the number of tiers.
Getting started this weekend
You don’t need every idea from this list installed before the patio starts feeling genuinely more spacious.
- Start with the simplest, lowest-commitment option, like a ladder-style plant stand or a few hanging baskets from an existing overhead structure
- Add a wall-mounted system or trellis with climbing vines once you’ve confirmed which corner or wall gets the best light for what you’re hoping to grow
- Save larger investments, like a fully irrigated living wall, for a dedicated second phase once you know how much ongoing vertical gardening genuinely suits your routine
Most patios that end up feeling considerably larger than their actual square footage got there by treating the walls and open air above eye level as genuine growing space, not just the floor plan alone.
Budget reality
| Budget Range | What It Typically Covers |
| Under $50 | Hanging baskets, a stacked terracotta pot tower, a pallet garden using a free or low-cost pallet |
| $50-150 | Ladder-style plant stand, gutter planters, a trellis with climbing vines, a vertical herb garden |
| $150-300 | A modular wall-mounted system, railing planter boxes, a tiered corner shelf unit |
| $300+ | A fully irrigated living wall panel system |
Most of the space-maximizing benefit comes from using height and wall space deliberately, not from the total amount spent on any single system.
What actually maximizes a small patio through vertical gardening
It was never really about squeezing more pots onto an already crowded floor.
It’s the bare wall finally holding a full modular planting system, the corner that’s sat empty for years now doing genuine work with a tiered shelf, the overhead beam supporting trailing baskets that add a whole layer of greenery the floor plan never accounted for.
Look up and around before adding another floor-standing pot, and the patio’s actual growing capacity turns out to be considerably larger than its square footage ever suggested on its own.