14 Lean-To Greenhouse Ideas for Small Yards
The lean-to greenhouse solved a problem no freestanding structure ever could have solved in my yard: there simply was not room for one. Not a smaller freestanding greenhouse. Not a repositioned garden bed. Not a rearranged patio or a narrower path.
The wall.
Because building against the house instead of away from it changed the entire equation. Before it: a small yard where every square foot of open space was already spoken for, a freestanding greenhouse never quite fitting anywhere. After it: a structure using a wall that was already standing, taking up almost no new ground at all.
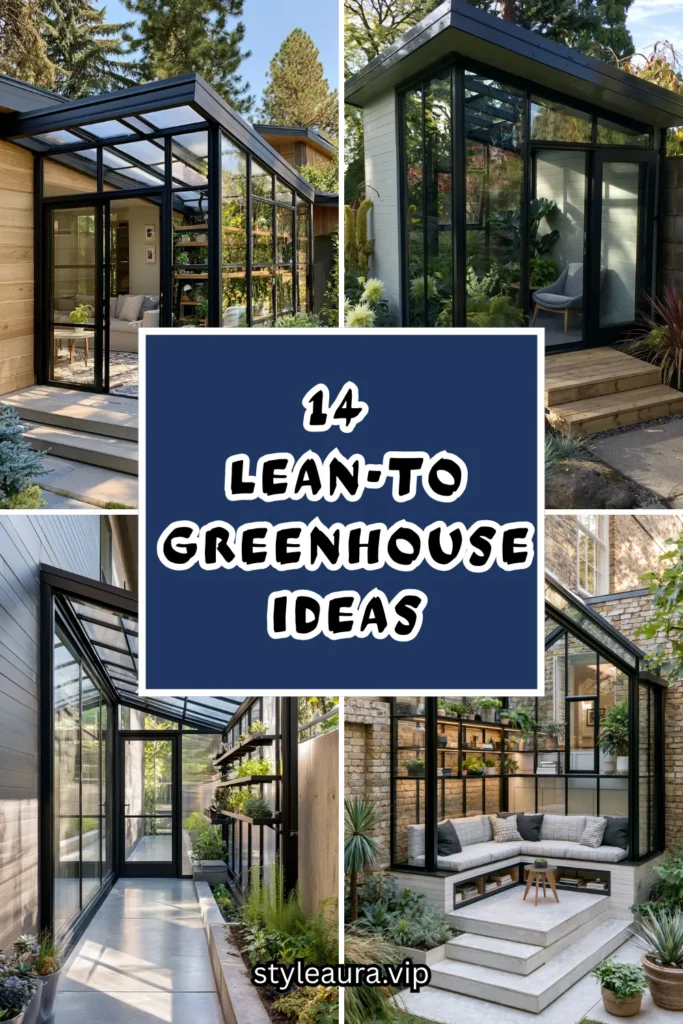
A lean-to greenhouse is not a compromise version of a real greenhouse. It is the correct structure for a small yard, built to use vertical space and an existing wall rather than competing for open ground. The house does half the structural work. The yard keeps almost everything it had before.
Here are 14 lean-to greenhouse ideas for small yards — from the simplest narrow strip against a fence to the most fully finished attached structure — built on that understanding.
Why a Lean-To Is the Right Structure for a Small Yard
The footprint math
A freestanding greenhouse needs access on all four sides for construction, maintenance, and airflow. A lean-to needs access on three.
That fourth side, already claimed by an existing wall, is footprint the yard never has to give up.
The shared-wall advantage
One full wall of the structure is already built, insulated, and weatherproofed. Material costs for a lean-to typically run 25 to 40 percent lower than an equivalent freestanding structure of the same floor area, simply because one wall never needs to be constructed at all.
The heat-sharing benefit
A lean-to built against a heated house wall gains a small but real temperature benefit from the house itself, particularly if the wall backs onto a kitchen, laundry room, or other consistently warm interior space.
The narrow-yard solution
Many small yards have unused strips of space along a side fence or the back of the house — too narrow for a bed, a patio, or a shed, but exactly the right width for a lean-to greenhouse.
The Four Lean-To Placements
Before choosing any design:
Against the house wall
The most common placement, sharing the exterior wall of the main dwelling.
Often allows an interior connecting door.
Benefits most from the house’s own heat.
Against a garden wall or fence
Uses a boundary wall or tall fence rather than the house itself.
No interior connection, but often more flexible in size and placement.
Works well where the house wall itself is unsuitable (wrong orientation, too many windows).
Against an existing shed
Adds greenhouse space to a structure already standing, without touching the house at all.
Keeps the growing space separate from the home’s living areas.
In a narrow side-yard passage
Built into the tight strip of space that runs along the side of many houses, often otherwise unused.
The tightest footprint of the four, and frequently the most overlooked opportunity in a small yard.
1. The Narrow Side-Passage Lean-To
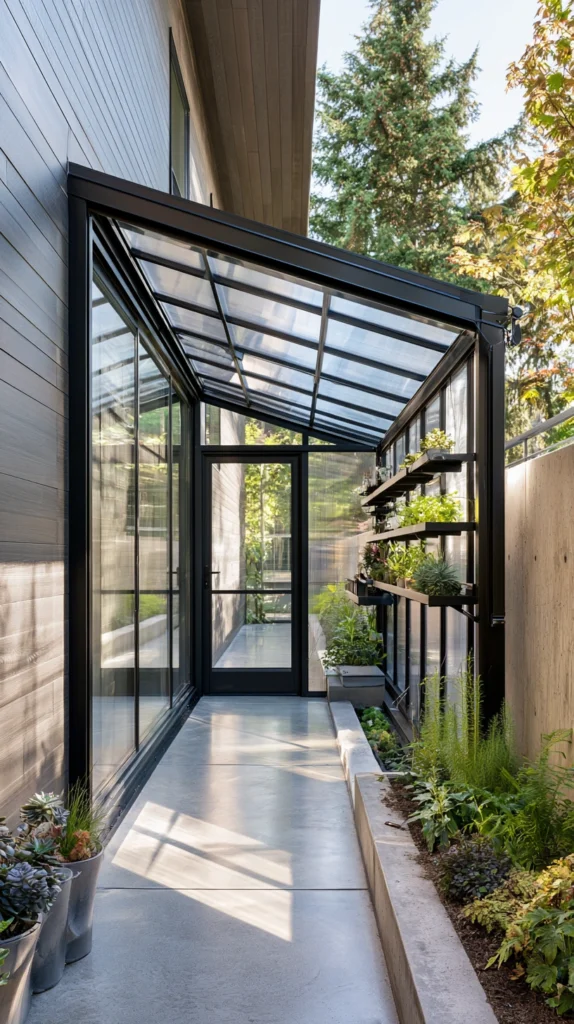
A slim lean-to greenhouse built into the unused strip of space running along the side of the house, often no more than 3 to 4 feet wide.
Why the side passage is the most overlooked opportunity
This strip of space is rarely used for anything beyond storing bins or walking through, and it is almost always long enough to fit a meaningful run of growing shelves.
The width
A 3-foot minimum width allows a single row of narrow benching with just enough room to walk and tend plants; anything under that becomes difficult to use comfortably.
The length
Run the full length of the available passage rather than a shorter section, since the structural cost per additional foot is low once the frame is already being built.
The glazing
Polycarbonate rather than glass, for both lighter weight in a narrow structural span and better impact resistance in a tight space where bumps are more likely.
The access
A single door at one end, ideally the end closer to the main garden or a frequently used path, rather than two doors that would eat into the limited width.
The shelving
A single row of narrow shelving along the house-facing wall only, keeping the opposite side clear as a walking aisle.
Cost breakdown: Frame and polycarbonate glazing: $200–450 Narrow shelving: $40–90 Door and hardware: $50–100 Total: $290–640
2. The Kitchen Wall Lean-To
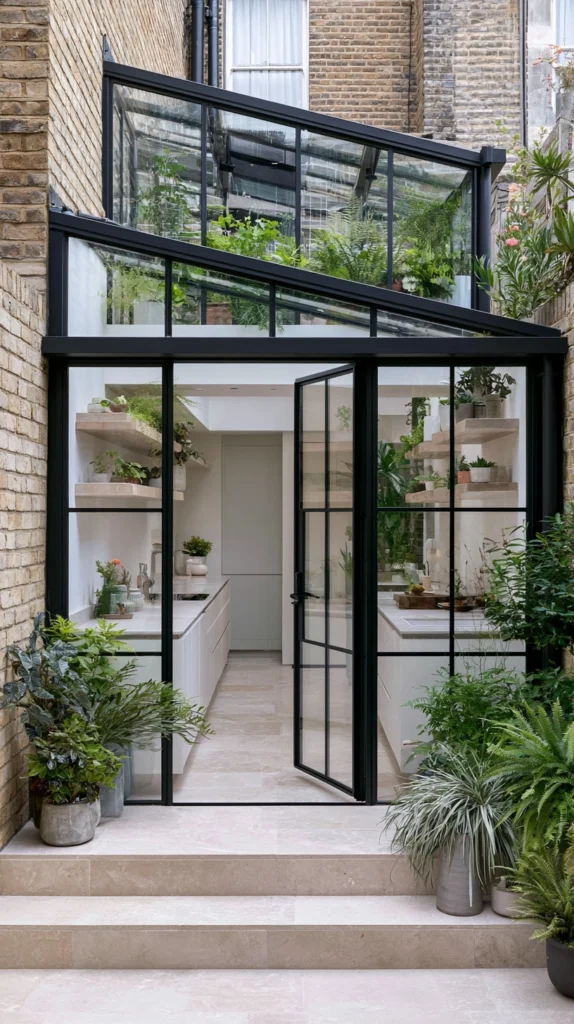
A small lean-to greenhouse built against the exterior wall of the kitchen, taking advantage of the ambient heat that wall often carries from cooking and appliances inside.
Why the kitchen wall performs better than other exterior walls
A kitchen wall runs warmer than most other exterior walls, from oven use, dishwasher cycles, and general appliance heat radiating outward, giving the greenhouse a small but real thermal advantage.
The connecting door
If feasible, a door cut through into the kitchen itself, allowing herbs and salad greens to be harvested directly into the cooking space with no outdoor trip required.
The plant selection
Culinary herbs and leafy greens, chosen specifically because of the kitchen’s proximity, rather than the larger specimen plants better suited to a garden-facing lean-to.
The size
Kept modest, often under 6 feet by 4 feet, since the goal is convenient kitchen-adjacent growing rather than a full growing operation.
The shelving height
Positioned at a comfortable reaching height from a standing position just inside the connecting door, prioritizing quick daily access over maximum plant capacity.
Cost breakdown: Small lean-to frame and glazing: $250–500 Connecting door installation: $150–400 Shelving: $30–60 Total: $430–960
3. The Fence-Line Lean-To
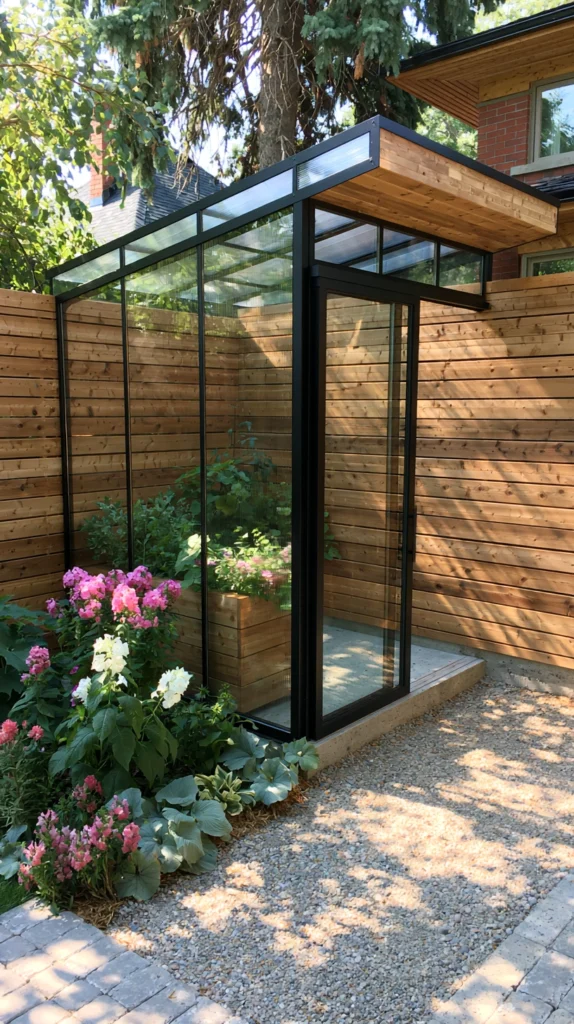
A lean-to greenhouse built against a tall garden fence or boundary wall rather than the house itself, useful where the house wall is poorly oriented or already crowded with windows.
Why the fence line is often the better wall to use
Many house walls face the wrong direction for good greenhouse light, or are interrupted by windows and doors that limit where a lean-to can actually attach. A boundary fence offers more flexibility in both orientation and placement.
The fence assessment
Confirming the fence is structurally sound enough to bear the load of an attached lean-to, or reinforcing it with additional posts before building against it.
The orientation
Choosing the boundary with the best south- or west-facing exposure, even if that means the structure sits farther from the house than a wall-mounted option would.
The frame
A self-supporting frame that leans against, rather than fully depends on, the fence for structural support, reducing stress on a fence not originally built to carry a greenhouse.
The access
A garden path connecting the fence-line lean-to back to the main patio or house entrance, since this placement typically requires walking through the yard to reach it.
Cost breakdown: Fence reinforcement (if needed): $50–150 Lean-to frame and glazing: $250–550 Garden path materials: $40–100 Total: $340–800
4. The Recycled Window Lean-To
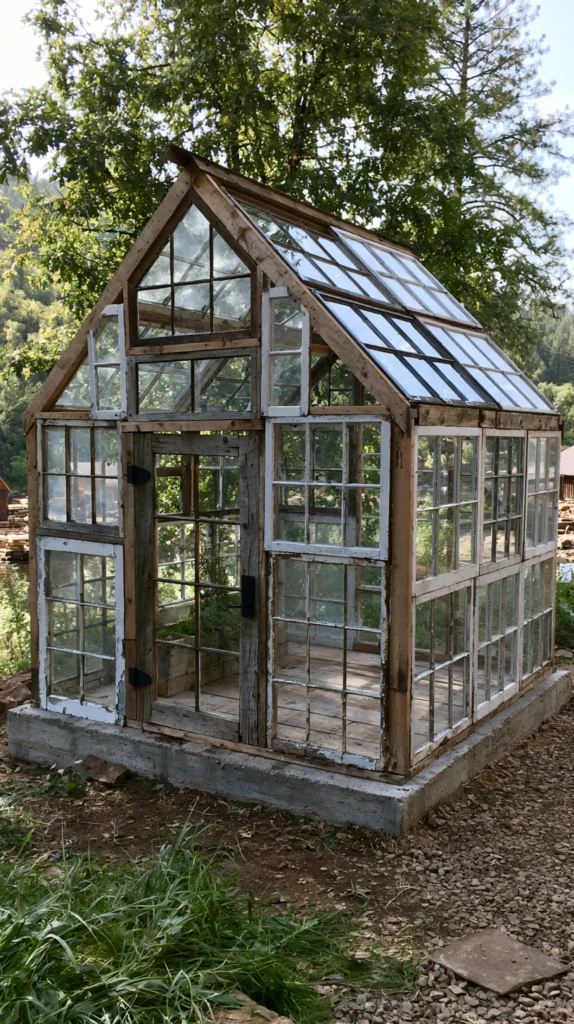
A lean-to built almost entirely from mismatched salvaged windows, keeping material cost low while adding individual character well suited to a small, visible yard structure.
Why salvaged glazing suits a small, prominent structure
In a small yard, the lean-to is often highly visible from the main living areas and patio, making its individual character more noticeable than in a larger property where a greenhouse might sit farther from view.
The sourcing
Salvage yards, demolition sites, and renovation project giveaways, collecting more windows than strictly needed to allow for breakage and mismatched sizing.
The frame
A simple lumber skeleton built up around the collected windows rather than designed to a fixed plan in advance, sized to whatever the salvaged glazing actually allows.
The character
Mismatched frame colors and styles left as-is, treated as a decorative feature of the small structure rather than something to disguise.
The finishing
A single coat of exterior sealant across all salvaged wood, unifying the look slightly without full repainting or replacement.
Cost breakdown: Salvaged windows: $0–80 Lumber frame: $60–120 Sealant and hardware: $20–40 Total: $80–240
5. The Compact Cold-Frame-to-Lean-To Hybrid
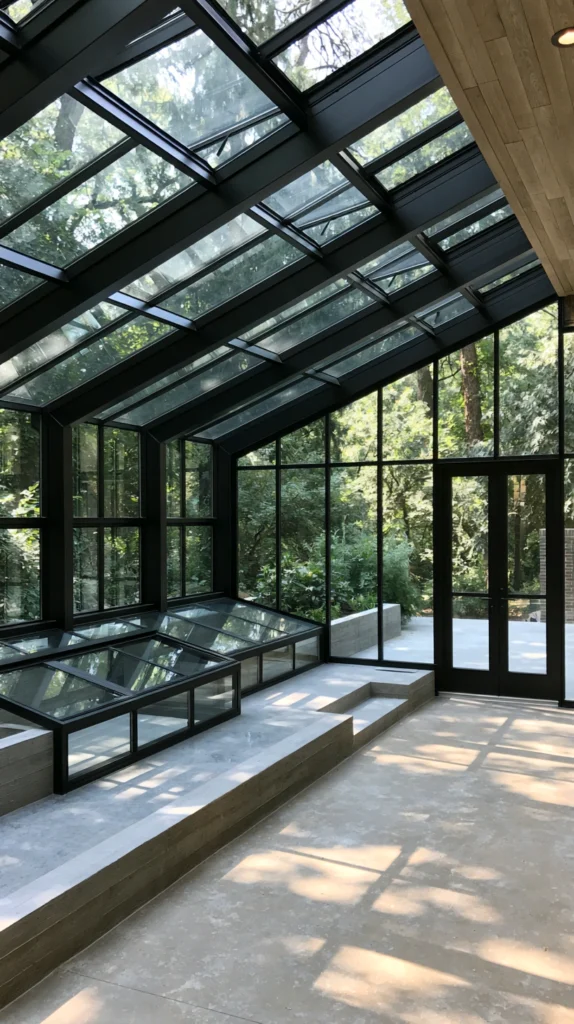
A structure that begins as a low cold frame at one end and rises to a full standing-height lean-to at the other, using a sloped roofline to fit an awkward or very tight space.
Why a variable-height design suits difficult small-yard corners
Some small-yard spots are only tall enough for a low structure at one end, widening or opening up further along — a variable-height lean-to fits that shape rather than forcing a uniform footprint that does not match the space.
The low end
Built at cold-frame height, roughly 2 to 3 feet, tucked into the tightest or most obstructed part of the available space.
The tall end
Rising to standing height where the space allows, providing the only section of the structure a person can actually walk into.
The roofline
A continuous sloped roof connecting the two heights, glazed the full length for consistent light across the whole structure.
The plant placement
Low, ground-level plants and seed trays at the cold-frame end; taller potted plants and hanging baskets at the standing-height end where there is vertical room for them.
Cost breakdown: Sloped frame construction: $150–350 Glazing (full length): $100–250 Hardware: $20–40 Total: $270–640
6. The Balcony or Rooftop Lean-To
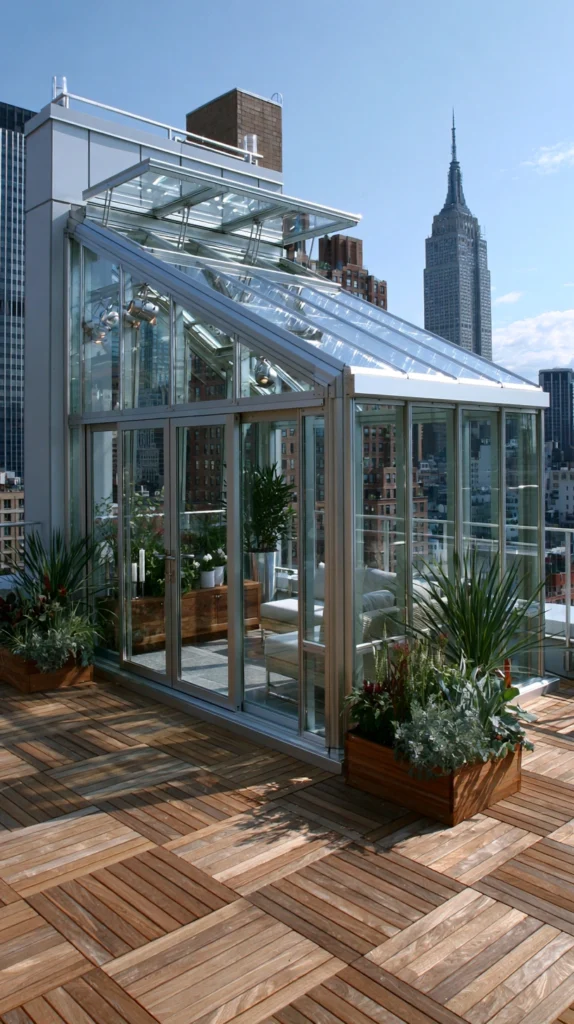
A small lean-to greenhouse built against a parapet wall or the side of a rooftop structure, extending growing space upward rather than outward for yards with essentially no ground space at all.
Why rooftop placement solves the smallest-yard problem entirely
A balcony or rooftop lean-to requires no ground footprint whatsoever, making it the only option on this list genuinely suited to a property with no usable yard space at all.
The structural check
A load assessment from a structural engineer or qualified contractor is essential before adding any rooftop structure — roofs and balconies are not automatically rated for the added weight of a greenhouse, soil, and water.
The wind consideration
Rooftop and elevated structures face significantly higher wind exposure than ground-level lean-tos, requiring more robust anchoring and often a lower profile design.
The materials
Lightweight aluminum framing and polycarbonate glazing, minimizing the load placed on the supporting structure below.
The water access
A dedicated water line or a manageable-sized water storage container, since carrying water up to a rooftop repeatedly is impractical for regular use.
Cost breakdown: Structural assessment: $150–400 Lightweight aluminum frame and glazing: $300–700 Anchoring hardware: $50–120 Total: $500–1,220
7. The Shed-Wall Lean-To Addition
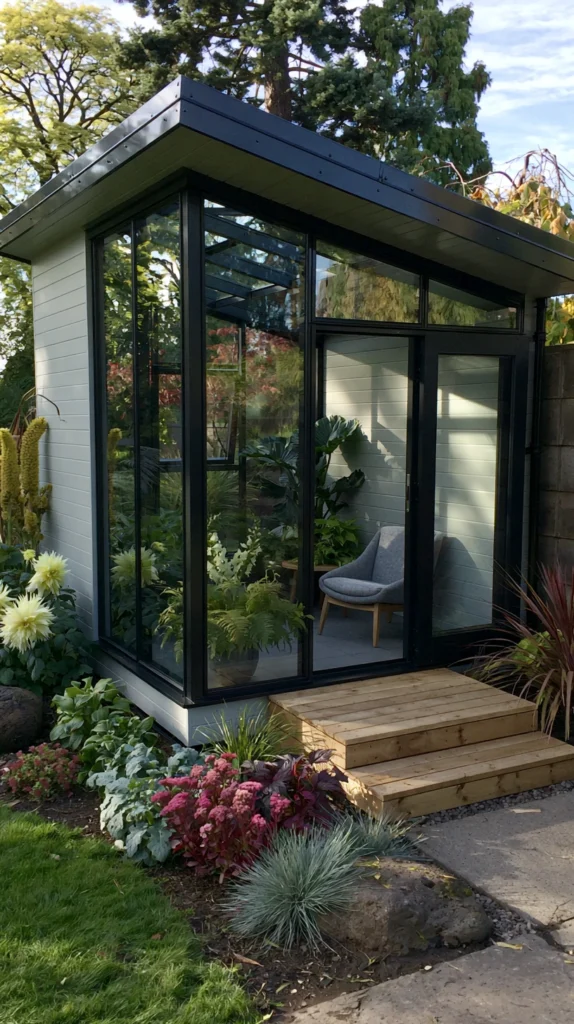
A lean-to greenhouse added onto the exterior wall of an existing garden shed, avoiding any contact with the house itself and using a structure already present in the yard.
Why the shed wall is often the easiest wall to build against
Unlike a house wall, a shed wall typically has no windows, no interior finish to protect, and no concern about affecting the home’s structural integrity or insulation.
The wall selection
The shed’s south- or west-facing exterior wall, for the best available sun exposure.
The attachment
Proper flashing at the roofline where the new lean-to meets the shed roof, preventing water running down the shed wall into the new structure’s roof joint.
The connecting door
A doorway cut into the shed wall for direct access between the two spaces, or left as two separate entries if the shed’s interior layout makes an opening impractical.
The size
Matched to the shed’s own footprint rather than exceeding it significantly, keeping the combined structure visually proportional in a small yard.
Cost breakdown: Lean-to frame and glazing: $250–500 Flashing and waterproofing: $30–60 Connecting doorway (if added): $100–250 Total: $380–810
8. The Vertical Trellis Lean-To
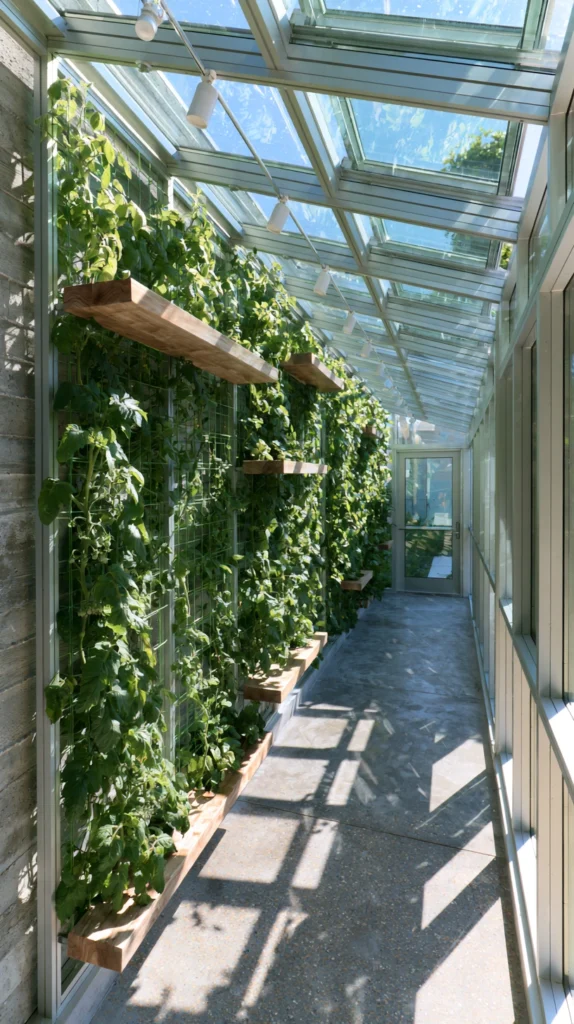
A narrow lean-to designed specifically around vertical growing — trellised vines, climbing vegetables, and wall-mounted planters — rather than traditional floor-level benching.
Why vertical growing suits the tightest lean-tos
A very narrow lean-to has little floor area for benches, but plenty of wall height to work with. Designing around vertical growth makes the most of that proportion.
The trellis
Mounted against the back wall, running the full height of the structure, for climbing plants such as cucumbers, beans, or ornamental vines.
The wall planters
Pocket planters or shelf brackets mounted at varying heights along the side walls, adding growing surface without consuming any floor space.
The floor
Left almost entirely clear, used only for a narrow walking path and perhaps a single small stool or kneeling pad.
The irrigation
A simple drip line running along the trellis and wall planters, since hand-watering a fully vertical layout from a standing position is more awkward than watering benched pots.
Cost breakdown: Lean-to frame and glazing: $200–450 Trellis and wall planters: $60–130 Drip irrigation: $40–90 Total: $300–670
9. The Corner Lean-To Using Two Existing Walls
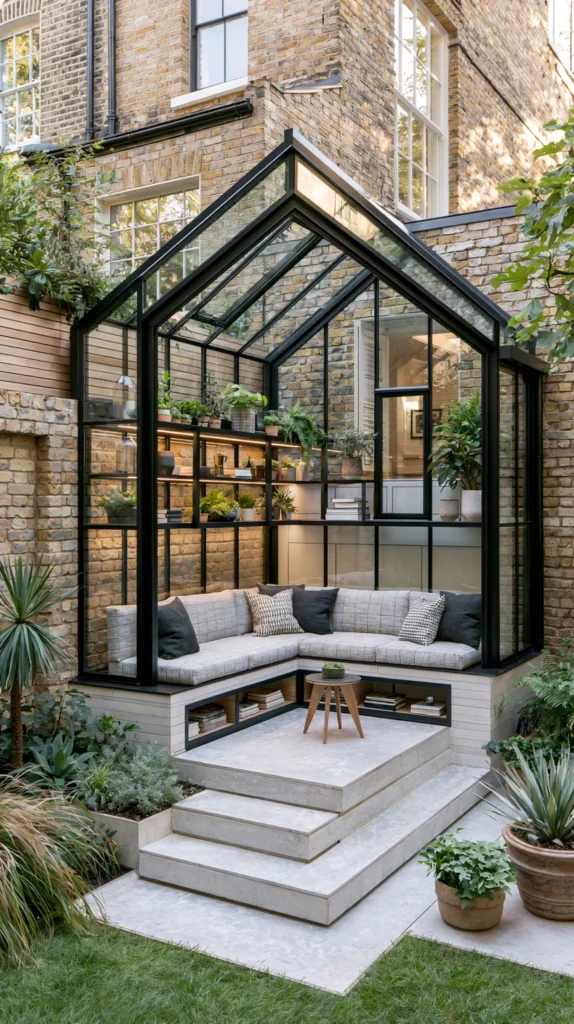
A lean-to built into an interior corner of the yard, using two existing walls — typically the house and a side fence or garden wall — rather than just one, for extra stability and an even smaller footprint.
Why a corner uses even less new material than a standard lean-to
With two sides already built, only two new walls plus the roof need to be constructed, further reducing material cost and the amount of new structure visible in the yard.
The corner selection
Wherever the house wall and a fence or garden wall meet at a roughly right angle, ideally with reasonable sun exposure from the two open sides.
The frame
Built to fit precisely into the corner, with the two new walls meeting the existing ones as cleanly as possible to avoid gaps that would let heat and humidity escape.
The door
Positioned on whichever open side offers the most convenient access from the main yard or patio.
The compact benching
An L-shaped bench following the two new glazed walls, maximizing growing surface within the small enclosed corner.
Cost breakdown: Two new walls and roof frame: $200–400 Glazing: $100–250 L-shaped benching: $50–100 Total: $350–750
10. The Insulated Four-Season Lean-To
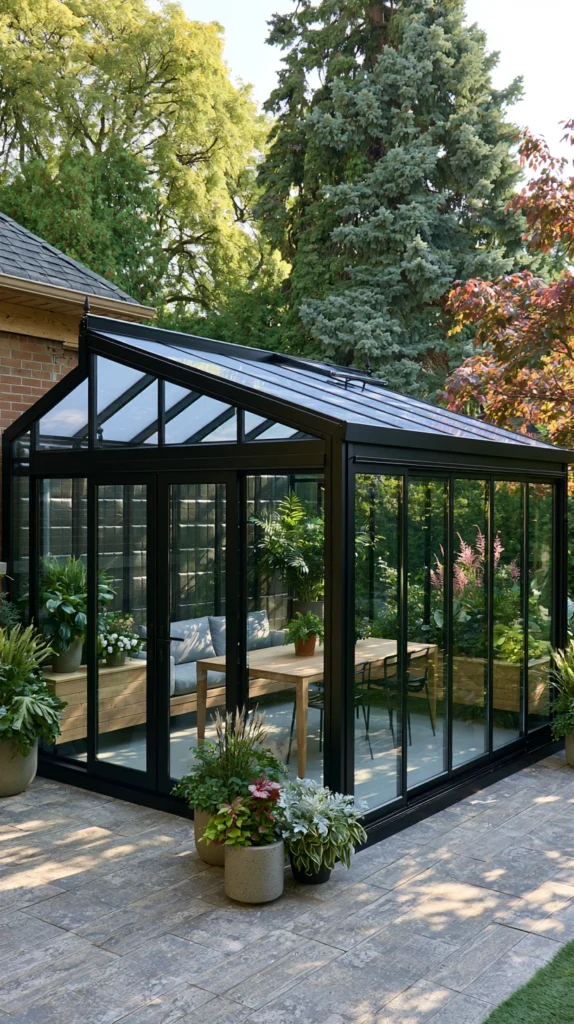
A lean-to built with real wall and roof insulation alongside the glazing, extending usability through the coldest months rather than functioning only as a three-season structure.
Why insulation matters even in a small structure
A small uninsulated lean-to loses heat quickly, since its limited air volume offers little thermal buffer against outside temperature swings. Insulation addresses that disadvantage directly.
The insulated sections
Any solid (non-glazed) wall sections built with standard stud framing and insulation, rather than left as thin single-layer material.
The glazing
Double-wall polycarbonate rather than single-layer, providing meaningfully better heat retention for a modest cost increase.
The heat source
A small space heater or heat mat system, sized appropriately to the lean-to’s compact volume rather than an oversized unit meant for a larger structure.
The door seal
A well-sealed door with weatherstripping, since heat loss around an ill-fitting door can undo much of the benefit of insulated walls and double glazing elsewhere.
Cost breakdown: Insulated wall sections: $80–180 Double-wall polycarbonate: $150–350 Small heater: $50–150 Door weatherstripping: $10–20 Total: $290–700
11. The Multi-Tier Vertical Shelving Lean-To
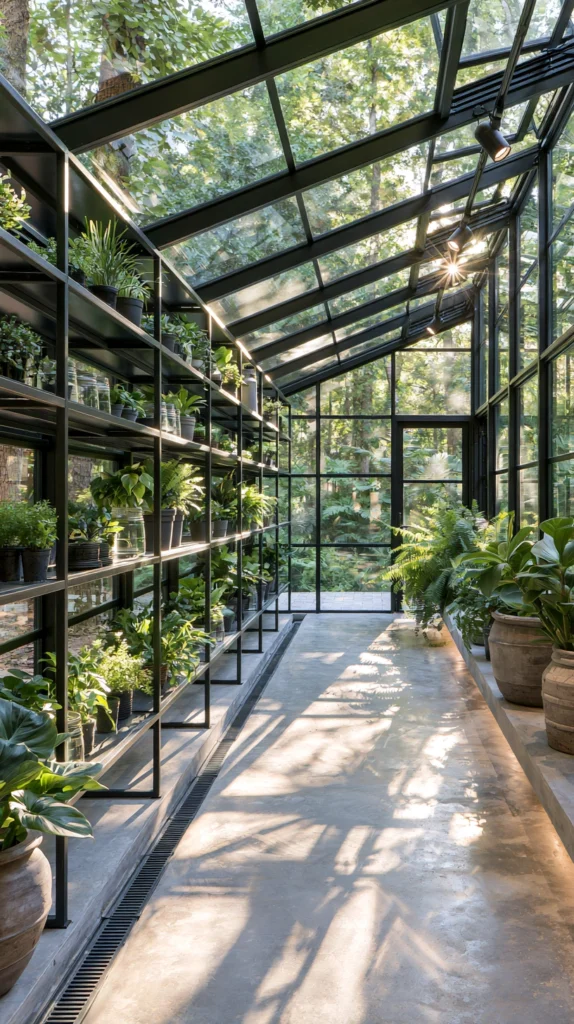
A lean-to fitted with several tiers of shelving stacked from floor to roofline, maximizing plant capacity within a small footprint by building growing space upward rather than out.
Why stacked shelving suits a lean-to’s sloped roof shape
A lean-to’s sloped roofline naturally creates more headroom at the tall end than a standard rectangular structure, well suited to tiered shelving that steps down in height alongside the slope.
The shelving
Wire or slatted shelving mounted in tiers along the back wall, with the tallest tier positioned at the structure’s tallest point.
The light distribution
Lower tiers receive meaningfully less light than upper tiers in a fully shelved lean-to — plant selection should account for this, with shade-tolerant species on the lowest shelves and sun-loving species on top.
The watering system
A simple gravity-fed drip system running from the top tier downward, since hand-watering multiple stacked tiers individually becomes time-consuming quickly.
The access
Shelving depth kept shallow enough that every plant can be reached and inspected without needing to remove other pots to get to it.
Cost breakdown: Lean-to frame and glazing: $250–500 Tiered wire shelving: $60–130 Gravity-fed drip system: $40–90 Total: $350–720
12. The Patio-Adjacent Lean-To With Shared Seating
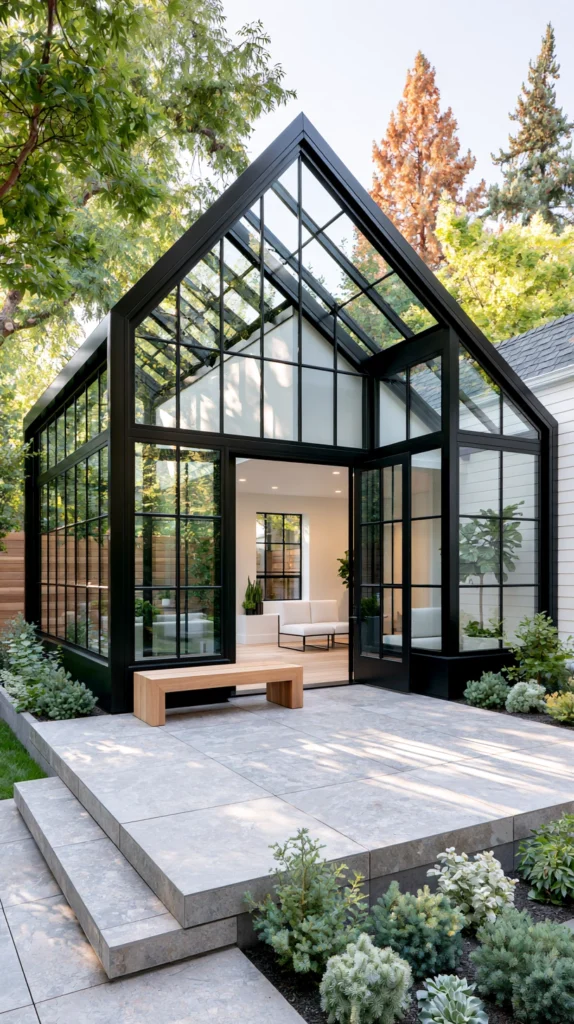
A lean-to positioned directly beside an existing patio, with a single bench or chair placed at the doorway so the structure functions as both growing space and a small outdoor seating extension.
Why proximity to the patio adds daily value
A greenhouse tucked into a far corner of the yard gets visited occasionally. One beside the main outdoor seating area gets seen, and used, every day the patio itself is used.
The placement
Directly adjacent to or sharing a wall with the patio’s boundary, so stepping from one space to the other requires no more than a few steps.
The seating
A single chair or narrow bench just inside the lean-to door, angled to look both into the growing space and back out toward the patio.
The shared materials
Flooring or paving that continues from the patio into the lean-to’s threshold, visually connecting the two spaces despite their different functions.
The plant arrangement
Kept toward the back and sides of the structure, leaving the doorway and immediate seating area open and uncluttered.
Cost breakdown: Lean-to frame and glazing: $250–500 Seating (chair or narrow bench): $40–100 Flooring continuation: $50–120 Total: $340–720
13. The Espalier Fruit Tree Lean-To
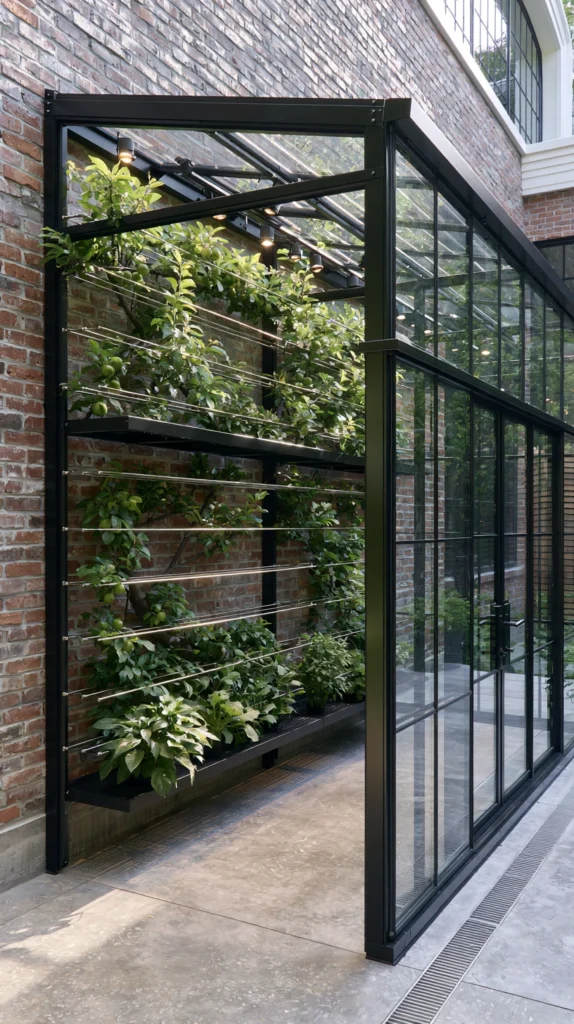
A lean-to built specifically to house an espalier-trained fruit tree along the back wall, combining a growing structure with a long-term ornamental and productive planting.
Why espalier suits a lean-to’s flat back wall
Espalier training grows a fruit tree flat against a wall in a two-dimensional pattern, which fits naturally against a lean-to’s solid back wall without competing for the limited floor space a small structure offers.
The tree selection
Fig, apple, or pear are commonly trained this way and tend to perform well in the warmer, sheltered conditions a lean-to provides.
The training system
Horizontal wires mounted against the back wall at even intervals, providing the structure the young tree’s branches are tied to as it grows.
The patience required
Espalier training takes several years to fully establish — this is a longer-term project than most other lean-to ideas on this list, worth factoring in before committing to the approach.
The remaining space
Floor and side space around the trained tree used for smaller companion plants or seasonal seedlings, since the tree itself occupies primarily the back wall rather than the full structure.
Cost breakdown: Lean-to frame and glazing: $250–500 Fruit tree (young, trainable): $30–70 Training wire and hardware: $20–40 Total: $300–610
14. The Complete Small-Yard Lean-To (The Fully Finished Structure)
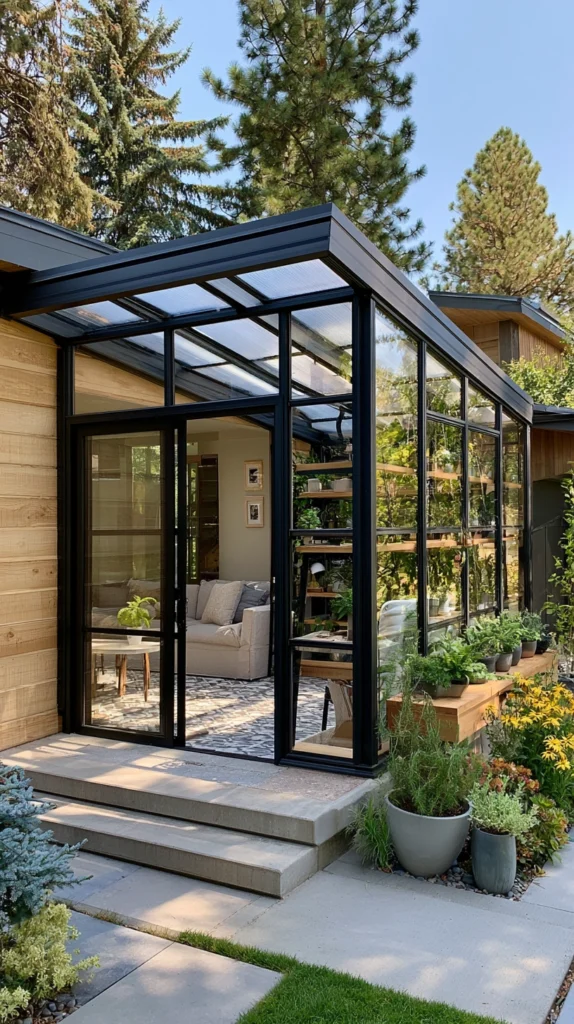
A complete lean-to combining several of the approaches above — proper insulation, tiered or vertical growing space, a connecting door where possible, and finished detailing — sized specifically to make the most of a small yard’s limited space.
What separates the complete lean-to from a basic attached frame
A basic lean-to: a frame and some glazing against a wall. A complete small-yard lean-to: every inch of the limited footprint planned deliberately, from the shelving height to the door placement to the season the structure will actually stay usable through.
The elements of the complete small-yard lean-to
The placement
The best available wall for sun exposure, whether that is the house, a fence, or an existing shed, chosen for orientation over convenience alone.
The structure
Insulated where solid, double-glazed where transparent, sized to the narrowest footprint that still allows comfortable access and tending.
The growing space
Vertical and tiered wherever possible, maximizing plant capacity without expanding the ground footprint.
The connection
A doorway into the house or an adjacent structure where feasible, reducing the daily walk to almost nothing.
The finishing
Matched or complementary materials to the existing wall it is built against, so the structure reads as an intentional addition rather than an afterthought.
The seasonal use
A small heater or heat mat system, extending the growing season well beyond what an uninsulated structure of the same size would allow.
The complete design in action
A cold, bright February morning in a small yard:
8am: The lean-to already several degrees warmer than the open yard, thanks to both the sun and the shared house wall.
8:15am: A step through the connecting door, seed trays checked without a coat.
8:30am: The narrow tiered shelving fully in use — more plants growing in this small structure than the yard’s open ground space could ever have accommodated.
The complete small-yard lean-to: proof that a genuinely productive growing space does not require a large yard, only the right wall and a well-planned narrow structure.
Cost breakdown for the complete structure: Assuming a starting point of an available wall with no existing structure: Insulated frame and double glazing: $350–700 Connecting door (if feasible): $100–300 Tiered shelving: $60–130 Small heater: $50–150 Finishing to match existing wall: $50–120 Total: $610–1,400
Phased over two or three seasons:
Season one ($300–550): The basic frame and single-layer glazing A single tier of shelving
Season two ($150–350): Upgraded double-wall glazing or added insulation A small heater Tiered or vertical growing additions
Season three ($100–300): A connecting door if not already added Finishing details and matched materials
The small-yard lean-to: not a compromise structure, but the correctly sized greenhouse for the space actually available.
The Question Before Any Lean-To Design
Before choosing a wall, a size, a material approach:
What is the primary reason for wanting a lean-to in this particular yard?
If the answer is: almost no ground space available — the balcony or rooftop lean-to, or the narrow side-passage design.
If the answer is: the house wall itself is unsuitable — the fence-line lean-to or the shed-wall addition.
If the answer is: year-round use — the insulated four-season lean-to.
If the answer is: the lowest possible cost — the recycled window lean-to.
The design follows the wall and the footprint actually available, more than any other factor. Every idea on this list solves that same constraint in a different way. The question is which wall, and which approach, fits this particular small yard.
The narrowest strip lean-to, built against the right wall: still delivers a genuine growing season. The complete structure, planned with intention: a small yard doing far more than its size would suggest.
That extension: the whole point of building against the wall instead of away from it.
Getting Started This Weekend
The immediate lean-to solution:
Walk the full perimeter of the yard and note every unused strip of space.
The side passage, the fence line, the shed wall — the space is very likely already there, just unnoticed.
Check the sun exposure on each wall before choosing one.
The best available light, not the most convenient wall, should decide the placement.
Measure before planning the frame.
A narrow lean-to still needs a minimum comfortable width to actually be usable — confirm the space allows it before committing to a design.
Start with the smallest workable footprint.
A structure can be extended later along the same wall; the wall itself is the fixed resource worth using wisely from the start.
The rest of the design: the elaboration of this moment.
The wall: the beginning. The lean-to: what grows against it.