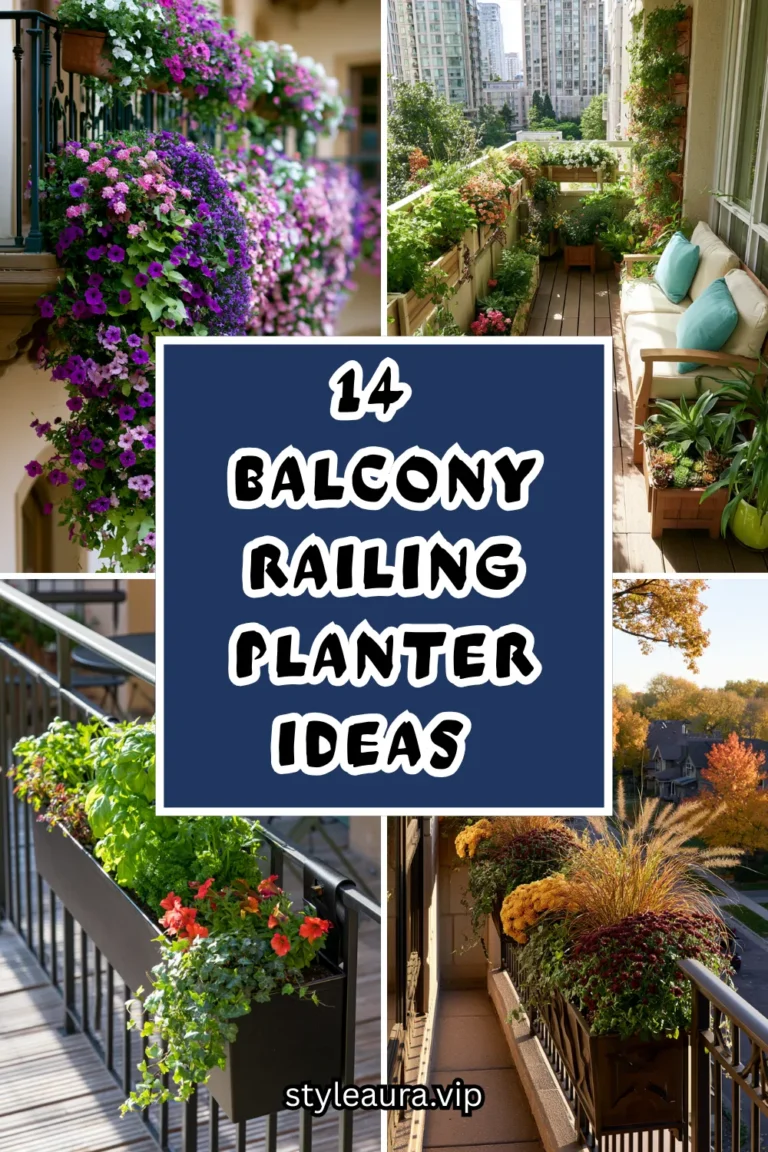
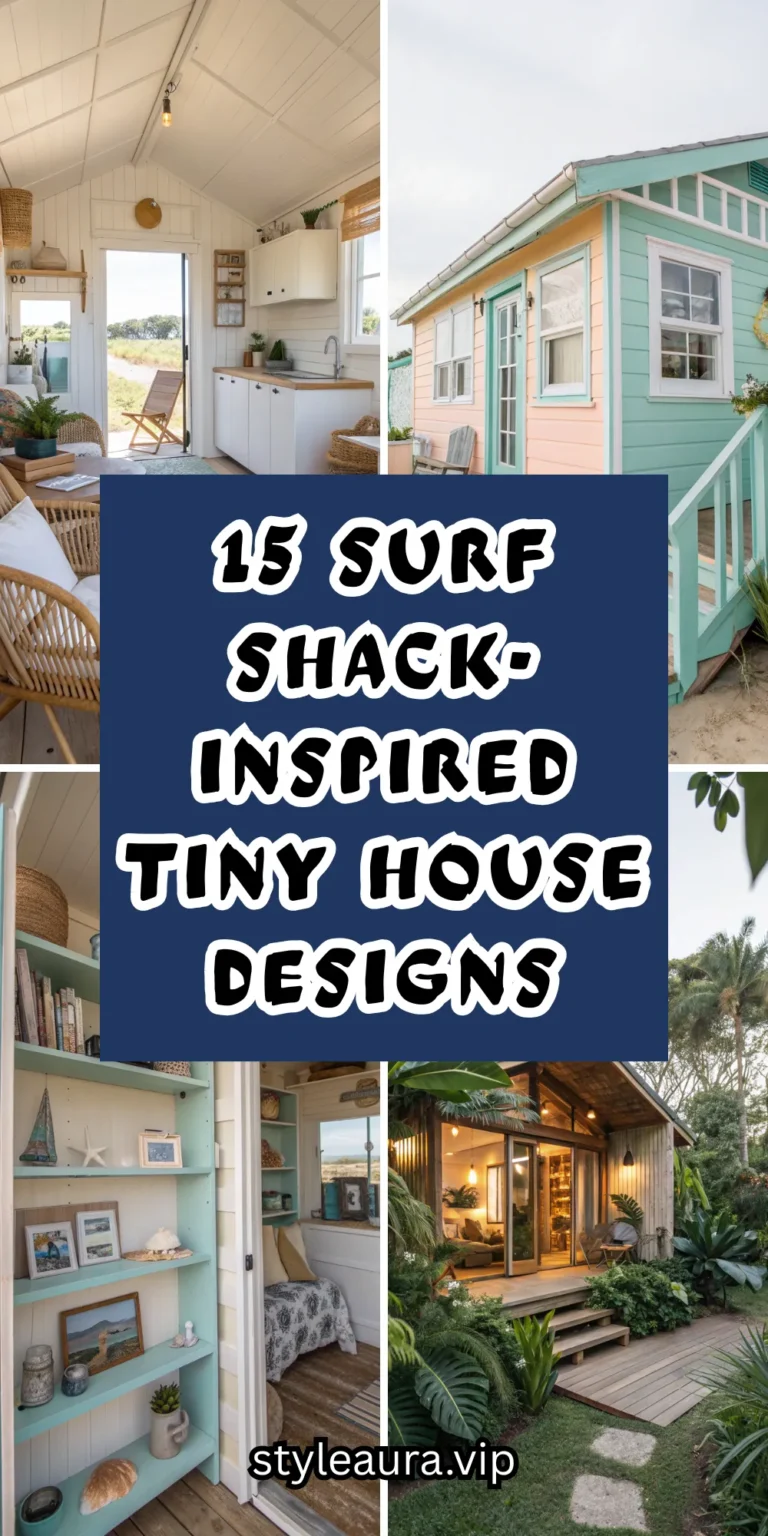
13 Small Backyard Greenhouse Ideas on a Budget
The greenhouse changed how long my growing season actually was, and it did it without costing anywhere near what I expected. Not the raised beds. Not the irrigation system. Not the fancy tools or the soil amendments or the seed catalogue subscriptions.
The structure.
Because the greenhouse did something none of the other garden investments did. Before it: a growing season bounded hard by the first and last frost, six months if the weather cooperated. After it: seedlings starting in February, tender plants surviving into November, a structure doing the work that used to depend entirely on the calendar.
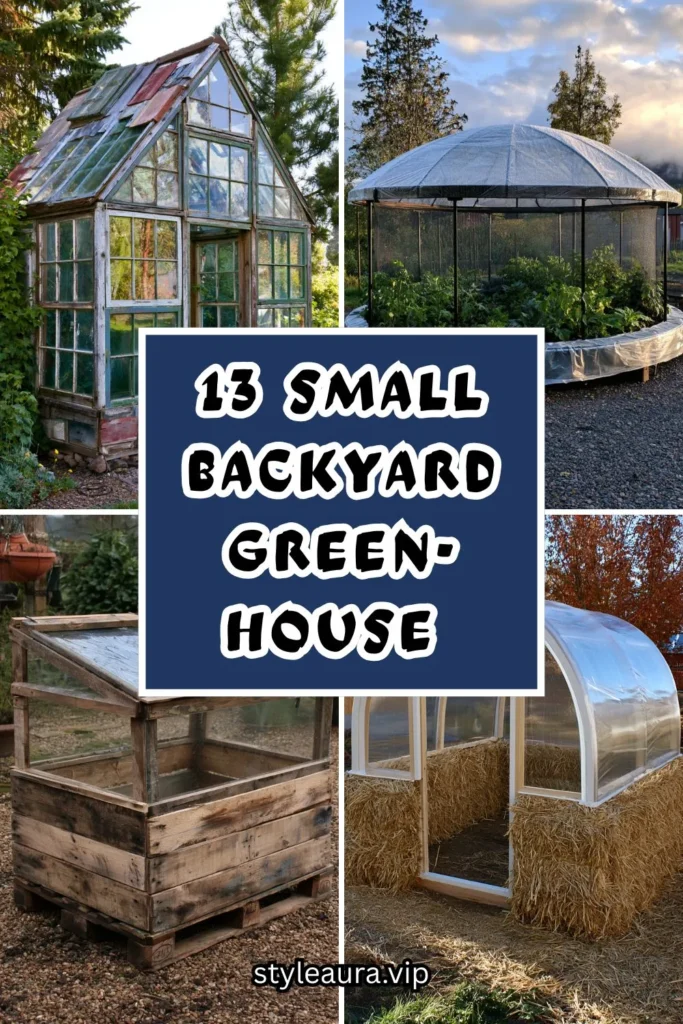
A greenhouse is not a luxury addition. It is a season-extension tool, and a small one costs far less than most people assume. A budget greenhouse does not need a foundation, glazing bars, or a contractor. It needs a frame, a covering, and the right spot.
Here are 13 small backyard greenhouse ideas — from the simplest cold frame to the most complete budget structure — built on that understanding.
Why a Small Greenhouse Changes the Garden
The frost equation
Without a greenhouse:
Seedlings started indoors on a windowsill, leggy and stretched toward the light.
Tender plants: killed by the first frost, full stop.
The garden: closes down hard at both ends of the season.
With a greenhouse:
Seedlings started six to eight weeks earlier, with real light from every direction.
A few degrees of frost protection: often the difference between a dead plant and a surviving one.
The garden: open longer at both ends, sometimes overlapping into the next season entirely.
The micro-climate
A greenhouse, even a small one, creates its own weather. Daytime heat is trapped and released slowly overnight, keeping the interior several degrees warmer than the open garden on a cold night.
The budget reality
A greenhouse does not need to be glass, permanent, or expensive to do this job. Polyethylene sheeting, recycled windows, and simple lumber frames all trap heat effectively — the trapped air is doing the work, not the material price tag.
The small-space advantage
A small greenhouse, positioned well, often outperforms a large one positioned poorly. Size matters less than sun exposure, wind shelter, and ventilation.
The Four Budget Greenhouse Types
Before choosing any design:
The cold frame
A low box with a clear lid, sitting directly on the ground or on a raised bed.
No standing room required.
The cheapest and simplest entry point into season extension.
The hoop house
A series of bent pipes or conduit, covered in plastic sheeting.
Walk-in height, lightweight, and often movable.
The most budget-friendly option that still offers standing room.
The lean-to greenhouse
A structure built against an existing wall or fence, using that wall as one full side.
Shares heat with the house if attached to it.
Requires less material than a freestanding structure.
The upcycled window greenhouse
Built from reclaimed windows and doors, often free or nearly free.
No two are alike, and no new glazing is purchased.
The most labor-intensive but often the cheapest material cost of all.
1. The Cold Frame From an Old Window
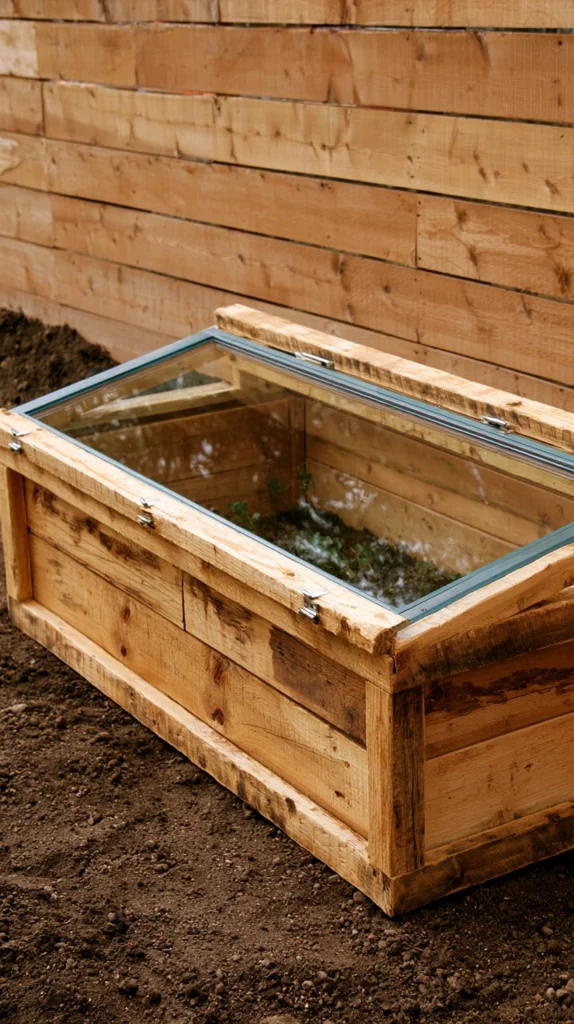
A low wooden box with a salvaged window as the lid, built directly over a garden bed — the simplest and cheapest structure on this list.
Why the cold frame is the best starting point
It requires no standing room, no door, and no ventilation system beyond propping the lid open. For under fifty dollars, it delivers weeks of extra growing time at both ends of the season.
The box
Built from scrap or reclaimed lumber, roughly 2 feet by 4 feet, with the back wall taller than the front for a sloped, sun-facing lid.
Untreated wood near soil and plants, to avoid chemical leaching.
The lid
An old window sash, sourced free from a salvage yard, a demolition site, or a classified ad.
Hinged at the back, so it can be propped open on warm days for ventilation.
The placement
South-facing if possible, tight against a wall or fence for extra wind shelter.
The ventilation
A stick or block to prop the lid open on any day above 45°F (7°C) — an unventilated cold frame overheats fast even in cool weather.
Cost breakdown: Reclaimed lumber: $0–20 Salvaged window: $0–20 Hinges: $5–10 Total: $5–50
2. The PVC Pipe Hoop House
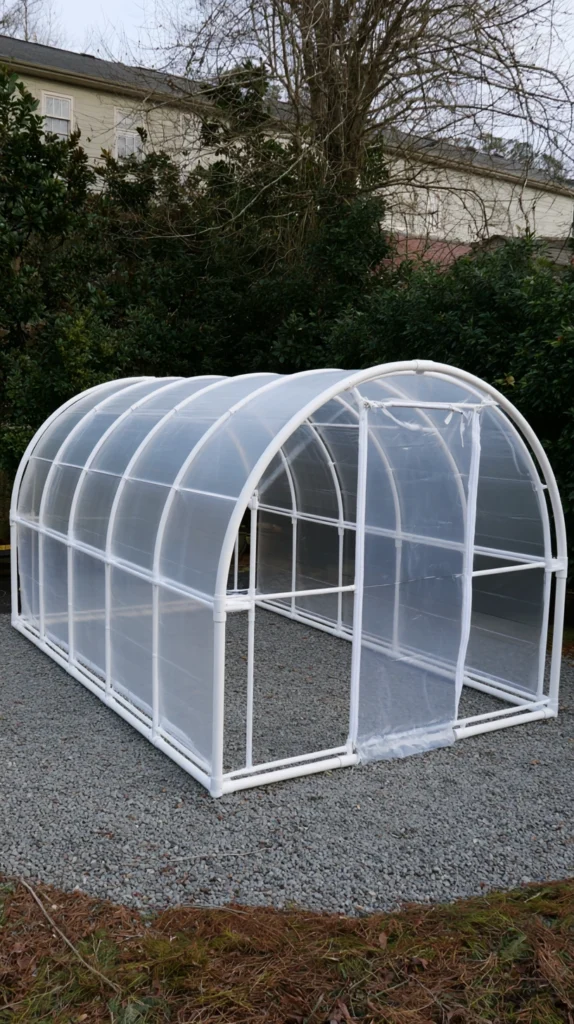
A series of PVC pipes bent into arches over a garden bed, covered in greenhouse plastic — the cheapest walk-in structure available.
Why PVC is the budget material of choice
It is inexpensive, widely available, lightweight, and easy to cut with a hand saw. No welding, no specialized tools.
The frame
PVC pipes (1-inch diameter) bent into arches and secured into rebar stakes driven into the ground at the base of each arch.
A ridge pipe running the length of the structure, connecting the tops of each arch for stability.
The covering
6-mil greenhouse plastic, stretched over the frame and secured with clamps or furring strips along the base.
The doors
Plastic sheeting left loose at each end, weighted or clipped shut, rather than a built door — the simplest and cheapest closure method.
The size
A 10-foot by 12-foot hoop house is achievable on a tight budget and still tall enough to walk into at the center.
Cost breakdown: PVC pipe and rebar: $40–70 Greenhouse plastic sheeting: $30–60 Clamps and hardware: $10–20 Total: $80–150
3. The Lean-To Against the House Wall
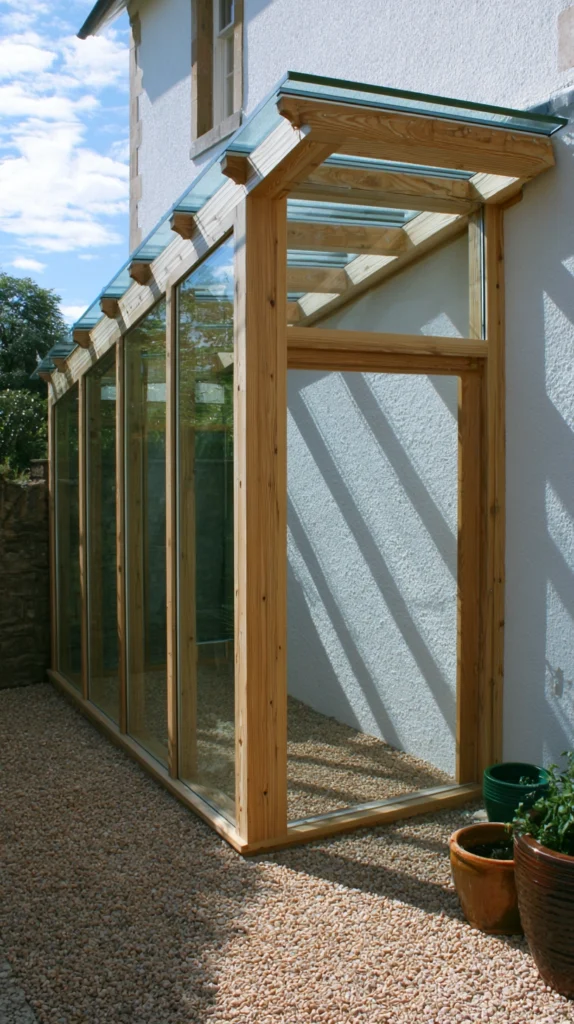
A greenhouse built against an existing exterior wall, using the wall itself as one full side of the structure — the design that requires the least material for the most enclosed space.
Why building against a wall saves money
One entire wall of the structure is already built. A lean-to greenhouse typically uses 25 to 30 percent less material than an equivalent freestanding structure.
The wall selection
A south- or west-facing wall, ideally one that receives direct sun for most of the day.
Brick or stone walls also radiate stored heat back into the greenhouse overnight, adding a small but real warmth benefit.
The frame
A simple lumber frame, sloped from the wall down to a low front wall or sill.
Angled roof glazing for maximum light capture, rather than a flat roof.
The glazing
Corrugated polycarbonate panels, more affordable than glass and far more impact-resistant.
The door
A single hinged or sliding door on the front or side, sized to the structure rather than a full-height door if space or budget is tight.
Cost breakdown: Lumber frame: $80–150 Polycarbonate panels: $60–120 Door and hardware: $30–60 Total: $170–330
4. The Repurposed Window Greenhouse
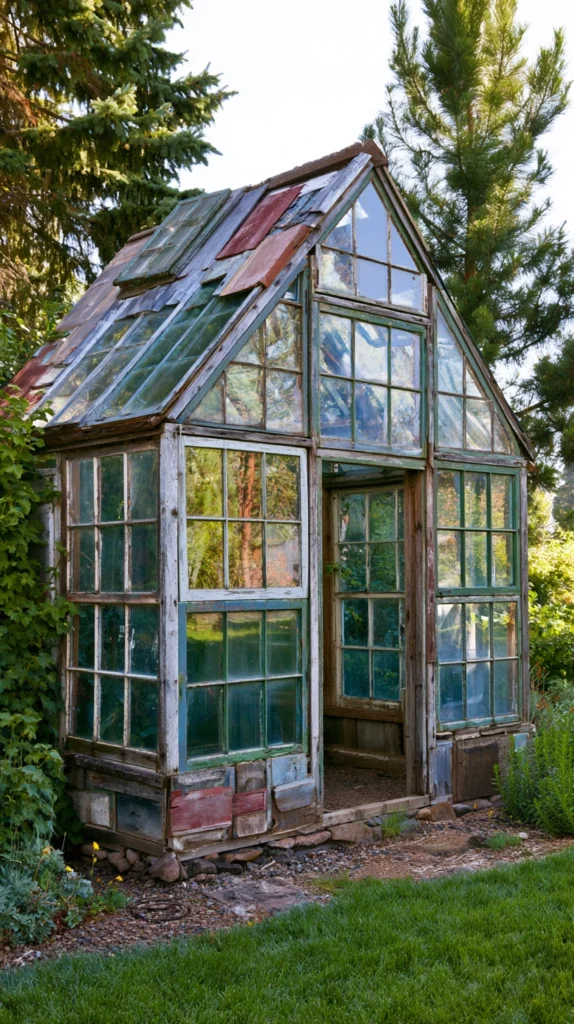
A full greenhouse built almost entirely from mismatched salvaged windows and doors — the structure with the lowest material cost and the most individual character.
Why salvaged glass works so well here
Old windows are frequently discarded during renovations, and many salvage yards sell them for a fraction of new glazing cost. The mismatch in size and style becomes the structure’s defining feature rather than a flaw.
The sourcing
Salvage yards, demolition sites, online classifieds, and neighborhood renovation projects are all reliable sources.
Collect more windows than needed, since sizes rarely align perfectly and some breakage should be expected.
The frame
A simple lumber skeleton sized to fit the collected windows, built up piece by piece rather than designed in advance.
The assembly
Windows fitted into the frame and secured with exterior screws and silicone sealant at each joint.
Mismatched frame colors left as-is, rather than repainted — the patchwork look is part of the charm and the budget.
The roof
A single salvaged window or a sheet of clear polycarbonate, sloped for water runoff.
Cost breakdown: Salvaged windows and doors: $0–100 Lumber frame: $60–120 Screws, hinges, sealant: $20–40 Total: $80–260
5. The Mini A-Frame Greenhouse
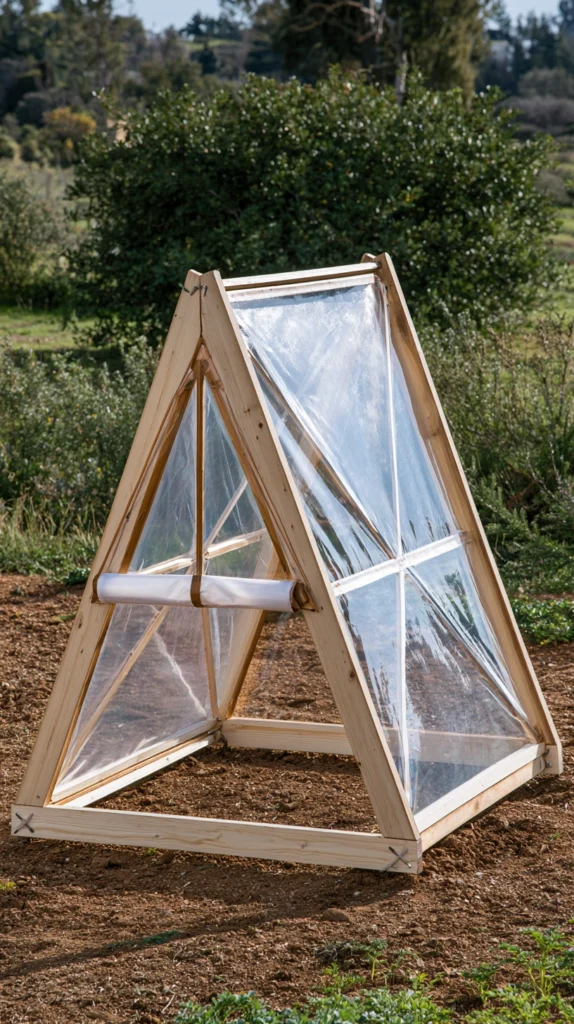
A small, freestanding A-frame structure, built from lumber and plastic sheeting, sized for a single raised bed — a step up from a cold frame without the cost of a full walk-in structure.
Why the A-frame shape is efficient
The triangular shape sheds rain and snow easily and uses the minimum material to enclose the maximum volume, which keeps both lumber and covering costs low.
The frame
2×2 lumber cut into triangular end pieces and connecting rails, assembled into a simple A-shape.
Sized to fit directly over an existing raised bed, so no new bed construction is required.
The covering
Greenhouse plastic or a repurposed clear shower curtain, stapled or clamped to the frame.
One end left as a flap door, rather than built hardware, for the simplest possible access.
The size
4 feet by 6 feet is typical, tall enough at the peak for a person to kneel or crouch inside.
The anchoring
Stakes driven at each corner, since a lightweight A-frame can shift in wind if left unanchored.
Cost breakdown: Lumber: $30–60 Plastic sheeting: $15–30 Stakes and hardware: $10–15 Total: $55–105
6. The Repurposed Trampoline Frame Greenhouse
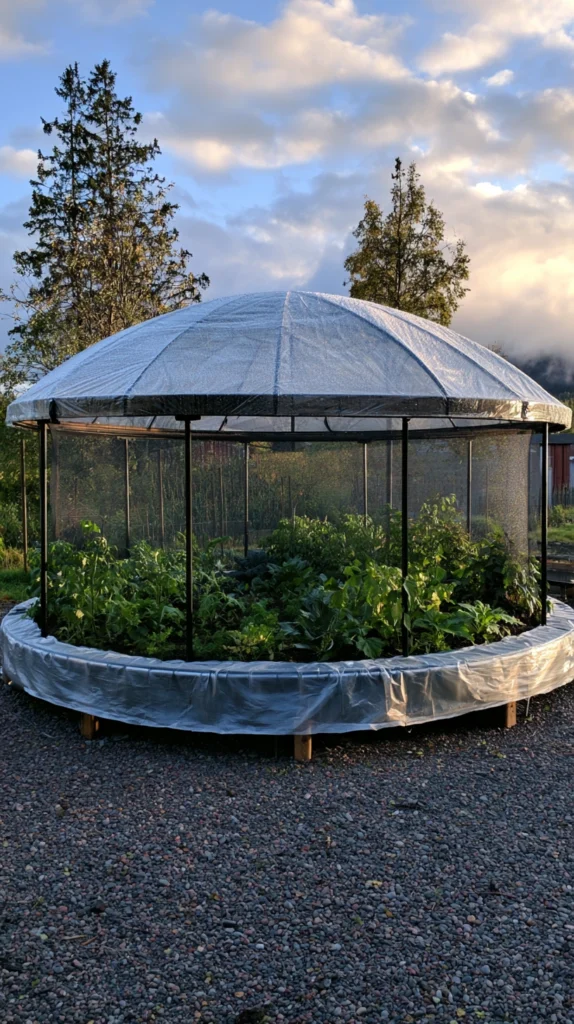
An old trampoline frame, stripped of its jumping mat, repurposed as the skeleton for a round or hexagonal greenhouse — a nearly free structure for anyone with a broken trampoline already sitting in the yard.
Why a trampoline frame is a genuinely useful find
The circular metal frame is already curved, already sturdy, and already sized for a walk-in structure — most of the structural work is done before any covering is added.
The frame
The trampoline’s circular top rail and leg supports, with the mat, springs, and net removed entirely.
Any rust spots wire-brushed and treated before covering is added.
The covering
Greenhouse plastic or heavy clear vinyl, wrapped around the frame and secured with zip ties or clamps at regular intervals.
The door
A vertical slit left in the plastic, weighted at the base or secured with a zipper strip sold for greenhouse use.
The floor
Left as bare soil for in-ground planting, or lined with landscape fabric and gravel for a cleaner interior.
Cost breakdown: Trampoline frame: $0 (repurposed) Plastic or vinyl covering: $30–60 Zip ties, clamps, zipper strip: $10–20 Total: $40–80
7. The Cattle Panel Hoop House
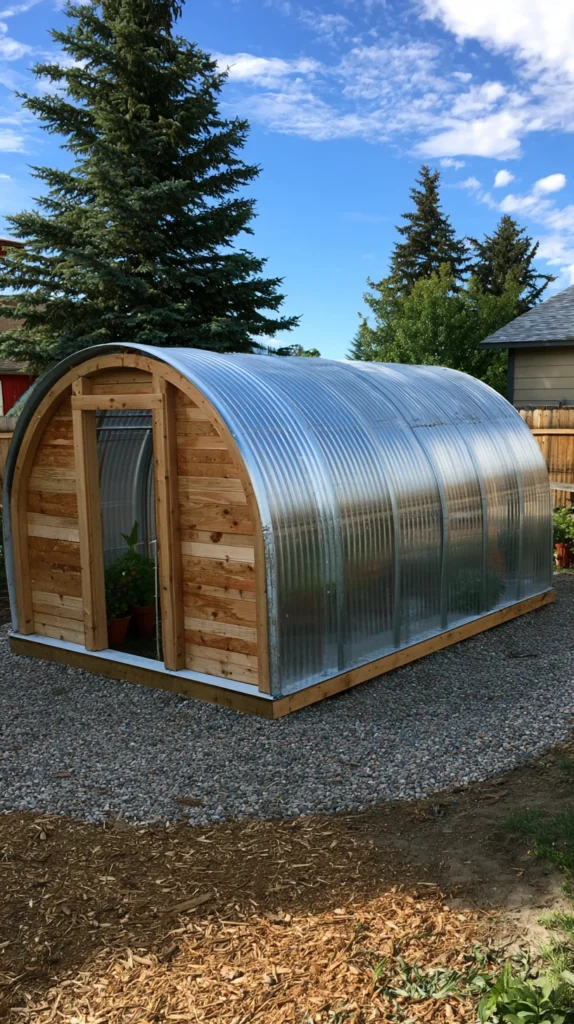
Livestock fencing panels, bent into arches and covered in plastic, forming an unusually sturdy walk-in greenhouse for a modest cost.
Why cattle panels outperform PVC for durability
Cattle panels are galvanized steel and hold their shape under snow load and wind far better than PVC pipe, at only a modest increase in cost.
The frame
16-foot cattle panels, bent into an arch and secured to a simple wood base frame on either side.
Multiple panels placed in sequence and wired together at the top for a longer structure.
The covering
Greenhouse plastic stretched over the arched frame, secured with wiggle wire in a base channel or simply clamped along the wood base.
The ends
Wood-framed end walls with a door on one end, built separately and attached to the first and last arches.
The size
A single cattle panel yields roughly 16 feet in length by 6.5 feet wide, more than enough for several raised beds.
Cost breakdown: Cattle panels (2–3): $60–120 Wood base frame: $30–60 Plastic sheeting: $30–60 Total: $120–240
8. The Raised Bed Cover Greenhouse
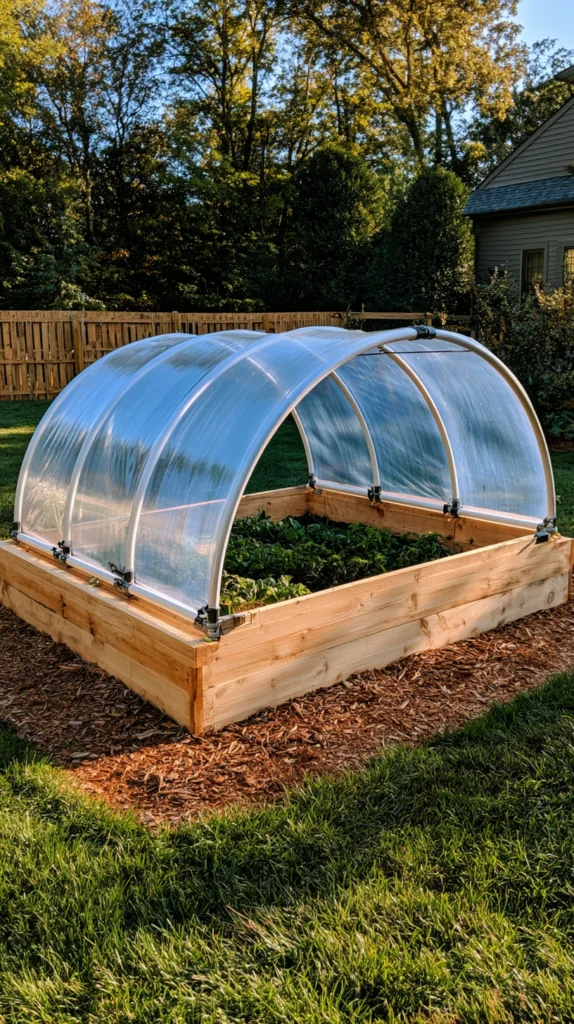
A simple hooped or boxed cover built directly over an existing raised garden bed, converting it into a mini greenhouse without any new footprint in the yard.
Why building onto an existing bed saves money
No new foundation, no new bed construction, no new footprint to plan for — the raised bed’s walls become the base of the greenhouse structure for free.
The hoops
Lengths of PVC or rebar-supported flexible conduit, bent into arches and inserted directly into the soil or clipped to the inside edge of the raised bed frame.
The covering
Greenhouse plastic in cooler months, shade cloth or insect netting in hot months — the same hoop frame serving double duty across seasons.
The clips
Purpose-made hoop clips, or simple binder clips, holding the covering to the hoops without punching holes in the plastic.
The access
The covering pulled back from one end for watering and harvesting, rather than a built door.
Cost breakdown: Hoops (PVC or conduit): $15–30 Greenhouse plastic: $15–30 Clips: $5–10 Total: $35–70
9. The Shipping Pallet Cold Frame
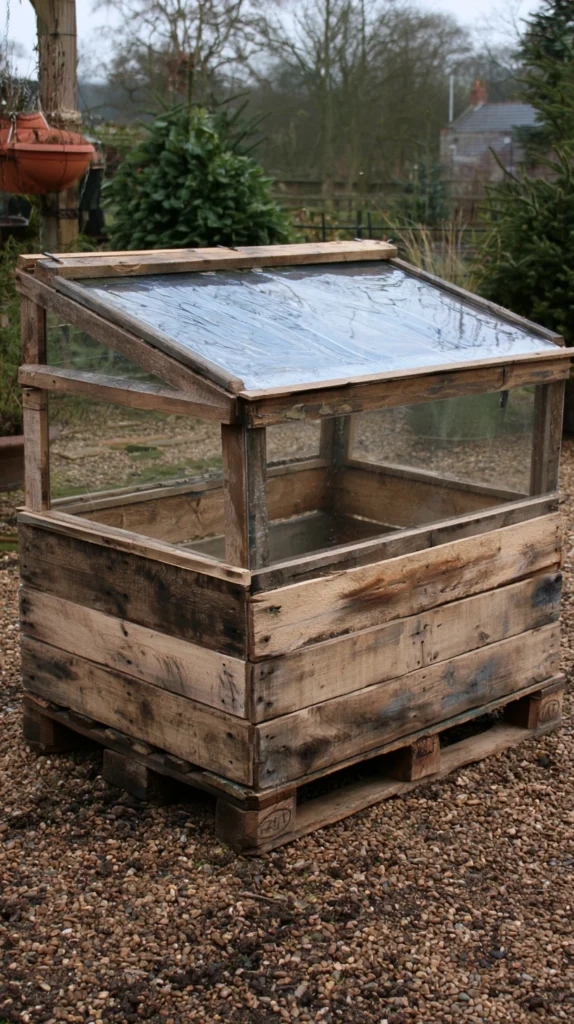
A cold frame built from disassembled wooden shipping pallets, one of the most commonly available free materials for garden construction.
Why pallets work well for this project
Pallets are frequently given away free by retailers and warehouses, and the slats provide ready-cut lumber in consistent widths.
The sourcing
Ask local garden centers, hardware stores, or furniture retailers for pallets they are discarding — most give them away without hesitation.
The disassembly
Slats pried free carefully with a pry bar, nails removed or hammered flush, and any damaged wood set aside.
The construction
A simple box frame built from the reclaimed slats, sized to the available lumber rather than to a fixed plan.
The lid
A salvaged window, or a simple frame covered in clear plastic sheeting stapled taut.
The finish
Left unfinished for a rustic look, or given a coat of exterior sealant for longevity, since pallet wood is not always treated for outdoor use.
Cost breakdown: Pallets: $0 (free) Salvaged window or plastic sheeting: $0–20 Hinges and hardware: $5–10 Total: $5–30
10. The Tension Pole Greenhouse
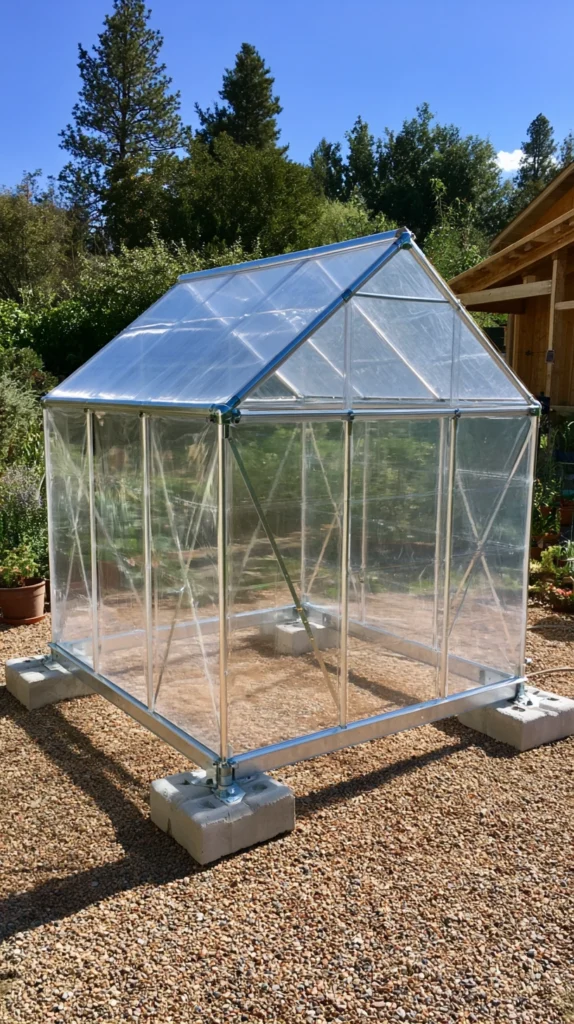
A frame built from tension poles and horizontal supports, wrapped in greenhouse plastic — a design requiring no ground anchoring at all, ideal for rented properties or temporary placement.
Why no-anchor construction matters for renters
A structure that does not require digging, staking, or permanent attachment to the ground can be dismantled and moved without leaving a trace — an important feature for anyone who does not own their yard.
The frame
Adjustable tension poles (the kind used for closet organizing or curtain rods) set vertically, connected by horizontal crossbars secured with clamps rather than screws.
The covering
Greenhouse plastic draped over the frame and secured with clips, rather than stapled or glued to any surface.
The weighting
Sandbags or bricks placed at the base of each corner in place of ground stakes, holding the structure steady without penetrating the soil.
The size
Best kept modest — 6 feet by 6 feet or smaller — since the tension-pole method has less structural rigidity than a staked frame.
Cost breakdown: Tension poles and crossbars: $40–70 Plastic sheeting: $20–40 Sandbags or weights: $10–20 Total: $70–130
11. The Straw Bale Greenhouse Base
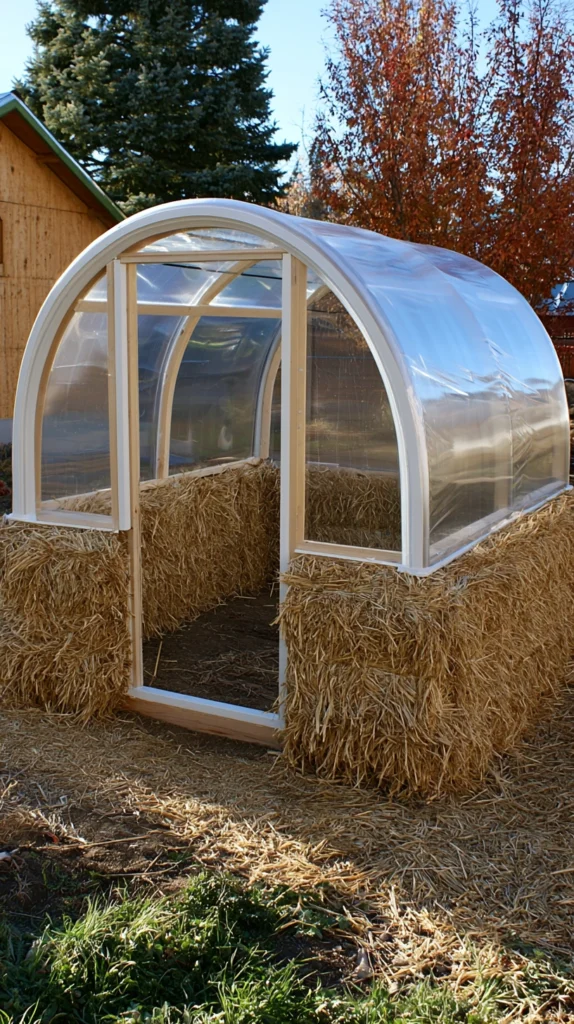
Straw bales stacked to form the lower walls of a greenhouse, with a simple hoop or A-frame structure built on top — an approach that adds insulation as well as structure.
Why straw bales add real value
Beyond serving as low-cost walls, straw bales provide meaningful insulation, helping the greenhouse interior hold heat overnight far better than a plastic-only structure of the same size.
The base
Straw bales stacked two high, arranged in a rectangle to form the lower wall of the structure.
Bales staggered at the corners, similar to brick-laying, for stability.
The frame above
A simple hoop or A-frame structure built on top of the straw wall, using PVC, conduit, or lumber.
The covering
Greenhouse plastic stretched over the upper frame and secured down into the straw bales with landscape staples.
The seasonal note
Straw bales break down over one to two seasons and need periodic replacement, which keeps this a lower-cost but not entirely one-time investment.
Cost breakdown: Straw bales (8–12): $40–70 Upper frame (PVC or lumber): $30–60 Plastic covering: $20–40 Total: $90–170
12. The Repurposed French Door Greenhouse
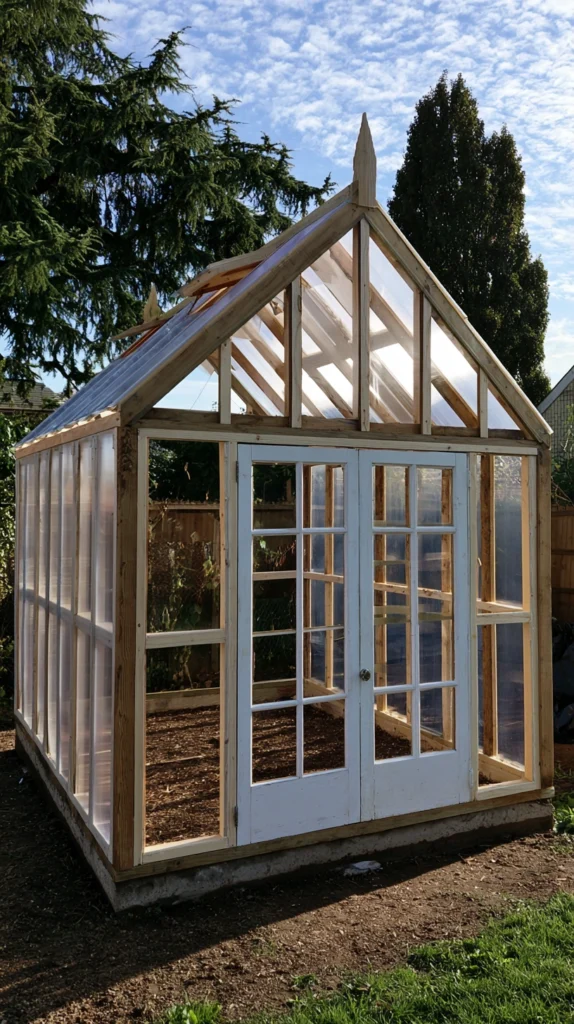
A small greenhouse built using a pair of salvaged French or patio doors as the front wall and entrance, combining a functional door with free or low-cost glazing.
Why doors solve two problems at once
A greenhouse needs both a wall and a door. Salvaged French doors provide glazing and a working entrance in a single piece, saving the cost and complexity of building a separate door.
The sourcing
Salvage yards, architectural reclamation centers, and renovation project giveaways are the most reliable sources for intact door sets.
The frame
A simple lumber structure built to the exact width and height of the salvaged doors, with the doors mounted as the front wall.
The remaining walls and roof
Polycarbonate panels or greenhouse plastic for the sides and roof, kept simple compared to the more detailed front.
The hardware
Existing door hinges and handles reused as-is, avoiding the cost of new greenhouse-specific hardware.
Cost breakdown: Salvaged French doors: $0–60 Lumber frame: $50–100 Polycarbonate or plastic for remaining walls: $40–70 Total: $90–230
13. The Complete Budget Backyard Greenhouse (The Full Small Structure)
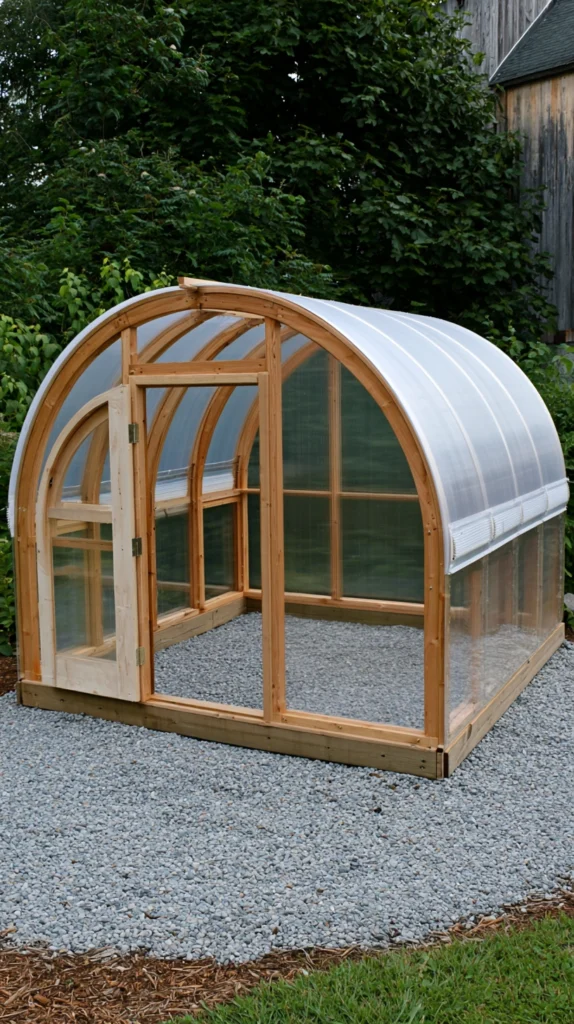
A complete small greenhouse combining several of the budget techniques above — a salvaged-material frame, an efficient covering, and a properly sited, ventilated structure sized for regular seasonal use.
What separates the complete structure from a single quick build
A cold frame or hoop cover: a single-purpose tool. A complete small greenhouse: a year-round growing space. The difference is whether ventilation, siting, and access were planned together, rather than solved one at a time.
The elements of the complete budget greenhouse
The frame
A combination approach — cattle panels or PVC hoops for the main structure, salvaged windows or doors where available for the entrance.
The siting
South-facing, sheltered from prevailing wind, positioned close enough to a water source to avoid a long hose run.
The covering
Greenhouse-grade plastic sheeting, rated for at least four years of UV exposure rather than a general-purpose tarp.
The ventilation
At least one roll-up side or a propped door, essential for preventing overheating on sunny days even in cool weather.
The floor
Landscape fabric with gravel or bark mulch over it, keeping weeds down and providing drainage.
The shelving
Simple lumber or repurposed pallet shelving along one side, for seed trays and potted plants.
The complete design in action
A late-winter morning:
8am: The door propped open slightly, the interior already ten degrees warmer than the yard outside.
Noon: Seed trays on the shelf, first true leaves showing weeks ahead of what a windowsill start would allow.
Late October, the same structure: tomato and pepper plants still producing, protected from the first light frosts that have already browned everything else in the open garden.
The complete budget greenhouse: not an expensive structure, but a genuinely extended growing season, built almost entirely from salvaged and low-cost material.
Cost breakdown for the complete structure: Assuming a starting point of nothing: Frame (cattle panels or PVC): $60–150 Salvaged door or window entrance: $0–60 Greenhouse plastic (UV-rated): $40–80 Ventilation hardware: $15–30 Flooring (fabric and gravel): $20–40 Shelving (repurposed pallets): $0–30 Total: $135–390
Phased over two or three seasons:
Season one ($60–150): A basic hoop or panel frame Basic plastic covering One propped-open vent
Season two ($60–120): A salvaged door or window entrance Proper flooring Shelving
Season three ($40–100): Upgraded UV-rated covering Additional ventilation Insulation (straw bales or bubble wrap lining) for winter use
The budget backyard greenhouse: not a weekend project in most cases, but a structure built with intention, piece by salvaged piece.
The Question Before Any Greenhouse Design
Before choosing a frame, a covering, a size:
What is the primary reason for wanting a greenhouse this season?
If the answer is: starting seeds earlier — the cold frame or the raised bed cover is the answer.
If the answer is: a walk-in growing space — the PVC hoop house, cattle panel hoop house, or lean-to.
If the answer is: no permanent structure or ground disturbance — the tension pole design or the trampoline frame conversion.
If the answer is: the lowest possible cost — the pallet cold frame or the repurposed window greenhouse.
The design follows the goal, and the budget follows the materials already on hand. Every greenhouse idea on this list serves a different combination of the two. The question is which combination fits this yard and this growing season.
The smallest cold frame in the right spot: still extends the season. The complete structure, built with intention: a genuinely longer year in the garden.
That extension: the whole point of the greenhouse.
Getting Started This Weekend
The immediate budget greenhouse solution:
Check for one salvaged material before buying anything.
An old window, a broken trampoline frame, a stack of pallets — the free material that solves half the project.
Build the smallest version first.
A cold frame over one bed, not a full walk-in structure. The confidence and the lessons come from the first small build.
Site it before building it.
South-facing, wind-sheltered, close to water — the position matters more than the material.
Leave a way to ventilate it before the first sunny day.
A propped lid or a loose flap: the detail most easily forgotten and most quickly regretted.
The rest of the design: the elaboration of this moment.
The frame: the beginning. The greenhouse: what grows inside it.