14 Long Narrow Backyard Ideas That Will Transform Your Space
A long narrow backyard has a shape most people associate with a bowling lane or a hallway, not a place anyone would choose to spend an afternoon.
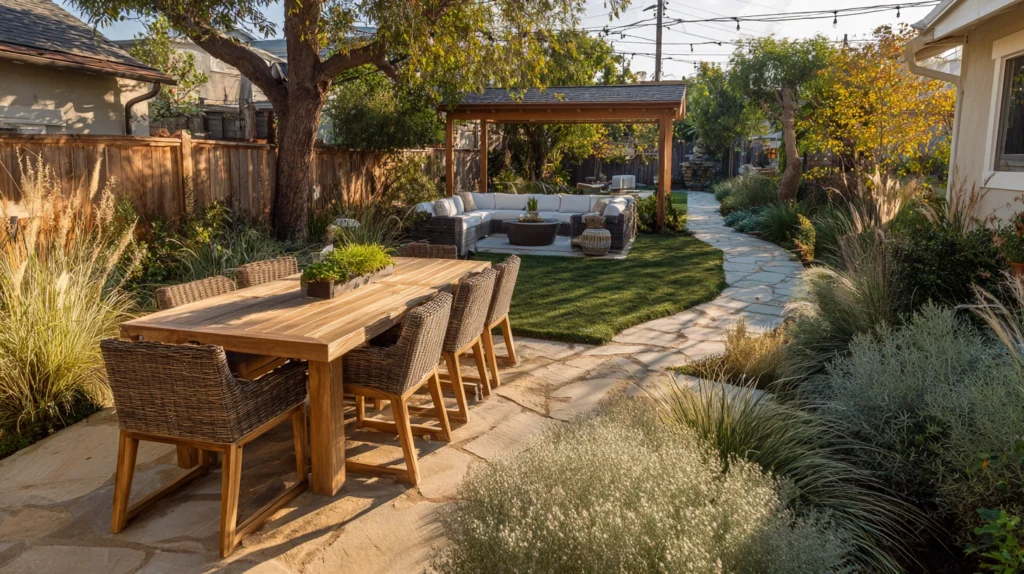
Fences pressed close on both sides, a strip of grass running the length of the property, and an obvious dead zone somewhere past the halfway point where nobody ever really goes.
That shape is actually a gift in disguise. A narrow lot forces genuine decisions about zoning and sightlines that a square, boxy backyard never demands, which is exactly why the best long narrow yards often end up more interesting than a wide, undefined one.
Here are 14 ways to turn that bowling-lane shape into a backyard that actually earns the whole length of the property.
Why a narrow yard needs a different design approach than a wide one
The shape itself dictates strategy more than personal style preference does.
- A single open lawn running the full length reads as empty and underused, no matter how nice the grass looks
- Dividing the space into distinct zones gives each section of the yard its own reason to be visited
- Sightlines matter enormously here, since a straight, narrow view can either feel like a tunnel or like a deliberately unfolding journey, depending entirely on what’s placed along the way
Once the yard is broken into a sequence of purposeful zones rather than treated as one long stretch, the narrow shape stops being a limitation.
1. Divide the Yard Into Three Distinct Zones
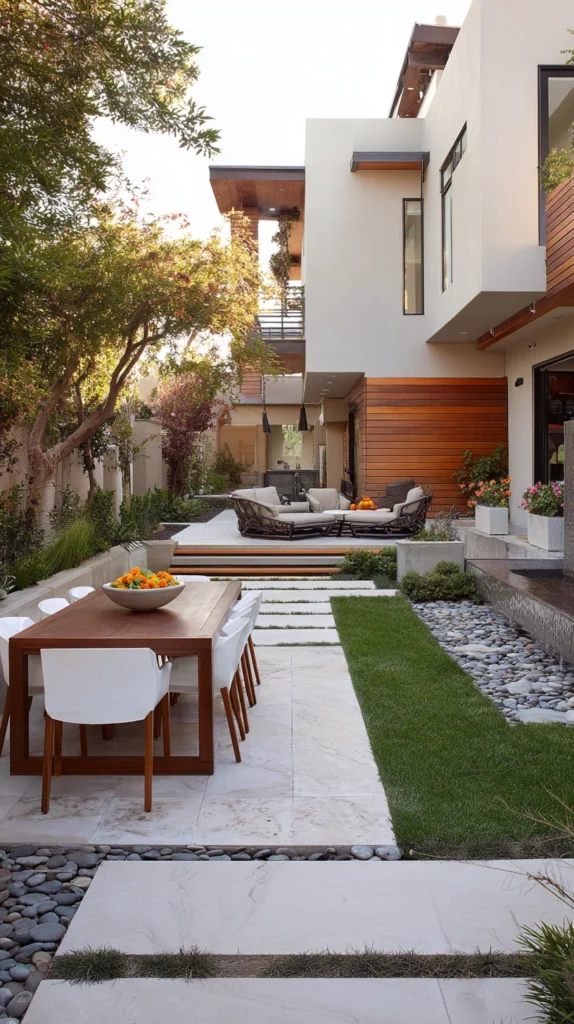
Breaking a single long run into a sequence of purposeful spaces.
Build it:
- The yard mentally divided into three roughly equal sections: a dining or lounge area near the house, a middle transition zone, and a destination feature at the far end
- Each zone given a clear, distinct purpose, rather than letting the whole space serve one single, undifferentiated function
- A visual or material transition marking the boundary between each zone, like a change in paving material or a change in planting height
Why zoning solves the narrow yard’s biggest structural problem:
- A single uninterrupted lawn running the full length of the property visually emphasizes the narrowness rather than disguising it
- Distinct zones give the eye several points of interest to travel toward, rather than one long, undifferentiated view
- It mirrors how much larger properties are naturally zoned, borrowing that same design logic and scaling it down to fit a narrower footprint
Why the specific proportions of each zone matter more than people initially assume:
Dividing the yard into three exactly equal sections isn’t always the right call. The zone closest to the house, since it typically sees the most daily use, often benefits from being slightly larger than the middle transition area, while the far destination zone can be more modest if it’s primarily a visual endpoint rather than a heavily used space. Walking the actual yard and considering how each section will realistically be used, rather than dividing purely by measuring tape, tends to produce a more functional result than a strictly even split.
Cost breakdown: No additional cost beyond whatever specific features are added to each zone, since this is fundamentally a planning decision.
2. Use a Curved or Angled Path Instead of a Straight One
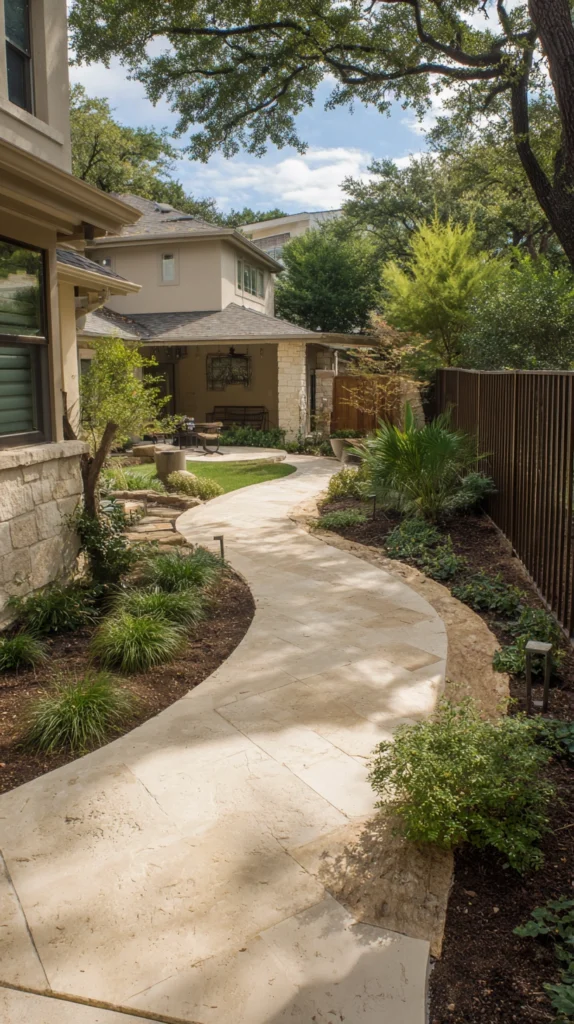
Disrupting the yard’s natural tunnel-like sightline.
Build it:
- A path of pavers, gravel, or mulch that curves or angles across the yard’s width rather than running in one straight line from the house to the back fence
- Plantings or a small structure positioned to partially obscure the view around each curve, encouraging genuine exploration rather than revealing the whole yard at a glance
- Path width kept consistent throughout, even as the direction changes, maintaining a comfortable and safe walking surface
Why breaking the straight sightline transforms how the space feels to walk through:
- A straight path emphasizes the yard’s narrow tunnel shape, while a curved one disguises the actual property lines and makes the space feel larger than it measures
- It creates a sense of discovery, since the full yard isn’t visible from the back door, encouraging people to actually walk its length rather than just glancing down it
- It’s a technique borrowed directly from traditional garden design, where curved paths have long been used specifically to make narrow or oddly shaped properties feel more expansive
Why this specific technique requires more upfront planning than a straight path would:
A curved path needs to be planned around actual obstacles or planting beds, rather than simply drawn as a decorative wiggle across open grass, or the curve reads as arbitrary rather than purposeful. Positioning a specific tree, shrub, or small structure at each curve’s turning point gives the path’s shape a genuine reason for existing, reinforcing the sense that the yard’s layout was deliberately designed rather than randomly decorated.
Cost breakdown: A curved gravel or paver path typically costs comparably to a straight path of the same length, generally $8 to $15 per square foot depending on material, though the layout itself takes more planning time.
3. Install a Pergola or Arbor as a Transition Marker
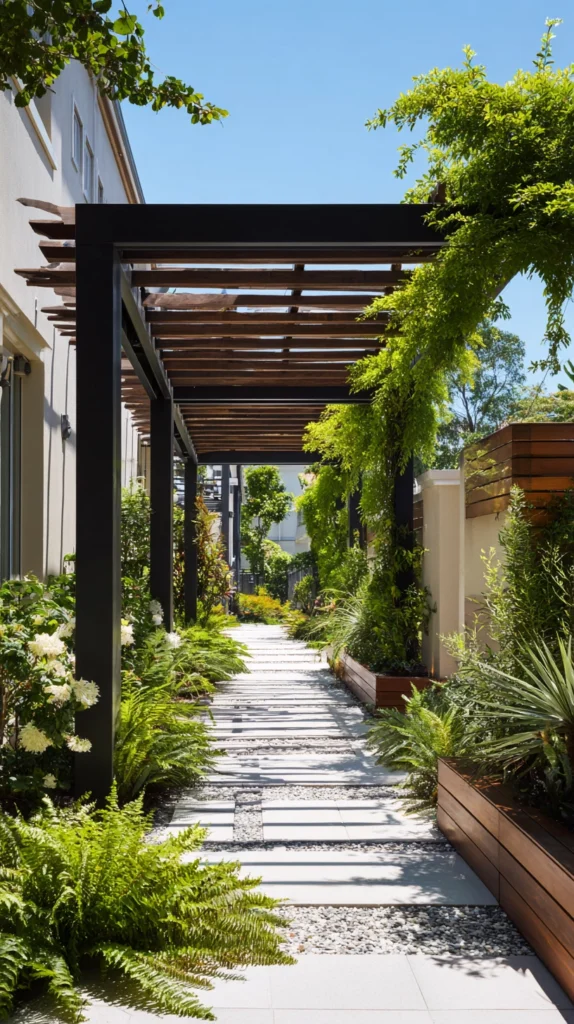
Using an overhead structure to signal a shift from one zone to the next.
Build it:
- A simple pergola or arbor positioned at the boundary between two zones, like between a dining area and a garden section
- Climbing plants like clematis or wisteria trained up and across the structure over time, adding living definition to the transition point
- Sized appropriately to the yard’s actual width, avoiding a structure so large it further emphasizes the narrow footprint
Why an overhead transition marker does more for a narrow yard than a ground-level divider:
- It creates a genuine sense of passing from one distinct space into another, similar to walking through a doorway between rooms
- The vertical structure draws the eye upward, which helps counter the yard’s tendency to emphasize its horizontal narrowness
- Once climbing plants fill in, it becomes a green, living marker rather than a purely architectural one, softening the transition further
Why positioning this structure at the right specific point in the yard matters more than the structure itself:
A pergola or arbor placed randomly partway down the yard doesn’t achieve the same effect as one placed precisely at the boundary between two intentionally designed zones. The structure’s real function here is to mark a meaningful transition, not simply to exist as a decorative element, so its placement should be decided only after the yard’s zoning plan is already established, ensuring it reinforces rather than arbitrarily interrupts the overall layout.
Cost breakdown: A simple pergola or arbor kit runs $200 to $600 depending on size and material.
4. Plant in Layers Along Both Fence Lines
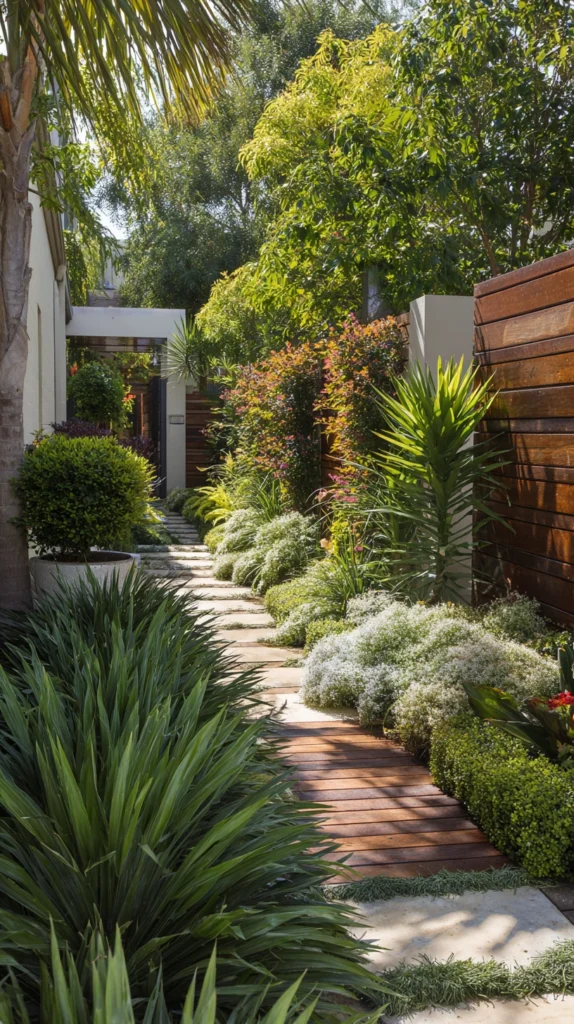
Softening the parallel fences that create the yard’s tunnel-like feeling.
Build it:
- Tall shrubs or small trees planted along the back of each border, with progressively shorter plants layered in front toward the lawn
- Varied foliage color and texture used throughout, rather than a single repeated plant species running the full fence length
- Layering applied consistently along both sides, rather than only addressing one fence line and leaving the other bare
Why layered planting along both fences addresses the yard’s core visual problem directly:
- Two bare, parallel fences are what most strongly reinforce the sense of a narrow corridor, and layered greenery breaks up those hard, straight lines considerably more than a single row of plants would
- Varied heights create a more three-dimensional, garden-like feeling instead of two flat green walls running the yard’s length
- It gives the eye considerably more to look at along the journey from the house to the back of the property, rather than just grass and fence extending straight back
Why varying the specific plants used at different points along the fence matters as much as the layering itself:
Planting the exact same shrub in a single unbroken row along the entire fence length, even if layered in height, can still read as monotonous and reinforce the sense of a long, unchanging corridor. Varying the specific plant species and color at different points along the fence, perhaps shifting from a darker evergreen near the house to a lighter, more textured planting further back, gives the eye actual markers of progress as someone moves through the space, reinforcing the zoned, sequential feeling the whole design is working toward.
Cost breakdown: Layered fence-line planting runs $15 to $40 per linear foot depending on plant size and variety, for a full treatment along both sides of the yard.
5. Position the Dining Area Closest to the House
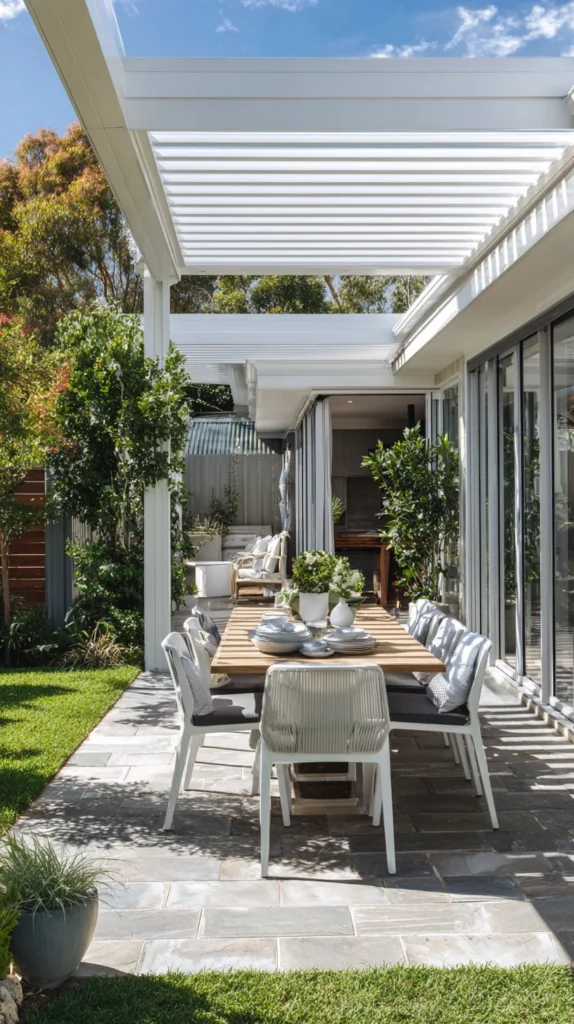
Prioritizing the zone that will see the most daily use.
Build it:
- A dining table and chairs positioned in the section of the yard closest to the back door, minimizing the distance food and dishes need to travel
- Overhead shade, whether a pergola, umbrella, or simple shade sail, added specifically over this zone given its frequent use
- The remaining yard length extending beyond this zone, giving the dining area a clear sense of being the entry point to the rest of the space
Why proximity to the house should drive this specific zoning decision:
- The dining area is typically the zone used most frequently and for the longest single stretches of time, making convenience genuinely more important here than in less frequently used zones further back
- Positioning it near the house minimizes the practical friction of carrying food, dishes, and supplies across a long yard for every single meal
- It naturally becomes the yard’s first zone encountered, setting the tone for the sequence of spaces that follow further down the property
Why resisting the urge to place the dining area at the “best” spot in the yard often produces a more functional result:
It’s tempting to place the dining area wherever the yard’s most attractive existing feature happens to be, even if that spot sits at the far end of the property. In practice, though, a dining area positioned far from the kitchen sees dramatically less actual daily use than one positioned close by, regardless of how nice the more distant spot looks. Prioritizing genuine function over the most photogenic possible placement tends to produce a yard that gets used considerably more often.
Cost breakdown: A dining table, chairs, and basic overhead shade run $400 to $1,200 depending on furniture quality and shade structure chosen.
6. Build a Destination Feature at the Far End
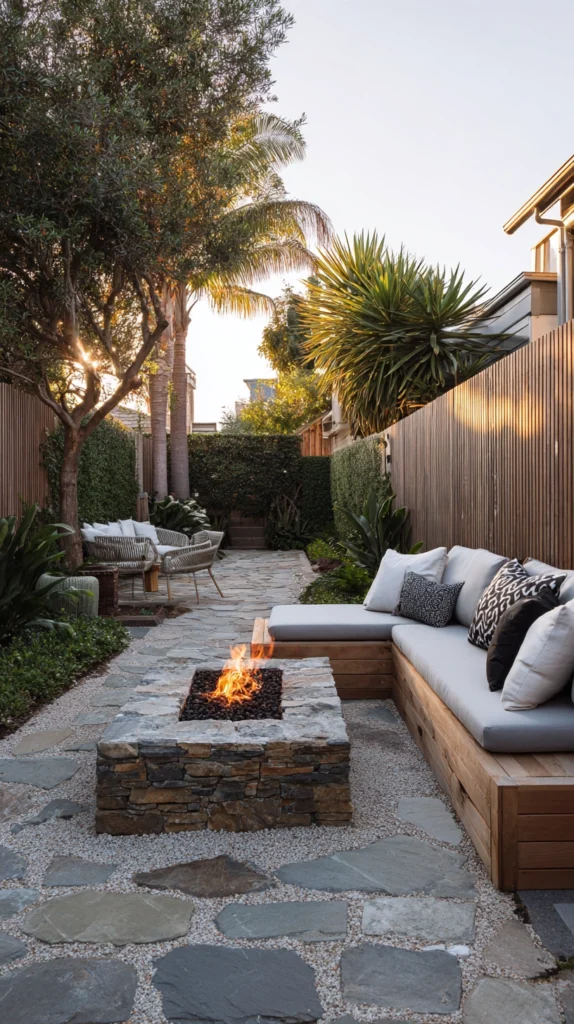
Giving the back of the property a genuine reason to be visited.
Build it:
- A small feature, like a fire pit, a reading nook, or a compact greenhouse, positioned at the yard’s far end
- Connected to the rest of the yard via the established path, giving it a clear, intentional route rather than existing in isolation
- Scaled modestly relative to the space available, since the far end of a narrow yard is often the tightest section of the property
Why a destination feature solves the common “dead zone” problem in long yards:
- Without a specific reason to walk the yard’s full length, the far end often becomes an unused, neglected section that exists purely as empty grass
- A genuine destination gives people an actual reason to make the full journey, activating a part of the property that would otherwise go to waste
- It creates a visual and functional endpoint for the path or sightline running through the yard, giving the whole layout a clear sense of arrival
Why choosing a feature that suits the specific available space at the yard’s end matters considerably:
The far end of a long narrow yard is very often the most constrained section of the property, sometimes narrowing further due to property line angles or existing trees. Choosing an appropriately scaled feature for this specific spot, rather than assuming a large feature planned for a standard yard will fit, prevents the frustrating scenario of a feature purchased or built without accounting for the actual, often tighter dimensions found at the yard’s far reaches.
Cost breakdown: A destination feature varies widely by category, typically $200 to $800 for a fire pit or reading nook, considerably more for a greenhouse structure.
7. Use Raised Garden Beds Along One Side Only
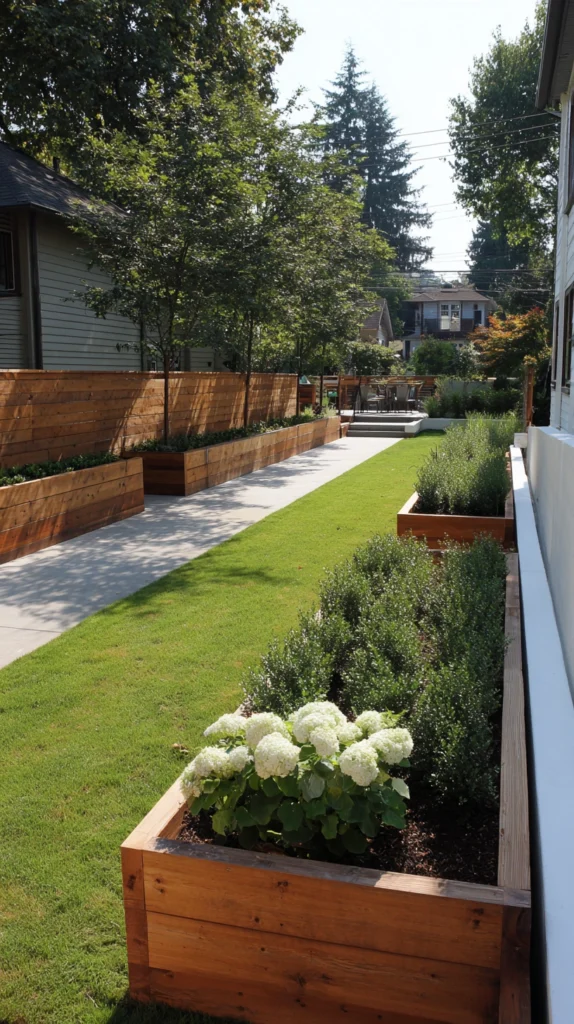
Reserving one fence line for growing space while keeping the other open for movement.
Build it:
- A run of raised garden beds installed along one full side of the yard, leaving the opposite side clear for a walking path or open lawn
- Beds sized consistently, typically 3 to 4 feet wide, allowing comfortable access from the open side without needing to step into the bed itself
- Planted with a mix of vegetables, herbs, and flowers depending on the household’s specific gardening interests
Why dedicating one entire side to growing space suits a narrow yard’s proportions well:
- It uses the yard’s naturally linear shape efficiently, since a run of garden beds along one side doesn’t require additional width the property doesn’t have
- Keeping the opposite side open maintains a clear walking path and sightline, preventing the yard from feeling boxed in on both sides simultaneously
- It gives the yard genuine daily function beyond pure aesthetics, particularly appealing to households interested in growing their own food
Why choosing one side rather than beds on both sides tends to produce a better result in a genuinely narrow lot:
Raised beds installed on both sides of an already narrow yard can leave the remaining walkway uncomfortably tight, particularly once the plants themselves mature and begin spilling slightly over the bed edges. Committing the growing space to a single side preserves a genuinely comfortable walking width down the yard’s other side, which matters considerably more in a narrow lot than it would in a wider property where both choices remain comfortable regardless.
Cost breakdown: Raised garden beds run $30 to $80 each depending on size and material, typically needing four to six beds to run a meaningful length along one side of the yard.
8. Install Lighting That Guides the Eye Down the Yard’s Length
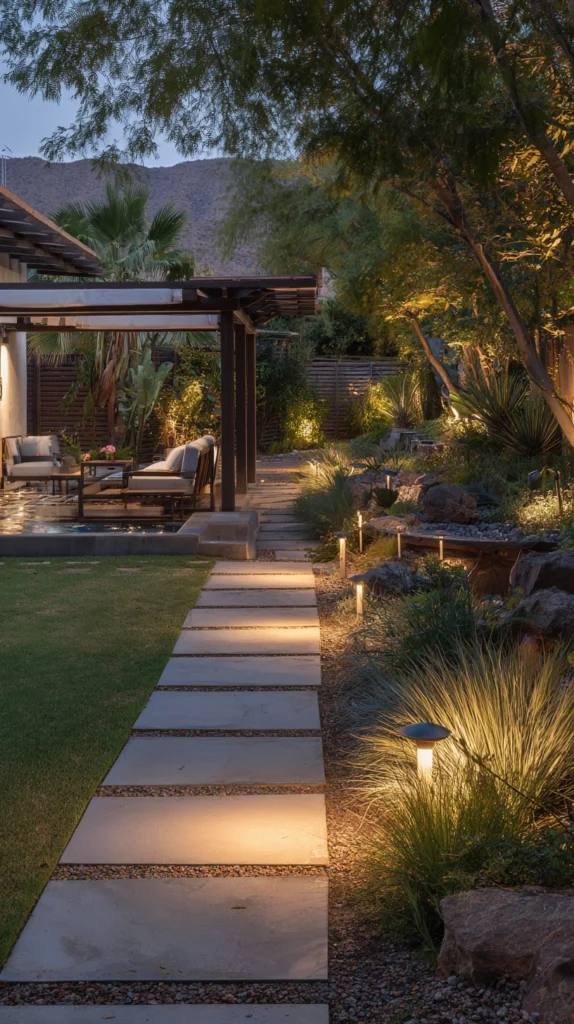
Using illumination specifically to reinforce the sense of a journey rather than a single flat space.
Build it:
- Low path lights installed at intervals along the walkway, spaced evenly to create a rhythmic visual guide down the yard’s length
- String lights or overhead fixtures added at each zone transition, marking those boundary points after dark as well as during the day
- Warm-toned bulbs used consistently throughout, tying the various lighting elements into one cohesive evening atmosphere
Why sequential lighting reinforces the zoning strategy even after dark:
- Path lights specifically draw the eye down the yard’s length, encouraging the same sense of a journey through distinct spaces that the daytime layout already establishes
- Marking zone transitions with a change in lighting style, not just daytime landscaping, keeps that zoned structure legible even during evening use
- It makes the yard considerably safer and more comfortable to actually use after dark, which matters more in a narrow yard where a single overhead light often can’t adequately illuminate the whole length
Why evenly spaced path lighting matters more in a narrow yard than in a wider one:
In a wider yard, a single strong light source can often adequately illuminate a large portion of the space at once. A long narrow yard doesn’t have that luxury, since the elongated shape means a single light source typically leaves large stretches of the property dim regardless of its brightness. Evenly spaced path lights running the yard’s full length solve this specific problem directly, ensuring no single stretch of the walkway goes dark while a light source elsewhere sits unnecessarily concentrated.
Cost breakdown: A full run of path lighting for a long narrow yard runs $80 to $200 depending on the number of fixtures needed and whether they’re solar or wired.
9. Add a Water Feature as a Focal Midpoint
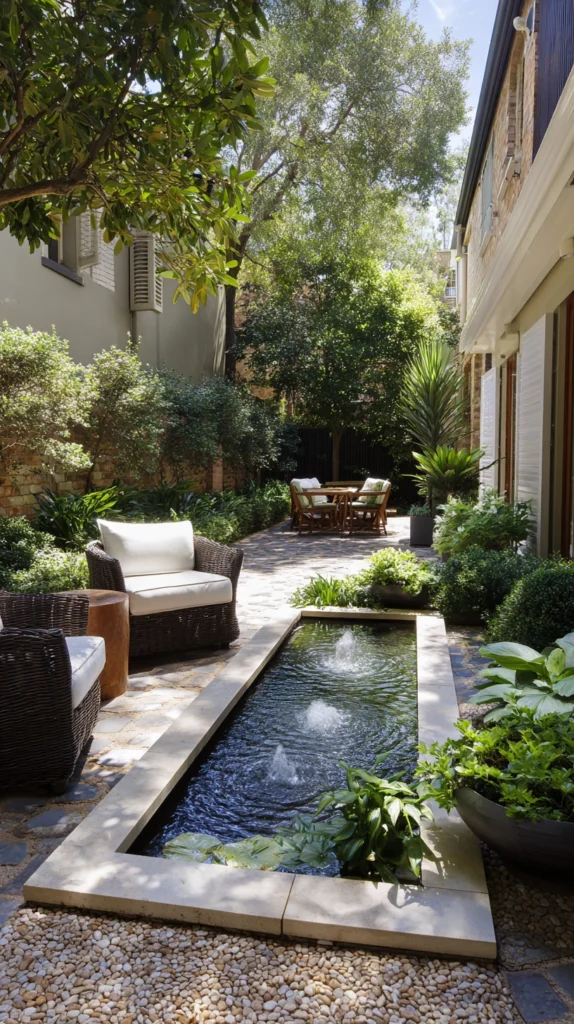
Using sound and movement to anchor the yard’s middle transition zone.
Build it:
- A small fountain or a compact recirculating water feature positioned at the yard’s midpoint, marking the transition between the near and far zones
- Sized modestly relative to the yard’s available width, avoiding a feature so large it narrows the usable walking path on either side
- Positioned within earshot of both the dining area and the far destination zone, letting the sound carry through much of the yard’s length
Why a midpoint water feature does double duty as both zone marker and sensory addition:
- The sound of moving water genuinely helps mask street noise or neighboring yard sounds, which matters more in a narrow lot often positioned closer to neighboring properties on both sides
- Positioned at the midpoint, it naturally reinforces the sense of passing through a distinct transition zone between the two ends of the yard
- It adds a focal point precisely where the yard might otherwise feel like its least defined, most transitional stretch
Why sizing this feature correctly for a narrow lot requires more restraint than it would in a wider yard:
A water feature sized appropriately for a standard suburban yard can easily overwhelm the available width in a genuinely narrow lot, leaving too little clearance on either side for comfortable walking. Choosing a feature specifically scaled down, often something closer to a large decorative bowl fountain than a full pond installation, respects the yard’s actual proportions while still delivering the sound and visual interest a water feature provides.
Cost breakdown: A compact fountain feature runs $100 to $300 depending on size and material.
10. Use Vertical Gardening to Maximize Limited Width
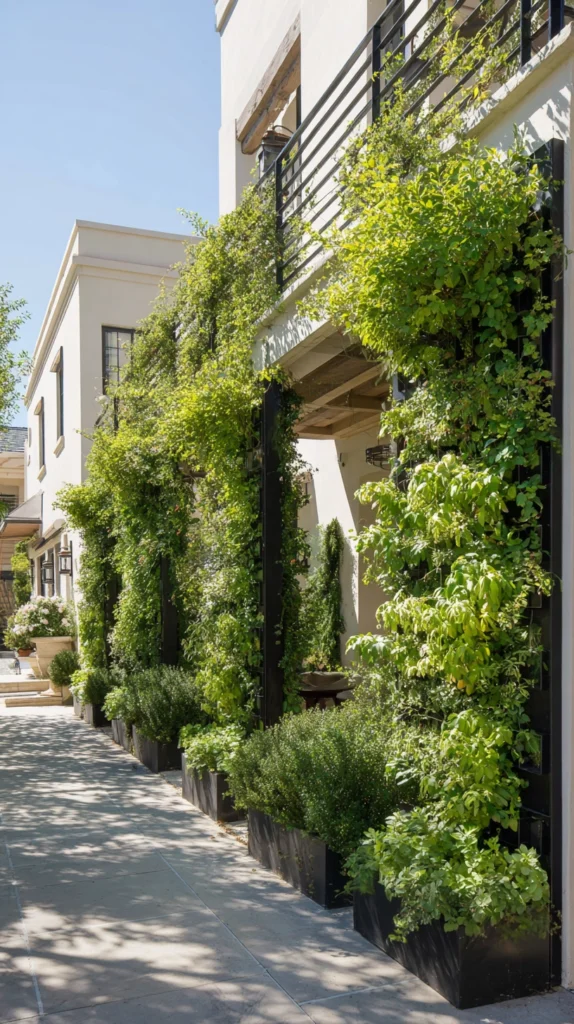
Growing upward along fences and walls rather than requiring additional ground footprint.
Build it:
- Trellises or wall-mounted planting systems installed along one or both fence lines, growing climbing plants or wall-mounted container gardens vertically
- Climbing vegetables like beans or cucumbers, or flowering vines like clematis, chosen depending on whether the goal is food production or purely ornamental greenery
- Positioned to avoid interfering with the walking path’s clearance, keeping vertical growth contained close to the fence itself
Why vertical growing suits a narrow yard’s limited width better than ground-level garden beds alone:
- It adds genuine growing capacity without requiring any additional ground footprint the yard doesn’t have to spare
- It further reinforces the layered fence-line planting strategy, adding another dimension of greenery without narrowing the usable walking space
- It works particularly well in combination with raised beds along one side, since climbing plants from those beds can be trained upward along an adjacent trellis
Why choosing the right trellis material and mounting method matters for long-term durability in this specific application:
A trellis mounted directly to a wood fence needs hardware rated for the fence material and the eventual weight of mature climbing plants, which can become considerably heavier than expected once fully grown. Using appropriately rated mounting hardware, and checking the fence’s own structural condition before adding significant vertical growing weight, prevents the frustrating scenario of a trellis pulling away from an aging fence once plants have matured to their full size.
Cost breakdown: Trellises and vertical planting hardware run $20 to $60 per linear foot of fence covered, depending on the specific system chosen.
11. Create a Narrow Lawn Strip Instead of a Full Grass Yard
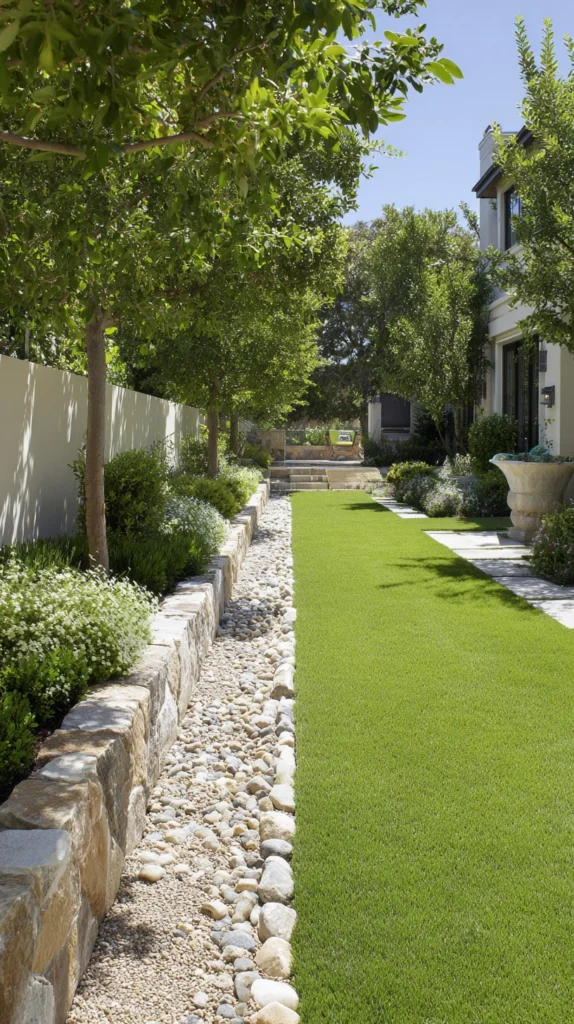
Reducing the grass footprint to a defined, intentional strip rather than letting it fill the entire width.
Build it:
- A narrow strip of lawn, often just 4 to 6 feet wide, running down the yard’s center or along one side
- Bordered clearly on both sides by garden beds, gravel, or paving, defining the lawn as one intentional zone rather than the yard’s default entire surface
- Sized specifically to the household’s actual grass needs, whether that’s space for a dog, kids’ play, or simply a patch of green underfoot
Why reducing the lawn’s footprint often improves a narrow yard more than maintaining a full-width grass surface:
- A full-width lawn running the yard’s entire length reinforces the sense of an undefined, single-purpose corridor more than a deliberately bordered strip does
- A narrower, clearly bordered lawn reads as an intentional design choice rather than simply whatever grass happened to grow across the available space
- It reduces the total lawn area needing regular mowing and watering, a genuinely practical benefit alongside the visual one
Why defining the lawn’s edges clearly matters as much as reducing its overall size:
Simply narrowing the mowed grass area without adding a clear border, like an edging material or an adjacent planting bed, can look more like neglected lawn care than an intentional design choice. Adding a defined edge, whether steel edging, a paver border, or a garden bed running alongside, signals clearly that the narrower lawn width was a deliberate decision, which matters considerably for how the whole yard reads to anyone walking through it.
Cost breakdown: Lawn edging material runs $2 to $6 per linear foot, a relatively small additional cost on top of whatever grass reduction or reseeding is involved.
12. Add a Small Structure That Bookends the Yard’s Far End
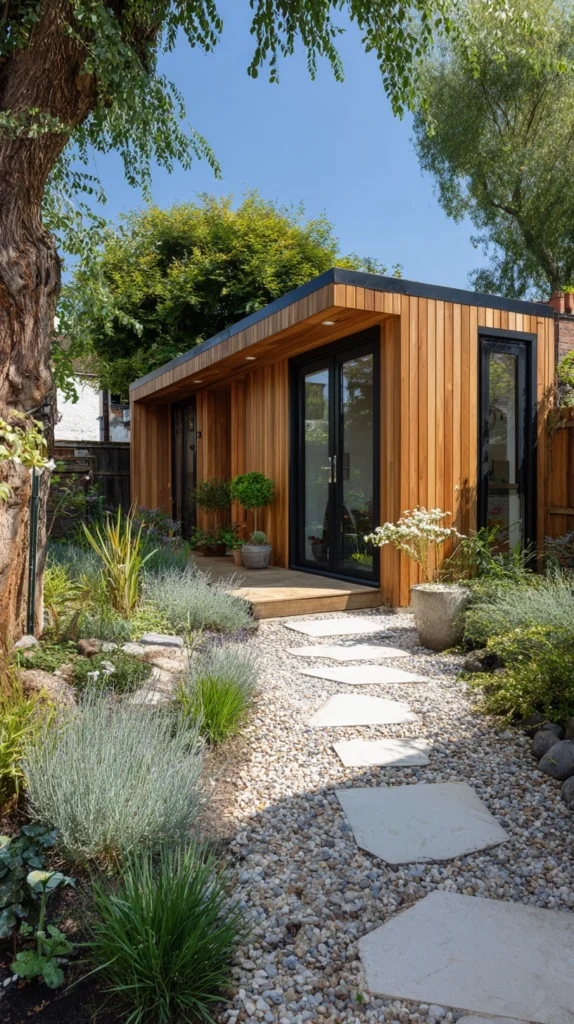
Giving the property line itself a defined, intentional finish rather than letting it end abruptly at a plain fence.
Build it:
- A small structure, like a potting shed, a simple storage unit, or an arbor with a bench, positioned directly at the yard’s back property line
- Styled to coordinate with the home’s existing architecture or the yard’s established material palette, rather than treated as a purely utilitarian afterthought
- Sized modestly to fit the yard’s actual width at its far end, which is often the most constrained section of a long narrow property
Why a structure at the property line’s edge improves the yard’s overall sense of completion:
- It gives the eye a clear, deliberate stopping point at the yard’s far end, rather than letting the property simply end at a plain, undecorated fence
- It reinforces the destination feature concept, giving the far end of the yard genuine architectural presence rather than treating it as leftover space
- A well-styled small structure can also solve a genuine storage need, combining function with the yard’s overall design goals
Why treating this structure as a genuine design element, not just storage, changes how the whole yard reads:
A plain, unstyled storage shed dropped at the back of the property tends to look like exactly what it is: a utilitarian afterthought disconnected from the rest of the yard’s design. Choosing a structure with some coordinated color, trim detail, or material connection to the rest of the yard, even if it’s still primarily functioning as storage, turns this same necessary feature into a genuine part of the overall design story rather than an eyesore tucked at the property’s least visible section.
Cost breakdown: A small styled structure runs $300 to $1,000 depending on size and whether it’s purchased as a kit or built from scratch.
13. Frame Views With Repeated Plantings for Visual Rhythm
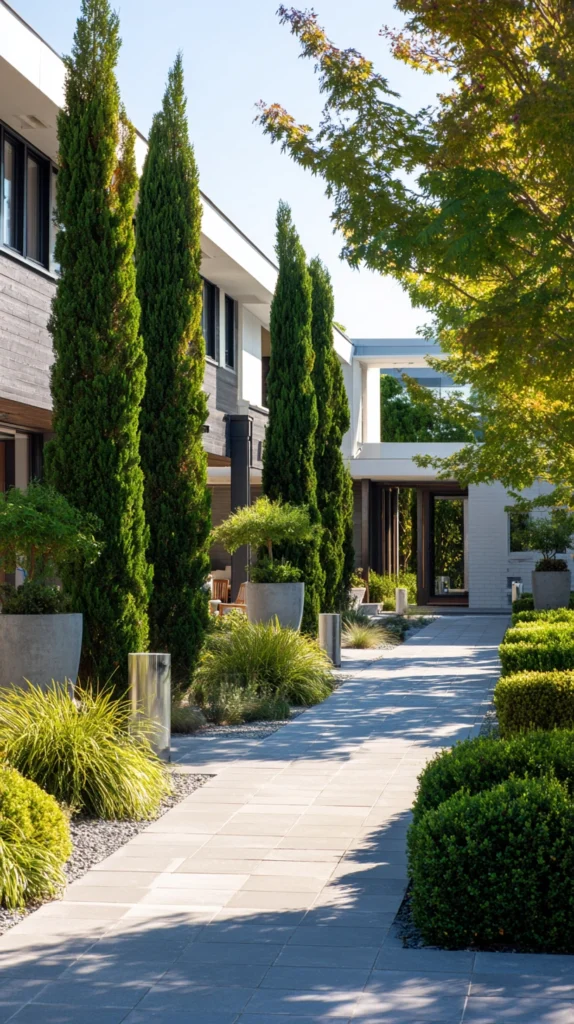
Using consistent, repeated elements to create a sense of intentional pattern down the yard’s length.
Build it:
- The same specific plant, like a columnar evergreen or a repeated ornamental grass, planted at regular intervals along the yard’s length
- Spaced evenly, creating a visual rhythm similar to columns lining a pathway or a formal garden allée
- Combined with the varied layered planting elsewhere in the yard, using this repeated element specifically as a structural, rhythmic accent rather than the yard’s only planting style
Why repeated plantings create a sense of intentional design that random, varied planting alone doesn’t achieve:
- A regular, repeated rhythm signals clear intentionality, similar to how columns or regularly spaced trees define grand garden pathways in much larger, more formal landscapes
- It gives the eye a predictable, calming pattern to follow down the yard’s length, working with the narrow shape rather than fighting against it
- It’s a technique that scales down effectively from large estate garden design into something achievable in a modest residential backyard
Why choosing a narrow, columnar plant variety specifically matters for this technique to work in a tight space:
A wide, spreading shrub repeated at regular intervals in a narrow yard would quickly overwhelm the available width, encroaching on the walking path from both sides. Choosing a genuinely narrow, upright, or columnar plant variety specifically bred or pruned for a tight footprint allows the repeated rhythm effect to work without sacrificing the yard’s already limited usable width, which is why plant selection matters as much as the spacing pattern itself in this specific technique.
Cost breakdown: Columnar evergreens or narrow ornamental grasses run $25 to $60 per plant depending on size, typically needing six to ten plants to establish a visible rhythm down a standard-length narrow yard.
14. Use Consistent Materials Throughout to Unify the Whole Length
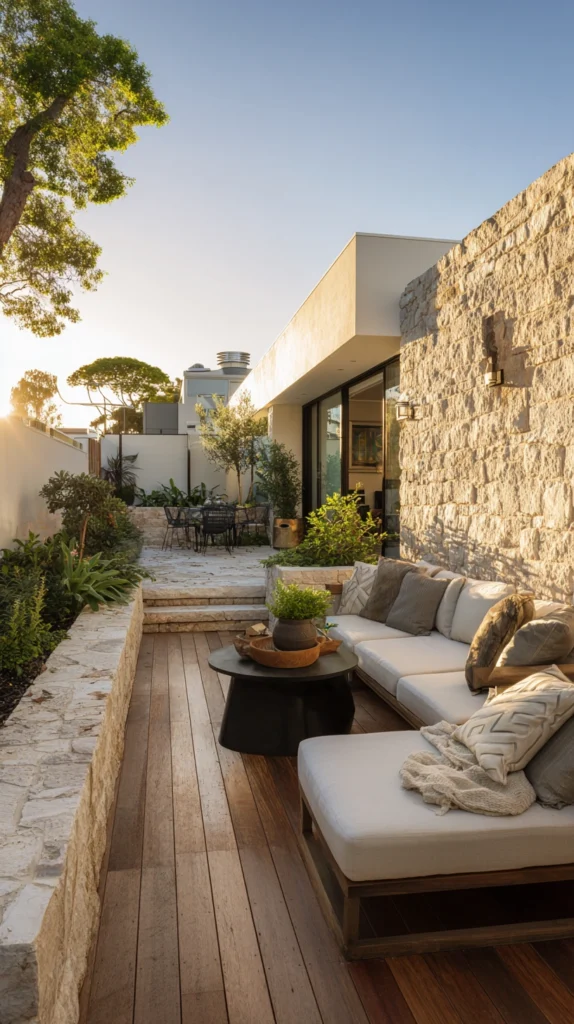
Tying every zone together through repeated material choices rather than treating each section as entirely separate.
Build it:
- A single paving material, wood tone, or metal finish repeated across each zone’s furniture, structures, and hardscaping
- Variation still allowed in each zone’s specific function and plantings, while the underlying material palette stays genuinely consistent throughout
- Applied deliberately from the initial planning stage, rather than retrofitted after each zone has already been independently decorated
Why material consistency matters more in a narrow yard than it might in a wider, less linear property:
- The yard’s shape means every zone is visible in sequence from nearly any vantage point, making material inconsistency between zones considerably more noticeable than it would be in a property where different areas are more visually separated
- A consistent material thread ties the whole zoned sequence together into one cohesive design story, rather than reading as several disconnected mini-projects
- It’s one of the most effective ways to make a narrow yard feel like a single, well-considered space rather than a series of unrelated decisions made independently over time
Why planning this consistency from the very beginning saves both money and effort compared to retrofitting it later:
Choosing one paving material, one dominant wood tone, and one metal hardware finish before any individual zone gets built or decorated is considerably easier and cheaper than trying to unify several already-completed, mismatched sections after the fact. Establishing this palette early, even if the yard’s zones get built out gradually over several seasons, means each new addition can simply follow the established plan rather than requiring a retroactive fix to bring it into alignment with everything already in place.
Cost breakdown: No additional cost beyond standard planning, though choosing higher-quality consistent materials upfront may shift the overall project budget compared to sourcing whatever’s cheapest independently for each zone.
Getting started this weekend
You don’t need every zone built before the yard starts feeling genuinely transformed.
- Start by walking the actual property and sketching out where the three main zones will go, before purchasing any materials or plants
- Add the path, whether curved or straight, and the layered fence-line planting once the zoning plan is settled
- Save larger structural additions, like a destination feature or a bookend structure at the far end, for a dedicated second phase once the basic layout is proven
Most long narrow yards that successfully transform do so because the zoning decision came first, with every subsequent choice, from paths to plantings to lighting, built to reinforce that same underlying structure.
Budget reality
A long narrow backyard transformation can happen gradually across a wide range of budgets.
- Under $200: Path lighting, a narrow defined lawn strip, repeated plantings for visual rhythm
- $200-600: A pergola or arbor transition marker, a compact water feature, raised garden beds along one side
- $600-1,500: A curved paver path, layered fence-line planting along both sides, dining furniture with overhead shade
- $1,500+: A full destination feature combined with a bookend structure at the yard’s far end
Most of the transformation comes from the zoning and sightline strategy itself, not from the total amount spent on any individual feature.
What actually transforms a long narrow backyard
It was never really about disguising the property’s actual shape.
It’s the curved path that hides the full view from the back door, the layered planting finally breaking up two parallel fences, the destination feature at the far end that finally gives the whole length of the yard a reason to be walked.
Zone the space deliberately, build a genuine sequence of destinations down its length, and the narrow shape stops reading as a limitation and starts reading as the thing that made the design interesting in the first place.