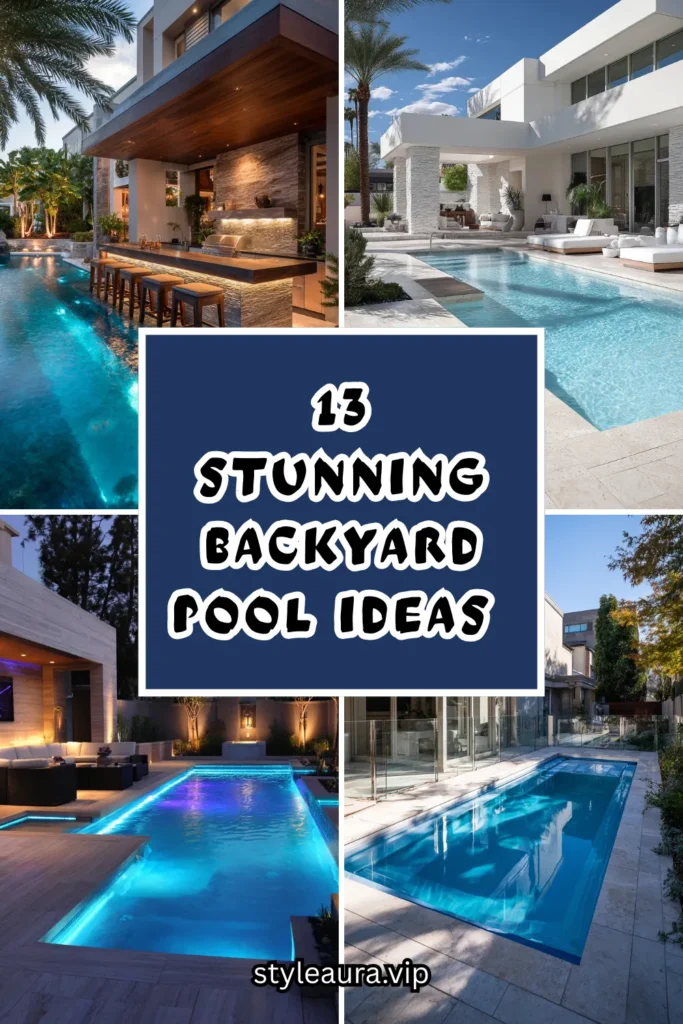
13 Stunning Backyard Pool Ideas for the Ultimate Summer Retreat
My pool used to be a rectangle of blue water and nothing else. Functional, occasionally used, completely forgettable.
I kept assuming a genuinely stunning pool required a full teardown and rebuild. Then I started paying attention to what actually made other people’s pools feel like a resort rather than a hole full of chlorinated water: layered lighting, a real lounging surface, shade that didn’t require dragging an umbrella around, some sense of sound and movement beyond the filter running.
I started small. A few floating solar lights. A pair of daybeds replacing the mismatched folding chairs. A single water feature bolted onto the existing deck jet plumbing.
Within a summer, that same plain rectangle became the place we spent entire Saturdays instead of forty-five minutes before someone got bored.
Here are 13 ideas that turn any backyard pool, new or decades old, into the kind of retreat you plan your whole weekend around.
Why Most Pools Never Become Retreats
The common mistakes:
The water-only approach:
- A pool with nothing surrounding it but bare concrete decking
- No shade, no seating worth lingering in, no reason to stay once you’re out of the water
- A functional pool that never becomes a destination
- Water alone is rarely enough to make people want to spend the whole day there
The daytime-only design:
- Every decision made based on how the pool looks at 2pm in direct sun
- No lighting plan for the hours the pool is actually most magical to use
- A beautiful pool that goes completely dark and lifeless after sunset
- Missing the reality that a lit pool at night is often more memorable than the same pool at noon
The single-purpose pool:
- One body of water expected to serve swimming, lounging, and entertaining all at once
- No distinct zones for sunbathing, shade, dining, or deeper swimming
- A pool that feels smaller than it is because nothing around it is defined
- Everyone crowded into the same six feet of decking
What a successful pool transformation does:
Creates genuine destinations around the water:
- A defined shallow lounging zone distinct from the swimming area
- Layered lighting extending the pool’s use well past sunset
- Real shade and real furniture, not a single umbrella and a stack of pool noodles
- A pool designed to be lived around, not just swum in
My revelation: A backyard pool becomes a retreat the moment it stops being just a container for water and starts being the center of an actual outdoor room.
1. The Sun Shelf or Tanning Ledge
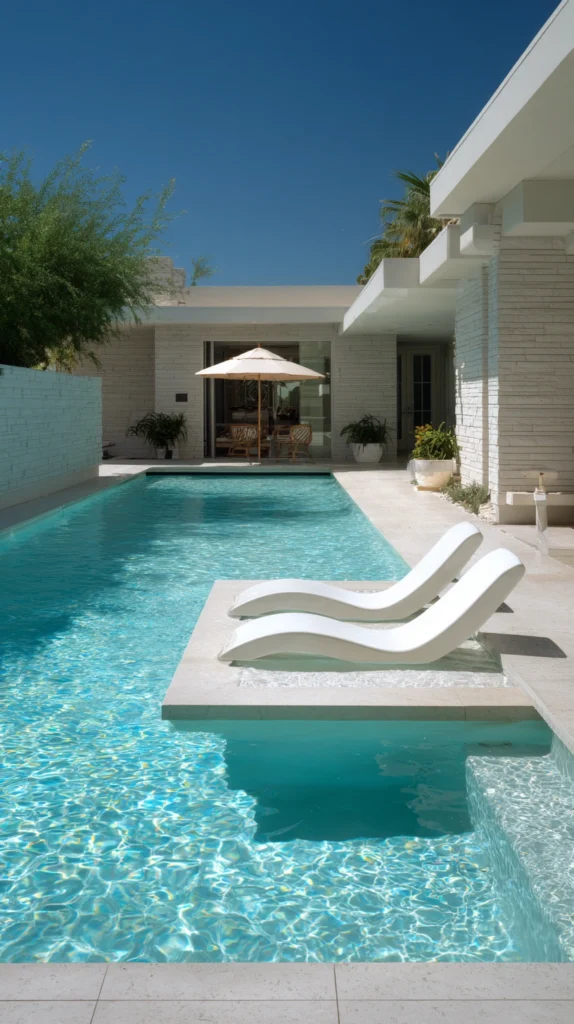
A shallow, submerged ledge built into the pool’s shallow end, just a few inches deep, made specifically for lounging in the water rather than swimming through it.
My pool with nowhere shallow to actually relax:
What I had:
- A standard pool sloping straight from three feet to eight feet, no shallow lounging area at all
- Kids and adults alike either standing in three feet of water or floating in the deep end
- No real way to sit in the water and just relax without a pool float
The sun shelf discovery:
Why this single feature changes everything:
- Creates a dedicated shallow zone, typically 6-9 inches deep, for lounge chairs to sit directly in the water
- Gives kids a safe, shallow area distinct from the main swimming zone
- Becomes the most-used part of the pool for adults who want to be near the water without actively swimming
- Works as a natural gathering spot for drinks, conversation, and simply cooling off
Choosing the right setup:
Design considerations:
- Sized for two to four submerged lounge chairs, typically an 8×10 to 10×12 foot area
- Positioned in full sun for tanning, or partially shaded if the household prefers cooler lounging
- Umbrella sleeves built directly into the shelf for adjustable shade over specific chairs
Cost:
- New pool build with a sun shelf included: $3,000-8,000 added to the base pool cost
- Retrofitting an existing pool with a sun shelf: $8,000-20,000 depending on structural changes required
My sun shelf: Adding a submerged ledge with two lounge chairs during a resurfacing project turned out to be the single most-used square footage in the entire backyard, more than the deep end, the diving board, or any of the surrounding decking combined.
Sun Shelf Tips
Position furniture on the shelf to withstand submersion:
Material requirement:
- Standard outdoor furniture isn’t designed to sit fully or partially underwater for hours at a time
- Purpose-built in-pool furniture uses marine-grade materials specifically rated for constant water exposure
- This distinction matters, since regular outdoor furniture will corrode or degrade quickly on a sun shelf
- Confirm the furniture is explicitly rated for submersion before purchasing anything for this space
Add umbrella anchors during construction, not after:
Planning ahead:
- Retrofitting an umbrella sleeve into an already-poured sun shelf is far more difficult and costly than including it from the start
- Even if shade isn’t needed immediately, building in the anchor point preserves the option
- This small addition during initial construction costs relatively little compared to a later retrofit
- Worth discussing with your pool contractor before the shelf is poured
2. Layered Underwater and Perimeter Lighting
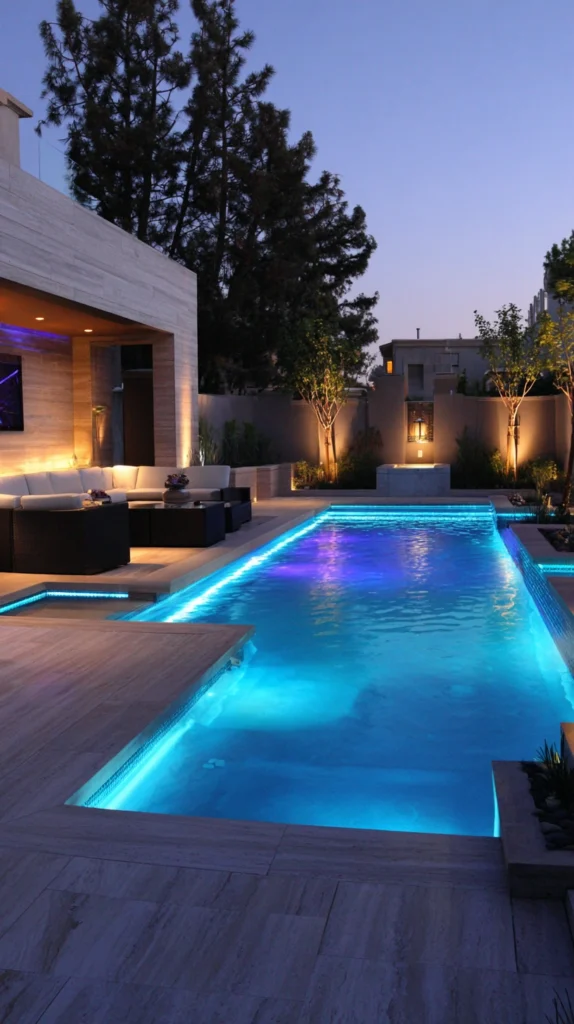
LED lighting built into the pool shell itself, combined with perimeter and landscape lighting around the water’s edge, transforming the pool after dark.
My pool that went dark and empty every evening:
What was limiting evening use:
- A single dim, outdated light fixture inside the pool, barely visible once the sun went down
- No lighting on the surrounding deck, making nighttime swimming feel unsafe rather than inviting
- A beautiful daytime pool that essentially disappeared as a usable space after dinner
The layered lighting solution:
Why multiple light sources matter more than one bright fixture:
- Color-changing LED pool lights create genuine atmosphere, not just visibility
- Perimeter deck lighting extends the sense of safety and usability around the entire pool area
- Layering underwater, deck-level, and landscape lighting mimics how a resort pool is actually lit
- Significantly extends the hours the pool genuinely gets used each day
Building the lighting layers:
Combining sources effectively:
- Color-changing LED fixtures replacing any older, single-color pool lights
- Low-voltage deck lighting recessed into coping or nearby hardscape
- Landscape uplighting on any trees or plants surrounding the pool area
- A smart controller allowing different color scenes for everyday swimming versus entertaining
Cost:
- LED pool light retrofit (per fixture): $400-900 including installation
- Perimeter deck lighting: $1,500-4,000 for a standard-sized pool area
- Smart lighting controller: $200-600
My layered lighting: Replacing the single outdated pool light with two color-changing LED fixtures, plus adding simple deck lighting around the coping, meant swimming after dark went from something that felt slightly unsafe to easily the family’s favorite time to be in the water.
Lighting Tips
Choose LED fixtures with a smart or app-based controller:
Convenience detail:
- Manually cycling through light colors at the equipment pad each time is inconvenient enough that it rarely happens
- App-based controllers let you set scenes and colors from a phone, right at poolside
- This small addition meaningfully increases how often the lighting actually gets used and enjoyed
- Worth the modest additional cost given how much atmosphere good lighting provides
Have an electrician confirm proper bonding and grounding for all pool lighting:
Safety requirement:
- Pool lighting involves electrical work in and around water, which has genuine safety stakes
- Always use a licensed electrician familiar with pool-specific code requirements for this work
- This isn’t an area to cut corners on for cost savings
- Confirm any retrofit work is inspected and code-compliant before regular use begins
3. A Water Feature With Real Sound
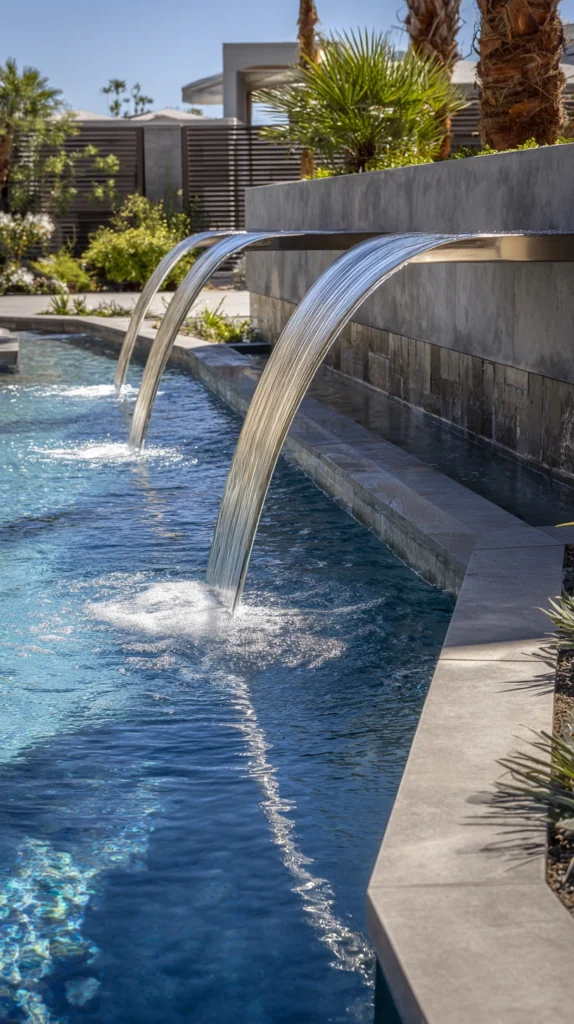
A waterfall, sheer descent, or deck jet feature adding the sound of moving water, not just a still, silent surface.
My pool that was completely silent:
What was missing:
- A pool with no water movement beyond the occasional filter cycle
- No sound to signal “resort” the way moving water instantly does
- A visually fine but atmospherically flat backyard feature
The water feature solution:
Why moving water changes the whole feel of a pool:
- Sound is one of the most underrated elements in making an outdoor space feel like a genuine retreat
- Masks nearby street or neighbor noise more effectively than almost any other backyard addition
- Creates a natural focal point that draws the eye even when no one is swimming
- Works at almost any budget level, from a single deck jet to a full rock waterfall
Choosing the right feature:
Style options:
- A raised spa spilling into the main pool, combining a water feature with a functional hot tub
- A stacked-stone waterfall built into a raised section of pool wall
- Sheer descent jets creating a smooth, glassy sheet of falling water
- Simple deck jets arcing water into the pool from the surrounding decking
Cost:
- Deck jets (per jet, installed): $300-800
- Sheer descent water feature: $1,500-4,000
- Raised spa with spillover: $8,000-20,000
- Full rock waterfall feature: $10,000-30,000
My water feature: Adding three deck jets along one side of the pool, at a fraction of the cost of a full waterfall, gave the whole backyard a sound and movement it never had before, and it remains one of the best decisions made during that first renovation phase.
Water Feature Tips
Match the feature’s style to the pool’s existing design language:
Design cohesion:
- A rustic rock waterfall on an otherwise modern, geometric pool can look disconnected
- Sheer descent jets or deck jets typically suit a more contemporary pool design
- Natural stone waterfalls pair better with a lagoon-style or naturalistic pool shape
- Consider the pool’s overall style before choosing a water feature, rather than picking based on looks alone
Run water features on a separate timer or pump from the main filtration system:
Operational flexibility:
- A dedicated pump for the water feature allows it to run independently of the main filter cycle
- This lets you enjoy the sound and visual of moving water without running the full filtration system unnecessarily
- Also allows the feature to be turned off during high-wind periods to reduce water loss from splashing
- A relatively small additional equipment cost that adds meaningful day-to-day flexibility
4. A Poolside Cabana or Shade Pavilion

A dedicated shade structure, separate from a simple umbrella, providing a genuine covered lounging space beside the pool.
My pool deck with no real relief from the sun:
What was limiting comfort:
- A single market umbrella that never quite covered everyone or stayed put in the wind
- Guests retreating indoors during peak sun hours rather than staying poolside
- No defined shaded zone for anyone who wanted to be near the pool without sitting in direct sun
The cabana solution:
Why a real structure outperforms a simple umbrella:
- Provides consistent, reliable shade regardless of the sun’s angle throughout the day
- Creates a defined architectural zone, giving the pool deck a genuine sense of separate spaces
- Often incorporates ceiling fans, curtains, or additional storage that an umbrella never could
- Becomes the pool area’s natural gathering spot during the hottest parts of the day
Choosing the right structure:
Style and material options:
- A simple wood or metal pergola with a canvas or louvered roof
- A fully enclosed cabana with curtains for adjustable privacy and shade
- A poolside pavilion matching the home’s existing architecture
- Sizing proportional to the lounging area it’s meant to cover, typically 12×14 feet minimum
Cost:
- Basic pergola-style shade structure: $2,500-6,000
- Curtained cabana structure: $5,000-15,000
- Fully finished pavilion with electrical and ceiling fan: $10,000-30,000
My cabana addition: Building a simple pergola with a retractable canvas roof over the daybeds gave the pool deck the one thing it had always been missing, a place to genuinely escape the sun without leaving the water behind entirely.
Cabana Tips
Position the structure based on actual sun tracking, not guesswork:
Orientation planning:
- Track the sun’s path across the pool deck for a full day before finalizing the structure’s placement
- The goal is blocking the hours the deck is used most, typically late morning through mid-afternoon
- A beautifully built cabana in the wrong spot still leaves the space uncomfortable at peak times
- This planning step determines whether the investment delivers its full intended benefit
Include ceiling fans if running electrical to the structure regardless:
Added comfort for modest cost:
- If electrical work is already happening for lighting, adding a ceiling fan is a relatively small additional expense
- Moving air meaningfully improves comfort in a shaded structure during hot, still summer afternoons
- This addition is far more cost-effective when planned alongside the initial electrical run than added later
- Worth discussing with your contractor before the structure’s wiring is finalized
5. A Fire and Water Combination Feature

Fire bowls or a linear fire feature positioned at the pool’s edge, creating a striking contrast with the water alongside it.
My pool that emptied out the moment the sun went down:
What was missing:
- A stunning daytime pool with nothing drawing people to stay once evening arrived
- No warmth or light source once the sun set, especially as temperatures dropped
- Missing the dramatic visual impact fire and water create together
The fire and water solution:
Why this combination is so consistently striking:
- Creates one of the most photographed, memorable features in high-end pool design for good reason
- Extends comfortable poolside lounging into cooler evening hours
- The contrast between flame and water draws the eye more powerfully than either element alone
- Works at multiple scales, from small fire bowls to a full linear fire trough
Choosing the right feature:
Style options:
- Fire bowls positioned at the corners of a raised pool wall or spa
- A linear fire trough running along one edge of the pool deck
- Fire pits positioned nearby but separate from the water’s edge, visible from the pool
- Gas-powered features for consistent, on-demand use versus wood-burning for a more traditional feel
Cost:
- Individual fire bowls (per bowl, installed): $800-2,500
- Linear fire trough feature: $5,000-15,000
- Separate nearby fire pit: $1,000-5,000 depending on material and size
My fire feature: Adding two fire bowls at the corners of the raised spa wall turned ordinary evening swims into something that felt genuinely special, and it’s become the single feature guests mention first when describing the pool to others.
Fire and Water Tips
Use a licensed pool and gas contractor for any fire feature installation:
Safety and code compliance:
- Gas line work near a pool involves both electrical and gas safety considerations that require proper licensing
- Improperly installed fire features near water present genuine safety risks
- This is not a project to attempt without qualified professional installation
- Confirm all required permits and inspections are completed before regular use
Test the fire feature’s heat output at typical seating distances before finalizing furniture placement:
Comfort verification:
- Fire features near a pool can radiate more heat than expected in an open outdoor setting
- Test with the feature actually running before permanently positioning nearby furniture
- This prevents seating that’s uncomfortably close or, alternatively, too far to feel the intended warmth
- A simple walk-through with the flame on saves rework after furniture is already placed
6. A Swim-Up Bar or Pool-Adjacent Bar Seating
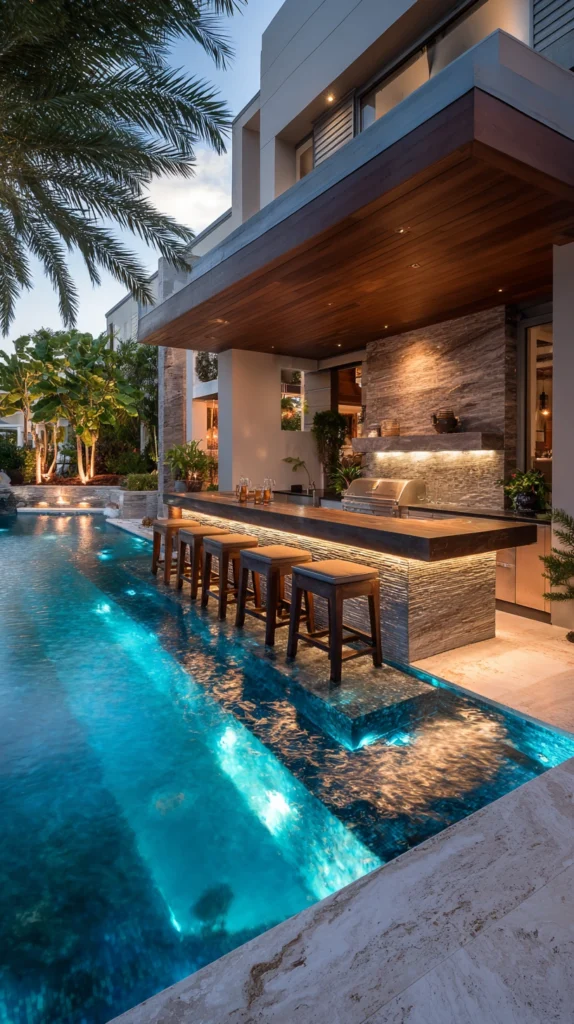
Bar-height seating built directly into the pool’s edge, or immediately adjacent to it, allowing guests to sit partially in the water while socializing.
My pool with no real social hub:
What was limiting how people gathered:
- Guests either fully in the water swimming or fully out on dry lounge furniture, with nothing in between
- No natural spot for drinks and conversation that didn’t require getting completely out of the pool
- A missed opportunity for the pool itself to become a genuine social gathering point
The swim-up bar solution:
Why this feature changes the social dynamic of the whole pool:
- Creates a genuine reason to gather in one spot rather than scattering around the pool’s perimeter
- Lets guests stay cool and social simultaneously, without the friction of getting in and out
- Becomes the pool’s natural centerpiece for entertaining, similar to how a kitchen island functions indoors
- Works even in a modest-sized pool, scaled down to a smaller built-in bench with an adjacent counter
Building the bar area:
Design components:
- Submerged bar stools built into the pool at counter height, typically 24-30 inches below a bar surface
- A stone, tile, or concrete bar counter positioned at the pool’s edge
- Storage or a small built-in cooler within reach of the bar seating
- Adequate lighting positioned specifically over this zone for evening use
Cost:
- New pool build with swim-up bar included: $8,000-20,000 added to base pool cost
- Retrofitting an existing pool with bar seating: $15,000-35,000 depending on structural changes
My swim-up bar: Building a small submerged bench with a simple stone counter along one edge of the pool completely changed how gatherings actually happened, since everyone naturally ended up clustered there instead of scattered across separate lounge chairs.
Swim-Up Bar Tips
Scale the feature to your actual entertaining habits, not an aspirational ideal:
Realistic sizing:
- A large swim-up bar built for a household that rarely entertains large groups may go underused
- Consider actual, typical gathering size before committing to a large-scale build
- A smaller submerged bench with a modest counter often delivers most of the benefit at a lower cost
- This consideration prevents overbuilding a feature relative to how the space actually gets used
Choose slip-resistant material for any submerged seating and counter edges:
Safety consideration:
- Wet stone or tile surfaces around a bar area see constant foot traffic getting in and out of the water
- Textured, slip-resistant material specifically rated for pool decking reduces fall risk in this high-traffic zone
- This matters as much as the visual design when selecting materials for this specific feature
- Confirm slip resistance ratings with your contractor before finalizing material choices
7. A Natural or Lagoon-Style Pool Design
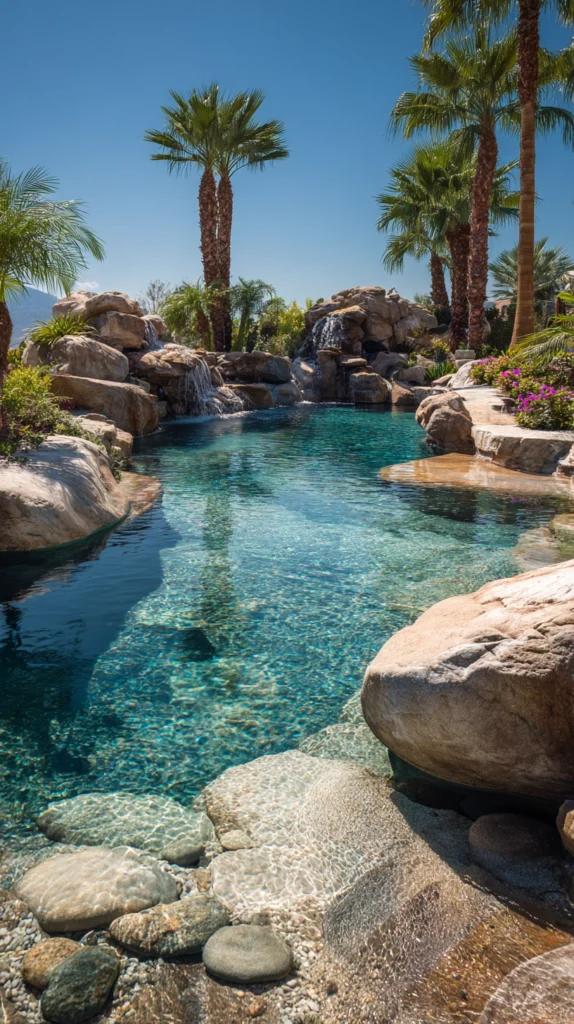
A freeform pool shape with rock formations, natural stone coping, and lush surrounding plantings, mimicking a natural swimming hole rather than a geometric pool.
My pool that felt more like a hotel amenity than part of the yard:
What was missing:
- A rectangular pool with a stark, disconnected relationship to the rest of the landscaping
- A design that felt imported rather than integrated into the actual property
- Missing the lush, organic feeling of swimming somewhere genuinely natural
The lagoon-style solution:
Why this design approach feels so different from a standard pool:
- Integrates the pool visually into the surrounding landscape rather than sitting apart from it
- Freeform edges and natural stone create a softer, more organic overall feeling
- Works particularly well on properties with existing mature trees or naturalistic landscaping
- Creates a genuinely distinct experience from the geometric pools common in most backyards
Design elements:
Key components:
- Freeform, irregular pool shape rather than a rectangle or oval
- Natural stone or boulder coping instead of standard poured concrete
- Dense, layered planting directly surrounding the pool’s edge
- A rock waterfall or grotto feature integrated into the overall shape
Cost:
- New lagoon-style pool build: significantly more than a standard geometric pool, typically 20-40% higher due to custom shaping and stone work
- Converting an existing geometric pool to this style: generally impractical without a full rebuild, given the shape and material changes involved
My lagoon-style consideration: While a full conversion wasn’t practical for an existing pool, incorporating natural stone coping and dense surrounding plantings during a renovation brought much of this organic feeling to an otherwise standard rectangular shape, without the cost of a complete rebuild.
Lagoon-Style Tips
Plan this style from the initial pool design phase whenever possible:
Timing consideration:
- This is one of the more difficult styles to retrofit onto an existing geometric pool
- If a lagoon-style pool is the goal, it’s far more cost-effective as part of new construction than a later conversion
- Discuss this preference with your pool designer at the very earliest planning stages
- Retrofitting elements like natural stone coping can approximate the look without a full shape change
Choose plants that can tolerate occasional splash and chlorine exposure:
Practical plant selection:
- Plants directly bordering a pool need some tolerance for chlorinated water contact
- Research specific plant varieties known to handle this exposure before finalizing your planting plan
- This consideration prevents beautiful initial plantings from struggling or dying within a season or two
- A local nursery familiar with poolside planting can offer region-specific recommendations
8. Upgraded Pool Decking Materials

Replacing standard poured concrete decking with travertine, wood-look porcelain tile, or another premium material significantly upgrading the pool area’s overall look and feel.
My pool deck that felt like an afterthought:
What was limiting the overall impression:
- Plain gray poured concrete surrounding an otherwise nice pool
- Decking that got uncomfortably hot underfoot during peak summer sun
- A material choice that read as purely functional rather than genuinely designed
The decking upgrade solution:
Why the decking material matters as much as the pool itself:
- Decking makes up a larger visible surface area than the water itself in most backyard layouts
- Premium materials like travertine stay noticeably cooler underfoot than standard concrete
- The right decking material ties the pool area visually into the rest of the home’s outdoor design
- One of the highest-impact upgrades available for an existing pool without touching the water itself
Material options:
Choosing the right decking:
- Travertine pavers for a naturally cool, classic pool deck material
- Wood-look porcelain tile for a modern aesthetic with better durability than actual wood
- Textured concrete overlay as a more budget-friendly upgrade over existing plain concrete
- Natural stone for the most premium, though also most expensive, option
Cost:
- Textured concrete overlay: $6-12 per sq ft
- Travertine pavers: $12-25 per sq ft installed
- Wood-look porcelain tile: $15-30 per sq ft installed
- Natural stone: $20-40+ per sq ft installed
My decking upgrade: Overlaying the original plain concrete with travertine pavers, at a cost that was significant but far less than a full pool rebuild, changed the entire feel of the space more than almost any other single project, and it stays genuinely cool underfoot even during the hottest part of the day.
Decking Tips
Prioritize heat-resistant material if the pool sees regular midday summer use:
Comfort consideration:
- Standard dark concrete and some paver materials can become uncomfortably hot in direct sun
- Travertine and certain light-colored materials stay noticeably cooler underfoot
- This matters significantly for households with young kids frequently walking barefoot around the pool
- Test material samples in direct sun before committing to a large-scale installation
Confirm proper slope and drainage before installing any new decking material:
Structural requirement:
- Pool decking needs to slope slightly away from the pool for proper water drainage
- An improperly sloped deck can lead to standing water, staining, and premature material wear
- This is a detail your contractor should address as part of any decking project, not an afterthought
- Confirm this specifically during the planning and quoting phase of any decking upgrade
9. A Vanishing or Infinity Edge

An edge where the water appears to spill seamlessly into the horizon or a lower catch basin, creating a dramatic visual effect for pools with a usable view.
My pool with a great view it wasn’t taking advantage of:
What was missing:
- A standard pool edge that visually cut off the property’s actual best view
- A design that ignored the natural advantage of the lot’s elevation and sightline
- Missing the opportunity to make the view itself part of the pool’s design
The infinity edge solution:
Why this feature is such a dramatic upgrade:
- Visually connects the pool to whatever view lies beyond it, whether landscape, water, or skyline
- Creates one of the most photographed and memorable pool styles available
- Works especially well on sloped lots where a natural elevation change already exists
- Transforms a standard pool into a genuine architectural statement
Design requirements:
What this feature involves:
- A lower catch basin collecting the water that spills over the vanishing edge
- Additional pumping equipment to recirculate water from the catch basin back into the main pool
- Careful alignment of the edge with the property’s actual best sightline
- Generally requires a sloped or elevated site to achieve the full visual effect
Cost:
- Added cost for an infinity edge during new pool construction: $20,000-60,000+ depending on scale and site conditions
- This feature is generally impractical to retrofit onto an existing flat-site pool without a full rebuild
My infinity edge consideration: This wasn’t practical for our specific flat lot, but understanding what it requires, a genuine elevation change and a clear sightline worth framing, helped clarify why this feature works so well on the right property and why it’s not simply a decorative edge treatment.
Infinity Edge Tips
Confirm your property’s actual site conditions before pursuing this feature:
Site assessment:
- This feature genuinely requires either natural or engineered elevation change to function and look correct
- A flat lot without a meaningful view rarely justifies the substantial additional cost involved
- Consult with a pool designer specifically about your site’s suitability before committing to this direction
- This upfront assessment prevents investing in a feature that won’t deliver its intended visual impact
Budget for the additional equipment and maintenance this feature requires:
Ongoing consideration:
- The catch basin and additional pump add both equipment cost and ongoing maintenance beyond a standard pool
- Factor this into the total cost of ownership, not just the initial construction expense
- This is a genuinely higher-maintenance feature compared to a standard pool edge
- Discuss long-term maintenance expectations with your contractor before finalizing this design choice
10. Poolside Daybeds and Lounge Furniture
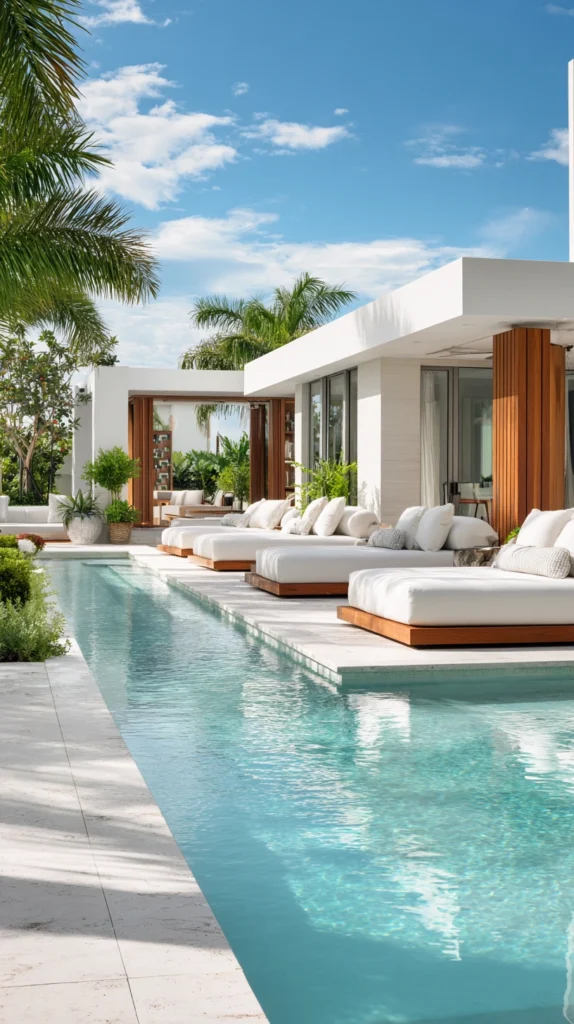
Genuine daybeds and quality lounge furniture replacing standard folding pool chairs or mismatched patio furniture.
My pool deck furnished with whatever we had lying around:
What was limiting the space:
- A stack of aging folding lounge chairs that nobody particularly wanted to sit in
- No real comfort encouraging people to actually stay poolside for hours
- Furniture that looked like an afterthought rather than a genuine design choice
The daybed solution:
Why real furniture changes how long people actually stay:
- Comfortable, genuinely well-made furniture encourages hours of use rather than a quick swim and retreat indoors
- Daybeds specifically create a genuine lounging destination distinct from simple upright chairs
- Quality materials hold up significantly better to sun and pool chemical exposure than budget alternatives
- One of the more visually impactful upgrades relative to its cost on this entire list
Choosing the right furniture:
Selection considerations:
- Woven or aluminum-frame daybeds designed specifically for poolside use
- Quick-dry, UV-resistant cushions rather than standard indoor-style cushioning
- A mix of daybeds and standard lounge chairs to accommodate different preferences and group sizes
- Sizing the collection to the deck’s actual available space without overcrowding
Cost:
- Quality poolside lounge chairs (per pair): $300-800
- A genuine daybed: $800-2,500
- Full furniture set for a standard pool deck: $2,500-8,000
My daybed upgrade: Replacing four mismatched folding chairs with two proper daybeds under the new pergola completely changed how the family actually used the pool, since lounging by the water became as appealing as swimming in it.
Daybed Tips
Choose quick-dry foam specifically designed for wet environments:
Material requirement:
- Standard cushion foam retains water and develops mildew when repeatedly exposed to pool splashes and rain
- Quick-dry foam allows water to pass through rather than absorbing and holding it
- This distinction significantly affects both comfort and the furniture’s long-term durability
- Confirm the specific foam type before purchasing any poolside seating
Rinse furniture regularly to remove chlorine and sunscreen residue:
Maintenance habit:
- Both chlorine and sunscreen can degrade outdoor fabric and frames over time if left to build up
- A simple regular rinse with a hose extends the furniture’s usable lifespan meaningfully
- This small habit is easy to skip but genuinely protects a significant furniture investment
- Worth adding to a regular pool area maintenance routine
11. An Outdoor Shower Near the Pool
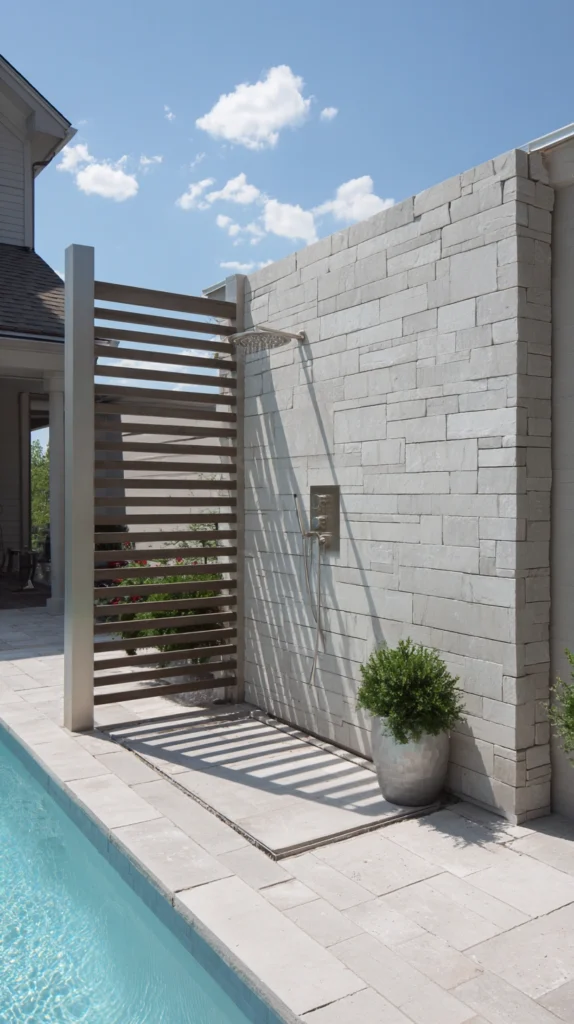
A dedicated outdoor shower positioned near the pool’s exit, allowing a quick rinse before or after swimming without tracking water and chlorine through the house.
My constant trail of wet footprints through the house:
What was inconvenient:
- Every swim ending with a walk through the house to shower off chlorine and sunscreen
- Wet floors and towels tracked from the pool deck through every room along the way
- No real way to rinse off quickly before hopping back in the pool after applying sunscreen
The outdoor shower solution:
Why this small addition solves a genuinely daily frustration:
- Eliminates the need to go inside for a quick rinse, keeping pool activity contained to the outdoor space
- Reduces water and chemical tracking through the house significantly
- Adds a resort-like touch that guests consistently notice and appreciate
- A relatively small project compared to most other items on this list, but with outsized daily convenience
Building the shower:
Design and material options:
- A simple wall-mounted showerhead on a post near the pool’s exit point
- A more finished enclosure with a small changing area and privacy screening
- Hot and cold water plumbing for genuine comfort, or cold-only for a simpler, lower-cost installation
- Positioned on a well-draining surface, such as gravel, decking with gaps, or a dedicated drain
Cost:
- Basic cold-water-only outdoor shower: $500-1,500 including plumbing
- Full hot and cold shower with an enclosure: $2,500-6,000
My outdoor shower: Installing a simple post-mounted shower near the pool gate, with just cold water plumbed to keep costs down, eliminated nearly all of the wet-footprint problem that had been a daily frustration for years before.
Outdoor Shower Tips
Position the shower along the actual path people take exiting the pool:
Practical placement:
- A shower positioned somewhere inconvenient relative to the actual exit point often goes unused
- Walk the typical path from pool to house before finalizing the shower’s exact location
- This consideration matters as much as the fixture choice itself for ensuring the feature actually gets used
- A shower right at the gate or exit point sees far more consistent use than one tucked in a corner
Ensure proper drainage to prevent standing water or erosion beneath the shower:
Site preparation:
- A shower running regularly onto ungraded ground can create muddy, eroded, or standing-water problems over time
- Gravel, a small dedicated drain, or permeable decking beneath the shower addresses this properly
- This consideration is worth planning before installation rather than fixing after problems appear
- A relatively small additional cost during initial installation prevents a bigger fix later
12. Automated Pool Covers and Safety Features
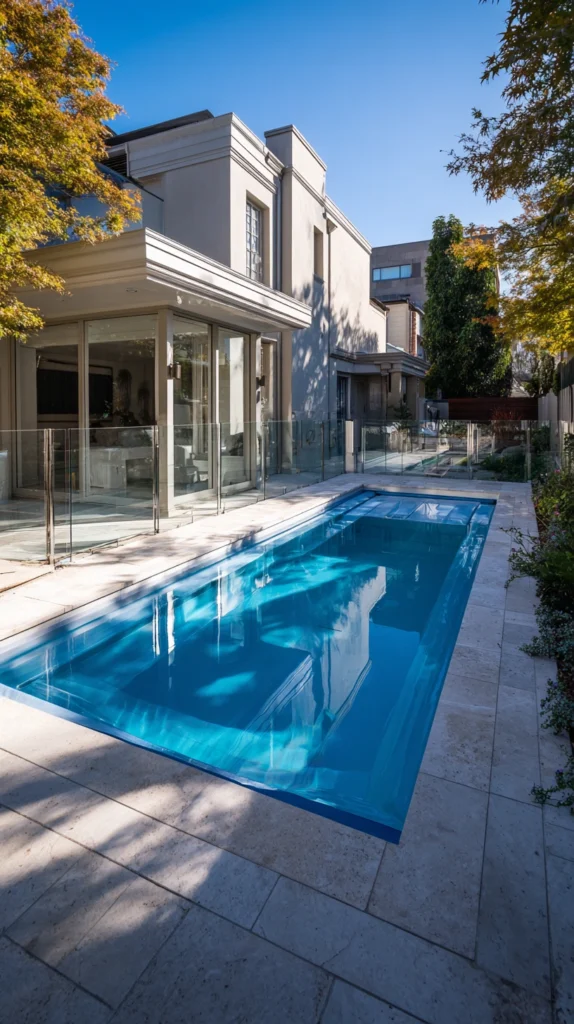
A motorized pool cover, combined with updated safety fencing or alarms, protecting both the pool’s cleanliness and everyone using the backyard.
My pool that needed constant manual cleaning and vigilant supervision:
What was inconvenient and concerning:
- Debris constantly falling into an uncovered pool, requiring frequent skimming and cleaning
- No real physical barrier beyond hoping everyone remembered pool safety rules
- Heat and chemical loss from an uncovered pool sitting exposed overnight
The automated cover and safety solution:
Why this addition matters beyond just convenience:
- A motorized cover significantly reduces debris, evaporation, and heat loss when the pool isn’t in use
- Safety covers rated for weight-bearing provide genuine protection against accidental falls into the pool
- Reduces daily and weekly maintenance time and chemical costs meaningfully
- Modern automated covers operate with the push of a button, removing any excuse to leave the pool uncovered
Choosing the right system:
Options and features:
- A track-mounted automatic cover retracting into a housing at the pool’s edge
- A safety-rated cover specifically capable of supporting weight in case of an accidental fall
- Pool alarms detecting motion or water disturbance as an additional safety layer
- Self-closing, self-latching gates as a baseline safety requirement in most jurisdictions
Cost:
- Manual safety cover: $2,000-5,000
- Automated motorized cover: $8,000-20,000
- Pool alarm systems: $200-600
- Safety fencing (if not already present): $15-40 per linear foot
My automated cover: Installing a motorized safety cover cut our weekly maintenance time significantly, kept the water noticeably cleaner between uses, and gave genuine peace of mind with young kids and pets regularly in the backyard.
Safety Feature Tips
Check local code requirements for pool safety before finalizing any system:
Regulatory compliance:
- Many jurisdictions have specific legal requirements around pool fencing, gate mechanisms, and cover ratings
- Confirm your local requirements before finalizing any safety feature purchase or installation
- This isn’t only about avoiding fines, since these codes exist based on genuine safety data
- A licensed pool contractor familiar with local code can guide this process
Don’t treat a cover or alarm as a replacement for active supervision:
Safety mindset:
- Automated safety features are a genuine additional layer of protection, not a substitute for direct supervision
- Continue treating pool time with young children as requiring active, attentive adult presence
- This mindset matters as much as any physical safety feature installed
- Safety equipment works best as one part of a broader, consistently applied safety approach
13. Seasonal Poolside Styling and Rotating Decor
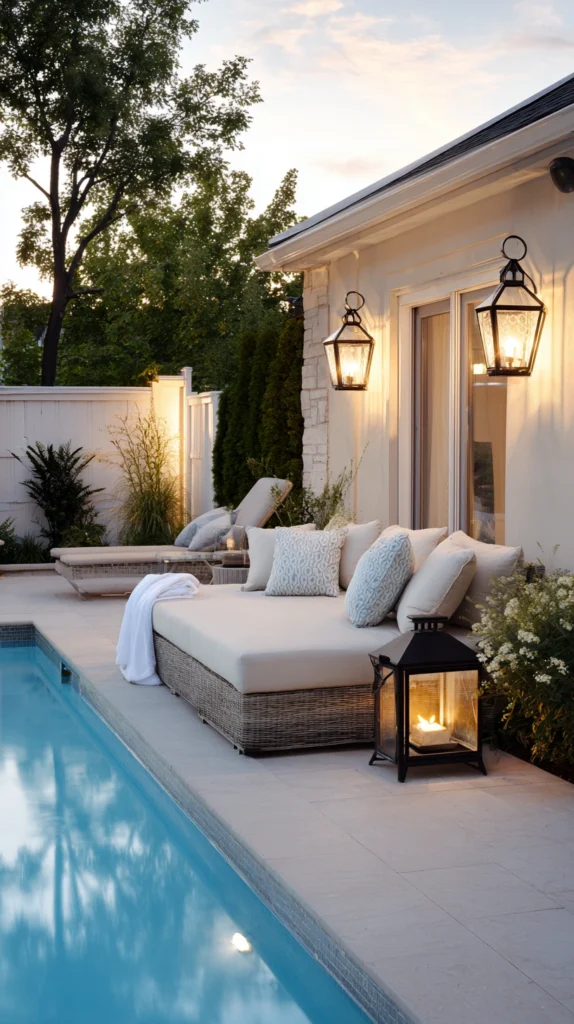
A rotating set of seasonal decor and styling elements, keeping the pool area feeling fresh and considered throughout the swimming season and beyond.
My pool area that looked identical from May through September:
What was making the space feel static:
- The same cushions, planters, and accessories left in place for the entire season
- A pool deck that looked the same in June as it did at the end of August
- Missing the sense of a space that responds to the actual rhythm of the summer
The seasonal styling solution:
Why rotating elements keeps the space feeling considered:
- Small seasonal changes signal ongoing care and attention to the space
- Keeps the pool area feeling current throughout an entire multi-month swimming season
- Relatively low-cost compared to any structural or hardscape change
- Creates renewed interest and small moments of anticipation as the season progresses
Building a seasonal rotation:
Elements to consider swapping:
- Early summer: bright, saturated cushion colors and fresh container plantings
- Peak summer: citronella and bug-deterrent elements, lightweight breathable textiles
- Late summer into fall: warmer tones, cozy throw blankets for cooler evening swims
- Off-season: proper storage and protective covering for furniture and cushions
Cost:
- Seasonal cushion covers or accents (per rotation): $50-150
- Seasonal container plantings: $30-80
- Total seasonal investment across a full year: $150-400
My seasonal styling: Simply swapping cushion colors and refreshing the potted plants around the pool twice each season kept the space feeling genuinely cared for, and it became a small, enjoyable ritual marking the actual passage of summer rather than a chore.
Seasonal Styling Tips
Focus on a small number of high-impact, easy-to-swap elements:
Efficiency principle:
- Attempting a full seasonal overhaul of the pool area each time quickly becomes unsustainable
- Choosing two or three key elements, cushions, planters, a few accessories, delivers meaningful visual change with manageable effort
- This focused approach is what makes the seasonal habit actually persist year after year
- Identify the specific changes that make the biggest visible difference for your particular space
Protect furniture and textiles properly during the off-season:
Storage practice:
- Cushions and lightweight decor left outdoors through winter or the off-season degrade significantly faster
- Clean and fully dry items before storing them in sealed, labeled containers
- A dedicated storage location protects this investment across multiple swimming seasons
- This small effort meaningfully extends the usable life of every seasonal purchase
Choosing Your Pool Transformation Projects
By Priority
Foundational comfort first:
- Poolside daybeds and lounge furniture (idea 10)
- Sun shelf or tanning ledge (idea 1)
- Upgraded pool decking materials (idea 8)
Extending usable hours:
- Layered underwater and perimeter lighting (idea 2)
- Fire and water combination feature (idea 5)
- Poolside cabana or shade pavilion (idea 4)
Atmosphere and sensory detail:
- Water feature with real sound (idea 3)
- Natural or lagoon-style pool design (idea 7)
- Seasonal poolside styling (idea 13)
By Effort Level
Lowest effort:
- Seasonal poolside styling (idea 13)
- Poolside daybeds and lounge furniture (idea 10)
- Outdoor shower near the pool (idea 11)
Medium effort:
- Water feature with real sound (idea 3)
- Layered lighting (idea 2)
- Automated pool covers and safety features (idea 12)
Higher commitment:
- Sun shelf or tanning ledge (idea 1)
- Poolside cabana or pavilion (idea 4)
- Swim-up bar (idea 6)
- Vanishing or infinity edge (idea 9)
- Natural or lagoon-style pool design (idea 7)
By Budget
Under $2,000:
- Seasonal poolside styling (idea 13)
- Basic outdoor shower (idea 11)
- Individual deck jets (idea 3)
$2,000-10,000:
- Poolside daybeds and lounge furniture (idea 10)
- Layered lighting upgrade (idea 2)
- Basic cabana or pergola (idea 4)
- Textured concrete decking overlay (idea 8)
$10,000-30,000:
- Fire and water combination feature (idea 5)
- Automated motorized cover (idea 12)
- Travertine or premium decking upgrade (idea 8)
$30,000+:
- Sun shelf added to an existing pool (idea 1)
- Swim-up bar retrofit (idea 6)
- Vanishing or infinity edge (idea 9)
Maintenance Through the Seasons
Spring:
- Inspect and reactivate any water features and lighting after winter dormancy
- Begin the seasonal styling rotation with fresh plantings and cushions
Summer:
- Rinse and maintain poolside furniture regularly to remove chlorine and sunscreen buildup
- Monitor automated covers and safety features for consistent operation
Fall:
- Store or protect delicate textiles and cushions ahead of colder weather
- Clean and prepare any fire features for increased cool-weather evening use
Winter:
- Properly winterize water features and equipment according to manufacturer guidance
- Plan the following season’s additions during the off-season months
My Complete Pool Transformation Journey
What I built across three years:
Year one ($3,200):
- Layered LED lighting replacing the single outdated pool light
- Three deck jets added along one side of the pool
- Learned that sound and light mattered more to the pool’s overall feel than I expected going in
Year two ($9,800):
- Pergola with retractable shade over new daybed seating
- Travertine decking overlay replacing the original plain concrete
- Learned that shade and real furniture changed how many hours we actually spent poolside each day
Year three ($6,500):
- Two fire bowls added to the raised spa wall
- Automated safety cover installed
- Learned that fire and water together created the single most talked-about feature of the entire project
Total investment: $19,500 across three years Most important lesson: Lighting, shade, and real furniture mattered more than any single expensive structural change Single highest-impact change across all three years: The layered lighting from year one, for the lowest relative cost and the most immediate transformation in how the pool felt after dark
Getting Started This Weekend
Start with layering, not a full rebuild.
This weekend:
Step 1 — Add a few floating or clip-on solar lights to the pool:
- The fastest, most affordable way to see the immediate impact of evening pool lighting
- Works with any existing pool, no electrical work required
Step 2 — Rinse and reassess your current poolside furniture:
- Notice which pieces genuinely get used and which ones sit empty
- This informs where a daybed or better lounge furniture would have the most impact
Step 3 — Track the sun across your pool deck for a full day:
- Note where shade is genuinely missing during peak hours
- This determines the best placement for a future cabana or pergola addition
Step 4 — Add one water feature element, even a simple deck jet:
- Brings sound and movement into the space immediately
- One of the most affordable upgrades on this entire list relative to its impact
My recommendation:
Start with lighting and a genuine assessment of your furniture:
- Both are affordable, fast to implement, and reveal exactly where the bigger future investments should go
- Both work with the pool you already have, requiring no structural changes to see the benefit
- This foundation makes every future addition build on a pool area that already feels more considered
Sit poolside after dark once the lighting is in place and notice how differently the whole space feels before planning anything else.
Now go build the pool retreat that finally feels like the center of your summer instead of a chore you maintain.
Quick Summary
The 13 stunning backyard pool ideas:
Foundation and comfort:
- Sun shelf or tanning ledge (idea 1): the most-used square footage most pools are missing
- Poolside daybeds and lounge furniture (idea 10): genuine comfort that keeps people poolside longer
- Upgraded pool decking materials (idea 8): a cooler, more premium foundation for the entire space
Extending usable hours:
- Layered underwater and perimeter lighting (idea 2): the single highest-impact, lowest-cost transformation
- Fire and water combination feature (idea 5): the most memorable evening focal point
- Poolside cabana or shade pavilion (idea 4): real relief from peak sun hours
Atmosphere and sensory detail:
- A water feature with real sound (idea 3): movement and noise that instantly signals “retreat”
- Natural or lagoon-style pool design (idea 7): a softer, more integrated feeling than a standard pool
- Vanishing or infinity edge (idea 9): a dramatic statement for the right property
Function and social design:
- Swim-up bar or pool-adjacent bar seating (idea 6): a genuine social centerpiece
- Outdoor shower near the pool (idea 11): a small addition solving a daily frustration
- Automated pool covers and safety features (idea 12): protection, cleanliness, and peace of mind
Ongoing freshness:
- Seasonal poolside styling and rotating decor (idea 13): a pool area that evolves with the season
The universal pool transformation rules:
Always:
- Layer lighting rather than relying on a single fixture
- Add real seating and shade, not just a functional swimming space
- Bring in sound and movement through a water feature, even a modest one
- Choose materials genuinely rated for constant sun, water, and chemical exposure
Never:
- Design the space based only on how the pool looks during the day
- Leave furniture as an afterthought compared to the water itself
- Treat automated safety features as a replacement for active supervision
- Assume a full rebuild is required before beginning any meaningful improvement
Common mistakes:
- Treating the pool as a standalone feature disconnected from the surrounding deck and landscaping
- Skipping evening lighting until the pool has already proven hard to use after dark
- Leaving the deck as one undefined space instead of distinct lounging, dining, and shade zones
- Underestimating how much lighting, furniture, and a water feature can transform an existing pool
- Waiting for a large renovation budget instead of starting with the highest-impact, lowest-cost changes first
Remember: layering, lighting, and defined zones consistently outperform any single expensive purchase, lighting and a genuine furniture upgrade deliver some of the fastest, most affordable transformation available, sound and movement from a water feature matter more than most people expect until they experience it, a pool designed for both day and evening use gets used far more consistently, and the best pool transformation is the one that turns a space you occasionally swim in into a space you spend your whole summer around.