15 Backyard Fire Pit Ideas Perfect for Autumn Nights
Most backyard fire pits get used the same way all year — a portable bowl dragged out for a few summer evenings, a couple of mismatched chairs pulled up, done by ten o’clock when the bugs get bad. It works fine when the fire is mostly there for ambiance and the evening air is still warm enough on its own.
That setup stops working the moment fall arrives. Once the sun sets by six and the air actually has a bite to it, the fire stops being a nice extra and becomes the entire reason anyone’s still outside. A few mismatched chairs and a bare patch of patio aren’t going to hold a group through a long autumn evening.
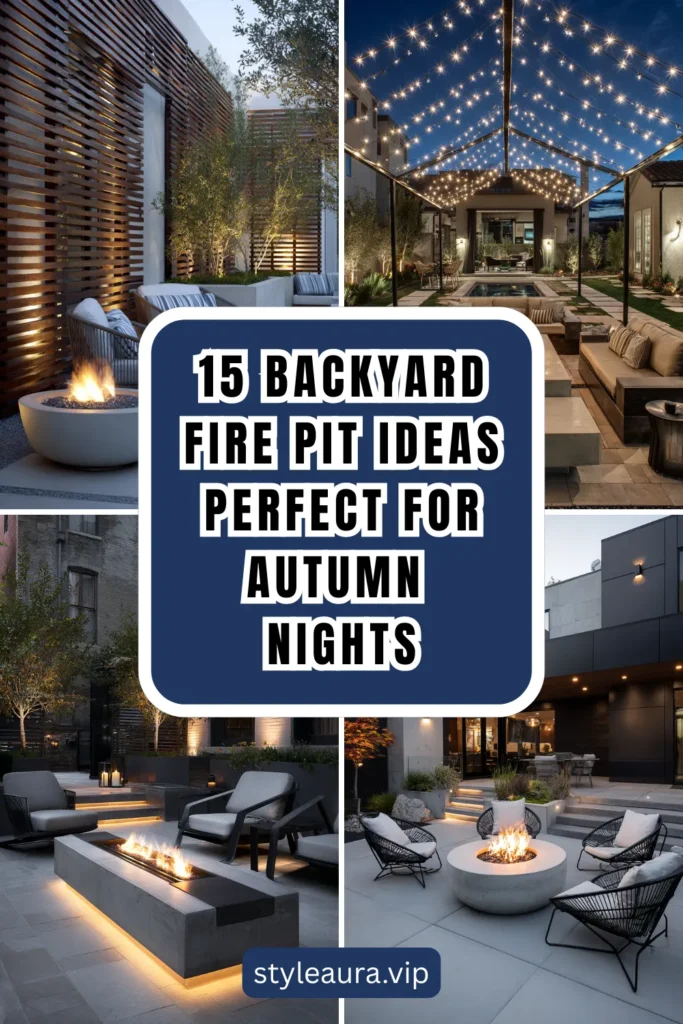
An autumn fire pit area isn’t a summer setup left out a little later in the year. It’s a different design problem — one built around real heat retention, wind, and an early darkness that turns the space into the evening’s main event much sooner than it would in July. Get the warmth and the layout right, and a fire pit becomes the one part of the yard that actually gets used more, not less, as the weather turns.
Here are 15 ideas for setting up a backyard fire pit area built for autumn nights specifically, not just borrowed from summer.
Why Autumn Fire Pit Nights Play by Different Rules Than Summer
The rules are not the same for every season around the fire:
Summer Fire Pit Advantages:
- Long warm evenings, where the fire is mostly ambiance rather than necessity
- Plenty of daylight before the fire is even needed
- Light clothing and minimal layering around the seating area
The summer fire pit comparison: the flame as a bonus, not a requirement
Autumn Fire Pit Advantages and Realities:
- The fire becomes the actual heat source, not just a visual feature
- Earlier darkness means the fire pit area becomes the evening’s main gathering point much sooner
- Wind and falling temperatures change how windbreaks, seating distance, and ember management all need to work
The key insight:
- Summer fire pit design rewards ambiance
- Autumn fire pit design rewards real warmth retention and wind management
- These are different design problems, not the same setup left out a little later into the year
The Heat and Wind Reality
The most important factor in autumn fire pit design:
The prevailing wind direction:
- Most evenings in a given yard have a fairly consistent wind pattern
- Seats positioned downwind catch smoke; seats with the wind at their back stay clear
- Know this — it governs where every chair in the layout actually gets placed
The “heat radius” calculation:
- A fire pit radiates genuinely usable warmth only within a certain radius, typically 6–10 feet depending on size
- Seating placed beyond that radius looks included in the circle but isn’t actually warm
- Work backward from the fire itself: the innermost ring is arranged for warmth, anything farther out is arranged for atmosphere alone
Most fire pit areas build in layers, not all at once:
- The hardscape and seating layer comes first, since it’s the hardest and most expensive to change later
- The warmth layer comes next — blankets, heaters, windbreaks — once the basic layout is set
- The smallest finishing touches come last: lighting, string lights, and seasonal styling
1. The Fire Pit Itself (The Centerpiece Worth Choosing Carefully)
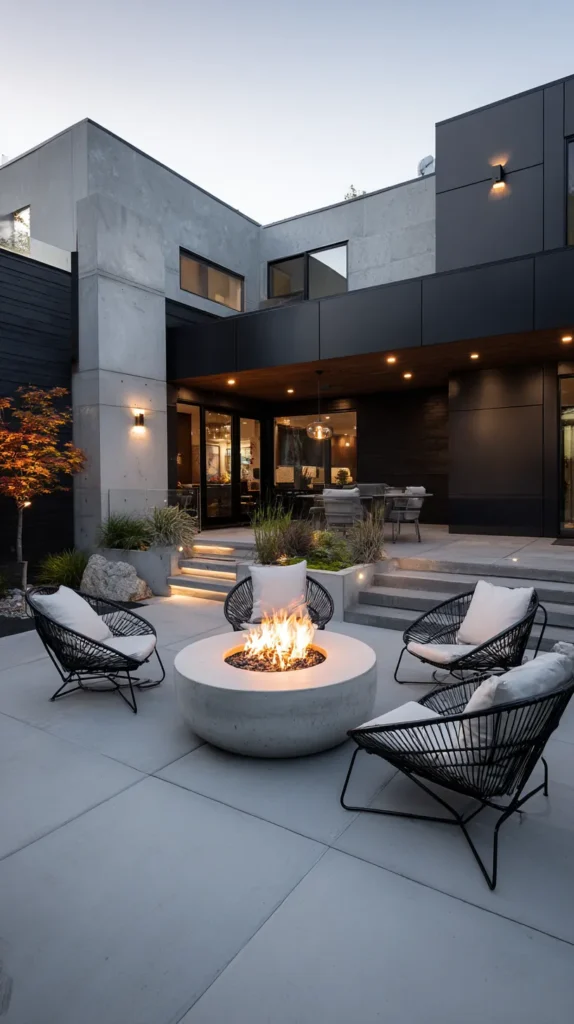
The fire pit itself — wood-burning, gas, or propane — the single purchase every other idea on this list gets arranged around, and the one decision most worth making carefully before anything else goes into the yard.
Why this single choice shapes everything else
- The anchor point: every other element — seating, lighting, even the patio surface — gets sized and placed in reference to this one feature
- The function-versus-ambiance question: a wood-burning pit offers real radiant heat and the sound and smell of an actual fire; a gas pit offers instant, adjustable, lower-maintenance flame
- The fall-specific stakes: in cooler weather, this isn’t just a nice backdrop, it’s the actual reason anyone stays outside after dark
The options
- Wood-burning fire pit — the most traditional option, with genuine crackle, sparks, and a wood-smoke scent no gas flame replicates
- Propane fire pit — push-button ignition, no ash to manage, but a smaller and more contained flame
- Natural gas fire pit, plumbed into a home’s existing line — the most convenient long-term, with the highest upfront installation cost
- A fire table, combining a flame feature with a usable flat surface around the edge, for smaller patios
The practical execution
- Check local ordinances and any seasonal burn restrictions before installing a wood-burning pit
- Leave at least 10 feet of clearance from structures, fences, and overhanging branches, more in dry conditions
- Choose a pit sized to the seating area planned around it — an oversized pit overwhelms a small patio, an undersized one leaves outer seats cold
Cost breakdown
- Portable steel wood-burning fire pit: $80–250
- Built-in masonry wood-burning fire pit: $1,500–4,000+
- Propane fire pit, freestanding: $200–600
- Gas fire pit, plumbed and installed: $2,000–6,000+
- Total: $80–6,000+, depending entirely on direction
The fire pit chosen with the whole yard in mind: the one purchase every other idea on this list eventually has to answer to.
2. The Circular Seating Arrangement (Built Around Where the Heat Actually Reaches)
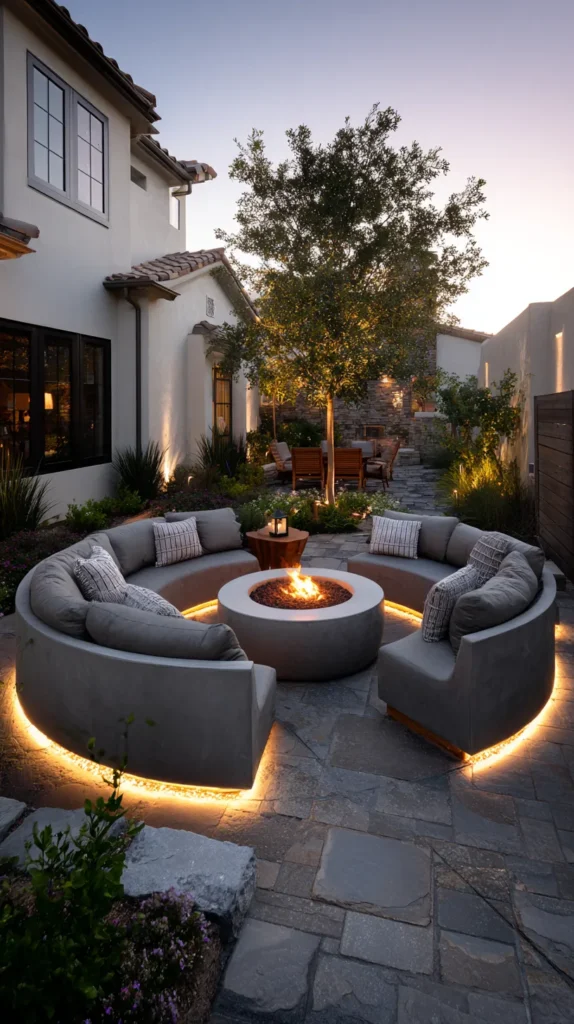
Chairs, benches, or built-in seating arranged in a full or partial circle around the fire — the layout decision that determines who actually feels warm and who’s just nearby.
Why the shape of the seating matters as much as the chairs themselves
- The heat-radius reality: a fire pit’s usable warmth covers a specific radius, and seating outside that radius is decorative rather than functional
- The conversation-shape principle: a circle keeps every face turned toward the center, which matters more around a fire than around almost any other outdoor feature
- The flexible-capacity need: autumn gatherings often swing between a couple of people and a full group, and the seating arrangement needs to expand and contract without losing its shape
The options
- Adirondack chairs, the classic fire pit seat, with a reclined angle built for sitting still for a long stretch
- A built-in stone or wood bench ring, permanent and weatherproof, doubling as the pit’s surround
- Mixed freestanding chairs, easy to add or remove depending on the size of the gathering
- Low stools or floor cushions, filling gaps in the circle for kids or extra guests without adding bulk
The practical execution
- Leave one or two gaps in the circle for serving, adding wood, or simply walking through, rather than closing it completely
- Position the most exposed seats — facing into the prevailing wind — closest to a windbreak, if one is part of the setup
- Keep seating within roughly 6–10 feet of the fire’s edge, beyond which radiant heat drops off quickly
Cost breakdown
- Adirondack chairs, each: $80–200
- A built-in seating ring, materials and labor: $1,500–4,000+
- Mixed freestanding chairs, a set of 4–6: $200–600
- Total: $200–4,000+, depending on direction
3. The Stone or Brick Surround (A Permanent Frame for an Open Flame)
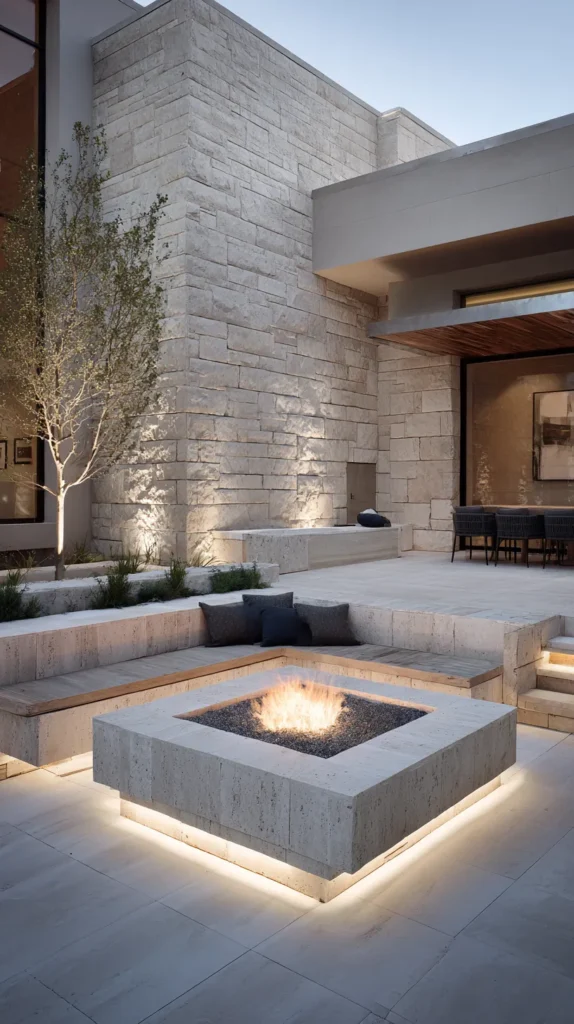
A built ring or low wall of stone or brick around the fire pit — the structural detail that turns an open flame into a finished feature rather than a temporary setup.
Why a surround changes how the whole feature reads
- The permanence signal: a built surround reads as a considered, permanent feature of the yard, distinct from a portable pit simply set down on the grass
- The function it adds: a surround contains sparks and embers more reliably than an open pit alone, and provides an additional low seating or resting surface around the edge
- The material warmth: stone and brick hold and radiate residual heat after the fire itself has died down, extending the warmth the area provides into the later part of the evening
The options
- A dry-stacked stone ring, the most natural-looking option, built without mortar for a rougher finish
- A mortared brick or block surround, more formal and structured, often matched to an existing patio
- A paver-edged ring, a lower-cost, DIY-friendly option using interlocking pavers
- A raised fire bowl set into a stone base, combining a manufactured fire feature with a custom surround
The practical execution
- Build on a level, non-flammable base — gravel or pavers, not grass or mulch, directly beneath the structure
- Size the surround’s height to double as casual seating, typically 14–18 inches, if that’s part of the plan
- Leave a gap or low point in the surround for adding wood and tending the fire without reaching over the wall
Cost breakdown
- DIY paver-edged ring, materials only: $150–400
- Professionally built dry-stack stone ring: $800–2,500
- Mortared brick surround, materials and labor: $1,200–3,500
- Total: $150–3,500, depending on materials and whether it’s a DIY or professional build
4. The Outdoor Rug (Defining the Room Without Any Walls)
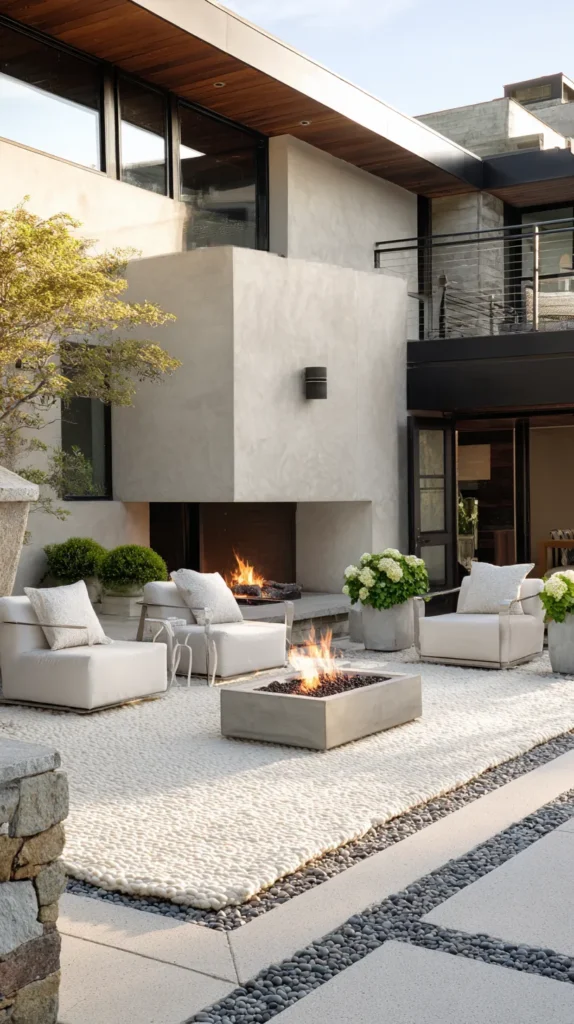
A weather-resistant outdoor rug placed beneath the seating area — the layer that marks the boundaries of the fire pit “room” the way a wall would indoors, without adding a single piece of structure.
Why a rug does more than soften the ground
- The boundary effect: a rug visually defines where the gathering space starts and ends, turning an undefined patch of patio or lawn into a clear destination
- The comfort layer: bare stone, concrete, or gravel underfoot gets cold quickly once the air temperature drops, and a rug adds a buffer between feet and that surface
- The color and pattern opportunity: this is one of the few large-format styling choices available in an otherwise hardscape-dominated space
The options
- Polypropylene outdoor rugs, the most common choice, resistant to moisture and UV fading
- Recycled plastic or “rough weave” rugs, durable enough to sit directly on grass, gravel, or rougher surfaces
- A rug sized specifically to the seating circle, rather than a generic rectangle, for a more intentional fit
- A layered look, with a smaller patterned rug over a larger neutral base, for more visual depth
The practical execution
- Choose a size that extends slightly under the front legs of the seating, rather than one that leaves a gap between rug and chairs
- Weight the corners or use rug stakes and grippers on a site exposed to wind
- Roll and store the rug during the off-season or heavy weather stretches, since most outdoor rugs aren’t built for permanent exposure
Cost breakdown
- Budget outdoor rug, large size: $60–150
- Mid-range outdoor rug: $150–350
- Total: $60–350
5. The String Light Canopy (Turning a Patch of Yard Into a Room)
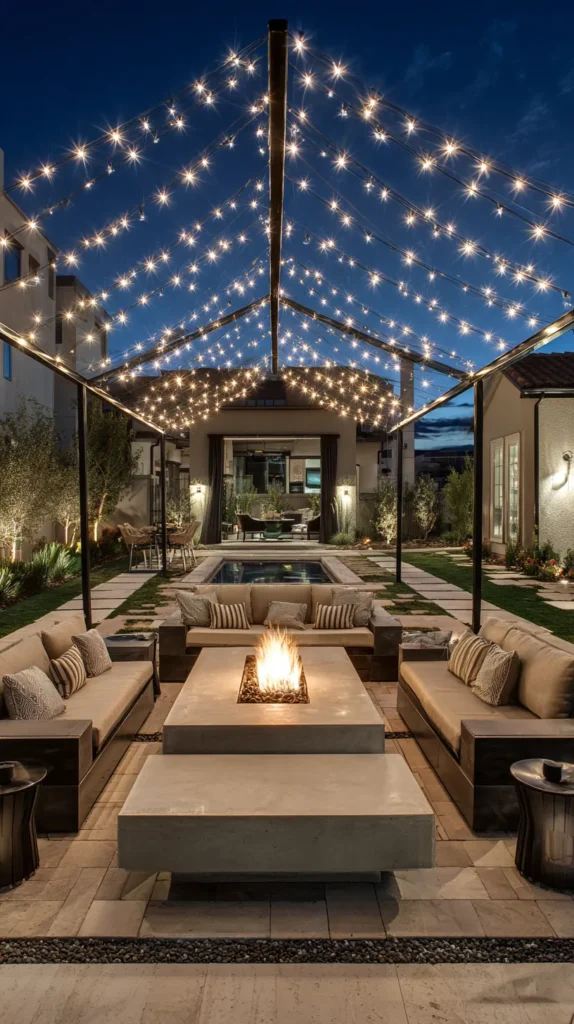
String lights hung overhead between trees, a pergola, or freestanding poles — the layer that gives an open backyard a visible ceiling once the sun goes down.
Why overhead light matters as much outdoors as it does indoors
- The early-darkness case: autumn evenings shorten quickly, and overhead light becomes the area’s primary illumination for more of the gathering than it would in summer
- The defined-space effect: light strung above the seating circle marks the top edge of the “room” the way the rug marks the floor
- The low-effort transformation: this is one of the lowest-cost, highest-visual-impact upgrades available for the whole area
The options
- Warm white LED string lights, the most versatile option, closest in tone to firelight
- Edison-style bulb string lights, heavier and more decorative, well suited to a pergola or fixed structure
- Solar-powered string lights, useful for an area without a nearby outdoor outlet
- A mix of string lights and lanterns, layering overhead light with lower, table-height light
The practical execution
- String lights from at least three points if possible, rather than a single straight line, for a fuller canopy effect
- Hang high enough to clear anyone standing, generally 7 feet or more, especially near the seating circle
- Use outdoor-rated, weatherproof lights and connections, since this layer stays up through changing fall weather
Cost breakdown
- String light set, outdoor-rated: $20–50
- Solar string lights: $25–55
- Mounting hooks or poles, if needed: $15–40
- Total: $20–95
6. The Firewood Storage Rack (Fuel Display as Decor)
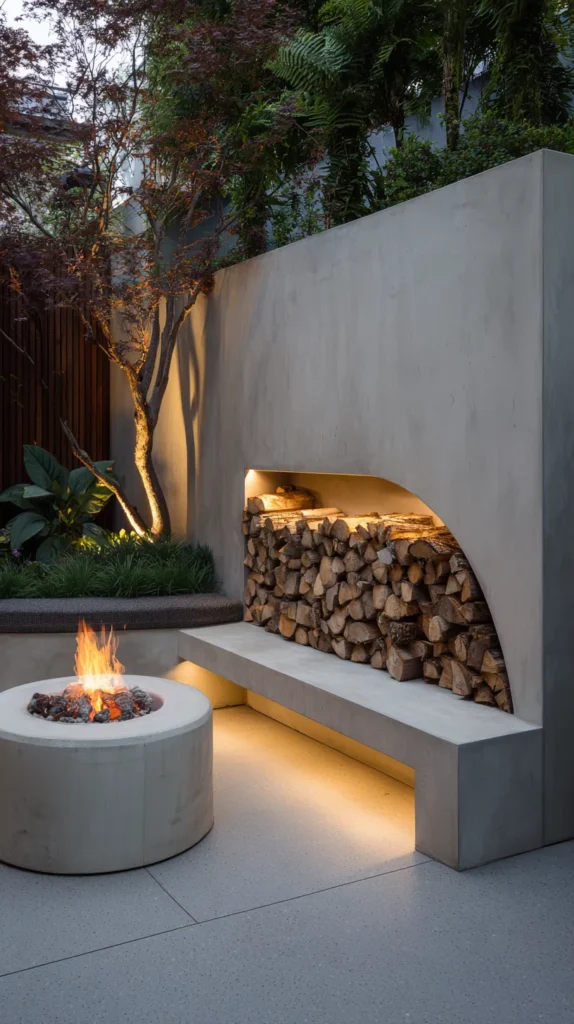
A dedicated rack or stack for firewood near the pit — the practical storage solution that also happens to be one of the most naturally photogenic features in the whole space.
Why a woodpile earns a deliberate place in the layout
- The function-as-decoration overlap: firewood has to be stored somewhere regardless, and a neatly stacked rack does that job while also adding texture and warmth to the visual scene
- The convenience case: wood stored within reach of the seating circle means the fire can be tended without anyone leaving the warm zone
- The seasonal abundance signal: a full woodpile reads as prepared and well-stocked, the outdoor equivalent of a stocked pantry
The options
- A simple log rack with end supports, the most common and least expensive option
- A covered firewood rack, protecting the stack from rain while keeping it visible
- A built-in stone or brick wood storage nook, matched to the fire pit surround for a cohesive look
- A smaller decorative bundle near the seating, kept separate from the larger bulk supply stored further away
The practical execution
- Position the rack close enough to the fire to be convenient, but with enough clearance to avoid radiant heat drying out or igniting the stack
- Stack with bark facing outward and cut ends in, both for a tidier appearance and slightly better airflow
- Keep a smaller, more visually curated bundle near the seating itself, replenished from the larger stock as needed
Cost breakdown
- Basic log rack: $25–60
- Covered firewood rack: $80–200
- Built-in stone wood storage nook: $400–1,200
- Total: $25–1,200, depending on direction
7. The Windbreak or Privacy Screen (Taming What Autumn Air Actually Does)
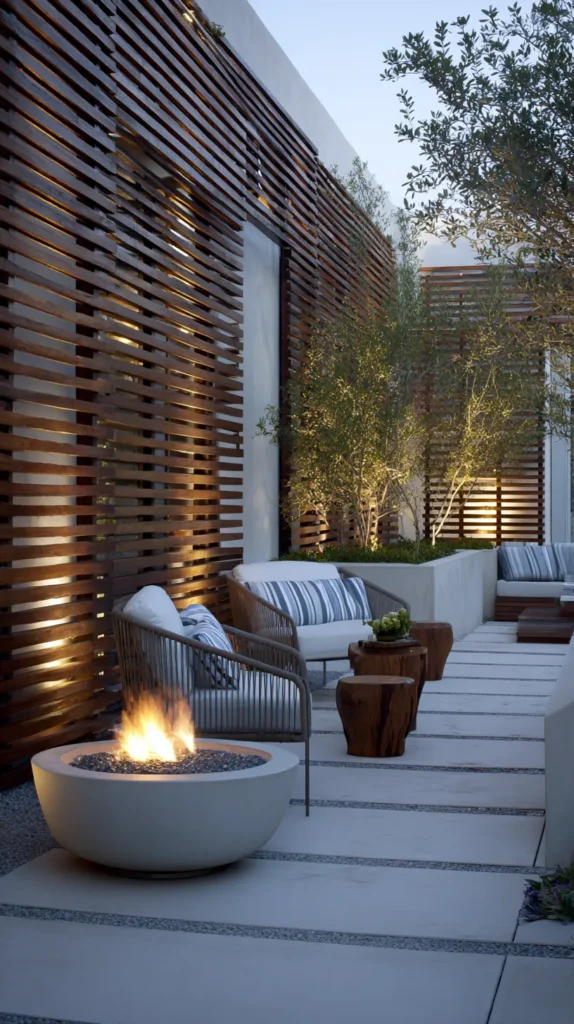
A freestanding screen, lattice panel, or planted hedge positioned to block the prevailing wind — the addition that keeps a fire pit area usable on the breezy evenings fall reliably brings.
Why blocking the wind matters more than adding more heat
- The wind problem fire alone can’t solve: even a well-built fire loses much of its felt warmth on a windy night, no matter how large the flame
- The smoke management benefit: a windbreak placed correctly can also help direct smoke away from the seating area rather than into it
- The privacy bonus: many windbreak materials do double duty, screening the gathering from neighboring yards or the street at the same time
The options
- A freestanding wood lattice panel, lightweight and easy to reposition as the wind direction shifts seasonally
- An outdoor curtain or canvas panel, hung from a frame or pergola, offering a softer, more textured look
- A planted hedge or row of tall grasses, a permanent, living option that takes a season or more to mature
- A low garden wall, more substantial and permanent than a panel, often paired with the seating surround from Idea #3
The practical execution
- Identify the prevailing wind direction for typical evening gatherings before fixing a permanent screen in place
- Leave enough distance between the screen and the fire that it isn’t exposed to direct heat or sparks
- For living windbreaks, plant well before the season they’re meant to serve, since most need a full growing season to provide real coverage
Cost breakdown
- Freestanding lattice panel: $40–120
- Outdoor curtain panel and frame: $80–200
- Planted hedge, per linear foot: $15–40
- Total: $40–500+, depending on material and scale
8. The Patio Heater Layer (Extending the Radius the Fire Alone Can’t Reach)
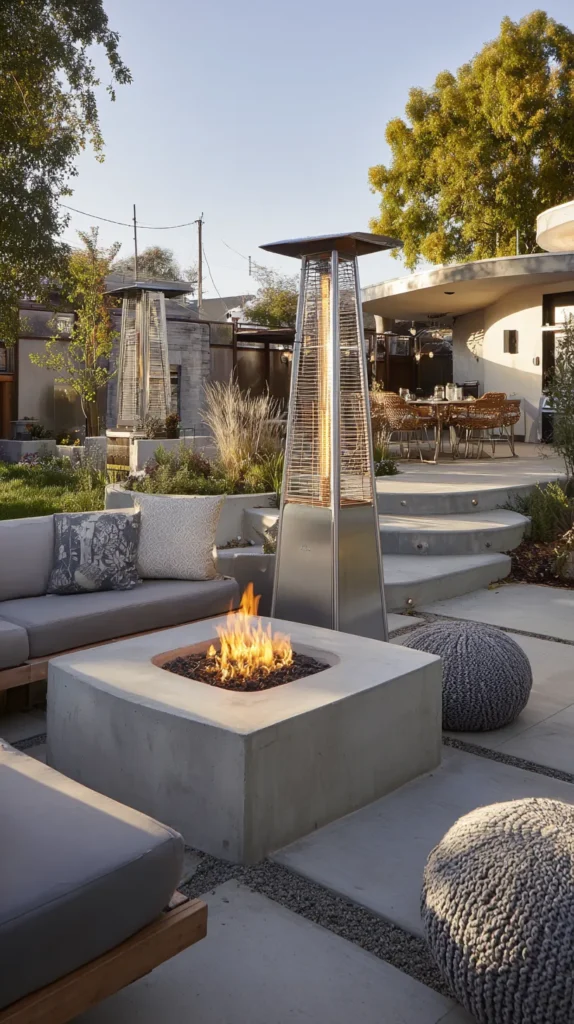
A standing patio heater or tabletop heat lamp positioned at the edge of the seating circle — the supplemental warmth source that keeps the outer seats from feeling like an afterthought.
Why a fire alone often isn’t enough
- The radius problem it solves directly: a fire pit’s heat drops off sharply past a certain distance, and a heater extends genuine warmth to seats the fire alone can’t reach
- The adjustable-control benefit: unlike a wood fire, a heater can be switched on or off instantly and adjusted in intensity without managing flames or fuel
- The larger-gathering case: a single fire pit often can’t keep an entire group warm once the guest count grows past what fits in the innermost ring
The options
- A freestanding propane patio heater, tall and radiant, good for covering a wider seated area
- A tabletop heater, smaller and more contained, useful near a side table or drink station
- An electric infrared heater, mounted on a pergola or overhead structure, requiring an outlet but producing no flame or fuel to manage
- A small space heater rated for outdoor or covered-patio use, for a more budget-conscious option
The practical execution
- Position heaters to cover the seats farthest from the fire pit itself, rather than duplicating the warmth already covered by the flame
- Confirm any electric option is rated for outdoor or damp conditions before installing it permanently
- Keep heaters a safe distance from anything flammable, including the wood storage rack and any fabric windbreak or canopy
Cost breakdown
- Tabletop heater: $40–90
- Freestanding propane patio heater: $120–350
- Electric infrared heater, mounted: $150–400
- Total: $40–400 per unit, depending on type and coverage needed
9. The Blanket and Throw Station (Warmth Within Arm’s Reach)
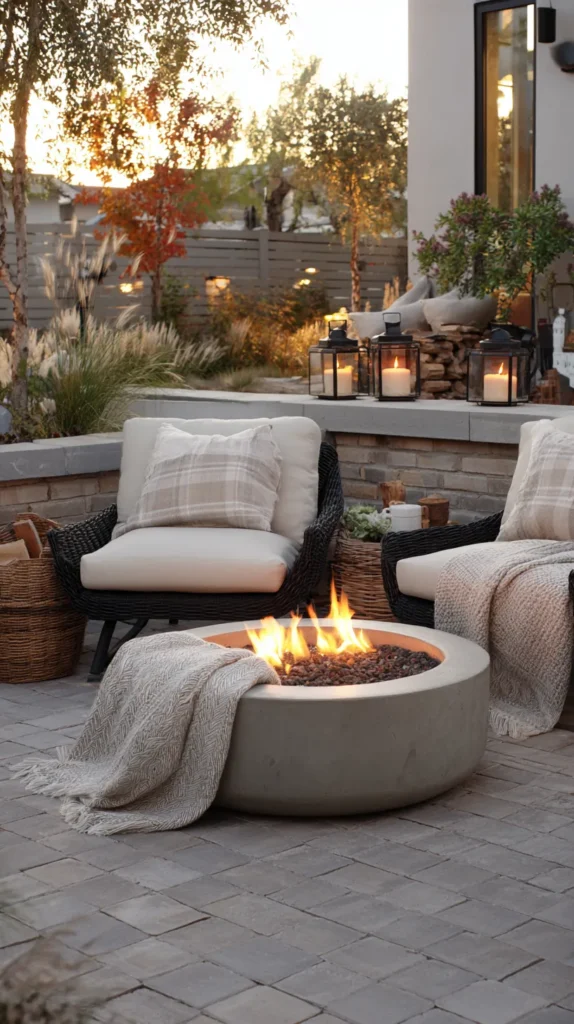
A basket or open-front bench holding extra blankets near the seating circle — the lowest-tech warmth layer on this list, and one of the most visually inviting.
Why a blanket pile counts as both comfort and decor
- The function-as-styling overlap: a stack of folded blankets in warm, varied tones looks intentional and styled even before anyone wraps up in one
- The real-comfort case: an autumn evening that starts comfortably can turn cold quickly once the sun fully sets, and a blanket within reach solves that without anyone needing to go back inside
- The texture it adds: blankets bring softness and color to a space otherwise dominated by stone, metal, and wood
The options
- A large woven basket holding a folded stack, positioned at the edge of the seating circle
- A storage bench with a lift-top, doubling as both seating and blanket storage
- Individual throws draped over each chair, ready before guests even arrive
- A mix of wool and fleece blankets, offering different weights depending on how cold the evening actually gets
The practical execution
- Choose materials that tolerate occasional dampness and a wash afterward, rather than anything delicate
- Position the station within easy reach of the seating circle, not stored away inside the house
- Bring blankets in at the end of the evening, or keep them in a weatherproof container if left outside overnight
Cost breakdown
- Outdoor-rated throw blanket, each: $20–45
- A set of 4–6: $100–250
- Storage basket or bench: $30–150
- Total: $100–400
10. The Overhead Pergola or Shade Structure (A Ceiling for a Room With No Walls)
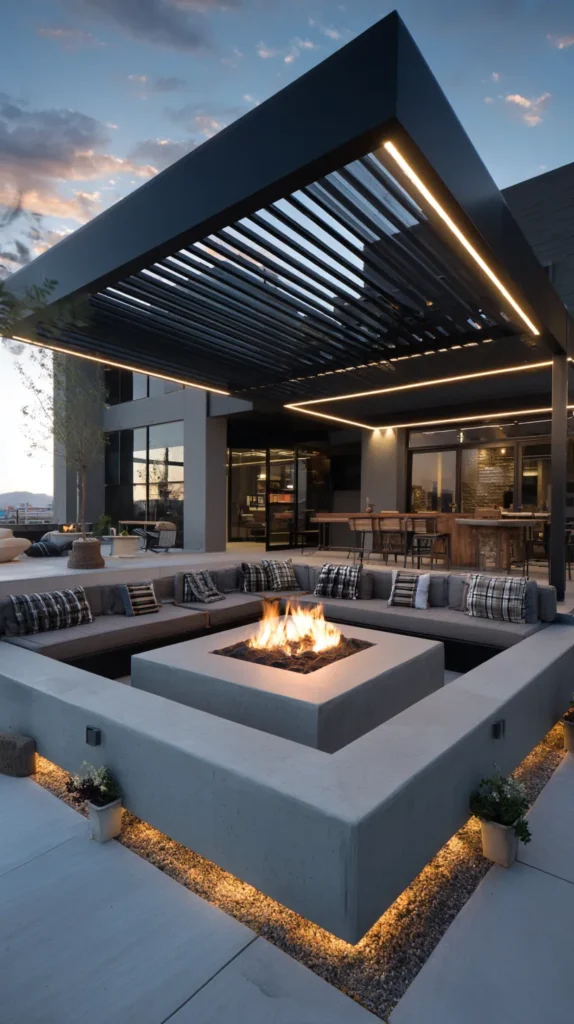
A pergola, arbor, or simple post-and-beam frame built over the seating area — the structure that gives an open-air gathering space something resembling a ceiling.
Why an overhead structure finishes the room
- The room-defining function: a pergola does for the overhead space what the rug and seating circle do for the floor, completing the sense of an actual room rather than an open patch of yard
- The mounting point it provides: a pergola gives string lights, curtains, and even a windbreak panel a fixed structure to attach to, rather than relying on trees or freestanding poles
- The light-rain extension: a pergola, especially with a partial roof or retractable cover, can keep a gathering going through a light autumn drizzle that would otherwise send everyone inside
The options
- An open-lattice wood pergola, providing structure and some dappled shade without fully enclosing the space
- A metal or aluminum pergola frame, lower-maintenance than wood, often paired with a retractable canopy
- A simple post-and-beam frame, a more minimal, DIY-friendly version without the full lattice roof
- A pergola with a retractable canopy or shade sail, adding light rain and sun protection on demand
The practical execution
- Size the structure to the seating circle below it, with enough clearance for the tallest person to stand comfortably underneath
- Anchor posts in concrete footings for any permanent structure, rather than relying on surface mounts alone
- Plan the wiring for string lights or an overhead heater during construction, rather than retrofitting it afterward
Cost breakdown
- DIY post-and-beam frame, materials: $300–800
- Kit-built wood pergola, materials and basic installation: $1,500–4,000
- Metal pergola with retractable canopy: $2,500–6,000+
- Total: $300–6,000+, depending on scale and materials
11. The Pathway Lighting (The Walk to the Fire as Part of the Experience)
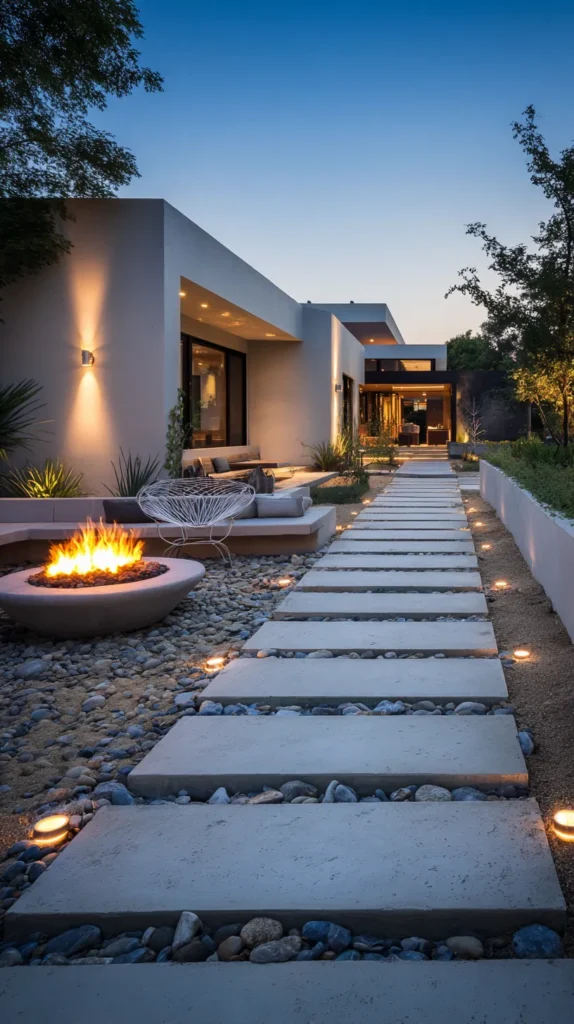
Low path lights or lanterns marking the route from the house or driveway to the fire pit — the lighting idea that solves a real safety issue while extending the evening’s atmosphere beyond just the seating circle itself.
Why the path deserves its own lighting plan
- The function it solves first: an unlit path across an uneven autumn lawn, possibly covered in fallen leaves, is a genuine tripping hazard once the sun sets early
- The atmosphere it extends: a lit path makes the walk toward the fire feel like part of the occasion rather than just the approach to it
- The flexible placement: unlike a fixed string light canopy, path lights can be added or repositioned easily as the layout of the yard changes
The options
- Solar-powered path lights, staked directly into the ground, requiring no wiring at all
- Low-voltage wired landscape lighting, more permanent and consistent, requiring a transformer connection
- Lanterns set along the path, battery-powered or with flameless candles, easy to move or remove seasonally
- String lights run low along a fence or border, an alternative to staked lights on a lawn that won’t tolerate ground stakes well
The practical execution
- Space lights close enough together that no stretch of the path is left fully dark
- Keep path lights low and angled downward, so they illuminate the ground rather than glaring into anyone’s eyes
- Clear fallen leaves from the path periodically, since accumulated leaves both hide the path’s edge and can dim solar light sensors
Cost breakdown
- Solar path lights, a set of 6–8: $30–70
- Low-voltage wired landscape lighting kit: $100–300
- Lanterns, a set of 4–6: $40–100
- Total: $30–300, depending on the system chosen
12. The Layered Outdoor Cushions (Comfort That Doubles as Color)
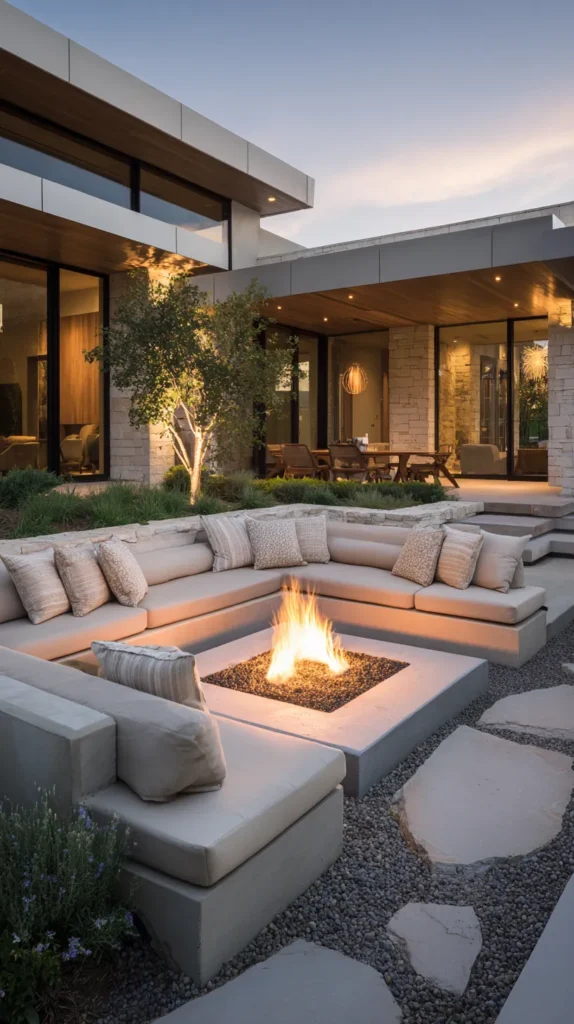
Weather-resistant cushions and pillows added to chairs and benches around the fire — the textile layer that softens hardscape and wood seating while adding most of the area’s actual color.
Why cushions matter more here than the seating itself
- The softening function: stone, wood, and metal seating around a fire pit is durable but rarely comfortable on its own for a long evening
- The color opportunity: in a space otherwise dominated by neutral and natural materials, cushions are often the easiest way to introduce real seasonal color
- The mix-and-match forgiveness: cushions in varied but complementary tones read as gathered and layered rather than mismatched, the same way textiles work in an interior space
The options
- Solid-color outdoor cushions, in deep autumn tones — rust, olive, mustard — as a base layer
- Patterned accent pillows, added in smaller numbers for contrast against the solid base cushions
- Bench cushions, sized specifically to built-in or long bench seating
- Floor cushions, for low stools or extra seating filled in around the circle
The practical execution
- Choose covers and fill materials specifically rated for outdoor use, since standard indoor cushions absorb moisture and mildew quickly outside
- Bring cushions inside or store them in a weatherproof bin during rain or overnight, even with weather-resistant materials
- Layer two or three colors maximum across the whole seating area, rather than letting every chair introduce a new pattern
Cost breakdown
- Outdoor seat cushion, each: $20–40
- Accent pillow, each: $15–30
- A full seating area set (6–8 pieces): $150–350
- Total: $150–350
13. The Drink and Roasting Station (A Second Small Center of Gravity)
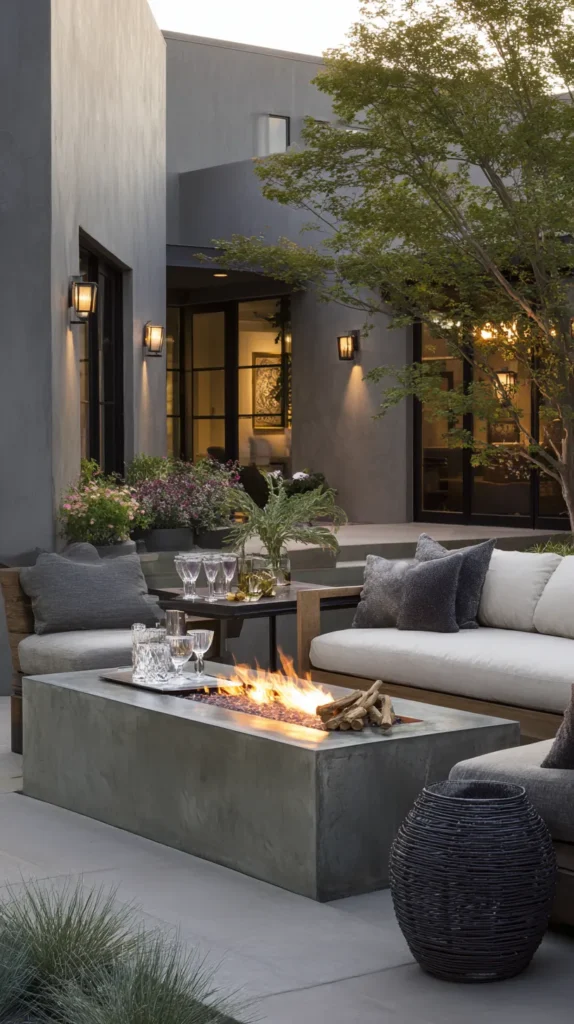
A small side table or cart stocked with drinks, roasting sticks, and s’mores supplies — the secondary gathering point that gives guests a reason to get up and move without leaving the fire pit area entirely.
Why a second station does more than a single decoration
- The repeated-use value: unlike a single decoration, a drink and roasting station gets visited multiple times through the evening, doing more work per dollar than almost anything else on the list
- The natural fire pairing: this station uses the heat that’s already there rather than requiring a separate appliance or setup
- The conversation-starter function: a station stocked for roasting and pouring gives guests something to do together, beyond simply sitting and talking
The options
- A small bar cart, rolled into position near the seating circle and back inside when the evening ends
- A weatherproof side table, left in place permanently near the fire
- A divided tray or small crate system, organizing roasting sticks, marshmallows, and chocolate separately from drinkware
- An insulated beverage tub or cooler, doubling as both function and a low, sturdy surface
The practical execution
- Position the station within reach of the fire for roasting, but outside the direct heat radius for anything that shouldn’t get too warm
- Keep roasting sticks in a labeled bundle so they’re easy to find and easy to return after use
- Restock through the evening rather than loading everything out at once, so the station still looks tidy by the time the fire’s been going for a few hours
Cost breakdown
- Small bar cart: $80–200
- Weatherproof side table: $40–120
- Roasting sticks and small trays: $20–40
- Total: $40–360, depending on the setup chosen
14. The Seasonal Foliage and Pumpkin Styling (The Smallest, Most Disposable Layer)
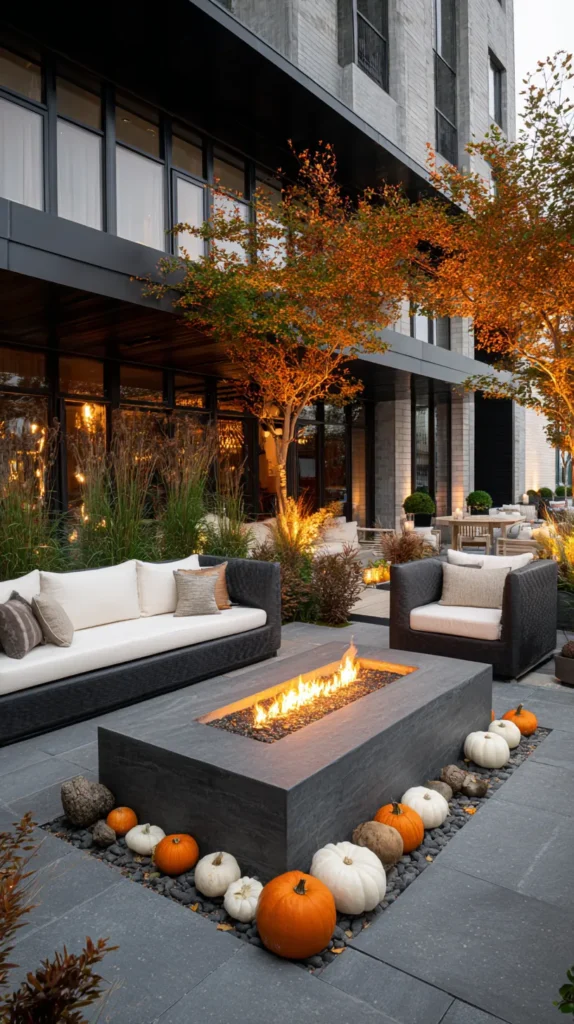
Small pumpkins, gourds, and fall branches arranged around the seating area or along the fire pit’s edge — the lowest-commitment styling layer on this entire list, swapped out every year without touching anything structural.
Why the smallest layer still matters
- The temporary-by-design value: unlike everything else on this list, this layer is meant to be replaced each season, which means there’s no pressure to get it perfectly right the first time
- The instant seasonal signal: a few pumpkins and a bundle of branches change the feel of an otherwise permanent hardscape faster than almost anything else
- The low cost relative to visual impact: this is one of the least expensive ways to make a fire pit area feel specifically like an autumn space rather than a general outdoor seating area
The options
- Small and mini pumpkins, grouped in clusters of odd numbers around the seating circle’s edge
- Gourds in varied shapes, mixed in with the pumpkins for texture variety
- Bundled branches with autumn leaves still attached, leaned in a corner or against the fire pit surround
- A simple seasonal wreath or swag, hung on a nearby fence or post if one is available
The practical execution
- Keep arrangements low and well clear of the fire pit itself, both for safety and so they don’t block sightlines across the seating circle
- Replace any pumpkins or gourds that begin to soften or rot, rather than leaving them out past their season
- Store reusable elements, like a wreath or dried branch bundle, for the following year rather than discarding everything after one use
Cost breakdown
- Small and mini pumpkins, a dozen: $15–30
- Gourds, mixed: $10–20
- A seasonal wreath or swag: $15–35
- Total: $15–85
15. The Side Table or Tray System (Somewhere for Everything That Isn’t in a Hand)
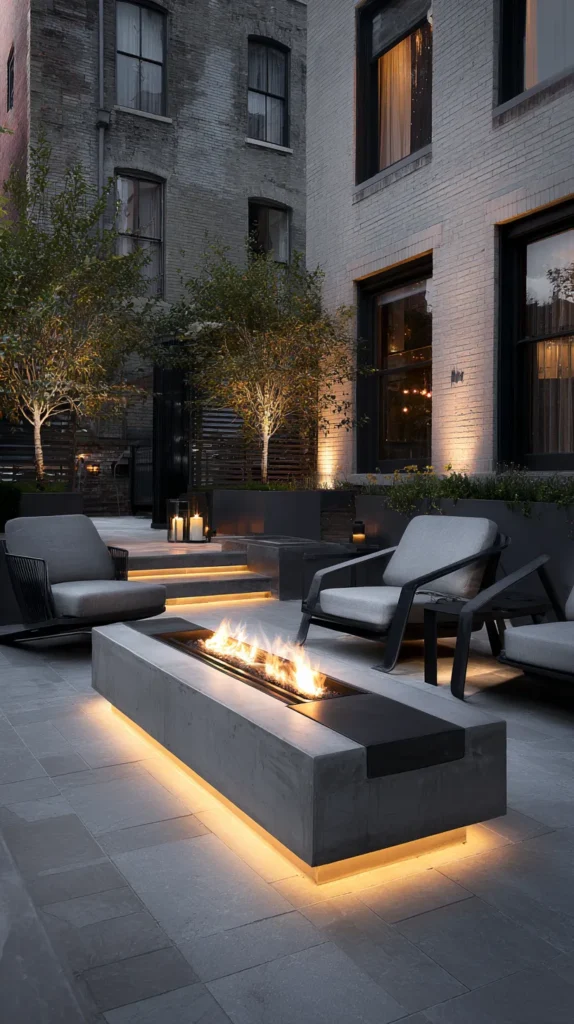
A set of small side tables or trays placed between or beside the seating, giving every guest a flat surface for a drink, a plate, or a phone — the unglamorous addition that keeps the whole area from filling up with cups balanced on armrests.
Why this is the most underrated idea on the list
- The clutter-prevention logic: without a flat surface nearby, drinks and plates end up on the ground, on an armrest, or back inside, none of which work well around a fire
- The invisible-when-working principle: a good side table is rarely noticed for itself; it’s only the absence of one that becomes obvious, in the form of a spilled drink or a guest holding a plate for an hour
- The household-specific sizing: a setup for two chairs needs far less than a setup for a full circle of eight, and the system should scale to match
The options
- Small individual side tables, one between every pair of chairs
- A stack of nesting trays, brought out only as needed and stacked away the rest of the time
- A single larger coffee table, in the center of a partial circle, for groups that prefer a shared surface over individual ones
- Tray tables that clip onto chair arms, a space-saving option for tighter seating arrangements
The practical execution
- Choose weather-resistant materials — metal, resin, or sealed wood — over anything that absorbs moisture or warps outdoors
- Keep surfaces low enough to reach easily from a seated position, generally close to arm height when seated
- Store smaller stacking tables or trays somewhere dry between uses, rather than leaving them out through every weather stretch
Cost breakdown
- Small individual side table, each: $25–60
- Nesting tray set: $40–90
- Total: $50–250, depending on how many pieces are added
The side table that’s never empty for long: the quiet infrastructure that keeps a fire pit gathering running smoothly long after the first round of drinks.
The Backyard Fire Pit Roadmap
The work, sequenced:
Phase One (the foundation):
- The fire pit itself (#1)
- The stone or brick surround (#3)
- The circular seating arrangement (#2)
- The overhead pergola or shade structure (#10)
Phase Two (the comfort layer):
- The patio heater layer (#8)
- The windbreak or privacy screen (#7)
- The outdoor rug (#4)
- The layered outdoor cushions (#12)
Phase Three (the light and atmosphere):
- The string light canopy (#5)
- The pathway lighting (#11)
Phase Four (the finishing touches):
- The firewood storage rack (#6)
- The blanket and throw station (#9)
- The drink and roasting station (#13)
- The seasonal foliage and pumpkin styling (#14)
- The side table or tray system (#15)
Getting Started This Weekend
The immediate-impact fire pit refresh:
One afternoon, three changes:
- Add outdoor cushions to the existing seating (Idea #12)
- Set up a blanket basket within reach of the chairs (Idea #9)
- Add a cluster of small pumpkins and gourds along the fire pit’s edge (Idea #14)
Total cost: $90–180. Time: about an hour. The fire pit area will feel ready for a long evening, without a single structural change.
The structural investment (the next big project):
Whichever of the fire pit itself (Idea #1) or the seating arrangement (Idea #2) isn’t already in place is the next worthwhile investment. Once both exist together, the surround, the rug, and every layer of warmth and lighting on this list has something solid to arrange itself around.
What a fully set up autumn fire pit area provides that summer use can’t:
The warmth that’s the actual point of the evening, not just the ambiance:
- A heat radius planned around real seating distance, not guesswork
- A heater layer that extends warmth past where the fire alone can reach
- A windbreak that keeps a breezy night from undoing all of it at once
The room built without a single wall:
- A rug marking the floor, a pergola marking the ceiling
- String lights forming a visible boundary once the sun is down
- A seating circle that holds its shape whether it’s two people or eight
The gathering that starts the moment the first chair gets pulled close:
- A drink and roasting station that gives guests a reason to get up and move
- A blanket pile that solves the cold before anyone has to ask for one
- A path lit clearly enough that walking out to the fire feels like part of the evening, not just the way there
An autumn fire pit doesn’t need summer’s long daylight or mild air to do its job. It works because it was built for exactly the conditions fall actually brings — early dark, real cold, and a wind that means business by October. The fire that’s tended carefully tonight is the same fire that’ll be tended again next week. The blanket pulled off the stack and wrapped around someone’s shoulders is the whole reason the rest of the evening gets to keep going.