15 Butler’s Pantry Design Ideas for a Functional Kitchen Annex
The butler’s pantry changed how my kitchen worked more than any single appliance upgrade ever did. Not the bigger range. Not the extra cabinet run. Not the second sink or the walk-in fridge or the reorganized spice drawer.
The room next door.
Because a dedicated overflow space did something no amount of kitchen storage alone could. Before it: a kitchen doing everything at once — cooking, storing, serving, hiding the mess mid-party — every function competing for the same counters and cabinets. After it: a second small room absorbing half of that load, the kitchen itself free to simply cook while the pantry handled storage, staging, and the clutter of entertaining.
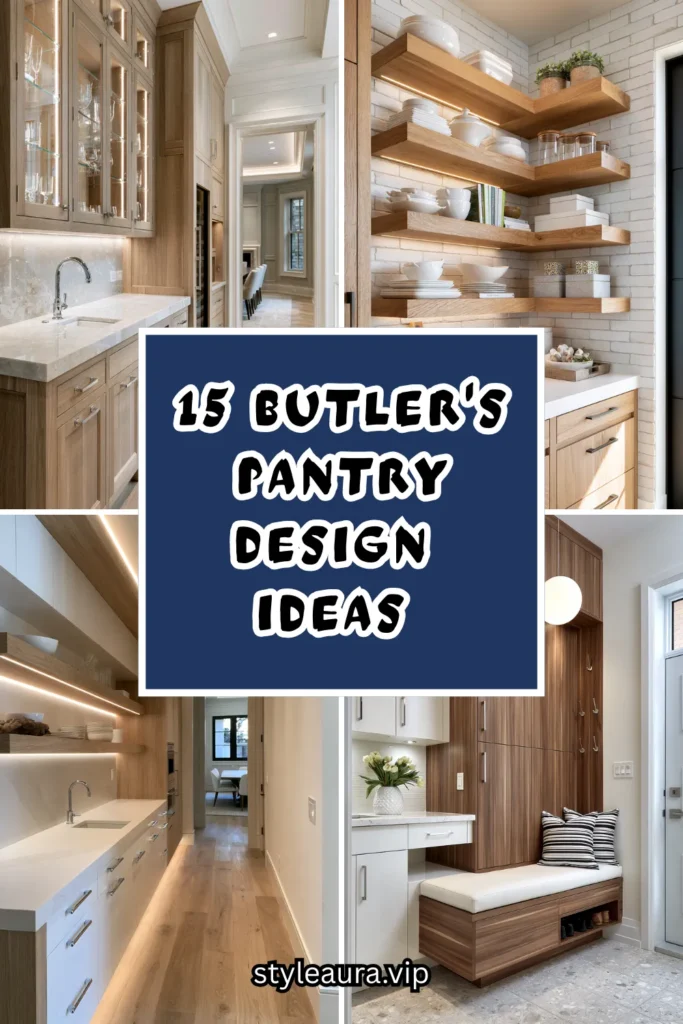
A butler’s pantry is not a bigger version of a walk-in food pantry. It is a functional annex, positioned between the kitchen and the dining room, designed to handle everything a kitchen does besides the actual cooking — storage, staging, serving, bar duty, small-appliance parking, and the temporary chaos of hosting. The kitchen: freed to do one job well, because a second room is quietly doing several others.
Here are 15 butler’s pantry design ideas for a functional kitchen annex — from the simplest single-wall version to the most fully outfitted annex — built on that understanding.
Why a Butler’s Pantry Earns Its Square Footage
The overflow function
A kitchen, however large, has finite counter and cabinet space. A butler’s pantry absorbs the overflow — the extra dishware, the small appliances used twice a year, the serving pieces only needed for a holiday meal — freeing the kitchen itself to stay functional for everyday cooking.
The staging advantage
Without a pantry:
Dishes plated on an already-crowded kitchen counter, mid-cooking, competing for space with active prep.
The kitchen: doing double duty as both cooking and staging area, at the exact moment it is busiest.
With a pantry:
A separate staging counter, positioned between the kitchen and the dining room, where plating and final touches happen without competing with active cooking.
The kitchen: focused entirely on cooking, while the pantry handles the transition to the table.
The concealment function
A butler’s pantry lets the mess of active cooking or entertaining stay contained to a space guests are less likely to see, keeping the kitchen itself presentable even mid-preparation.
The historical throughline
The original butler’s pantry served exactly this function in grand historical homes — a buffer between the working kitchen and the formal dining room, where staff staged, polished, and stored without either space intruding on the other. The modern version does the same job for a household without staff, simply automating what once required an extra set of hands.
The Five Core Functions of a Butler’s Pantry
Before designing any single element:
Storage
Dishware, glassware, and serving pieces not needed for daily use.
The most traditional and expected function.
Frees kitchen cabinets for everyday items alone.
Staging and serving
A counter for plating, garnishing, and organizing food before it reaches the table.
The function most directly tied to entertaining.
Best positioned directly between the kitchen and dining room.
Beverage and bar service
Wine storage, a beverage fridge, glassware, and bar tools.
Increasingly common as a primary pantry function.
Suited to households that entertain with drinks service regularly.
Small appliance parking
The coffee maker, stand mixer, and other daily appliances better kept out of the main kitchen’s sightline.
Addresses the counter-clutter problem directly.
Requires adequate counter space and nearby outlets.
Overflow food storage
Bulk pantry goods, backup supplies, and small appliances too large for kitchen cabinets.
The most functional, least glamorous role.
Still worth designing with the same care as the more visible functions.
1. The Single-Wall Galley Pantry
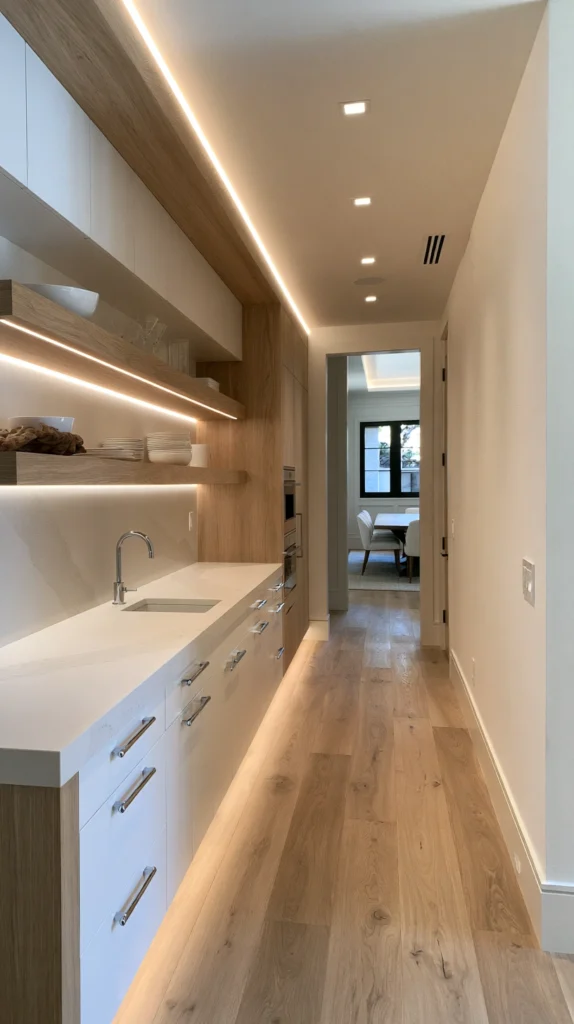
A narrow pantry built along one wall of a hallway or small connecting room, fitted with base cabinets, upper shelving, and a section of counter, requiring the smallest possible footprint.
Why a single-wall layout suits most standard home footprints
Not every home has room for a full secondary room, but most have a hallway or awkward connecting space between the kitchen and dining room that a single-wall pantry can occupy without requiring new square footage.
The cabinetry
Base cabinets with drawer storage below, upper cabinets or open shelving above, running the wall’s full length rather than a shorter, partial run.
The counter
A continuous counter surface along the same wall, providing the staging and prep space this compact layout still needs to function properly.
The width requirement
A minimum of roughly 3 feet of clearance in front of the cabinetry, enough for one person to comfortably work and pass through simultaneously.
The connection
Positioned directly on the path between the kitchen and dining room, so its narrow footprint is naturally walked through rather than requiring a deliberate detour to access.
The lighting
Under-cabinet lighting along the counter, since a narrow single-wall space often lacks the natural light a fuller room would receive.
Cost breakdown: Base and upper cabinetry: $2,500–6,000 Counter surface: $600–1,500 Under-cabinet lighting: $100–250 Total: $3,200–7,750
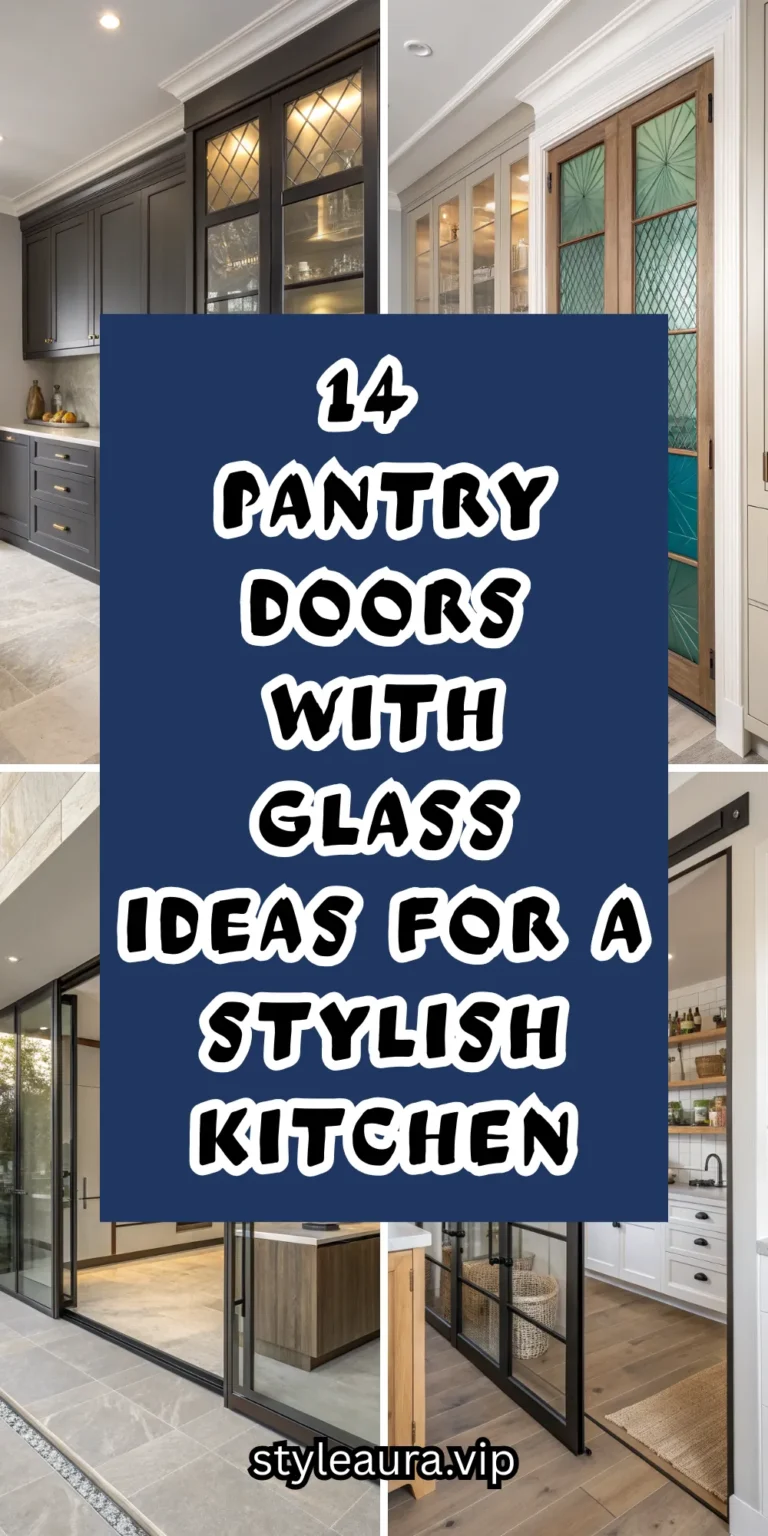
2. The Glass-Front Display Cabinet Wall

A butler’s pantry built around a wall of glass-front cabinets, displaying fine china, glassware, and serveware rather than concealing it behind solid doors.
Why glass-front storage suits a pantry’s more visible, semi-formal role
Unlike a kitchen’s everyday cabinets, a butler’s pantry often houses genuinely attractive serving pieces — the good china, the crystal glassware — worth displaying rather than hiding.
The cabinetry
Glass-front upper cabinets, either clear or lightly frosted glass, paired with solid base cabinets below for less visually appealing storage.
The interior lighting
Small LED strip lighting inside each glass-front cabinet, illuminating the displayed dishware even when the room’s main lights are off.
The curated display
Dishware arranged with the same intentional styling principles used for open kitchen shelving — varied heights, occasional negative space, rather than every shelf packed edge to edge.
The backing
A painted or wallpapered interior back panel behind the glass, in a color that makes the displayed china and glassware stand out clearly.
The base cabinet contrast
Solid doors below holding less visually appealing storage — bulk supplies, small appliances — keeping the display cabinets’ contents the room’s clear visual focus.
Cost breakdown: Glass-front cabinetry: $3,000–7,000 Interior LED lighting: $150–300 Total: $3,150–7,300
3. The Beverage and Wine Bar Pantry
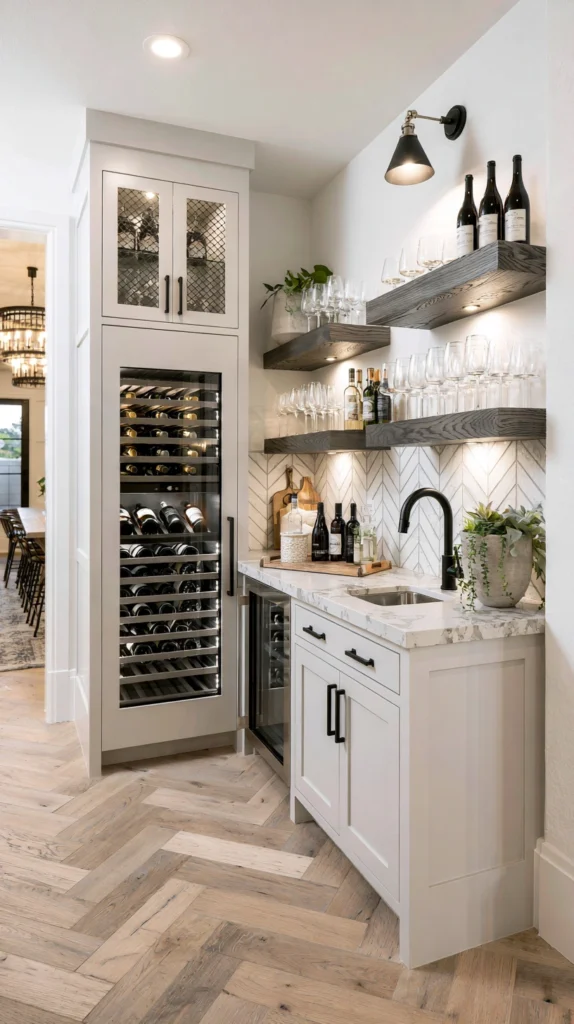
A butler’s pantry organized primarily around drink service — a wine fridge, an ice maker, glassware storage, and a small bar counter — functioning as the home’s dedicated entertaining bar.
Why a beverage-focused pantry suits a household that entertains regularly
Drink service during a gathering creates its own particular clutter — bottles, ice, mixers, glassware — that a dedicated bar zone contains far more effectively than scattering the same items across the kitchen counter.
The wine storage
A built-in wine fridge or a wall-mounted wine rack, sized to the household’s actual collection rather than an oversized unit that outstrips real need.
The ice and mixers
A small ice maker or a simple ice bucket station, alongside a shelf or small refrigerator section for mixers, garnishes, and bar syrups.
The glassware
Open or glass-front shelving specifically for stemware and bar glasses, positioned at a height convenient for reaching mid-conversation during a gathering.
The bar counter
A short stretch of counter dedicated to mixing and pouring, ideally with a small sink for rinsing glasses without returning to the main kitchen sink.
The tool storage
A small drawer or crock for bar tools — a shaker, jigger, muddler — kept together rather than mixed in with general kitchen utensils.
Cost breakdown: Wine fridge: $400–1,200 Cabinetry and counter: $1,500–3,500 Small bar sink: $300–700 Glassware shelving: $200–500 Total: $2,400–5,900
4. The Coffee and Breakfast Station Pantry
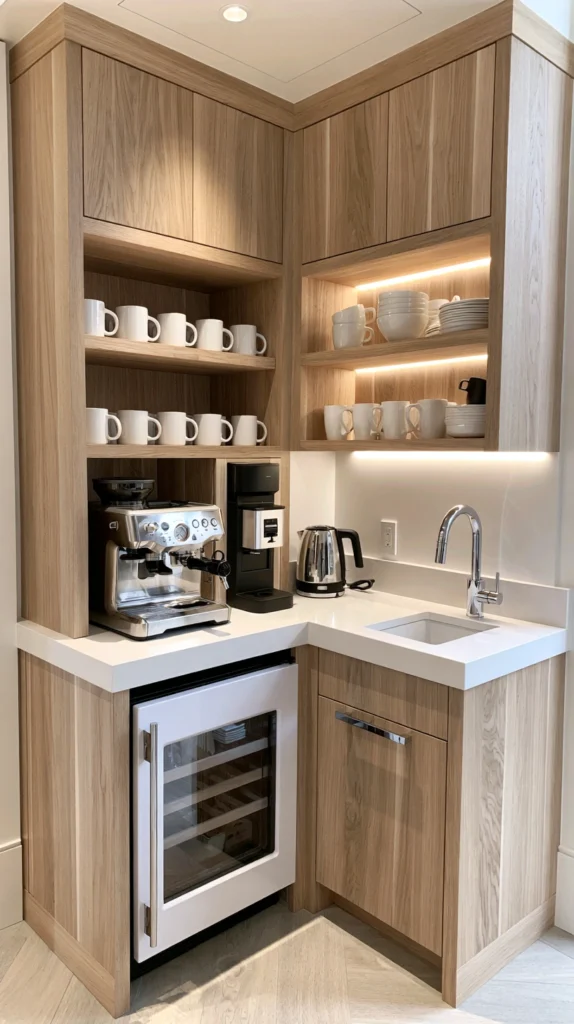
A pantry zone specifically dedicated to coffee and breakfast service — a coffee maker, mugs, syrups, and pastries — keeping the morning routine’s clutter out of the main kitchen entirely.
Why a dedicated coffee zone solves a genuinely common daily friction point
The coffee maker, grinder, mugs, and related supplies are used every single morning, yet they clutter the main kitchen counter for the rest of the day if there is no dedicated spot for them elsewhere.
The appliances
The coffee maker, an electric kettle, and a grinder, plugged in and left permanently in place on a dedicated section of pantry counter.
The mug storage
Open shelving or hooks for everyday mugs, positioned directly above or beside the coffee station for immediate reach each morning.
The supply storage
Coffee, tea, sugar, and syrups stored in matching canisters or small labeled bins, kept organized and visible rather than scattered across a kitchen cabinet.
The small fridge option
A small under-counter refrigerator for milk and creamer, avoiding a daily trip to the main kitchen fridge for the morning routine’s most frequent need.
The daily habit
Positioned so the entire morning coffee routine — grind, brew, pour, add milk — happens in one contained zone, without needing to touch the main kitchen at all.
Cost breakdown: Coffee station cabinetry and counter section: $800–2,000 Small under-counter fridge: $300–600 Canisters and mug storage: $60–150 Total: $1,160–2,750
5. The Walk-Through Connector Pantry
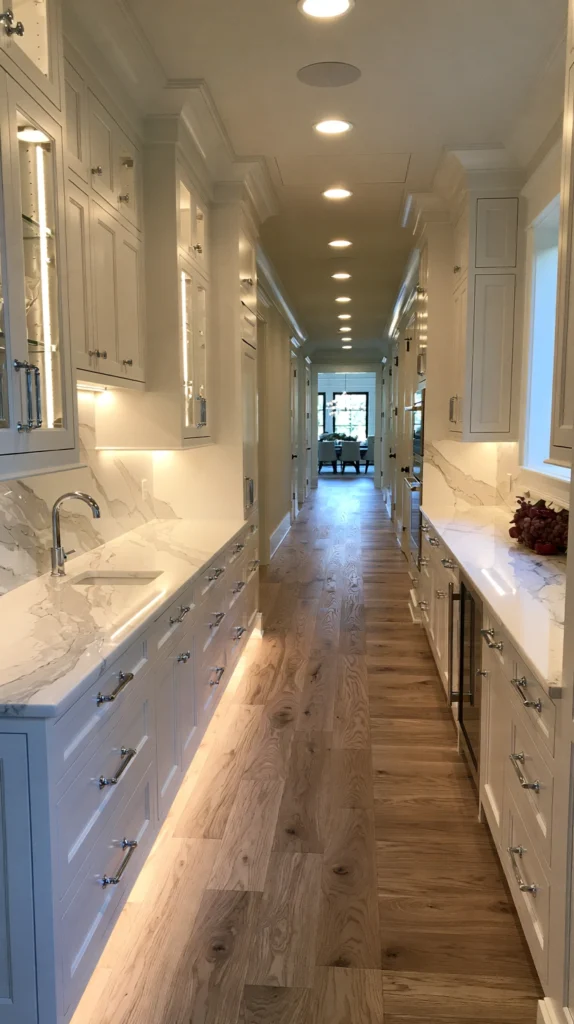
A butler’s pantry designed as a genuine walk-through passage between the kitchen and dining room, with storage and counter space lining both sides of the path.
Why a walk-through design suits an open-concept home specifically
In a home where the kitchen and dining room are already physically separate rooms, a walk-through pantry uses the necessary connecting hallway as functional space, rather than as wasted circulation area alone.
The layout
Cabinetry and counters along both walls of the connecting hallway, with a clear walking path maintained down the center.
The width requirement
A minimum of 42 to 48 inches of total width, providing enough clearance for both the flanking storage and comfortable two-way foot traffic during a meal service.
The dual-sided storage
One side dedicated more to dishware and serving pieces near the dining room end, the other side more toward food storage and small appliances near the kitchen end, reflecting the natural flow of use.
The lighting
Overhead and under-cabinet lighting throughout, since a walk-through passage is used constantly and briefly rather than lingered in, making good task lighting more important than ambient mood lighting alone.
The flooring continuity
Flooring that continues from either the kitchen or dining room, reinforcing the sense that this is a connected passage rather than a separate destination room.
Cost breakdown: Cabinetry (both walls): $4,000–9,000 Counters (both walls): $1,200–3,000 Lighting: $200–500 Total: $5,400–12,500
6. The Small Appliance Garage Annex
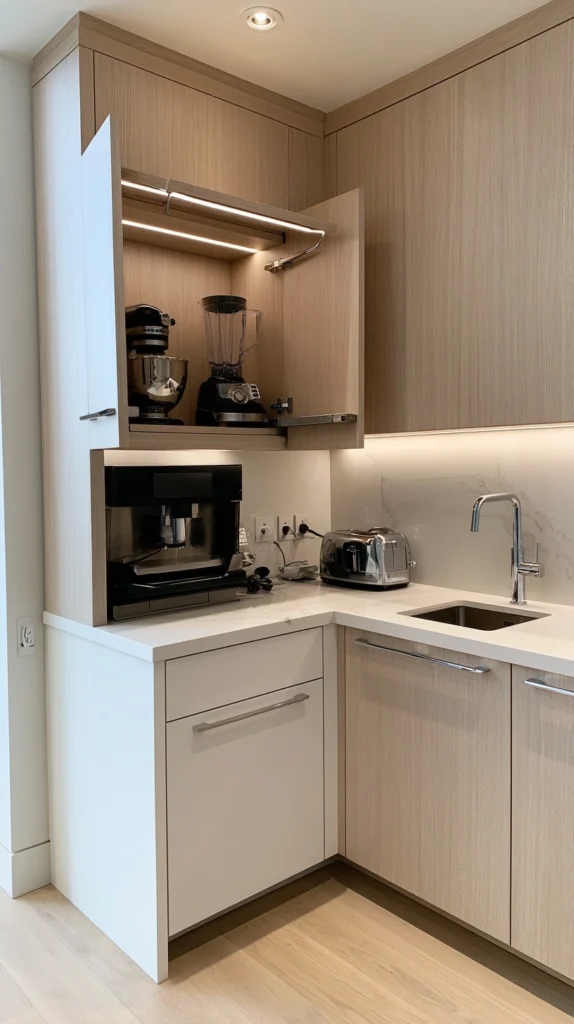
A butler’s pantry built specifically to house the household’s small appliances — stand mixer, food processor, blender, toaster — freeing the main kitchen counter entirely of daily-use equipment.
Why relocating appliances to the pantry solves the counter clutter problem directly
Small appliances are almost never beautiful objects in their own right, and no amount of kitchen counter styling fully compensates for a stand mixer and food processor sitting in view all day.
The appliance shelving
Deep, sturdy shelving or a pull-out shelf system, sized specifically to the household’s actual appliance collection rather than generic pantry shelving.
The outlet placement
Outlets installed directly at appliance shelf height, allowing items to remain plugged in and ready for use rather than needing to be unplugged and moved for every use.
The heavy item consideration
A stand mixer or other particularly heavy appliance positioned on a lower, sturdier shelf or a pull-out shelf at counter height, avoiding the need to lift a heavy item down from an elevated position regularly.
The main kitchen benefit
The kitchen counter itself left entirely clear of daily-use appliances, addressing the counter styling challenge many kitchens face without requiring any change to the kitchen’s actual design.
The proximity
Close enough to the kitchen that retrieving an appliance for actual use remains quick and convenient, rather than so far removed that the appliances simply go unused.
Cost breakdown: Deep shelving or pull-out system: $300–800 Additional outlets: $150–400 Total: $450–1,200
7. The Open Shelving and Basket Storage Pantry
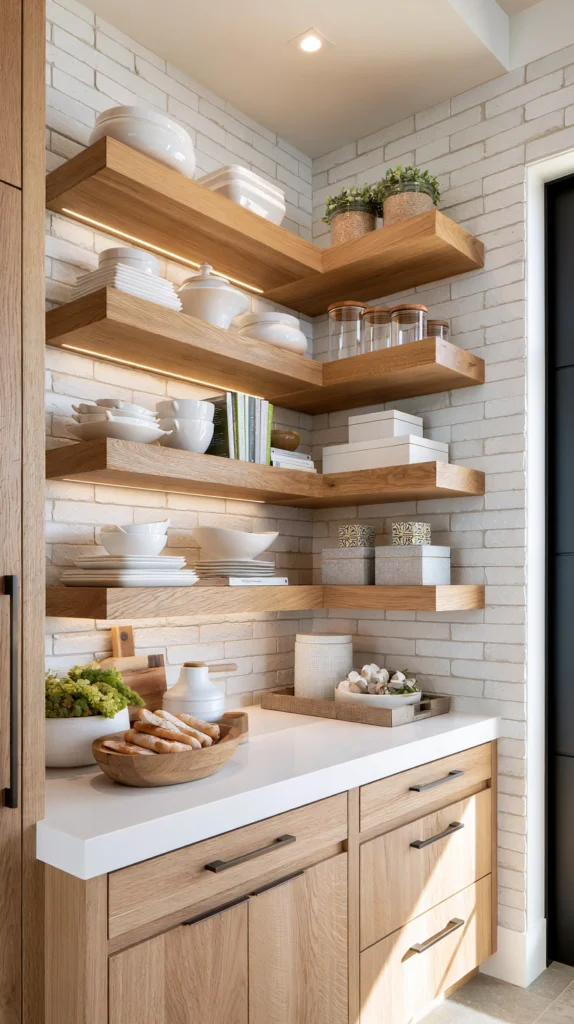
A more casual, farmhouse-leaning pantry design using open wood shelving and woven baskets rather than closed cabinetry, for a warmer, more textured look than a fully cabineted room.
Why open shelving suits a pantry differently than it suits a main kitchen
A butler’s pantry, used less constantly than the main kitchen, can tolerate a more relaxed, open storage approach without the same daily visual clutter concern that open shelving can create in a heavily trafficked cooking space.
The shelving
Solid wood shelves, either built-in or a freestanding shelving unit, running the pantry’s available wall space.
The baskets
Woven baskets and bins grouping smaller items — napkins, extra linens, snack supplies — that would look disorganized displayed loosely on open shelving without a container.
The labeling
Small tags or labels on baskets and jars, both functional for quickly locating specific items and part of the room’s overall styled, considered appearance.
The mixed materials
Ceramic canisters, glass jars, and woven baskets together, echoing the same material-mixing principle used in any well-styled open storage display.
The lower shelf practicality
Heavier or less attractive bulk items kept on lower shelves, reserving the more visible upper shelves for the room’s better-looking storage pieces.
Cost breakdown: Wood shelving: $200–500 Baskets and bins (assorted): $60–150 Canisters and jars: $30–80 Total: $290–730
8. The Prep Sink and Second Water Source
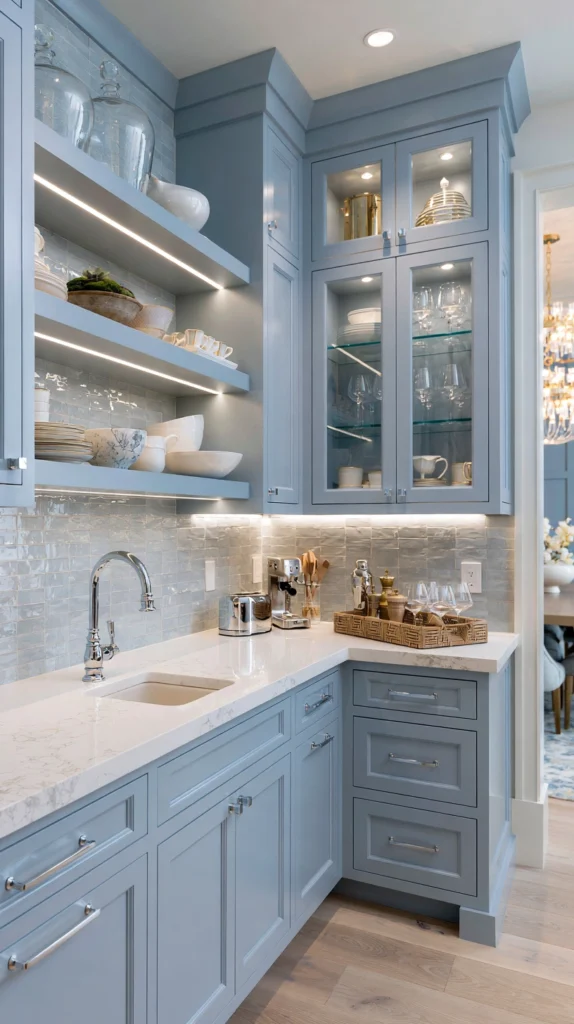
A butler’s pantry fitted with its own small prep or bar sink, providing a second water source independent of the main kitchen sink during cooking or entertaining.
Why a second sink meaningfully reduces kitchen bottlenecks
During active cooking or a gathering, the main kitchen sink is frequently occupied — washing produce, rinsing dishes, filling a pot — creating a bottleneck for anyone needing water for a separate task at the same moment.
The sink
A small single-basin prep or bar sink, sized appropriately for rinsing glassware or filling a pitcher rather than a full-scale second kitchen sink.
The plumbing consideration
Requires running new plumbing lines to the pantry location, typically the single largest cost driver in this specific upgrade, worth planning during a broader renovation when walls are already open.
The faucet
A simple, functional faucet, matched in finish to the main kitchen’s fixtures for visual consistency between the two spaces.
The use cases
Rinsing serving dishes before storage, filling a vase or pitcher, or handling bar service without returning repeatedly to the busy main kitchen sink during a gathering.
The drainage
Proper drainage connection to the home’s existing plumbing system, requiring professional installation rather than a DIY approach given the plumbing work involved.
Cost breakdown: Small prep or bar sink: $200–500 Plumbing installation: $1,500–3,500 Faucet: $100–300 Total: $1,800–4,300
9. The Built-In Buffet and Serving Counter

A section of counter in the butler’s pantry designed and positioned specifically for staging a buffet-style meal, directly accessible from the dining room.
Why a dedicated buffet counter improves the actual mechanics of hosting
Without a defined staging counter, a buffet-style meal ends up spread across whatever surface is available — a kitchen island already needed for cooking, or a dining table also needed for seating. A dedicated counter solves this directly.
The counter placement
Positioned with direct, unobstructed access from the dining room, ideally along the same wall the pantry shares with that room, minimizing the distance food travels from stove to serving counter to table.
The counter length
Sized generously enough to hold multiple serving dishes simultaneously, accounting for the household’s actual typical gathering size rather than only everyday, non-entertaining use.
The warming option
A built-in warming drawer beneath the counter, keeping food at serving temperature during a longer, more leisurely holiday-style meal.
The outlet placement
Outlets built into the counter’s backsplash for slow cookers, warming trays, or a coffee station during dessert service.
The everyday use
Doubling as additional prep or landing space during non-entertaining periods, ensuring the counter earns its place in the room’s everyday function, not only during occasional larger gatherings.
Cost breakdown: Buffet counter construction: $1,000–2,500 Warming drawer: $600–1,200 Additional outlets: $100–250 Total: $1,700–3,950
10. The China and Linen Storage Wall
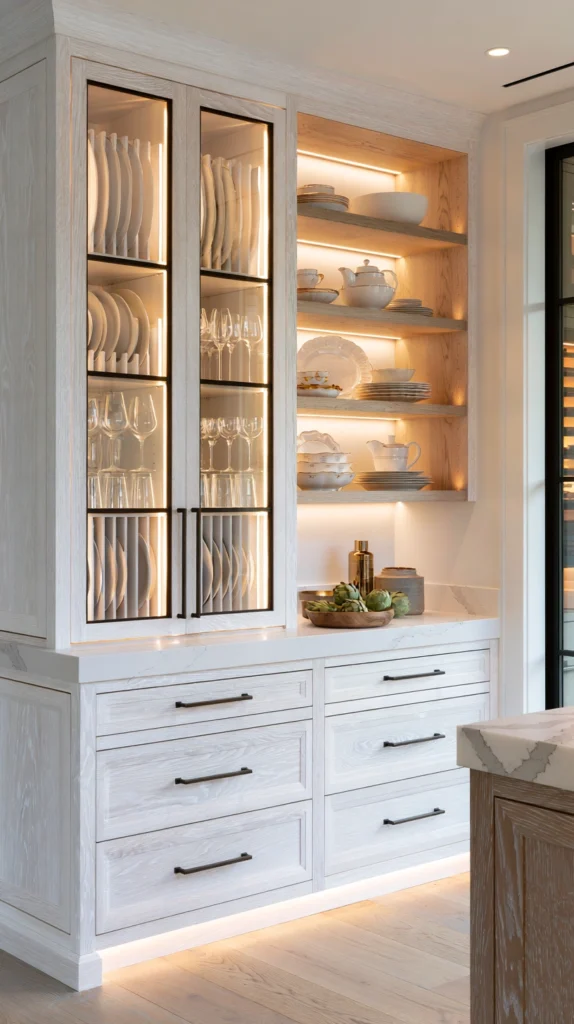
A wall of specialized storage — plate racks, stemware holders, and drawer inserts for table linens — built specifically around the dimensions and needs of formal dining pieces.
Why generic cabinetry often fails formal dining storage specifically
Standard kitchen cabinets are sized for everyday dishware and cookware, not for the taller stacks, more delicate stemware, or flat linens formal entertaining pieces require — purpose-built storage solves problems generic cabinetry creates.
The plate storage
Vertical plate racks or dividers, sized specifically to the household’s good china dimensions, preventing the stacking and potential chipping risk of storing formal plates the way everyday dishware is stored.
The stemware storage
Hanging stemware racks or dedicated upper cabinet shelving with stemware-specific dividers, protecting delicate glass from the chip risk of standing pieces directly against each other.
The linen storage
Wide, shallow drawers sized for folded tablecloths and napkins, avoiding the deep creasing that comes from storing large linens in a standard, narrower drawer.
The silver storage
A felt-lined drawer or a dedicated silver chest section, protecting silver flatware and serving pieces from the tarnishing that unprotected storage accelerates.
The inventory approach
Storage sized and planned around the household’s actual specific collection, measured before cabinetry is built rather than fitted afterward to whatever generic shelving happens to be installed.
Cost breakdown: Custom plate racks and dividers: $300–700 Stemware storage: $200–500 Linen drawers: $400–900 Silver storage drawer: $150–400 Total: $1,050–2,500
11. The Mudroom-Adjacent Combination Pantry
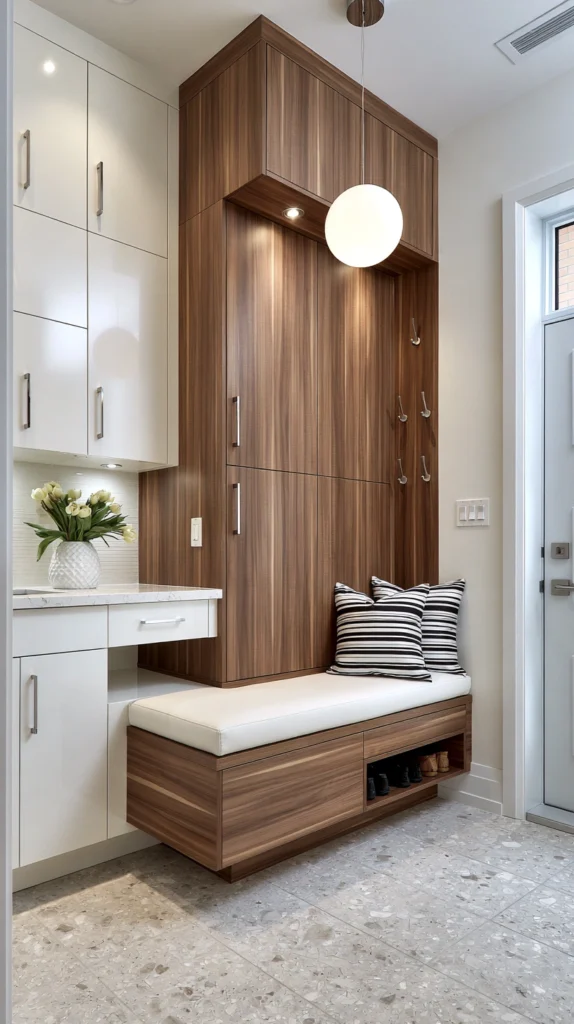
A butler’s pantry positioned adjacent to or combined with a mudroom or back entry, serving double duty as both kitchen overflow storage and household drop-zone.
Why combining these two functions can work well in a home with limited additional square footage
Not every home has room for a dedicated butler’s pantry and a separate mudroom. Combining the two into adjacent or overlapping space makes efficient use of a single area for two related household functions.
The zoning
A clear division within the shared space — pantry cabinetry and counter on one side, hooks, bench, and shoe storage on the other — even without a physical wall separating the two functions.
The shared entry
Positioned near the home’s back or side door, serving as both the entry point for groceries heading into pantry storage and the household’s everyday coming-and-going traffic.
The flooring
A durable, easily cleaned material throughout, since this combined space handles both kitchen-adjacent tasks and the dirt and moisture typical of a mudroom entry.
The storage split
Upper cabinets and pantry-style shelving for kitchen overflow, lower cubbies and hooks for shoes, bags, and outerwear, keeping the two functions organized within the same room.
The traffic flow
Wide enough clearance to accommodate both grocery unloading and daily foot traffic without one function regularly interfering with the other.
Cost breakdown: Pantry-side cabinetry: $1,500–3,500 Mudroom-side storage (hooks, bench, cubbies): $500–1,200 Flooring: $400–900 Total: $2,400–5,600
12. The Appliance Garage With Roll-Top Doors

A section of the pantry counter fitted with a tambour or roll-top door, concealing small appliances and countertop clutter behind a closing surface without requiring a full separate room.
Why a roll-top solution suits a pantry with limited depth for a full appliance closet
Where the pantry itself is fairly narrow, a roll-top garage achieves appliance concealment within the same counter footprint already planned, rather than requiring additional dedicated appliance closet space.
The tambour door
A wood or metal slatted roll-top door, sliding up and back to reveal the appliances stored beneath, then rolling back down to conceal them when not in use.
The outlet access
Power outlets installed inside the garage space itself, allowing appliances to remain plugged in and functional even with the door closed.
The sizing
Built to the specific dimensions of the appliances intended for the space, checked before construction rather than assumed, since roll-top garages have less forgiving tolerances than open shelving.
The everyday versus occasional use
Frequently used appliances like a coffee maker sometimes kept accessible outside the garage, reserving the concealed space for less constantly used items like a stand mixer or food processor.
The visual benefit
The pantry counter reading as clean and uncluttered when the garage door is closed, with genuine function still available immediately behind it.
Cost breakdown: Tambour door mechanism and installation: $400–900 Outlet installation: $100–250 Total: $500–1,150
13. The Floor-to-Ceiling Bulk Storage Wall
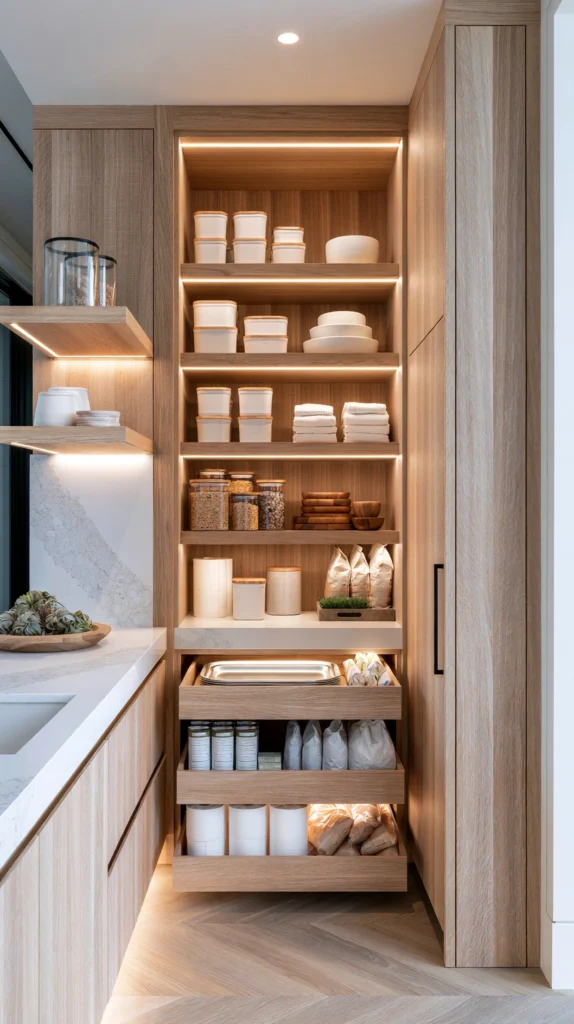
A wall of tall, deep cabinetry specifically designed for bulk pantry goods — large packages, backup supplies, bulk purchases — providing the practical storage volume a household’s everyday kitchen pantry cannot accommodate.
Why bulk storage deserves its own dedicated design consideration
Bulk goods — cases of water, large packages from a warehouse store, backup supplies — are rarely beautiful and rarely need to be, but they do need genuine, well-organized volume that most kitchen pantries were never designed to hold.
The shelving depth
Deeper shelving than typical kitchen cabinetry, sized to accommodate large packaging and bulk containers rather than the shallower depth suited to everyday dishware.
The height utilization
Shelving running the full available wall height, using a small step stool for the highest shelves, maximizing storage volume within the room’s existing footprint.
The organization system
Clear bins or labeled sections by category — paper goods, canned goods, backup toiletries — keeping a genuinely large volume of stored material navigable rather than a single undifferentiated mass.
The rotation practice
Newer purchases placed behind older stock, a simple first-in-first-out system ensuring bulk goods actually get used before expiring or becoming stale.
The weight consideration
Heavier items stored on lower shelves, both for genuine ease of access and for basic safety, avoiding heavy bulk packages stored at a height where they could be difficult or risky to retrieve.
Cost breakdown: Floor-to-ceiling shelving: $600–1,500 Bins and labeling system: $60–150 Total: $660–1,650
14. The Powder Room-Adjacent Elegant Pantry

A more formally styled butler’s pantry, finished with wallpaper, a statement light fixture, and decorative hardware, positioned near a powder room or the main entrance to guest circulation areas.
Why some pantries deserve more decorative attention than others
A butler’s pantry positioned along a path guests actually walk — toward a powder room, or visible from the dining room — benefits from the same design attention given to any other guest-visible space, rather than being treated as purely back-of-house.
The wallpaper
A bold or richly patterned wallpaper, since a pantry’s smaller wall sections and shorter sightlines can support a more dramatic pattern than a full-sized room might comfortably hold.
The lighting fixture
A statement pendant or small chandelier, elevating the room’s finish level beyond a purely utilitarian light source.
The hardware
Brass or aged bronze cabinet hardware, matched to the home’s broader hardware finish for consistency between the pantry and the more visible rooms it connects.
The countertop material
A genuine stone or high-quality quartz counter, rather than a more utilitarian laminate, since this pantry’s visibility to guests justifies the same material investment given to the main kitchen.
The guest-facing consideration
Kept tidier and more consistently styled than a fully back-of-house pantry might require, since this version is genuinely part of the home’s guest-visible circulation rather than hidden entirely from view.
Cost breakdown: Wallpaper: $80–200 Statement light fixture: $150–400 Brass hardware: $100–250 Stone or quartz counter: $800–2,000 Total: $1,130–2,850
15. The Complete Butler’s Pantry (The Fully Functional Annex)
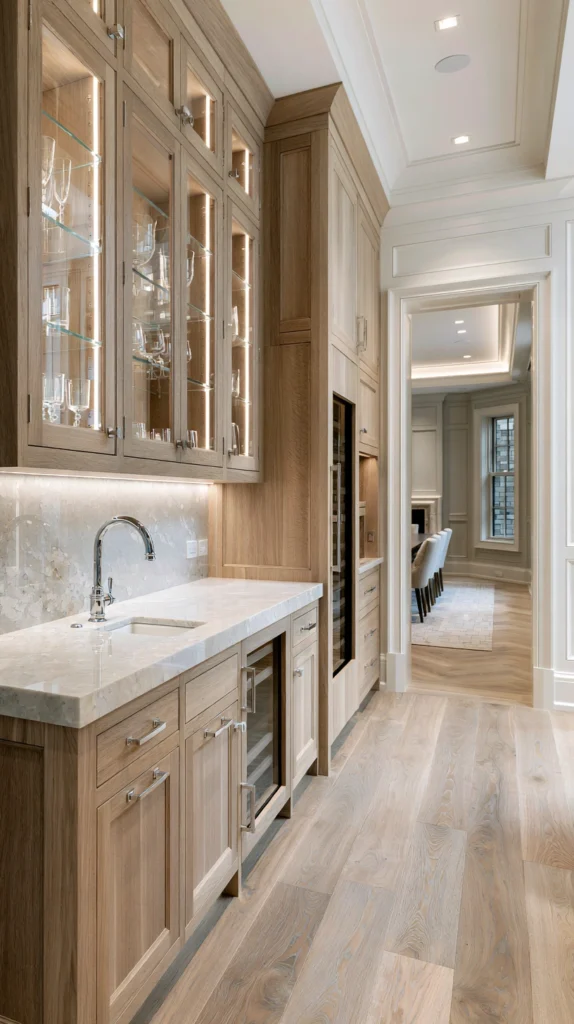
A complete butler’s pantry combining several of the approaches above — dedicated storage zones, a staging counter, a small prep sink, and considered finishes — designed as a genuine functional extension of the kitchen rather than simply overflow storage.
What separates the complete pantry from a single wall of extra cabinets
A wall of extra cabinets: helpful, but limited. A complete butler’s pantry: a genuinely multi-functional room, handling storage, staging, bar service, and small appliance parking simultaneously, freeing the main kitchen to focus purely on cooking.
The elements of the complete butler’s pantry
The storage
A mix of glass-front display cabinets for good china and closed cabinetry for bulk goods and less attractive storage.
The staging counter
A dedicated stretch of counter positioned between the kitchen and dining room, used for plating and organizing food before service.
The water source
A small prep or bar sink, reducing bottlenecks at the main kitchen sink during cooking and entertaining alike.
The beverage station
Wine storage and a small bar setup, handling drink service independently of the main kitchen.
The appliance parking
A dedicated shelf or garage for the stand mixer, food processor, and other daily appliances, keeping the main kitchen counter clear.
The finishes
Considered lighting, hardware, and counter material, reflecting the room’s visibility to guests as much as its purely functional role.
The complete design in action
A holiday gathering:
2pm: Backup supplies and extra folding chairs retrieved from the bulk storage wall, the good china pulled from the glass-front cabinets for the first time since last year.
4pm: Dishes plated at the staging counter, the main kitchen still fully occupied with the last of the cooking, neither space interfering with the other.
5pm: Drinks poured at the small bar station, ice and glassware all within reach, no one needing to cross into the busy kitchen for a refill.
7pm: The buffet counter holding the full spread, guests serving themselves directly from the pantry rather than crowding the kitchen itself.
The complete butler’s pantry: not simply more storage, but a second working room that lets the kitchen do one job — cooking — exceptionally well, because everything else has somewhere else to happen.
Cost breakdown for the complete pantry: Assuming a starting point of an empty connecting space: Storage cabinetry (mixed glass-front and closed): $3,500–7,500 Staging counter: $1,000–2,000 Small prep sink and plumbing: $1,800–4,300 Beverage and bar station: $1,000–2,500 Appliance shelving: $300–700 Lighting and hardware: $250–650 Total: $7,850–17,650
Phased over a renovation timeline:
Phase one: Cabinetry and general storage, the foundational layer every other function builds on
Phase two: The staging counter and appliance parking, addressing the most immediate kitchen overflow needs
Phase three: The prep sink, beverage station, and finishing details, completing the room’s full functional range
The complete butler’s pantry: not an incidental extra room, but a genuine second half of the kitchen’s total working capacity, planned with the same intention as the kitchen itself.
The Question Before Any Butler’s Pantry Design
Before choosing a layout, a storage system, a finish level:
What is the primary function this space needs to serve?
If the answer is: overflow storage for dishware and bulk goods — the china and linen storage wall or the floor-to-ceiling bulk storage design.
If the answer is: easier hosting and entertaining — the built-in buffet counter or the beverage and bar pantry.
If the answer is: decluttering the main kitchen counter — the small appliance garage or the roll-top tambour design.
If the answer is: the space is genuinely tight — the single-wall galley layout, sized to whatever connecting hallway or awkward space already exists.
The design follows the household’s actual overflow problem, more than any single design trend. Every idea on this list solves a different piece of what a kitchen alone cannot handle. The question is which specific overflow — storage, staging, bar service, or appliance clutter — matters most for this particular household.
The single wall of extra cabinets in an existing hallway: still meaningfully frees up the main kitchen. The complete annex, planned with intention: a kitchen that finally has room to simply cook, because everything else has its own place to happen.
That freedom: the whole point of building a butler’s pantry in the first place.
Getting Started This Weekend
The immediate butler’s pantry step:
Identify the specific overflow problem the kitchen currently has.
Too many dishes with nowhere to go, too much appliance clutter, or no real staging space during a party — the answer determines which of the fifteen approaches actually fits.
Measure the connecting space already available, whether a hallway, a closet, or an awkward nook.
Most homes already have some version of this space; the question is whether it is currently being used for anything at all.
Sort what would actually move into the new space before designing any cabinetry.
The good china, the stand mixer, the bar tools — knowing what needs a home shapes the layout far more usefully than a generic pantry plan would.
Start with the single function causing the most daily friction.
The rest of the design: the elaboration of this moment.
The overflow: the beginning. The butler’s pantry: what gets built to hold it.