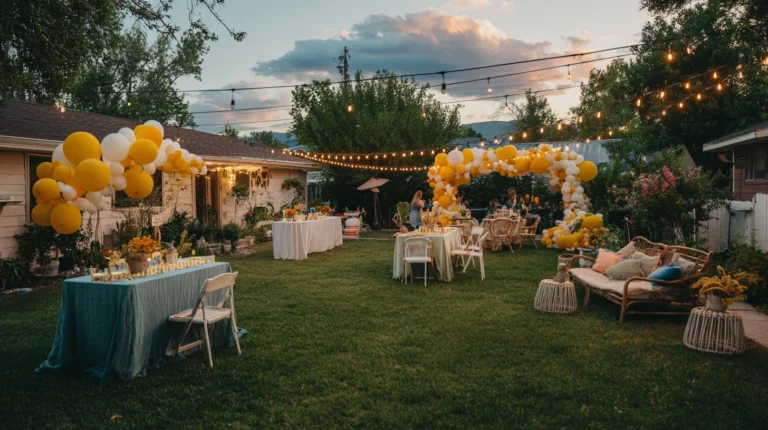
14 Gorgeous Backyard Party Decoration Ideas for Every Occasion
My first backyard party looked exactly like what it was: folding tables, a few balloons taped to the fence, and string lights bought the day before because someone mentioned the yard looked bare at dusk. It worked, technically. It did not feel like an event.
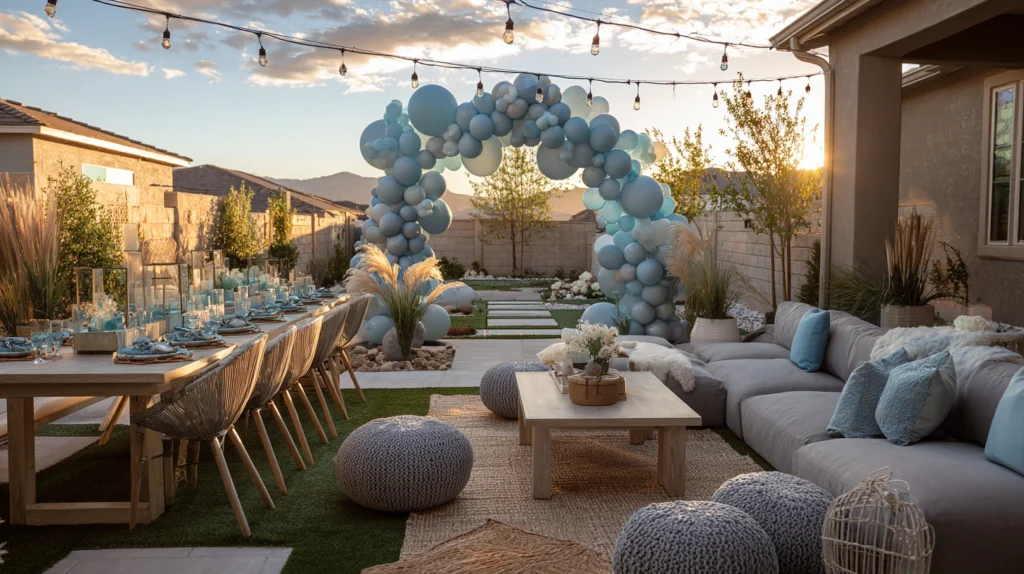
I kept assuming great party decor meant either an expensive rental company or hours of elaborate DIY. Neither was actually true. The parties that genuinely looked pulled together shared a few specific techniques: a defined focal point, consistent color throughout, and layers of texture at different heights.
Once I started applying those same techniques to my own backyard gatherings, birthday parties, a graduation, a casual Friday dinner, the difference showed up immediately in the photos and, more importantly, in how guests actually behaved. People lingered instead of hovering near the exit.
Here are 14 backyard party decoration ideas that work across occasions, built around the same principles event designers rely on every time.
Why Most Backyard Party Decor Falls Flat
The common mistakes:
The scattered, no-theme approach:
- Decorations purchased individually with no coordinating color or style
- A mix of leftover items from previous parties, none of them relating to each other
- A yard that looks decorated but not designed, more clutter than celebration
- Missing the cohesion that makes even simple decor read as intentional
The single-focal-point-only setup:
- All decorative effort concentrated on one element, like a balloon arch, with nothing else addressed
- The rest of the yard left in its everyday, undecorated state
- A jarring contrast between the one styled area and everything surrounding it
- Missing the layered approach that makes a whole space feel transformed, not just one corner
The daytime-only planning:
- Every decorating decision made based on how the space looks in daylight
- No lighting plan for when the party inevitably extends into evening
- A beautifully decorated yard that loses all its impact the moment the sun sets
- Missing the reality that many backyard parties are most memorable after dark
What a successful backyard party decoration plan does:
Creates cohesion through repetition and color:
- A consistent color palette carried across every decorative element
- Multiple focal points working together rather than one isolated highlight
- Lighting planned as thoroughly as any daytime decor
- A yard that feels transformed as a whole, not just decorated in patches
My revelation: The techniques that make backyard party decor look professional are about consistency and layering, not about spending more. The same three or four colors and materials repeated throughout the space outperform a much larger, less coordinated collection every time.
1. The Color-Coordinated Balloon Garland
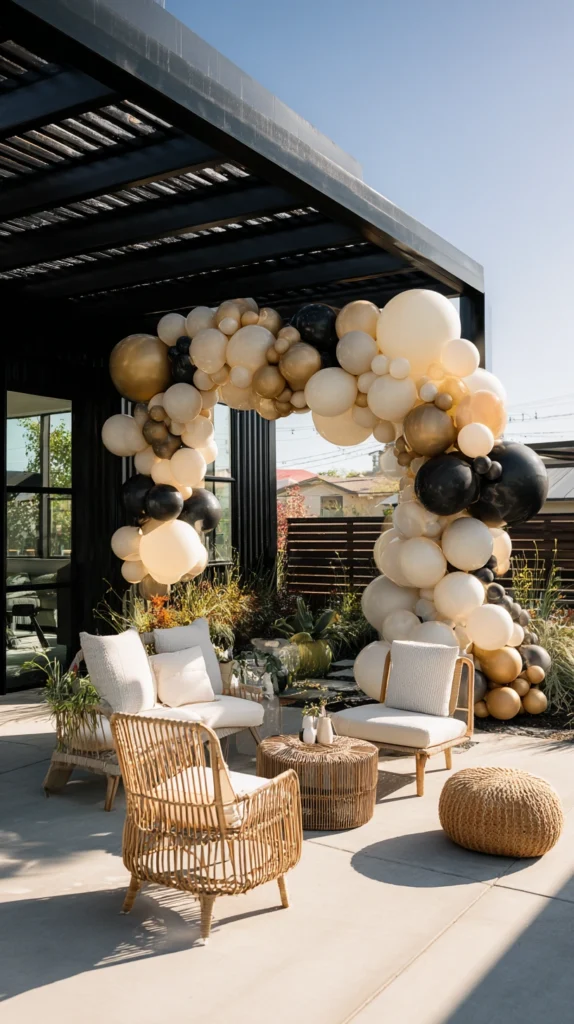
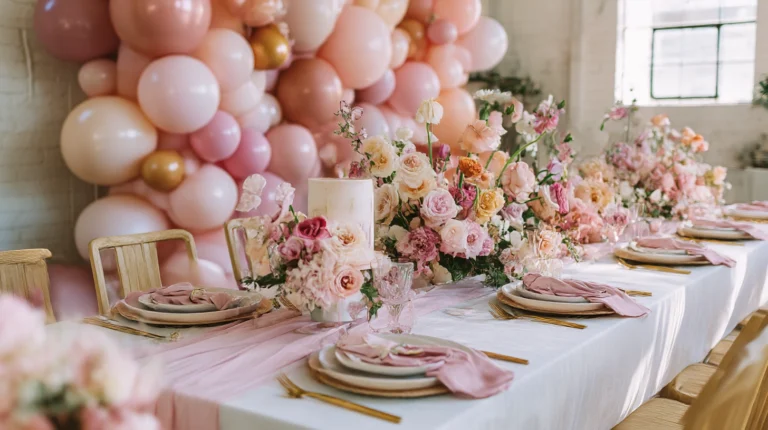
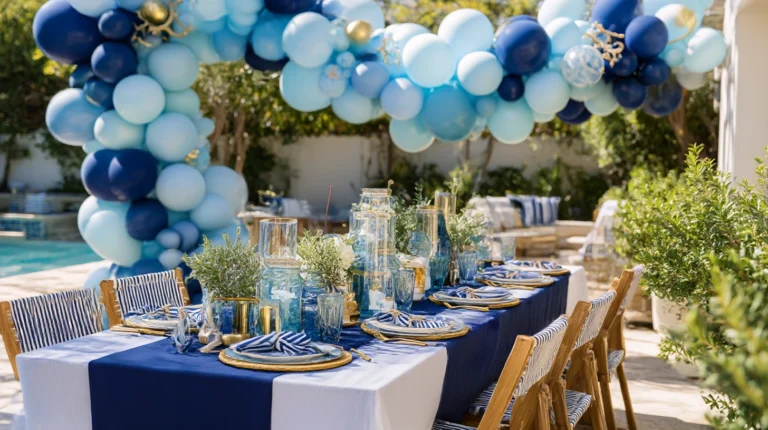
An organic-shaped balloon garland, built from a coordinated color palette rather than a single solid color, positioned as the party’s main visual anchor.
My scattered balloon bunches:
What I had:
- A handful of mismatched balloon bunches tied to chairs and fence posts around the yard
- No coordinated color story tying any of them together
- A festive but genuinely chaotic-looking result rather than a cohesive one
The balloon garland discovery:
Why an organic garland outperforms scattered bunches:
- A garland built from three to four coordinated colors and varied balloon sizes reads as genuinely designed
- Serves as an immediate, unmistakable focal point for photos and general orientation within the party
- The organic, clustered shape looks significantly more current and polished than uniform balloon bouquets
- One of the most transformative single additions available for a relatively modest cost
Building the garland:
Construction basics:
- A balloon garland strip or fishing line as the base structure
- Balloons in three to four coordinating sizes (5-inch, 11-inch, and jumbo) for genuine textural variation
- A palette of two to three main colors plus one metallic or neutral accent tone
- Clusters attached with balloon glue dots or the garland strip’s built-in attachment points
Placement strategy:
Where to position the garland:
- Framing an entry point, arch, or doorway into the party space
- Along a fence line as a backdrop for a dessert table or photo area
- Draped along a pergola or existing structure for a more integrated, built-in look
Cost:
- Balloon garland kit (strip, pump, glue dots): $15-25
- Assorted balloons (60-100 count for a substantial garland): $20-40
- Total: $35-65
My color-coordinated balloon garland: Building one organic garland in dusty rose, cream, and gold, framing the dessert table, delivered more visual impact than the previous five scattered balloon bunches combined, at a comparable total cost.
Balloon Garland Tips
Limit the palette to three or four colors maximum:
Color restraint:
- A garland incorporating too many different colors can look busy rather than genuinely coordinated
- Three to four colors, including one metallic or neutral, consistently reads as more sophisticated
- This restraint is what separates a designed garland from simply a lot of balloons in one place
- Choose colors that also appear elsewhere in the party’s decor for genuine overall cohesion
Vary balloon size significantly throughout the garland:
Textural technique:
- A garland using only one balloon size looks flatter and less dynamic
- Mixing small, medium, and jumbo balloons creates the organic, clustered look currently associated with professional balloon design
- This size variation matters as much as the color choice for achieving a genuinely polished result
- Cluster balloons tightly together rather than spacing them evenly for the most current, natural-looking effect
2. The Layered Table Centerpiece
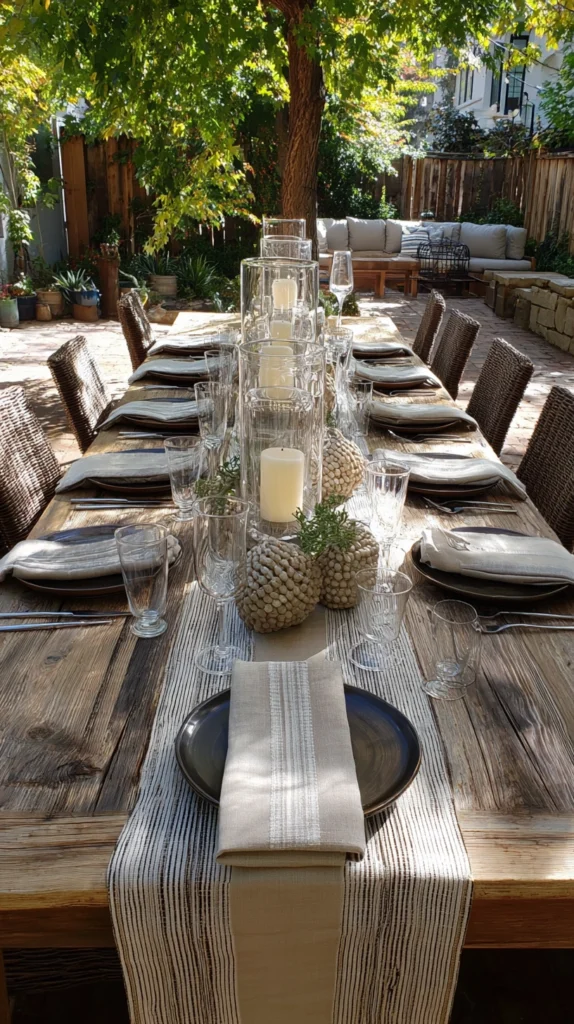
A dining or buffet table centerpiece built in distinct height layers, rather than a single flat arrangement, creating genuine dimension along the table’s length.
My flat, single-level table decor:
What was underwhelming:
- A single row of low centerpieces running down the table’s center, all at the same height
- A table that looked decorated but lacked any genuine visual depth
- A missed opportunity for the layered technique event designers consistently rely on
The layered centerpiece solution:
Why height variation transforms a table’s overall impact:
- Creates genuine visual rhythm and dimension along the table’s length, rather than one flat plane
- Allows guests seated across from each other to still see and converse without a tall obstruction directly in the sightline
- Mimics the layering technique used consistently in professional event and wedding table design
- A relatively achievable DIY technique delivering a noticeably more polished, considered result
Building the layered centerpiece:
Construction approach:
- Alternate tall and low elements down the table’s length, rather than uniform height throughout
- Tall elements: a substantial floral arrangement, a tall candlestick cluster, or a dramatic branch arrangement
- Low elements: a runner with scattered small votives, low floral clusters, or a scattering of fruit or greenery
- Position tall pieces where they will not block sightlines across the table’s width, typically alternating with low sections
Choosing materials for each layer:
Building cohesive height variation:
- Tall glass vases or candlesticks for height without excessive visual weight
- A table runner as the unifying base layer running the full table length
- Greenery, whether fresh or faux, woven through both tall and low elements for cohesion
Cost:
- Table runner: $15-35
- Candlesticks and votives: $20-60
- Floral or greenery elements: $30-100
My layered centerpiece: Alternating tall glass candlestick clusters with low scattered greenery and votives down the full table length gave the dinner party table a sense of genuine dimension that the previous single-height row of centerpieces never achieved.
Layered Centerpiece Tips
Confirm sightlines remain clear across the table’s width, not just along its length:
Guest experience consideration:
- Tall centerpieces positioned directly across from a seated guest can block conversation and eye contact
- Position the tallest elements to alternate with lower sections, ensuring every seat has at least one clear sightline
- This consideration matters as much as the centerpiece’s visual design for a genuinely successful table setup
- Sit at a few different table positions during setup to confirm sightlines before finalizing placement
Use a consistent runner or base layer to visually unify the varied heights:
Cohesion technique:
- Height-varied elements placed with no unifying base layer can look disconnected from each other
- A table runner running the full length ties the tall and low elements into one cohesive composition
- This unifying layer is what makes the height variation read as intentional design rather than a random assortment
- Choose a runner color and material coordinating with the party’s overall palette
3. The String Light Canopy
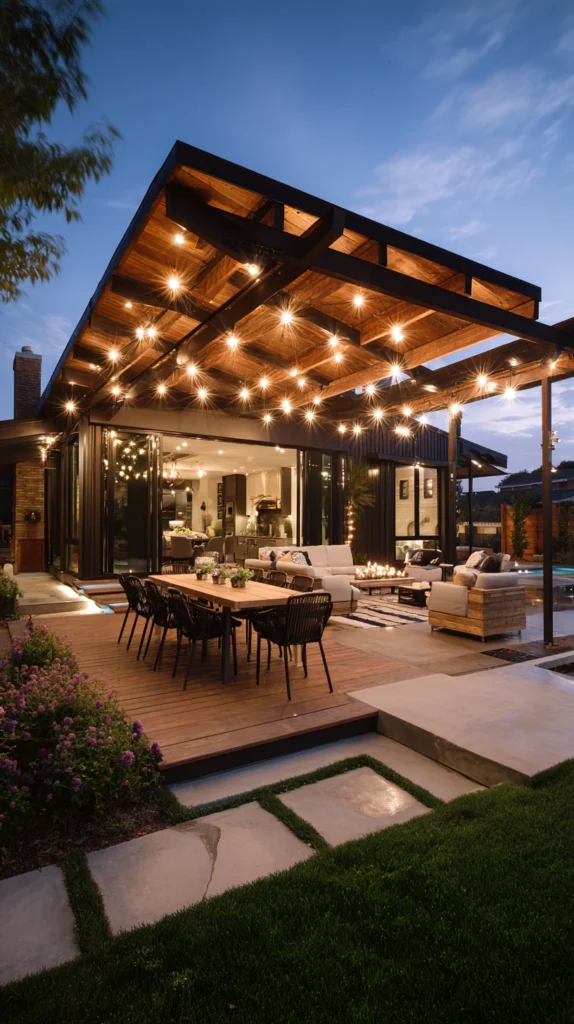
Overlapping strands of string lights, hung in a crisscrossing pattern above the main gathering area, creating a genuine overhead canopy effect.
My single strand of string lights:
What felt insufficient:
- One strand of lights hung along the fence, providing minimal actual illumination or atmosphere
- No sense of an overhead canopy, just a decorative line along one edge of the space
- A missed opportunity for the significantly more dramatic effect multiple overlapping strands provide
The string light canopy solution:
Why an overhead canopy delivers such outsized impact:
- Creates a defined, enclosed feeling over the gathering area, similar to being under a tent without the cost
- Multiple overlapping strands provide significantly more genuine illumination than a single perimeter strand
- One of the most consistently requested, most photographed backyard party decor elements available
- Transforms the party space’s evening atmosphere more dramatically than almost any other single addition
Building the canopy:
Installation approach:
- String multiple light strands from a central point outward to several surrounding anchor points, creating a crisscross pattern
- Anchor points can include trees, a pergola, fence posts, or temporary poles specifically installed for the party
- Allow a gentle, natural sag in each strand rather than pulling them perfectly taut
- Layer strands at slightly different heights for added visual depth
Choosing the right lights:
Style and quantity considerations:
- Warm white LED string lights for the most universally flattering, party-appropriate glow
- Calculate roughly 300-500 total feet of lights for a canopy over a standard-sized gathering area
- Globe-style bulbs for a more substantial, dramatic look; mini lights for a more delicate, twinkling effect
Cost:
- String lights (per 48-foot strand): $20-40
- Total for a full canopy (6-10 strands): $150-350
- Temporary poles, if needed: $30-80 each
My string light canopy: Crisscrossing eight strands of warm white lights between the existing pergola and two temporary poles created a genuine overhead canopy that transformed the party space the moment the sun went down, and it remains the single most photographed element from that entire event.
String Light Canopy Tips
Install the canopy the day before the party, allowing time to adjust the pattern:
Setup timing:
- Achieving an even, attractive crisscross pattern often requires some trial and adjustment
- Installing the day before, rather than hours before guests arrive, allows time to genuinely perfect the layout
- This buffer also accounts for any unexpected complications, like insufficient anchor points or additional lights needed
- Testing the lights after dark, before the actual party, confirms the effect works as intended
Use a timer or smart plug to ensure the lights turn on automatically at dusk:
Reliability consideration:
- Manually remembering to turn on the canopy exactly when needed adds unnecessary stress to party preparation
- An outdoor-rated timer or smart plug ensures the transformation happens automatically and reliably
- This small addition removes one more task from an already busy party preparation checklist
- Test the timer’s accuracy a day or two before the event to confirm proper timing
4. The Textile Table Runner and Layered Linens
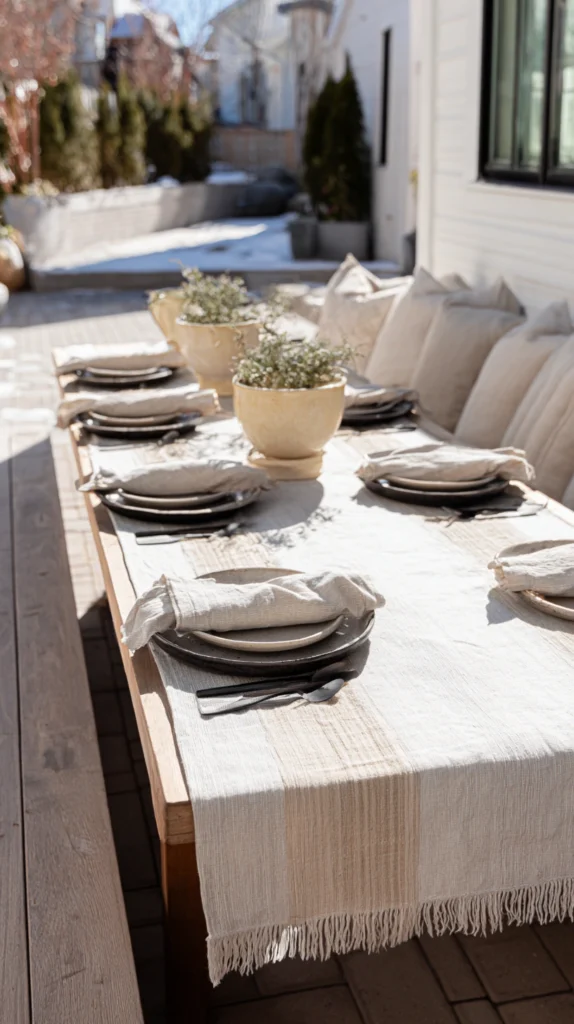
Multiple coordinating linens, layered rather than a single tablecloth, adding texture and visual richness to the party’s dining surfaces.
My single flat tablecloth:
What felt one-dimensional:
- One solid-color tablecloth covering the entire table, with no additional textile layering
- A table that looked serviceable but lacked the richness professional event styling typically achieves
- A missed opportunity for the layered linen technique that adds significant polish for relatively little cost
The layered linens solution:
Why layering multiple textiles elevates the table significantly:
- Combining a base tablecloth with a contrasting runner and coordinating napkins adds genuine textural depth
- Different fabric weights and textures, linen, cotton, a bit of lace or embroidery, create visual richness a single flat cloth cannot
- A relatively low-cost technique delivering a noticeably more considered, event-styled appearance
- Works for both large dining tables and smaller drink or dessert station surfaces
Building the layered linens:
Combining elements effectively:
- A solid base tablecloth in a neutral or coordinating color as the foundation
- A contrasting table runner, in either a complementary color or a textured material like linen or burlap
- Cloth napkins, folded or tied in a coordinating color, at each place setting
- An optional table topper or smaller accent cloth for further layering on statement surfaces
Coordinating the palette:
Keeping the layers cohesive:
- Choose two to three colors maximum across all linen layers
- Vary texture more than color for visual interest without creating a mismatched appearance
- Coordinate linen colors with the balloon garland, floral arrangements, and overall party palette
Cost:
- Base tablecloth: $15-30
- Table runner: $10-25
- Cloth napkins (set of 8-12): $15-30
My layered table linens: Adding a burlap runner and coordinating cloth napkins over the base tablecloth gave the dinner table genuine textural richness, and the layered look photographed noticeably better than the flat single tablecloth used at previous gatherings.
Layered Linens Tips
Vary fabric texture more than color across the different layers:
Textural technique:
- Multiple linens in identical smooth fabric but different colors can look flat despite the layering
- Combining different textures, smooth cotton, textured linen, a bit of lace trim, creates genuine visual richness
- This textural variety matters as much as the color coordination for achieving a considered, layered look
- Prioritize sourcing at least one textured element among the otherwise smoother linen layers
Iron or steam linens before the party for a genuinely polished final look:
Presentation detail:
- Wrinkled linens undermine even a well-planned layered arrangement
- A quick iron or steam session, done the day before or morning of the party, significantly improves the table’s overall polish
- This small preparation step is easy to skip under time pressure but meaningfully affects the finished appearance
- Store linens properly folded or hung between uses to minimize wrinkling before the next event
5. The DIY Photo Backdrop Wall
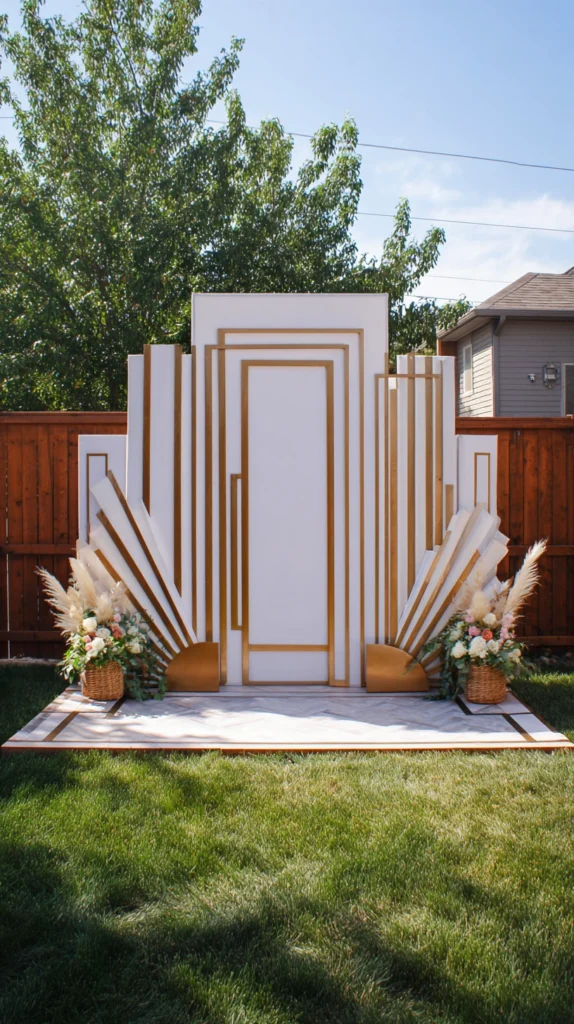
A dedicated backdrop, built from balloons, greenery, fabric, or a combination, specifically positioned for guest photos.
My missing dedicated photo spot:
What was absent:
- Guests taking photos against whatever happened to be behind them, often a plain fence or cluttered background
- No specific, styled spot encouraging and supporting good party photos
- A missed opportunity for one of the most consistently popular modern party additions
The photo backdrop solution:
Why a dedicated backdrop adds genuine value to any gathering:
- Provides a clear, styled destination for guest photos throughout the party
- Naturally encourages guests to gather and interact in a specific, decorated zone
- Creates a consistent visual “brand” for the event that ties into photos shared afterward
- One of the most requested additions for celebratory occasions specifically, from birthdays to graduations
Building the backdrop:
Construction approaches:
- A simple fabric or streamer backdrop, hung from a frame, the fence, or a garage door
- A greenery wall or arch, using faux or fresh garland attached to a frame or the fence itself
- A balloon-focused backdrop, combining the garland technique with a fabric or greenery base
- A simple painted or printed banner as a lower-effort backdrop foundation
Styling considerations:
Completing the backdrop area:
- Position with adequate space in front for guests to stand and pose comfortably
- Ensure adequate lighting specifically at this spot, since it will be used well into the evening
- Include a small prop table nearby if the occasion calls for photo props
Cost:
- Fabric or streamer backdrop materials: $20-50
- Greenery garland or wall panels: $40-120
- Frame or stand, if not using an existing structure: $30-80
My photo backdrop wall: A simple greenery arch positioned against the garage door, with warm string lights woven through it, became the spot where nearly every guest took at least one photo, and the resulting shared photos all carried a consistent, considered look tying back to the party itself.
Photo Backdrop Tips
Position the backdrop with adequate space for guests to stand and pose comfortably:
Practical spacing:
- A backdrop positioned in a tight corner limits how comfortably guests can actually use it
- Confirm several feet of clear standing space in front of the backdrop before finalizing its location
- This spacing consideration matters as much as the backdrop’s visual design for genuine usability
- Test the space by standing in front of the backdrop yourself before the party begins
Light the backdrop area specifically, given how much evening use it will receive:
Evening functionality:
- A beautifully designed backdrop becomes difficult to use and photograph once natural light fades
- Position string lights or a soft lamp specifically illuminating this area for evening photos
- This addition ensures the backdrop remains genuinely useful throughout the entire party, not just during daylight hours
- Test the lighting after dark before the event to confirm it provides adequate illumination for photos
6. The Fire Pit or Fire Feature Centerpiece
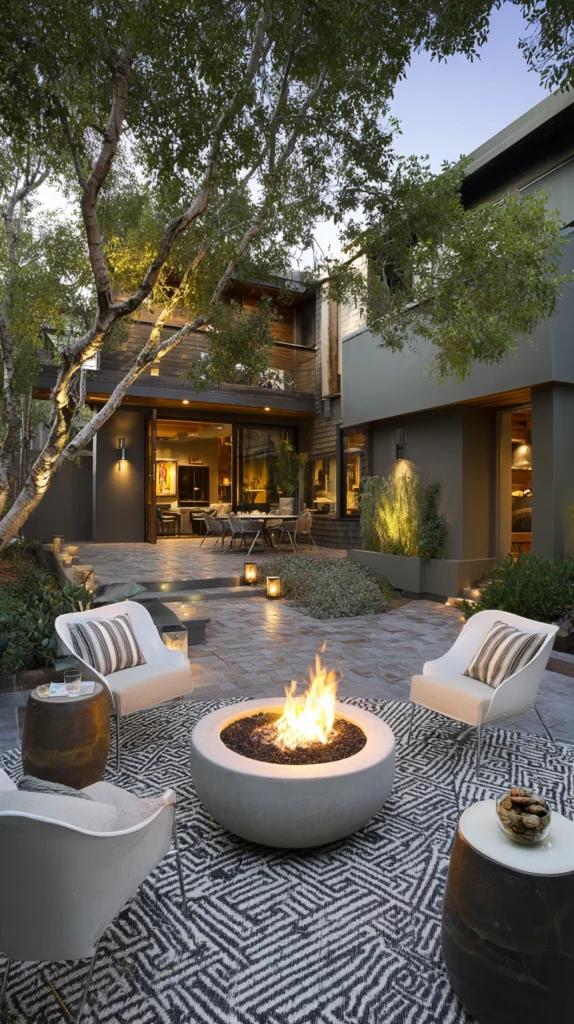
A fire pit, positioned as a central gathering point with surrounding seating, extending the party into cooler evening hours.
My party that ended when the sun went down:
What was limiting the event’s length:
- Guests naturally beginning to leave as evening cooled, with no specific draw keeping them outside longer
- A missed opportunity for the genuine gathering power a fire feature specifically provides
- A party that peaked during daylight rather than building toward a memorable evening close
The fire feature solution:
Why a fire pit extends and elevates any backyard gathering:
- Creates a natural, magnetic gathering point drawing guests together as the evening cools
- Extends the party’s comfortable duration significantly beyond what would otherwise be possible
- Provides genuine warmth and atmosphere, distinct from purely decorative lighting elements
- One of the most consistently effective additions for making a gathering feel like a genuine event rather than simply an afternoon visit
Setting up the fire feature:
Practical considerations:
- A portable fire pit, positioned in a clear area with adequate surrounding clearance
- A ring of chairs or a bench arrangement specifically surrounding the fire feature
- S’mores supplies or a simple beverage station positioned nearby for natural, extended lingering
Safety for a party setting:
Non-negotiable precautions:
- Position away from any decorations, particularly balloon installations or fabric backdrops
- Maintain clear supervision throughout the party, particularly with children present
- Confirm local regulations permit the specific fire feature type being used for the event
Cost:
- Portable fire pit rental or purchase: $50-300
- Surrounding seating, if not already available: $100-400
- S’mores or beverage station supplies: $20-50
My fire pit party centerpiece: Positioning a rented fire pit with a ring of borrowed chairs meant the party naturally migrated there as evening cooled, and guests who might otherwise have left by eight stayed well past ten, gathered around the fire long after the main meal had ended.
Fire Feature Tips
Position the fire feature well clear of any decorative installations:
Safety and decor coordination:
- Balloon garlands, fabric backdrops, and string lights all present fire risk if positioned too closely
- Maintain generous clearance between the fire feature and any flammable decorative elements
- This spacing consideration should be part of the initial party layout planning, not an afterthought
- Walk through the planned layout specifically checking this clearance before the party begins
Stock a self-serve s’mores or warm drink station near the fire to encourage lingering:
Extending engagement:
- A fire feature alone draws people initially, but a nearby activity or treat station keeps them there longer
- A simple s’mores setup or a warm drink station, positioned within comfortable reach of the fire seating, naturally extends how long guests remain gathered
- This addition requires minimal extra effort but meaningfully enhances the fire feature’s overall impact on the party’s success
- Position the station close enough to be convenient without crowding the fire’s immediate seating area
7. The Hanging Paper Lantern Cluster
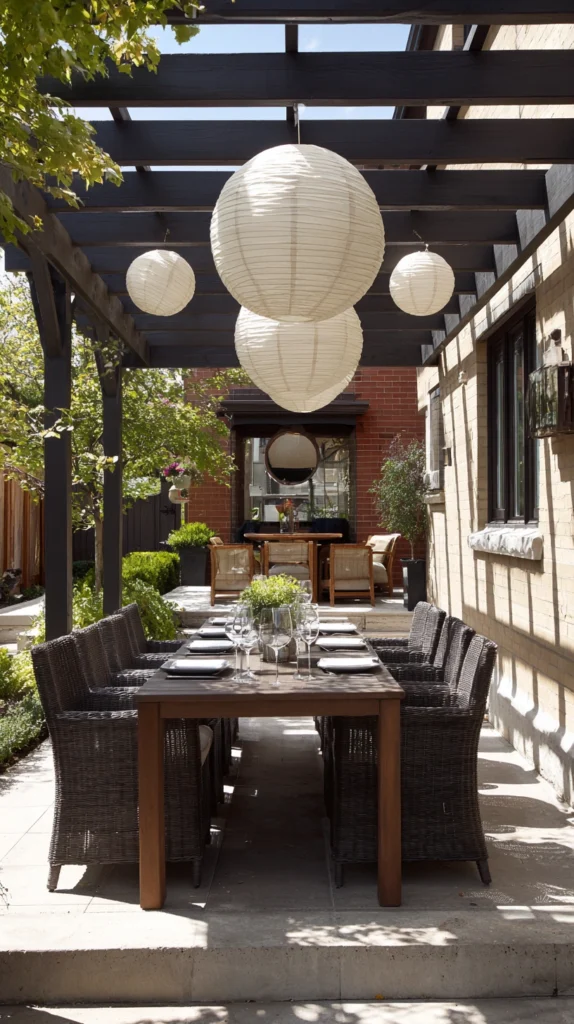
A cluster of paper lanterns, varied in size and hung at different heights, adding color and dimension without requiring electrical lighting.
My missing daytime color and dimension:
What felt flat:
- Decor relying entirely on string lights, which provide minimal visual interest before dusk
- No colorful, dimensional element visible and effective during the party’s earlier daylight hours
- A missed opportunity for the specific daytime-to-evening versatility paper lanterns provide
The paper lantern cluster solution:
Why lantern clusters work well across the full party timeline:
- Provide genuine color and visual interest during daylight hours, unlike string lights alone
- Continue to look attractive after dark, whether lit internally or simply silhouetted against string lights nearby
- A cluster of varied sizes creates dimensional, layered visual interest similar to the balloon garland technique
- Relatively lightweight and easy to install compared to more elaborate structural decor
Building the lantern cluster:
Installation approach:
- Hang lanterns from an existing structure, tree branches, or a temporary line strung across the party area
- Vary lantern size significantly, mixing small, medium, and large within the same cluster
- Group clusters at varied heights rather than hanging all lanterns at a uniform level
- Coordinate lantern colors with the party’s overall palette
Choosing the right lanterns:
Style and material options:
- Paper lanterns for the most affordable, lightweight option with genuine color variety
- Fabric lanterns for a slightly more substantial, textured alternative
- LED lantern lights, if internal illumination is desired for evening use
Cost:
- Paper lanterns (assorted sizes, per set of 10-15): $25-50
My hanging lantern cluster: A cluster of coral and cream paper lanterns, varied in size and hung at different heights from the pergola beams, added genuine color and dimension throughout the entire party, looking just as intentional in bright afternoon sun as it did once the evening string lights came on around it.
Paper Lantern Tips
Vary lantern size and hanging height significantly within each cluster:
Dimensional technique:
- Uniform lantern size and height creates a flatter, less dynamic visual effect
- Mixing small, medium, and large lanterns, hung at genuinely varied heights, creates the same organic dimension the balloon garland technique achieves
- This variation is what separates a genuinely designed cluster from simply several lanterns hung in a row
- Step back periodically during installation to assess the overall dimensional effect before finalizing placement
Choose weather-appropriate lanterns if any chance of rain exists:
Practical material consideration:
- Standard paper lanterns can be damaged or destroyed by even light rain
- If weather is uncertain, choose water-resistant fabric lanterns or plan for quick removal if rain begins
- This consideration matters especially for outdoor events planned during less predictable weather seasons
- Keep a backup plan for quick lantern removal if the forecast shifts unexpectedly close to the event
8. The Coordinated Dessert and Drink Station
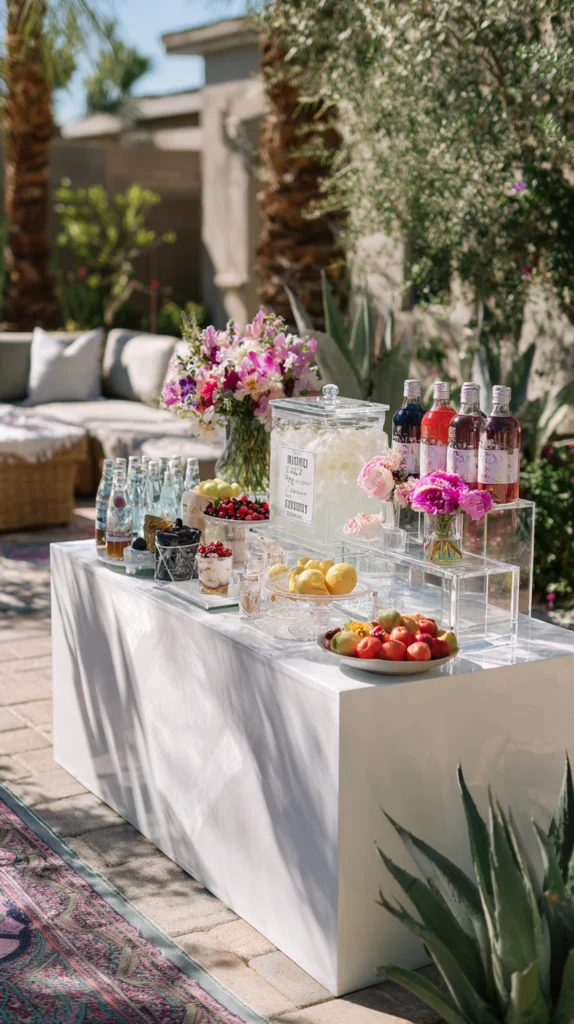
A styled table specifically for desserts or drinks, using consistent servingware, signage, and a coordinated color palette distinct from, but complementary to, the main dining area.
My mismatched serving setup:
What felt disjointed:
- Desserts and drinks served from whatever containers and platters happened to be available
- No coordinated visual theme tying the serving station to the rest of the party’s decor
- A missed opportunity for the kind of styled station that consistently photographs as a party highlight
The coordinated station solution:
Why a dedicated, styled station elevates the whole party:
- Creates a genuine secondary focal point, distinct from but complementary to the main dining area
- Consistent servingware and color coordination signals the same level of intentional design carried throughout the event
- Naturally encourages guests to gather, mingle, and photograph this specific area
- One of the most consistently popular and photographed elements at modern celebratory gatherings
Building the station:
Styling approach:
- A dedicated table, draped in linens coordinating with the party’s overall palette
- Servingware, platters, and stands in a consistent material or color family, rather than mismatched pieces
- Simple signage labeling items, adding a polished, considered touch
- Height variation among serving pieces, using cake stands and risers alongside flat platters
Coordinating with the overall party theme:
Tying the station into the bigger picture:
- Match linens and accent colors to the balloon garland and table centerpiece palette
- Incorporate the same greenery or floral elements used elsewhere in the party’s decor
- Position within reasonable proximity to the main gathering area, avoiding an isolated, disconnected placement
Cost:
- Coordinated servingware and stands: $40-120
- Table linens and signage: $20-50
My coordinated dessert station: Styling the dessert table with matching white cake stands at varied heights, simple printed labels, and linens matching the party’s blush and gold palette turned a previously mismatched spread into the second most photographed spot at the entire party.
Dessert Station Tips
Use height variation among serving pieces, not just flat platters:
Dimensional serving technique:
- A table with only flat platters at one level looks less dynamic than one incorporating varied heights
- Cake stands, tiered trays, and simple risers create the same dimensional interest as the layered centerpiece technique
- This variation matters as much for a serving station as it does for a formal table centerpiece
- Arrange the tallest pieces toward the back of the table, allowing shorter items to remain visible in front
Add simple signage for a noticeably more polished, considered appearance:
Finishing detail:
- Unlabeled food and drink items can look casual even when carefully arranged
- Small printed or handwritten labels add a level of polish disproportionate to their actual cost and effort
- This detail signals genuine intentional planning, elevating the station’s overall perceived effort
- Coordinate label style and font with any other printed elements used throughout the party
9. The Fresh or Faux Greenery Garland
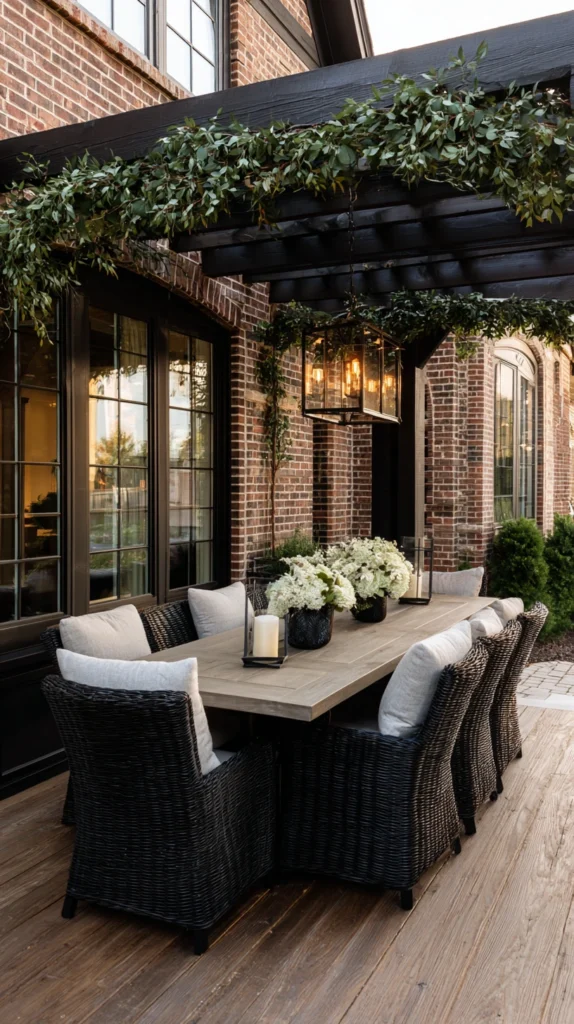
Greenery, either fresh-cut or high-quality faux, draped along tables, railings, or archways, adding natural texture throughout the party space.
My missing natural texture element:
What was lacking:
- Decor relying heavily on balloons, fabric, and manufactured materials, with no genuine greenery incorporated
- A missed opportunity for the natural texture and softening effect greenery specifically provides
- A party space that felt festive but lacked the organic warmth greenery typically adds
The greenery garland solution:
Why greenery adds a specific quality other decor elements cannot replicate:
- Introduces genuine natural texture, softening the more structured, manufactured quality of balloons and fabric
- Works beautifully layered with nearly every other decoration idea on this list, from the table centerpiece to the photo backdrop
- Fresh greenery in particular adds a subtle, pleasant fragrance to the party space
- A relatively affordable way to add significant visual richness across multiple areas of the party
Choosing fresh versus faux greenery:
Comparing the two options:
- Fresh greenery (eucalyptus, ivy, ferns) offers the most authentic texture and fragrance, though it requires purchasing close to the event date
- High-quality faux greenery can be reused for future events, offering better long-term value despite a higher upfront cost
- A mix of both, fresh for the most visible elements and faux for less central decor, balances cost and authenticity
Where to use greenery throughout the party:
Application areas:
- Draped along the dining table’s runner as part of the layered centerpiece
- Woven through the photo backdrop or balloon garland for added texture
- Trailing along stair railings, fence tops, or archway structures
Cost:
- Fresh greenery garland (per 6-foot length): $15-35
- Faux greenery garland, reusable (per 6-foot length): $20-45
My greenery garland: Weaving fresh eucalyptus through the balloon garland and down the center of the dining table tied every element of the party’s decor together with a consistent, natural texture, and the subtle fragrance added a sensory dimension the visual decor alone had not provided.
Greenery Garland Tips
Purchase fresh greenery as close to the event date as reasonably possible:
Freshness timing:
- Fresh greenery begins wilting relatively quickly once cut, particularly in warmer weather
- Purchasing one to two days before the event, rather than earlier, ensures the greenery looks its best throughout the party
- This timing consideration matters significantly for how the greenery ultimately photographs and holds up during the event
- Store fresh greenery in water or a cool location until installation to maximize freshness
Invest in quality faux greenery if planning to host multiple events over time:
Long-term value consideration:
- High-quality faux greenery, while costing more upfront than fresh, can be reused across numerous future gatherings
- This investment often proves more cost-effective for anyone who regularly hosts backyard parties or gatherings
- Look specifically for realistic, higher-quality faux products rather than the most inexpensive available option
- Store faux greenery properly between events to maintain its appearance for repeated future use
10. The Themed Color Palette Throughout
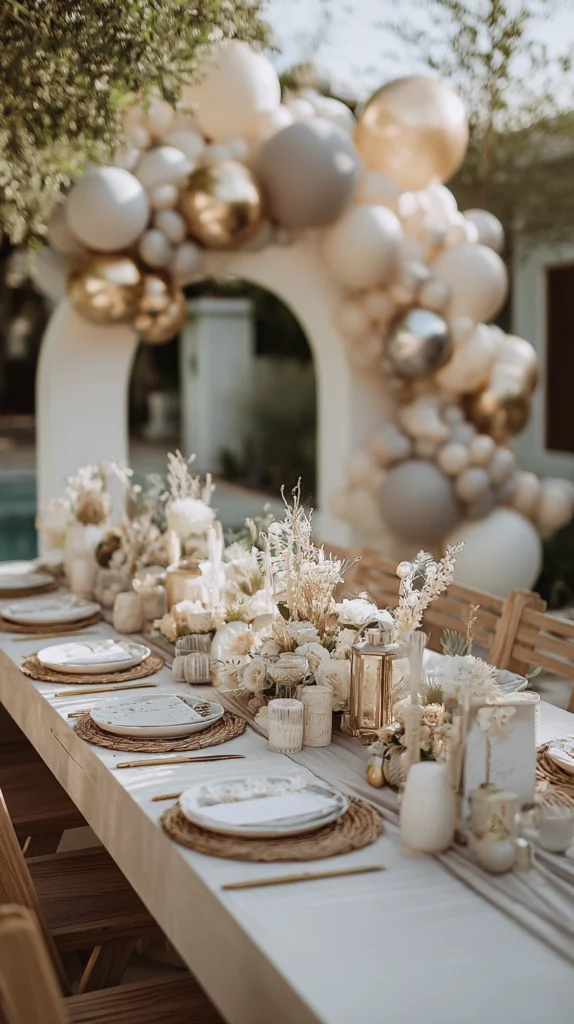
A consistent two-to-three color palette applied across every decorative element, from balloons to linens to lighting accents, tying the entire party together.
My mismatched, occasion-by-occasion color choices:
What was undermining cohesion:
- Balloons in one color scheme, linens in another, and dessert styling in yet a third, unrelated palette
- Each decorative element chosen independently, without reference to how it would look alongside everything else
- A party that, despite individually nice elements, lacked any sense of a unified overall design
The consistent palette solution:
Why a single coordinated palette matters more than any individual decoration choice:
- Ties every separate decorative element into one cohesive, clearly intentional design
- Allows even a relatively modest decoration budget to read as considered and professional
- The single most important underlying principle connecting every other idea on this list
- Professional event design consistently prioritizes color consistency above nearly any other individual decorating decision
Choosing the palette:
Selecting colors for the specific occasion:
- Two primary colors plus one accent or metallic tone, for the clearest, most cohesive result
- Colors coordinated with the specific occasion, softer pastels for a baby shower, richer jewel tones for an adult celebration
- Consider the season and existing yard colors when finalizing the palette, ensuring it complements rather than clashes with the natural setting
Applying the palette consistently:
Carrying the colors throughout:
- Balloon garland, table linens, and dessert station styling all pulling from the same specific color references
- Even small details, napkin ties, signage, favor packaging, coordinated to the same palette
- Greenery and neutral tones used as the connective tissue between the more saturated palette colors
Cost:
- No inherent additional cost; achieved through coordinated selection within existing decoration budgets
My consistent color palette party: Committing to dusty rose, cream, and gold across every single decorative element, from the balloon garland to the napkin ties to the dessert station, transformed a collection of individually nice decorations into something that read as one clearly considered, professionally styled event.
Color Palette Tips
Choose the palette first, before purchasing any individual decorative element:
Planning sequence:
- Selecting decorations item by item, without a predetermined palette, frequently results in a mismatched final result
- Establishing the two-to-three color palette before any shopping begins ensures every subsequent purchase supports the overall cohesion
- This sequencing is the single most important planning step for achieving a genuinely unified party design
- Write down or photograph the specific chosen colors to reference consistently while shopping for each element
Use one neutral or metallic tone as connective tissue between bolder palette colors:
Cohesion technique:
- Two bold, saturated colors used alone, without any neutral element, can compete rather than complement each other
- A neutral tone (white, cream, natural wood) or a metallic accent (gold, rose gold, silver) bridges the bolder colors together
- This connective element is often what makes a two-color palette feel sophisticated rather than simply matched
- Incorporate this neutral or metallic tone across multiple decor elements, not just one isolated piece
11. The Outdoor Rug and Defined Flooring Zone
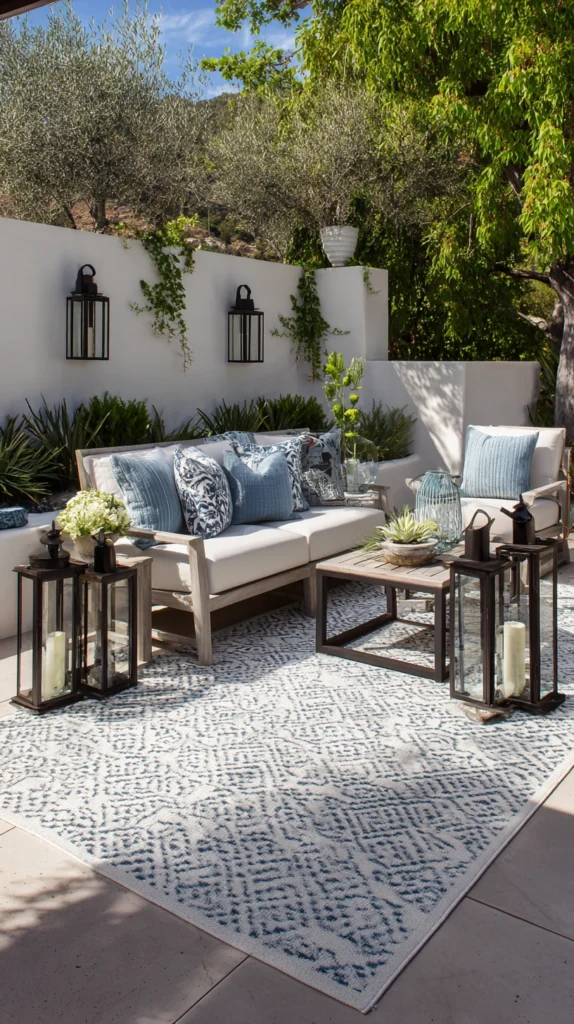
An outdoor rug or defined ground covering, placed beneath the main gathering or dining area, grounding the party space the way flooring grounds an indoor room.
My undefined grass or patio party area:
What felt unfinished:
- Party furniture and decor arranged directly on grass or bare patio, with no defined “floor” beneath
- A gathering area that blended into the rest of the yard without any clear boundary
- A missed opportunity for the grounding, room-defining effect a rug specifically provides
The outdoor rug solution:
Why a defined ground covering matters for party decor specifically:
- Creates a clear visual boundary for the main gathering area, similar to how a rug defines a room indoors
- Adds color, pattern, and texture underfoot, an often-overlooked decorative opportunity
- Provides a more comfortable surface for guest seating and standing compared to bare grass or hard patio material
- A relatively simple addition delivering a surprisingly significant improvement in how “finished” the party space feels
Choosing the right ground covering:
Options by budget and occasion:
- A large outdoor rug, sized to encompass the main seating or dining area
- A more affordable option using outdoor-rated interlocking tiles or a simple painted canvas floor cloth
- Layering a smaller accent rug over a larger neutral base for added visual interest
Coordinating with the party’s palette:
Tying the ground covering into the overall design:
- Choose a rug pattern or color incorporating at least one shade from the party’s main palette
- A more neutral rug allows other decorative elements to stand out; a bolder pattern becomes its own design statement
- Consider the rug’s role in photographs, since it will appear in the background of many seated and standing shots
Cost:
- Large outdoor rug (8×10 or similar): $60-200
- Outdoor canvas floor cloth: $40-120
My outdoor party rug: Placing a large striped outdoor rug beneath the main seating area gave that section of the yard a genuine sense of definition, and it grounded the whole gathering space in a way that made the party feel like it was happening in a designed room rather than simply on the lawn.
Outdoor Rug Tips
Size the rug generously enough to encompass the full seating or gathering arrangement:
Proportion consideration:
- A rug too small leaves furniture floating awkwardly around its edges, undermining the grounding effect
- Measure the intended seating or gathering arrangement before selecting the rug’s dimensions
- This sizing consideration matters as much for a party rug as it does for everyday outdoor furniture arrangements
- When in doubt, choose the larger of two size options under consideration
Secure the rug against wind or foot traffic shifting, particularly for an all-day event:
Practical stability:
- An unsecured outdoor rug can shift or bunch with heavy foot traffic or breezy conditions
- Rug tape or discreet corner weights keep the rug in place throughout a longer event
- This small precaution prevents a tripping hazard and maintains the rug’s polished, flat appearance throughout the party
- Check the rug’s position periodically during a longer event and readjust as needed
12. The Personalized Banner or Signage
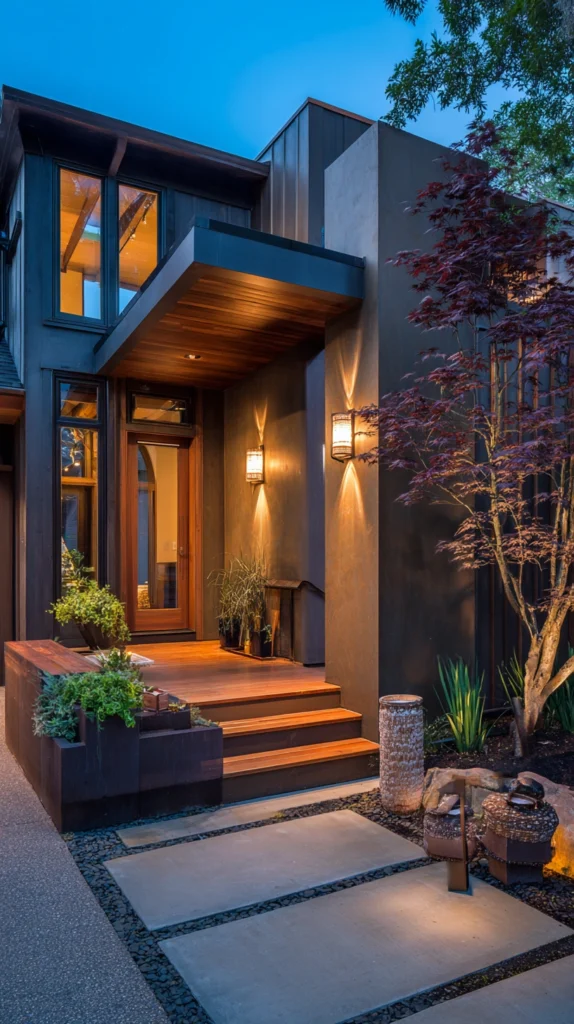
Custom or personalized banners, signs, or lettering specifically marking the occasion, adding a genuinely celebratory, event-specific focal point.
My generic, non-specific decor:
What felt impersonal:
- Decorations that could have suited nearly any gathering, with nothing specifically marking this particular occasion
- A missed opportunity for the genuine celebratory impact personalized signage provides
- A party that looked festive but did not clearly communicate what was actually being celebrated
The personalized banner solution:
Why occasion-specific signage adds genuine celebratory value:
- Clearly communicates and celebrates the specific occasion, whether a birthday, graduation, or milestone anniversary
- Creates an obvious, meaningful focal point for photos specifically marking the event
- Personalization, a name, an age, a specific date, adds emotional significance beyond generic decor alone
- One of the most straightforward ways to make decor feel genuinely specific to the actual celebration
Choosing the right banner or signage:
Options by style and effort:
- A custom-printed banner, ordered in advance with the specific occasion’s details
- Individual paper or fabric letters, strung together to spell out a name, age, or celebratory phrase
- A chalkboard or wood sign, hand-lettered for a more personal, DIY aesthetic
- Balloon letters, incorporated directly into the balloon garland for a fully integrated look
Placement strategy:
Positioning for maximum impact:
- Above or centered within the photo backdrop area
- Along the main entry point, welcoming guests with the occasion’s specific details
- Positioned prominently near the dessert or cake table, where celebratory photos are most likely to happen
Cost:
- Custom-printed banner: $20-50
- Individual letter garland: $10-30
- Chalkboard or wood sign: $15-40
My personalized banner: A simple custom banner reading the specific milestone birthday, positioned above the dessert table, gave the party a clear celebratory focal point that generic decor alone had never quite provided, and it appears in nearly every photo taken that day.
Personalized Banner Tips
Order custom-printed banners well in advance to avoid last-minute stress:
Timing consideration:
- Custom printing often requires production and shipping time beyond what same-week ordering allows
- Order any custom banner or signage at least two to three weeks before the event date
- This lead time prevents the stress of a last-minute scramble or an unavailable personalized element
- Confirm the specific vendor’s production and shipping timeline before finalizing the order date
Coordinate banner colors and fonts with the party’s overall palette and style:
Design cohesion:
- A banner in mismatched colors or an unrelated font style can look disconnected from the rest of the party’s decor
- Choose banner colors from the established party palette, and a font style matching the overall aesthetic, whether elegant, playful, or rustic
- This coordination ensures the banner feels like a genuine part of the overall design rather than an isolated addition
- Review the banner design alongside samples of other decor elements before finalizing the order
13. The Ambient Music and Sound Setup
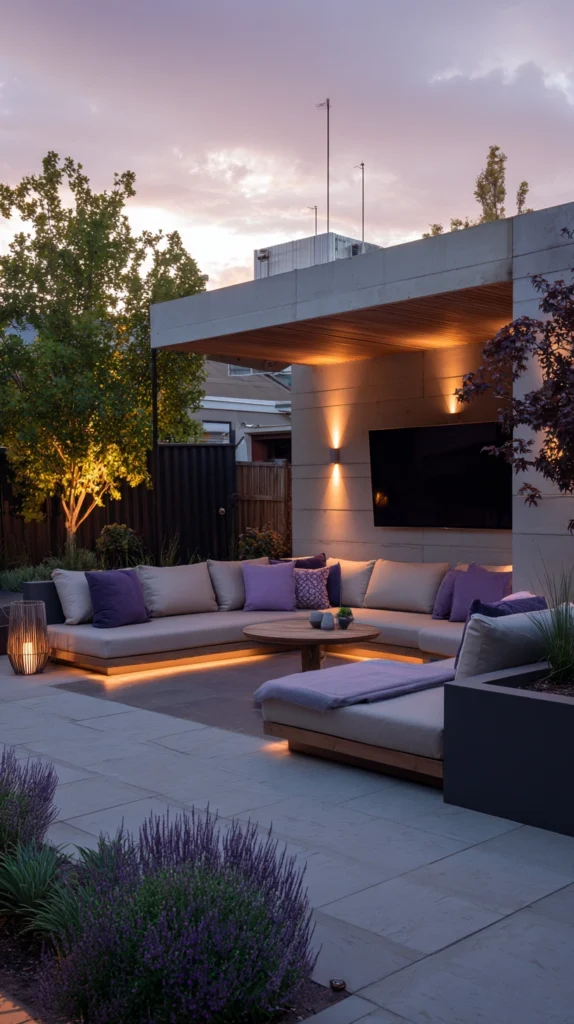
A dedicated outdoor speaker system, positioned to provide consistent, appropriately leveled background music throughout the party space.
My missing atmospheric sound layer:
What was overlooked:
- A visually well-decorated party space with no consideration given to the auditory atmosphere
- Music, if present at all, coming from a single small speaker, inconsistent across different areas of the yard
- A missed opportunity for the significant atmospheric contribution appropriate background music provides
The ambient sound solution:
Why sound deserves the same planning attention as visual decor:
- Background music significantly affects the party’s overall mood and energy, independent of any visual decoration
- Consistent sound coverage across the gathering space prevents awkward silent zones or overly loud areas near a single speaker
- A relatively simple setup delivering meaningful atmospheric value, often for a modest cost given many households already own compatible devices
- Frequently the most overlooked element in otherwise carefully planned party decor
Setting up the sound system:
Practical approach:
- A portable outdoor-rated speaker, positioned centrally within the main gathering area
- Multiple smaller speakers, if available, positioned at different points for more even coverage across a larger yard
- A pre-planned playlist appropriate to the occasion, rather than relying on ad-hoc music choices during the event
Volume and placement considerations:
Getting the atmosphere right:
- Position speakers to provide consistent background coverage without any single area experiencing excessive volume
- Set volume levels supporting conversation rather than overwhelming it, adjusting as the party’s energy shifts throughout the event
- Consider a slight volume increase later in the evening if the occasion calls for more active dancing or energy
Cost:
- Portable outdoor-rated speaker: $50-200
- Multiple speaker setup for larger yards: $150-400
My ambient party sound setup: Positioning a portable outdoor speaker centrally within the gathering area, playing a pre-planned playlist matched to the party’s mood, added an atmospheric layer that the visual decor alone, however carefully planned, could not have provided on its own.
Ambient Sound Tips
Prepare a playlist in advance rather than relying on real-time music selection during the party:
Preparation priority:
- Scrambling to select music during the actual event distracts from hosting and often results in inconsistent mood
- A pre-planned playlist, ideally organized to match the party’s expected progression from arrival through later evening, maintains consistent atmosphere
- This preparation removes one more task from the day of the event itself
- Test the playlist’s overall flow and volume levels before the party begins, adjusting as needed
Position speakers to avoid both silent zones and areas of excessive volume:
Coverage consideration:
- A single speaker positioned at one end of a larger party space creates uneven sound coverage
- For larger gatherings, multiple speakers positioned at different points provide more consistent atmosphere throughout
- This consideration matters especially for yards with distinct zones, like a separate dessert station or fire pit area
- Walk the full party space during setup, confirming consistent, appropriate volume throughout before guests arrive
14. The Seasonal and Occasion-Specific Accent Layer
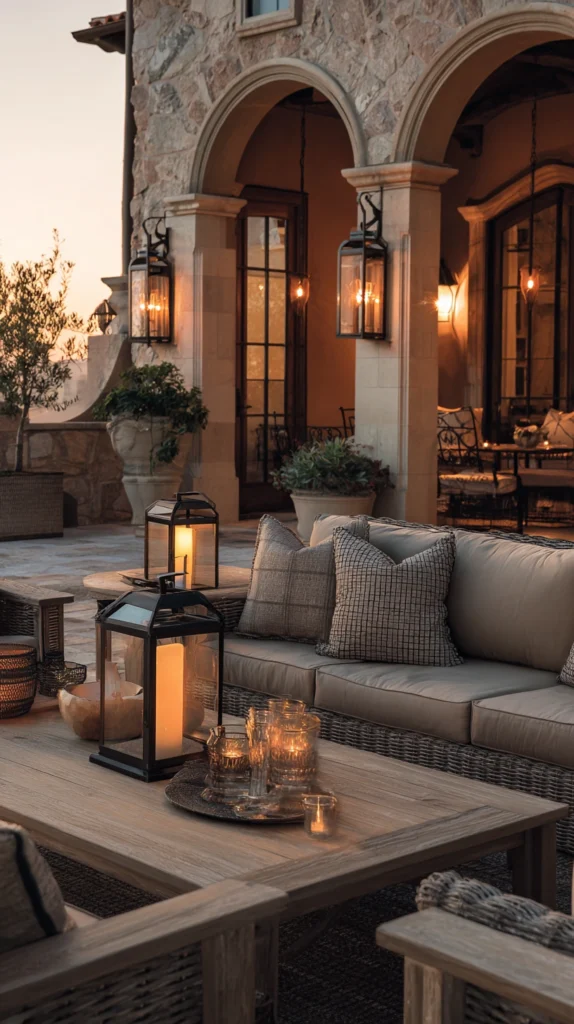
A final layer of accents specifically tied to the season or occasion, whether fall gourds, spring florals, or holiday-specific touches, personalizing the otherwise reusable decor foundation.
My generic decor without seasonal or occasion specificity:
What was missing:
- A solid foundation of reusable decor elements, balloons, linens, lighting, but nothing marking the specific season or occasion
- A party that could have happened in any month, with no connection to the actual time of year or specific celebration
- A missed opportunity for the final layer of specificity that makes generic decor feel genuinely tailored
The seasonal accent solution:
Why this final layer matters even with strong foundational decor already in place:
- Connects the party specifically to its actual season or occasion, rather than feeling generic or interchangeable
- Relatively low-cost additions, layered onto an already-strong foundation, deliver meaningful specificity
- Creates genuine anticipation and relevance, since the same core decor elements can be refreshed differently for each new event
- The detail that most clearly signals thoughtful, occasion-specific planning rather than a one-size-fits-all approach
Building the seasonal layer:
Accent ideas by season and occasion:
- Fall gatherings: small pumpkins, gourds, and warm-toned foliage accents woven into the greenery garland
- Spring and summer celebrations: fresh seasonal flowers incorporated into centerpieces and the photo backdrop
- Winter holiday gatherings: evergreen sprigs, pinecones, and warm metallic accents layered into existing decor
- Milestone occasions: age-specific or theme-specific small props incorporated into the dessert station or photo area
Layering without overwhelming the foundation:
Keeping the accent layer proportional:
- Add seasonal or occasion-specific touches to existing decor elements rather than introducing entirely separate new pieces
- A few well-chosen accents woven throughout the existing garland, centerpiece, and backdrop deliver more cohesion than isolated seasonal additions
- This layered approach also keeps the reusable foundation genuinely reusable for future, differently-themed events
Cost:
- Seasonal accent materials (gourds, flowers, pinecones, small props): $20-60
My seasonal accent layer: Weaving small pumpkins and warm-toned dried foliage through the existing neutral balloon garland and greenery for a fall birthday gathering gave the same reusable decor foundation genuine seasonal specificity, without requiring an entirely new decor investment for that particular event.
Seasonal Accent Tips
Build the foundational decor in neutral, reusable tones, reserving bold seasonal color for the accent layer:
Long-term strategy:
- A foundation built entirely in season-specific colors limits its reusability for future, differently-themed events
- Neutral balloons, linens, and lighting provide a versatile base that seasonal accents can then personalize for each specific occasion
- This strategy delivers better long-term value for anyone hosting multiple backyard gatherings across the year
- Reserve the boldest, most specific seasonal or occasion-based color choices for smaller, more easily swapped accent pieces
Weave seasonal accents into existing decor elements rather than treating them as separate additions:
Integration technique:
- Seasonal accents added as entirely separate, isolated pieces can look disconnected from the rest of the party’s design
- Integrating small gourds, flowers, or seasonal props directly into the existing garland, centerpiece, or backdrop creates a more cohesive final result
- This integration is what allows the same foundational decor to feel genuinely fresh and specific for each new occasion
- Take a few extra minutes during setup to weave rather than simply place these accent elements throughout the existing decor
Choosing Your Backyard Party Decorations
By Occasion Type
Birthdays and milestone celebrations:
- Color-coordinated balloon garland (idea 1)
- Personalized banner or signage (idea 12)
- DIY photo backdrop wall (idea 5)
Dinner parties and adult gatherings:
- Layered table centerpiece (idea 2)
- Layered linens (idea 4)
- Fire pit or fire feature centerpiece (idea 6)
Casual seasonal gatherings:
- Seasonal and occasion-specific accent layer (idea 14)
- Fresh or faux greenery garland (idea 9)
- Hanging paper lantern cluster (idea 7)
By Effort Level
Lowest effort:
- Themed color palette throughout (idea 10)
- Ambient music and sound setup (idea 13)
- Seasonal and occasion-specific accent layer (idea 14)
Medium effort:
- Layered table centerpiece (idea 2)
- Layered linens (idea 4)
- Hanging paper lantern cluster (idea 7)
- Outdoor rug and defined flooring zone (idea 11)
Higher commitment:
- Color-coordinated balloon garland (idea 1)
- String light canopy (idea 3)
- DIY photo backdrop wall (idea 5)
- Coordinated dessert and drink station (idea 8)
By Budget
Under $75:
- Themed color palette throughout (idea 10)
- Layered linens (idea 4)
- Personalized banner or signage (idea 12)
- Ambient music and sound setup, using existing devices (idea 13)
$75-200:
- Color-coordinated balloon garland (idea 1)
- Hanging paper lantern cluster (idea 7)
- Fresh or faux greenery garland (idea 9)
- Coordinated dessert and drink station (idea 8)
$200-400:
- String light canopy (idea 3)
- DIY photo backdrop wall (idea 5)
- Outdoor rug and defined flooring zone (idea 11)
$400+:
- Fire pit or fire feature centerpiece (idea 6)
- Full-yard combination of multiple higher-commitment elements
Maintenance and Reuse Between Events
Store for reuse:
- Faux greenery garland, cleaned and stored flat
- String lights, coiled and stored dry
- Neutral linens and rugs, laundered before storage
Plan to replace each time:
- Fresh greenery and floral elements
- Balloons
- Occasion-specific banners and signage
Refresh with seasonal accents:
- Neutral decor foundation, layered with new seasonal or occasion-specific touches for each event
My Complete Backyard Party Decor Journey
What I built across several parties:
First party ($180):
- Basic string lights and mismatched balloon bunches
- Learned that lack of a coordinated palette undermined even genuinely nice individual decorations
Second party ($240):
- Color-coordinated balloon garland and layered table centerpiece
- Learned that repetition and height variation delivered noticeably more polish for a similar total cost
Third party ($310):
- Full string light canopy, photo backdrop, and coordinated dessert station
- Learned that layering multiple focal points throughout the space outperformed concentrating all effort on one element
Total investment across three parties: $730 Most important lesson: A consistent color palette mattered more than the total amount spent on decorations Single highest-impact addition: The string light canopy, for transforming the party’s evening atmosphere more dramatically than any other single element
Getting Started This Weekend
Start with the palette, not the purchases.
This weekend:
Step 1 — Choose a two-to-three color palette before buying anything:
- Consider the occasion, the season, and the existing yard’s colors
- This decision guides every subsequent purchase and prevents mismatched decor
Step 2 — Choose one focal point to build first:
- A balloon garland, a photo backdrop, or a string light canopy
- Starting with one well-executed focal point delivers more impact than several rushed, incomplete elements
Step 3 — Plan for evening, not just daytime:
- Confirm lighting will carry the party’s atmosphere once natural light fades
- This planning step is easy to overlook but significantly affects how memorable the event actually feels
Step 4 — Add one layer of greenery or texture to tie elements together:
- Fresh or faux greenery woven through the main focal point and table decor
- This addition creates cohesion between otherwise separate decorative elements
My recommendation:
Start with a coordinated color palette and one string light layer:
- Both are relatively affordable and deliver immediate, noticeable transformation
- Both provide a foundation that every other decoration idea on this list naturally builds upon
- This starting point ensures every subsequent addition supports rather than competes with the overall design
Step back and view the space at both midday and after dark before deciding what to add next.
Now go build the backyard party that finally looks as good as the occasion deserves.
Quick Summary
The 14 backyard party decoration ideas:
Focal points and structure:
- Color-coordinated balloon garland (idea 1): an immediate, unmistakable visual anchor
- DIY photo backdrop wall (idea 5): a dedicated, styled destination for guest photos
- Fire pit or fire feature centerpiece (idea 6): extends the party into memorable evening hours
- Personalized banner or signage (idea 12): genuine occasion-specific celebration
Table and surface styling:
- Layered table centerpiece (idea 2): dimension and rhythm along the table’s length
- Layered linens (idea 4): textural richness beyond a single flat tablecloth
- Coordinated dessert and drink station (idea 8): a genuine secondary focal point
Lighting and atmosphere:
- String light canopy (idea 3): the most dramatic evening transformation available
- Hanging paper lantern cluster (idea 7): color and dimension across day and evening
- Ambient music and sound setup (idea 13): the often-overlooked auditory layer
Cohesion and grounding:
- Fresh or faux greenery garland (idea 9): natural texture tying elements together
- Themed color palette throughout (idea 10): the single most important underlying principle
- Outdoor rug and defined flooring zone (idea 11): a grounded, defined gathering space
- Seasonal and occasion-specific accent layer (idea 14): specificity layered onto a reusable foundation
The universal backyard party decor rules:
Always:
- Choose a coordinated color palette before purchasing any individual decoration
- Plan lighting as thoroughly as any daytime visual decor
- Layer height and texture rather than keeping every element at one flat level
- Position decorative focal points to work together rather than isolating all effort in one spot
Never:
- Purchase decorations item by item without a predetermined coordinating palette
- Rely on a single overhead light or one string of lights for the entire evening’s atmosphere
- Position fire features near balloon installations or fabric decor without adequate clearance
- Assume visual decor alone is sufficient without considering the party’s auditory atmosphere
Common mistakes:
- Scattering decorations without any coordinating color story tying them together
- Concentrating all decorative effort on one focal point while leaving the rest of the space undecorated
- Planning decor entirely around daytime appearance, with no strategy for the party’s evening hours
- Skipping the layered height and texture techniques that separate designed decor from simply “a lot of decorations”
- Treating sound and music as an afterthought rather than a genuine component of the overall atmosphere
Remember: a consistent color palette matters more than the total decoration budget, layering height and texture consistently outperforms flat, single-level arrangements, evening lighting deserves the same planning attention as daytime decor, multiple coordinated focal points create more impact than one isolated highlight, and the best backyard party decor is the kind that makes the entire space feel transformed, not just decorated in patches.