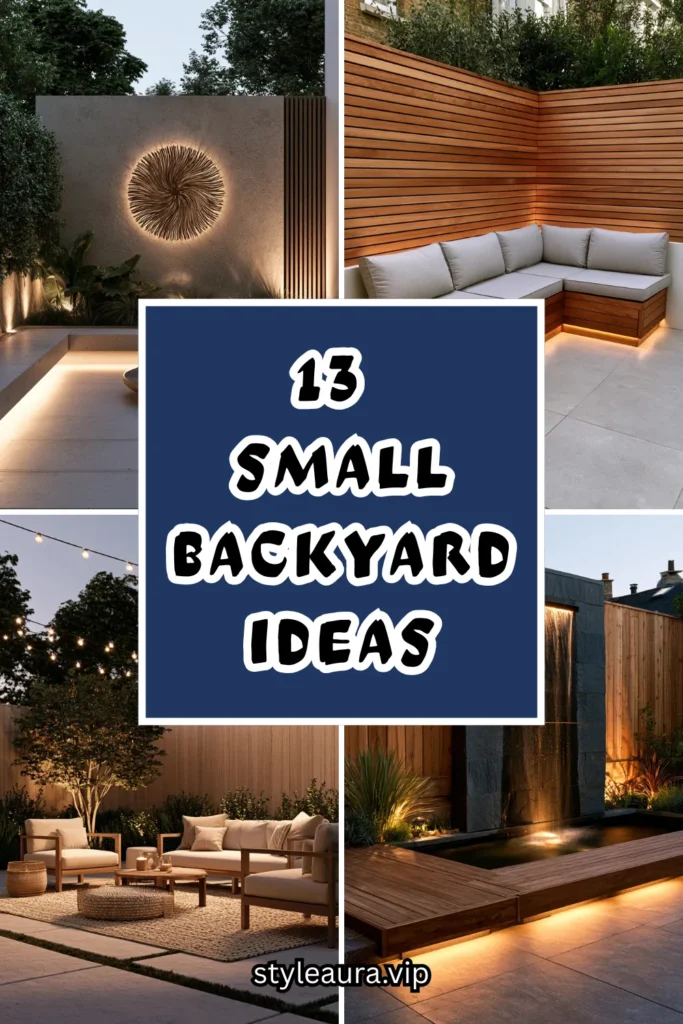
13 Small Backyard Ideas That Make Every Inch Count
My backyard is 14 feet wide. For years I treated it like there wasn’t much to be done with that, just a grill, two chairs, and a lot of empty concrete nobody quite knew what to do with.
I kept assuming a small backyard just meant a smaller version of what everyone else had. Then I started noticing that the tiny outdoor spaces that actually felt generous weren’t bigger, they were just smarter about every single foot of ground and wall space they had.
I started small, literally. A folding table that only came out when needed. A mirror on the fence. Planters mounted vertically instead of sitting on the ground eating up floor space.
Within a season, that same 14-foot strip went from a space we tolerated to one that genuinely felt like it had room to breathe, even though not one inch of actual square footage had changed.
Here are 13 ideas that make a small backyard feel like it’s working twice as hard as its actual size suggests.
Why Most Small Backyards Feel Even Smaller Than They Are
The common mistakes:
The full-size furniture approach:
- Standard-sized outdoor furniture crammed into a space built for something smaller
- Every piece competing for the same limited floor space
- A yard that feels cluttered and cramped rather than cozy and intentional
- Furniture scaled for a big backyard, forced into a small one
The single flat-use layout:
- One undivided space expected to handle dining, lounging, storage, and gardening all at once
- No vertical thinking, everything spread across the same limited ground plane
- A yard that feels smaller because every function is competing on the same flat surface
- Missing the walls, fences, and overhead space that a small yard actually has plenty of
The “wait until it’s bigger” mindset:
- Treating a small yard as not worth investing in until a hypothetical future move
- Bare, unfinished corners left that way because “there’s not much room anyway”
- A missed opportunity, since small spaces often respond dramatically to focused, thoughtful upgrades
- The size of the yard mistaken for the size of the opportunity
What a successful small backyard transformation does:
Uses every dimension, not just the floor:
- Vertical space treated as genuinely usable square footage
- Furniture and features scaled specifically to the space’s actual dimensions
- Visual tricks used deliberately to make the space feel more expansive than its measurements
- A yard designed around its actual size, not apologized for because of it
My revelation: A small backyard feels spacious the moment you start using the walls, the corners, and the air above the ground, not just the patch of dirt or concrete at your feet.
1. Vertical Planters Instead of Ground-Level Pots
Wall-mounted planters, a tiered plant ladder, or a hanging system moving greenery off the ground and onto the fence or wall.
My yard cluttered with floor-level pots:
What I had:
- A dozen scattered pots covering nearly a third of the available floor space
- Plants blocking walking paths and making the small yard feel even more crowded
- Genuine greenery I wanted, but no space-efficient way to display it
The vertical planting discovery:
Why moving plants up changes everything:
- Reclaims significant floor space that was previously covered in pots
- Uses fence and wall space that would otherwise sit completely empty
- Creates a genuine lush, layered look, since a vertical arrangement often displays more plants in less footprint than a ground grouping ever could
- One of the highest-return moves available specifically because small yards have so much unused vertical surface
Choosing the right system:
Options by budget and commitment:
- Simple wall-mounted planter brackets for a handful of individual pots
- A tiered ladder-style plant stand, requiring zero permanent installation
- A modular living wall system with integrated planting pockets for maximum density
Cost:
- Wall-mounted planter brackets (set of 4-6): $25-50
- Tiered plant ladder: $40-90
- Modular living wall system: $150-400
My vertical planters: Moving eight of my twelve pots onto simple wall-mounted brackets freed up an entire walking path that had been blocked for two years, and the plants actually look fuller and more intentional now than they ever did scattered across the ground.
Vertical Planting Tips
Choose lightweight pots specifically for anything wall-mounted:
Weight consideration:
- Heavy ceramic pots put significant strain on wall brackets and mounting hardware over time
- Lightweight resin or fabric planters reduce this risk while holding just as much soil and plant material
- This distinction matters more the higher up the mounting point, where a failure is both more damaging and more dangerous
- Confirm the specific bracket’s weight rating before loading it with a filled, watered pot
Group plants by watering needs within the same vertical zone:
Care simplification:
- A vertical arrangement makes it easy to accidentally mix plants needing very different watering schedules
- Grouping similar-need plants together, even within a single planter ladder, keeps maintenance manageable
- This consideration matters as much in a small space as a large one, maybe more, since every plant here is doing visible work
- Research each plant’s specific needs before finalizing the vertical layout
2. A Fold-Down or Foldable Furniture System
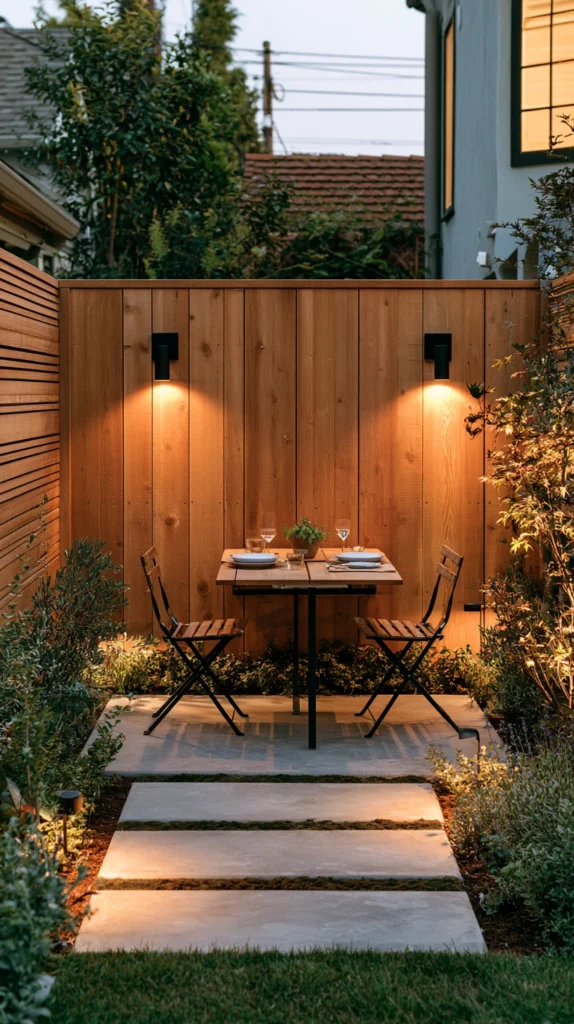
A wall-mounted fold-down table, paired with foldable or stackable chairs, providing full dining function without permanent floor space commitment.
My permanently cramped patio:
What I had:
- A fixed table and chair set taking up roughly half of the entire available yard, whether in use or not
- No ability to reclaim that space for anything else, even when not actively eating outside
- A yard that felt like a dining room first and everything else second, purely due to furniture footprint
The fold-down furniture solution:
Why collapsible furniture is such a natural fit for small spaces:
- Reclaims significant floor space during the majority of the day when the dining area isn’t in active use
- A wall-mounted fold-down table uses zero floor footprint when folded flat against the fence or wall
- Stackable chairs store in a fraction of the space fixed chairs require
- Lets one small yard genuinely function as multiple different spaces throughout a single day
Choosing the right pieces:
What to look for:
- A wall-mounted fold-down table rated for outdoor use, typically supporting 2-4 place settings when open
- Lightweight stackable chairs that store easily against a wall or in a small closet or shed
- A folding bistro set as a simpler, fully portable alternative to a wall-mounted table
Cost:
- Wall-mounted fold-down table: $80-200
- Stackable outdoor chairs (set of 4): $100-250
- Simple folding bistro set: $80-180
My fold-down table: Installing a wall-mounted fold-down table against the fence, paired with four stackable chairs stored in a small deck box, meant the same 8×10 foot patio now works as a full dining space at dinner and a completely open lounging area every other hour of the day.
Fold-Down Furniture Tips
Mount the fold-down table into structural framing, not just fence boards alone:
Installation requirement:
- A table folded down and loaded with dishes puts real weight and leverage strain on its mounting point
- Locate a fence post or add a mounting board secured into structural framing before installing
- This step prevents the table from pulling loose after a season of regular use
- Worth the extra effort during installation to avoid a frustrating failure later
Store folded chairs somewhere genuinely accessible, not just technically stored:
Practical habit:
- Chairs stored somewhere inconvenient often just don’t get used, defeating the purpose of choosing foldable furniture
- A nearby deck box, a hook system on a fence, or a small designated shed spot keeps them within easy reach
- This consideration matters as much as the furniture choice itself for whether the system actually gets used daily
- Test the actual retrieval process before assuming a storage spot will work long-term
3. A Built-In Corner Bench With Storage
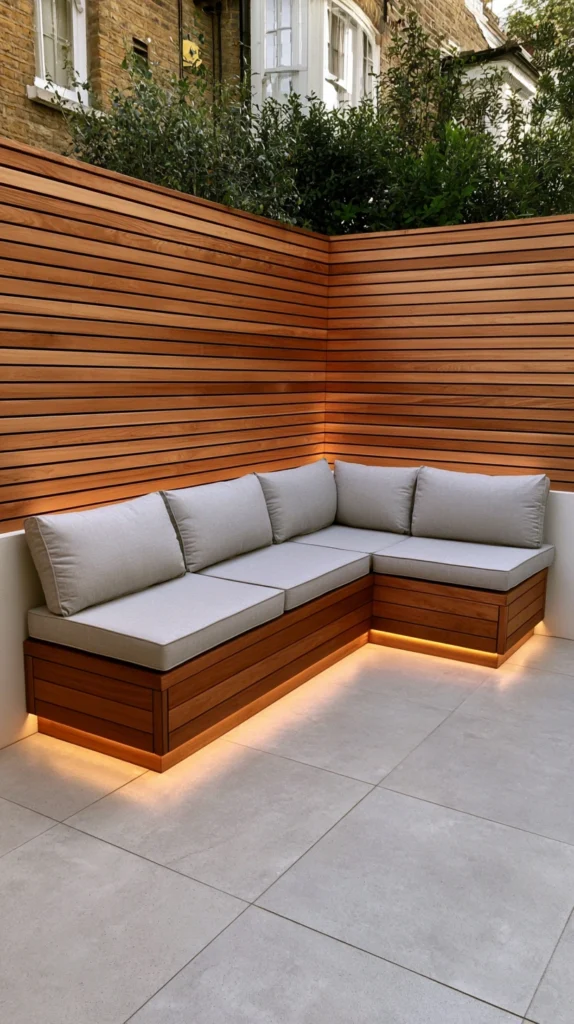
An L-shaped bench built into two corners of the yard, doubling as both seating and enclosed storage beneath the seat.
My yard with no seating and nowhere to put anything:
What I had:
- No dedicated seating at all beyond a couple of mismatched folding chairs
- Grilling tools, cushions, and outdoor toys with no defined storage spot
- Corner areas of the yard sitting completely unused and undefined
The built-in bench solution:
Why a built-in corner piece works so much better than standalone furniture:
- Seats significantly more people per square foot than individual chairs ever could
- Uses corner space, which is otherwise some of the most commonly wasted area in a small yard
- The storage compartment beneath solves the “where does everything go” problem simultaneously
- Reads as a genuine architectural feature rather than just furniture placed in the space
Building the bench:
Construction basics:
- Frame the bench using pressure-treated lumber, sized to fit the specific corner dimensions
- Build a hinged lid across the seat for full storage access underneath
- Add a weatherproof cushion across the top for genuine seating comfort
- Seal or paint the exterior wood for weather protection and a finished look
Cost:
- Materials for a basic L-shaped bench (8-10 linear feet total): $200-400
- Cushions and hinges: $80-150
My built-in bench: Building a simple L-shaped bench into the two back corners of the yard created seating for six people in a footprint that previously held two folding chairs, while the storage underneath finally gave cushions and grilling tools an actual home.
Built-In Bench Tips
Use a piano hinge across the full seat length rather than smaller individual hinges:
Hardware choice:
- A full-length piano hinge distributes weight and stress evenly across the entire lid
- Smaller individual hinges concentrate that stress at just a few points, leading to earlier failure
- This detail matters significantly given how much daily use a corner bench typically sees
- The modest additional cost of a piano hinge is worth it for the added durability
Add a simple prop rod or soft-close mechanism to the storage lid:
Safety and convenience detail:
- An unsupported lid can slam shut on fingers or stored items
- A basic prop rod, or a soft-close hinge kit, prevents this while keeping the design simple
- This small addition meaningfully improves the bench’s everyday usability
- Worth the minor additional cost and installation time during the initial build
4. A Wall-Mounted Mirror to Expand the Visual Space
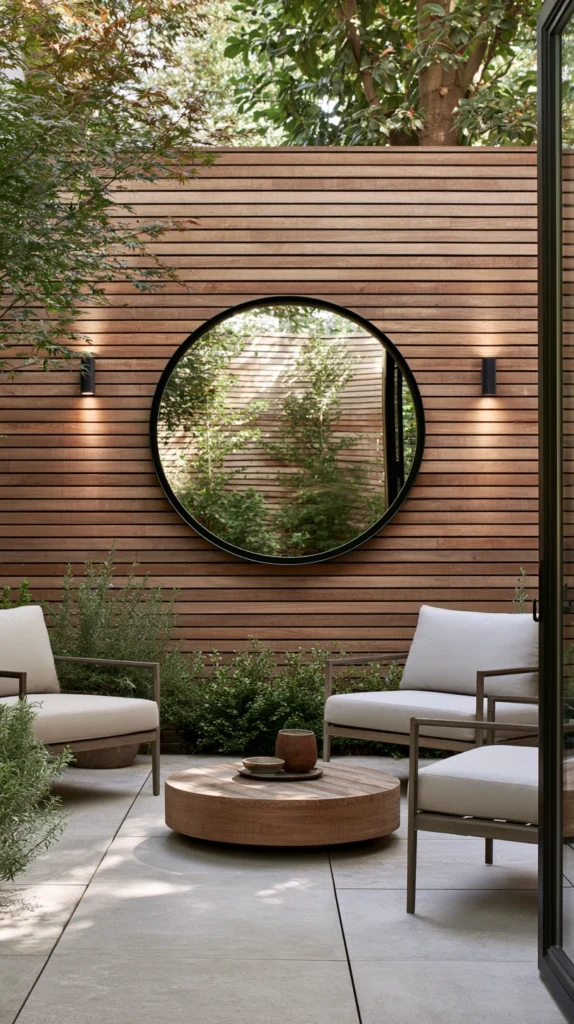
A weatherproof outdoor mirror mounted on a fence or wall, visually doubling the perceived depth of a small yard.
My yard that felt boxed in on every side:
What I had:
- A fully fenced yard with clear, close boundaries on every side
- A space that felt smaller than its actual dimensions simply because every edge was so visible and close
- No sense of depth or visual escape anywhere in the layout
The outdoor mirror solution:
Why this trick genuinely works, not just as a gimmick:
- Reflects greenery, sky, and existing features, visually doubling the sense of depth in that direction
- One of the most well-established small-space design tricks, borrowed directly from small indoor room design
- Costs relatively little compared to almost any other item on this list
- Particularly effective when positioned to reflect the yard’s best feature, whether plants, a light fixture, or open sky
Choosing and placing the mirror:
Getting the placement right:
- A large mirror, at least 24-36 inches in one dimension, delivers a noticeably stronger effect than a small one
- Position it to reflect the yard’s best view or feature, rather than a fence or blank wall
- Weatherproof, shatter-resistant material specifically designed for outdoor use is essential
- Angling the mirror slightly, rather than mounting it perfectly flat, can enhance the reflected depth effect
Cost:
- A quality large outdoor mirror: $60-180
My outdoor mirror: Mounting a large round mirror on the fence directly across from my most established planting bed instantly made the yard feel meaningfully larger, reflecting the greenery back into the space in a way that genuinely surprised how effective it was for the cost.
Outdoor Mirror Tips
Confirm the mirror is specifically rated for exterior weather exposure:
Material verification:
- A standard indoor mirror will fog, cloud, or develop backing damage quickly when exposed to outdoor humidity and rain
- Outdoor-rated mirrors use different backing and frame materials designed to resist this deterioration
- This distinction is essential, not optional, for this specific application
- Confirm the product is explicitly labeled for outdoor or garden use before purchasing
Position the mirror where it won’t create confusing glare or reflect direct sun into seating areas:
Placement consideration:
- A mirror reflecting direct afternoon sun into a nearby seating area can create genuine discomfort or glare
- Observe the sun’s path relative to the intended mirror placement before finalizing the installation
- This consideration prevents an otherwise great design choice from creating an unexpected daily annoyance
- A quick test with a handheld mirror in the intended spot at different times of day reveals any issues
5. Zone Definition Using Rugs and Lighting Instead of Walls
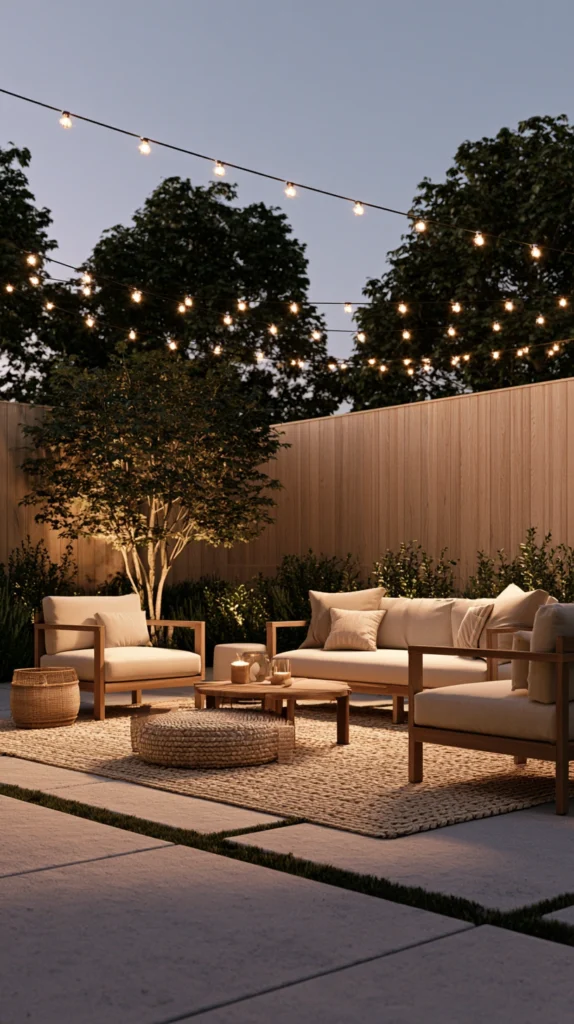
Using an outdoor rug and a distinct lighting treatment to visually define separate zones within a single small, undivided space, without any physical walls or dividers.
My single undefined patch of yard:
What I had:
- One flat, undivided space expected to handle dining, lounging, and general gathering all at once
- No visual cues suggesting where one function ended and another began
- A space that felt smaller because it never read as more than one single, generic area
The zone-definition solution:
Why visual zoning works even without any physical dividers:
- A rug instantly signals “this is a distinct area” the same way it does indoors
- Different lighting treatments over different areas reinforce this same visual separation
- Costs nothing in actual square footage, unlike a physical divider or planter wall
- Makes a small yard feel like it contains multiple considered spaces rather than one generic patch
Building the zones:
Practical application:
- An outdoor rug beneath the dining table, distinct in color or pattern from the rest of the space
- String lights specifically over the dining zone, versus a lantern or different fixture over a lounge corner
- A slight furniture arrangement shift, angling lounge chairs inward, that reads as a distinct grouping
Cost:
- Small to medium outdoor rug: $50-120
- Additional zone-specific lighting: $30-80
My zone definition: Adding a single rug beneath a small bistro table, with string lights strictly over that zone and a separate lantern near the two lounge chairs on the other side of the patio, made an 8×12 foot space read as two genuinely distinct areas rather than one cramped afterthought.
Zone Definition Tips
Keep the rug and lighting choices distinct but still part of the same overall color story:
Balancing separation and cohesion:
- Zones that are too visually different from each other can make an already small space feel choppy and disjointed
- Choosing complementary rather than clashing colors and materials keeps the zones feeling connected
- This balance is worth testing by standing back and viewing the whole space together before finalizing choices
- A shared color thread running through both zones ties the overall small space together
Use furniture orientation, not just rugs and lighting, to reinforce each zone:
Layout reinforcement:
- Angling chairs toward each other within a zone, rather than facing outward randomly, strengthens the sense of a defined area
- This detail costs nothing and works together with the rug and lighting choices already made
- Small furniture orientation adjustments are worth testing even after the rest of the zoning is in place
- The combination of all three elements together delivers a much stronger effect than any single one alone
6. A Narrow Raised Bed Along the Fence Line
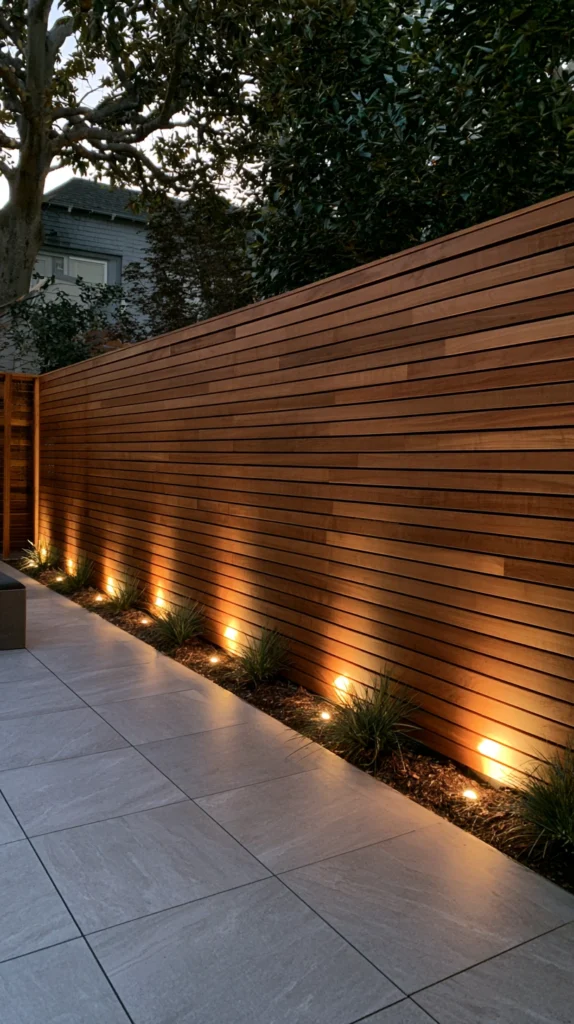
A slim raised planting bed, only 12-18 inches deep, running along one or more fence lines, adding significant planting capacity without eating into usable floor space.
My yard with no room for actual gardening:
What I had:
- A desire to grow vegetables and flowers, with seemingly no floor space available for a real garden bed
- Fence lines sitting completely unused, treated as boundaries rather than usable growing space
- A small footprint that felt like it ruled out gardening altogether
The narrow raised bed solution:
Why a slim bed along the fence delivers real growing capacity:
- Uses the yard’s perimeter, which is otherwise dead space in most small yard layouts
- A 12-18 inch depth is genuinely enough for most herbs, flowers, and even many vegetables
- Keeps the actual center of the yard fully open for furniture and movement
- One of the few ways to add real garden space to a small yard without sacrificing any usable floor area
Building the bed:
Construction considerations:
- Frame the bed using cedar or another rot-resistant wood, sized to the specific fence run
- Line the fence-facing side with landscape fabric to protect the fence material from consistent soil moisture
- Fill with quality raised bed soil mix rather than native ground soil
- Consider a simple drip irrigation line along the bed’s length for consistent watering
Cost:
- Materials for a 10-foot narrow raised bed: $80-150
- Soil to fill it: $40-80
- Basic drip irrigation line: $30-60
My narrow bed: Building a 12-inch-deep bed along one entire fence line added roughly 20 square feet of genuine growing space, all of it previously unused dead zone, without taking a single inch away from the yard’s actual usable floor area.
Narrow Raised Bed Tips
Choose compact or trailing plant varieties suited to a narrow bed’s limited soil depth:
Plant selection matters:
- Deep-rooted vegetables like large tomatoes need more soil depth than an 18-inch bed comfortably provides
- Herbs, lettuces, strawberries, and compact flowering plants are all well suited to this shallower depth
- Researching specific root depth requirements before planting prevents disappointing results later
- This consideration is worth addressing at the planning stage, not after the bed is already built and filled
Leave a small gap between the bed and the fence itself for airflow and access:
Structural consideration:
- A bed built flush against the fence traps moisture against the wood, accelerating rot
- A 1-2 inch gap allows airflow and makes any future fence maintenance easier to access
- This small planning detail meaningfully extends both the fence’s and the bed’s usable lifespan
- Worth accounting for in the initial measurements before cutting any lumber
7. A Compact Tabletop or Wall Water Feature
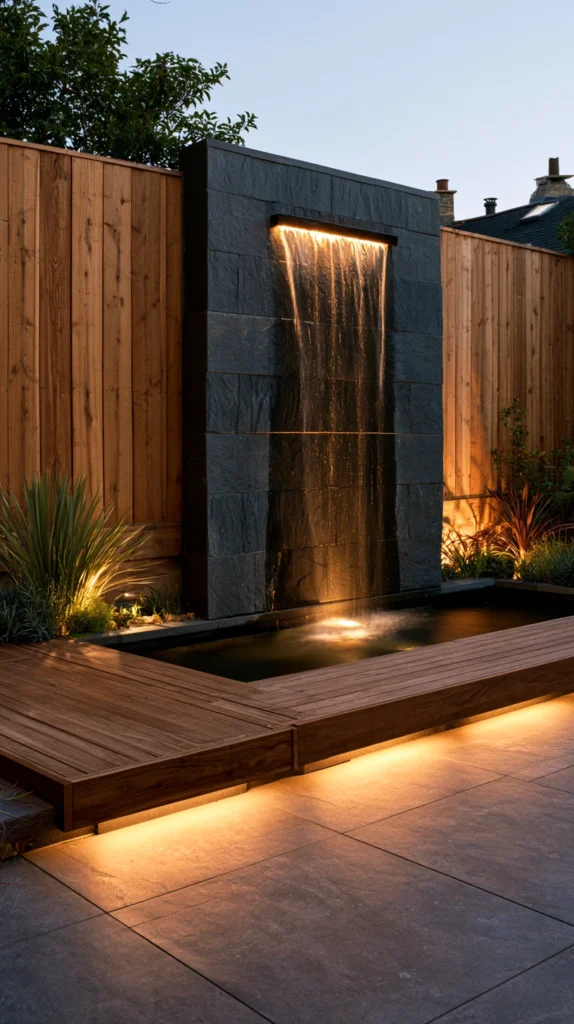
A small tabletop fountain or wall-mounted water feature, delivering the sound and atmosphere of moving water without requiring any real footprint.
My small yard missing any sense of atmosphere:
What I had:
- A yard so small that a real in-ground water feature felt completely impractical
- A desire for the kind of ambiance moving water brings to a space, without a realistic way to achieve it
- Wasted wall space that could theoretically hold something beyond a single hanging planter
The compact water feature solution:
Why a small feature delivers a genuinely outsized atmospheric effect:
- Sound doesn’t require much physical space to have a meaningful impact on how a yard feels
- A wall-mounted feature uses vertical space rather than competing for limited floor area
- Helps mask nearby street or neighbor noise, which matters even more in a small, closely bordered yard
- One of the more surprising high-value additions relative to how little space it actually requires
Choosing the right feature:
Options for small spaces:
- A wall-mounted water feature, often just a few inches deep, mounted directly to a fence or wall
- A compact tabletop fountain positioned on a side table or shelf
- A simple recirculating pot fountain, requiring only a single container and a small pump
Cost:
- Tabletop fountain: $40-100
- Wall-mounted water feature: $100-300
- DIY recirculating pot fountain: $40-80 in parts
My compact water feature: Mounting a slim wall fountain on the fence directly behind the seating area added genuine ambiance and, more practically, meaningfully reduced how noticeable the neighboring street noise felt, all within a footprint of just a few inches of depth.
Water Feature Tips
Choose a feature with an adjustable pump flow rate:
Sound customization:
- The right water sound volume varies significantly by personal preference and by how close seating is to the feature
- An adjustable pump lets you dial in a gentle trickle versus a more pronounced flow
- This flexibility matters more in a small yard, where the feature is likely close to where people actually sit
- Test the feature at a few different flow settings before finalizing placement relative to seating
Clean and refill small water features more frequently than larger ones:
Maintenance reality:
- Smaller water volumes evaporate and collect debris more quickly than a larger in-ground feature would
- A weekly check and refill, plus periodic full cleaning, keeps the feature looking and sounding its best
- This is a manageable but genuinely necessary maintenance commitment worth planning for
- Skipping this leads to cloudy water and a diminished version of the feature’s intended effect
8. Multi-Level Deck or Patio Platforms
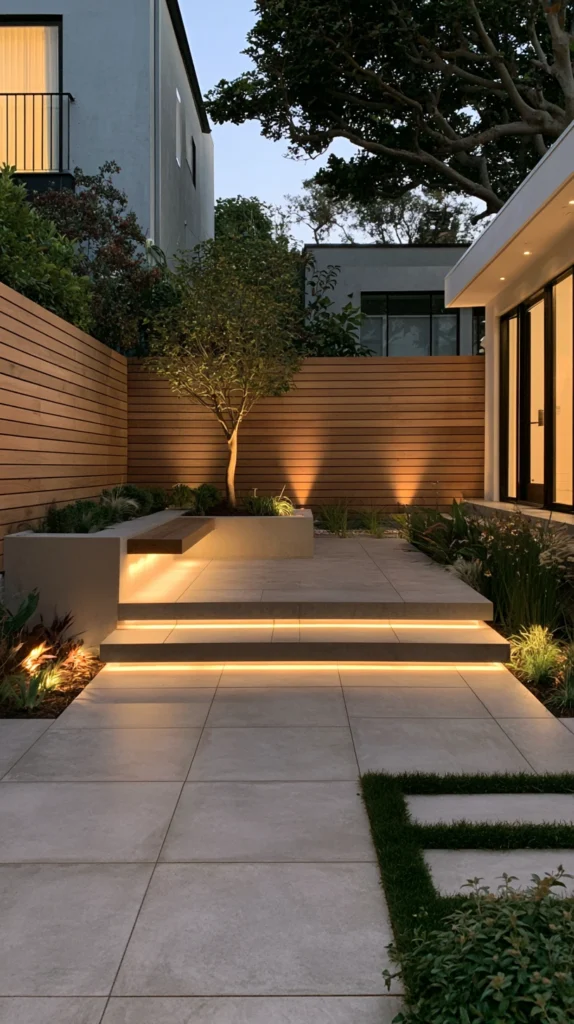
Building the patio or deck in two slightly offset height levels, rather than one single flat plane, adding a sense of dimension and distinct zones to a small footprint.
My single flat, undifferentiated patio:
What I had:
- One completely flat patio surface, functional but visually and spatially one-dimensional
- No sense of separation between different activities happening in the same flat space
- A missed opportunity to use height as a design tool, the way larger properties often do
The multi-level solution:
Why even a small height change adds significant dimension:
- A single step-down or step-up level creates genuine spatial separation without any additional footprint
- Adds visual interest and a sense of intentional design to what would otherwise be a flat slab
- Can be used to define a slightly more private lounge area distinct from a more open dining zone
- Works even with a height change as modest as 6-8 inches between levels
Building the levels:
Construction approach:
- A raised deck platform, built with a simple frame, positioned adjacent to the existing ground-level patio
- A sunken or recessed seating nook, if the yard’s grading allows for it
- Clear, safe step transitions between levels, with adequate lighting marking the height change
Cost:
- A small raised deck platform addition (8×10 feet): $1,200-3,000 depending on material
- A simpler single-step platform using pavers or timber: $300-800
My multi-level patio: Adding a single raised 8×8 foot platform for the lounge chairs, just one step up from the main dining patio, gave the yard a sense of distinct zones and genuine dimension that the previous flat layout never achieved, all within the same original footprint.
Multi-Level Tips
Light every level change clearly for nighttime safety:
Safety requirement:
- An unlit step between levels is a genuine tripping hazard, especially for guests unfamiliar with the space
- Simple step lights or a strip of LED lighting along the transition edge addresses this directly
- This consideration is essential, not optional, for any multi-level outdoor design
- Budget for this lighting as part of the initial platform build, not as an afterthought
Keep the height difference modest in a genuinely small yard:
Scale consideration:
- A dramatic height change can make an already small space feel more chopped up than dimensional
- A modest 6-10 inch change delivers the visual and spatial benefit without overwhelming a tight footprint
- This restraint is specifically important in a small yard, where a larger height change has proportionally more visual impact
- Consider the yard’s total size relative to the platform before finalizing the height difference
9. A Single Statement Tree or Large Specimen Plant
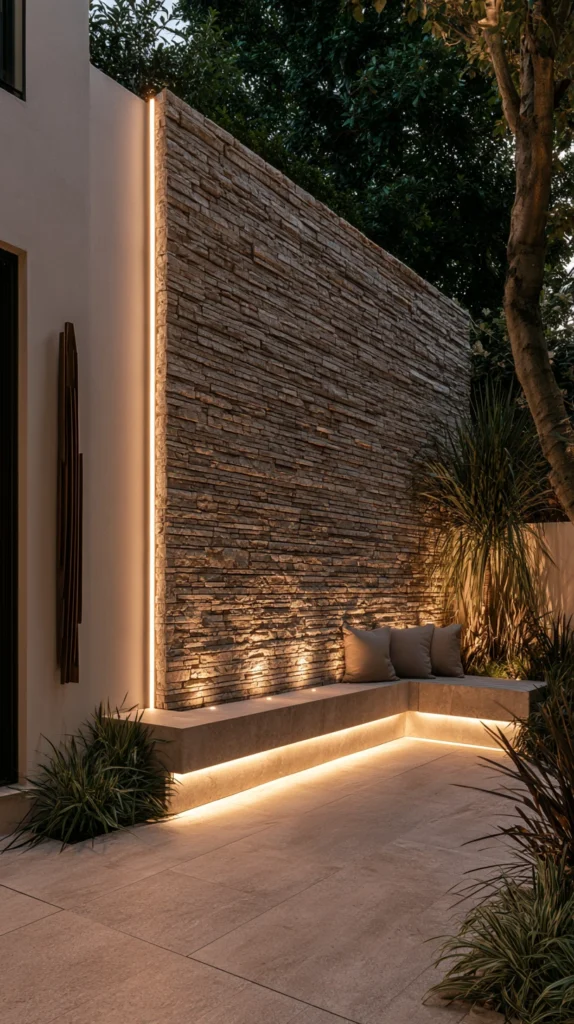
One well-chosen, appropriately scaled tree or large plant, rather than several smaller scattered plantings, anchoring the yard with genuine presence.
My yard with scattered small plants and no real anchor:
What I had:
- Several small potted plants and a couple of low shrubs, none of which gave the yard any real focal point
- A collection of greenery that read as an afterthought rather than an intentional design choice
- No vertical anchor drawing the eye upward in an otherwise flat, low landscape
The statement plant solution:
Why one well-chosen large plant outperforms several small ones:
- Creates a genuine focal point the eye is drawn to, rather than scattered attention across many small elements
- A single well-placed tree or large plant reads as far more intentional and established than a scattered collection
- Adds vertical interest in a space that’s otherwise entirely low and flat
- Counterintuitively, one large plant often makes a small yard feel more spacious than many small ones crowding the ground
Choosing the right plant:
Selection considerations:
- A small ornamental tree in a large container, sized appropriately to not overwhelm the space
- A large architectural plant, like a potted olive tree or a tall ornamental grass clump
- Positioned in a corner or along one edge, rather than dead center, to preserve open floor space
Cost:
- A quality small tree or large specimen plant: $80-300
- A large, appropriately scaled container: $50-150
My statement tree: Removing four smaller scattered pots and replacing them with a single potted Japanese maple in the corner completely changed how the whole yard read, giving it a genuine focal point and, somehow, making the remaining open space feel more generous rather than less.
Statement Plant Tips
Choose a mature or near-mature specimen rather than a small starter plant:
Immediate impact consideration:
- A small starter tree takes years to deliver the visual presence a small yard benefits from immediately
- Investing in a more established specimen costs more upfront but delivers the intended effect right away
- This is one of the few places on this list where spending more genuinely changes the immediate result
- Balance this against budget, since a smaller plant will still mature into the same effect over time
Position the statement plant off-center rather than in the exact middle of the yard:
Layout principle:
- A plant placed dead center can awkwardly divide an already small space into two smaller halves
- Positioning it in a corner or along one edge preserves a more open, usable central area
- This placement choice significantly affects how spacious the rest of the yard actually feels
- Test a few different positions, even temporarily, before committing to the plant’s final spot
10. A Fence-Mounted Storage and Tool Wall
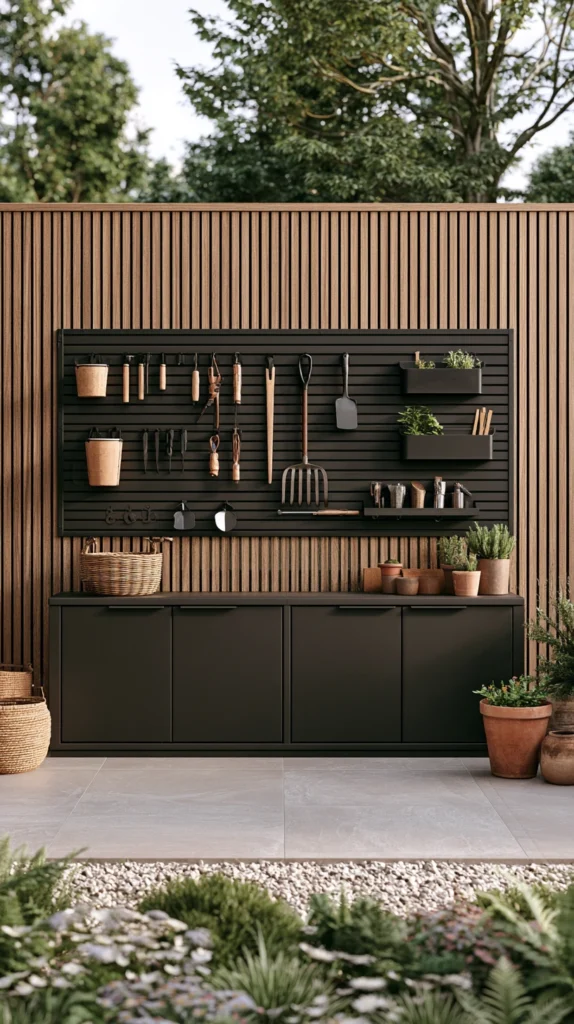
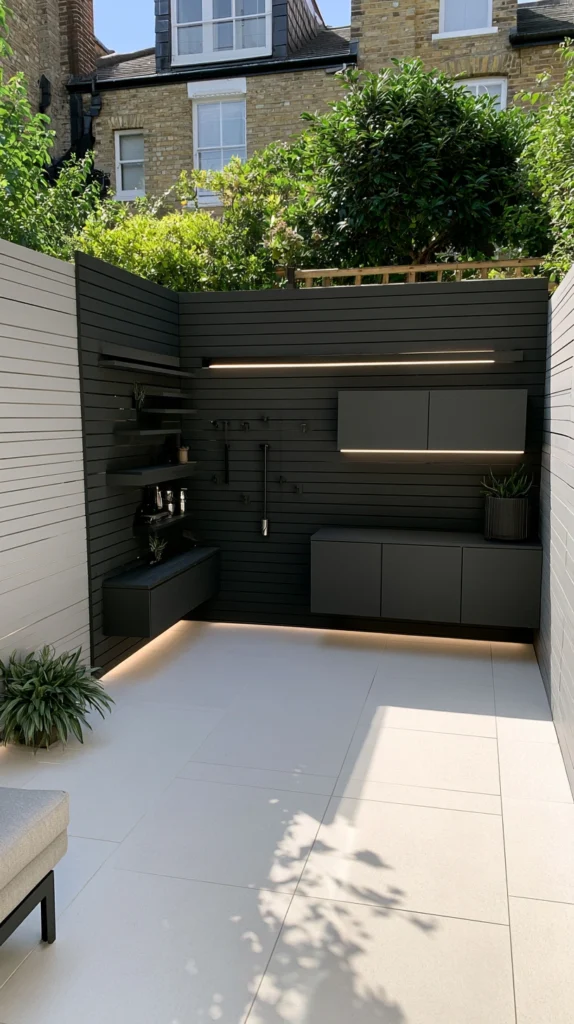
A pegboard, slatwall, or hook system mounted directly to the fence, keeping tools, cushions, and outdoor gear organized without consuming any floor space.
My yard cluttered with loose gear and no storage:
What I had:
- Garden tools, a hose, and outdoor cushions scattered loosely around the small patio
- No shed or storage structure, and no floor space to spare for one even if I wanted it
- A yard that felt cluttered specifically because everything sat out in the open with nowhere else to go
The fence storage wall solution:
Why mounting storage vertically solves a small yard’s biggest organizational challenge:
- Uses fence space that would otherwise remain completely empty and unused
- Keeps the actual floor area fully clear for furniture, movement, and everything else on this list
- A pegboard or slatwall system organizes tools far more effectively than loose ground storage ever could
- One of the most purely functional, high-value additions available for a small space specifically
Building the storage wall:
Setup options:
- A weatherproof pegboard panel mounted to the fence, holding hooks and small bins
- A slatwall system offering more heavy-duty hanging capacity for larger tools
- A simple row of coated hooks for hoses, a broom, and other larger loose items
Cost:
- Weatherproof pegboard panel and hooks: $50-100
- Slatwall system: $80-180
- Simple hook row: $20-40
My storage wall: Mounting a small weatherproof pegboard to the side fence, holding the hose, a broom, and a few small tool hooks, cleared the ground of nearly everything that had been sitting loose, and the yard immediately felt less cluttered without losing a single inch of floor space.
Fence Storage Tips
Choose galvanized or powder-coated hardware specifically rated for outdoor exposure:
Material durability:
- Standard indoor pegboard hooks and hardware rust quickly when exposed to outdoor moisture
- Galvanized or powder-coated options are specifically designed to resist this kind of corrosion
- This distinction matters significantly given how long this kind of storage system typically stays installed
- Worth the modest additional cost over standard indoor-rated hardware
Position heavier items lower on the storage wall, lighter items higher:
Practical organization:
- Heavier tools mounted too high create both a safety risk and general inconvenience reaching them
- A rough weight-based hierarchy, heavy at the bottom, light at the top, makes the system genuinely functional day to day
- This consideration is easy to plan for during initial installation and harder to fix after everything is already mounted
- A few minutes of planning here prevents an awkward, inconvenient final layout
11. Curved or Diagonal Layout Lines
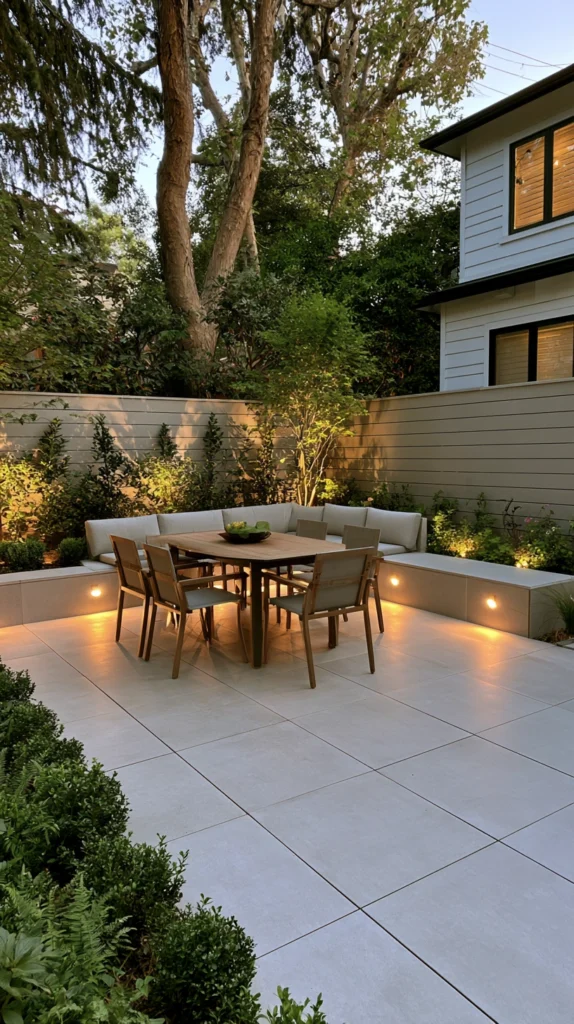
Angling a patio, path, or planting bed diagonally across the yard rather than following the straight, parallel lines of the property’s actual boundaries.
My yard that felt narrow and boxy:
What I had:
- A patio and pathway laid out in perfectly straight lines parallel to the fence
- A yard that emphasized its narrow, rectangular actual dimensions rather than disguising them
- A layout that made the space feel exactly as small as its measurements suggested
The diagonal layout solution:
Why breaking from straight, parallel lines tricks the eye into perceiving more space:
- A diagonal sightline is naturally longer than a straight line across the same rectangular footprint
- This is a well-established design principle, borrowed from small indoor room layouts, applied to a small yard
- Softens the boxy, narrow feeling that straight parallel lines tend to emphasize in a small space
- One of the more subtle but genuinely effective tricks on this entire list
Applying the diagonal principle:
Where to use it:
- A patio or paved area angled at 30-45 degrees relative to the fence lines
- A curved or diagonal path connecting different zones rather than a straight, direct route
- Planting beds angled rather than running in strict parallel lines along the fence
Cost:
- This is primarily a layout and planning decision rather than an added material cost
- If retrofitting an existing straight patio, expect $500-2,000 depending on the size of the area being reconfigured
My diagonal layout: Reorienting a new gravel path to angle diagonally across the yard, rather than running it straight along the fence line, genuinely made the space feel longer and less boxy, even though the actual yard dimensions never changed at all.
Diagonal Layout Tips
Test the diagonal orientation with rope or garden hose before committing to permanent materials:
Planning verification:
- Laying out the intended diagonal line with a flexible material lets you walk the space and confirm the effect before installation
- This test reveals whether the angle genuinely improves the sense of space or just complicates the layout unnecessarily
- A relatively quick, low-cost verification step before any real construction begins
- Worth doing even for a seemingly simple project like a diagonal planting bed line
Balance the diagonal element with at least some straight, grounding lines elsewhere:
Design balance:
- An entire yard built on diagonal lines can start to feel chaotic rather than spacious
- Pairing one diagonal element (a path or patio edge) with straight furniture arrangement or bed edges elsewhere maintains order
- This balance is what separates “cleverly expanded” from “confusingly angled”
- Consider the whole yard’s layout together rather than applying the diagonal principle everywhere at once
12. A Single Consistent Flooring Material Throughout
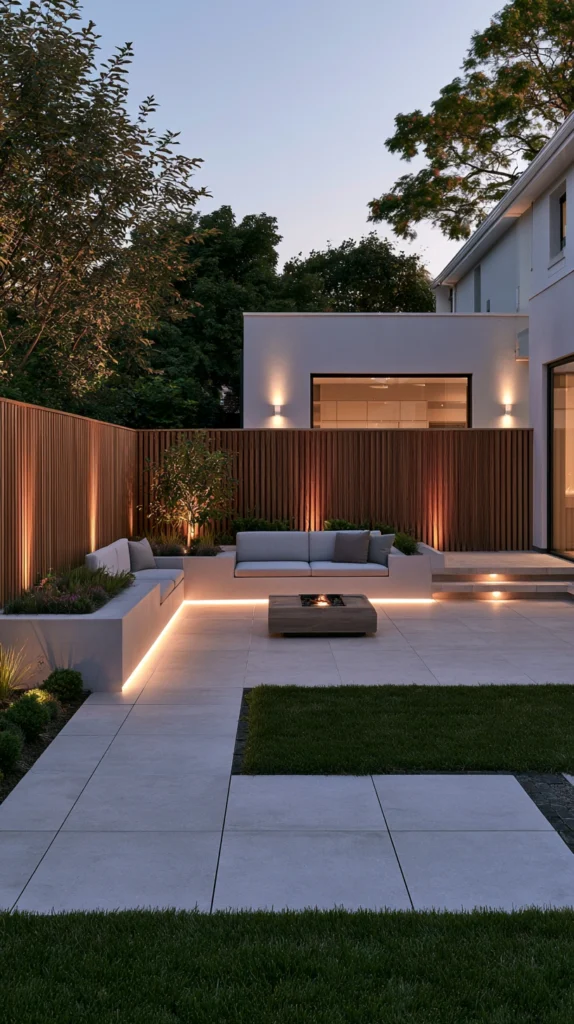
Using the same paving, decking, or ground cover material across the entire small yard, rather than mixing several different surfaces.
My yard with three different, disconnected surfaces:
What I had:
- A concrete patio slab, a small patch of grass, and a gravel side strip, none of them relating to each other
- Visual boundaries created by every material change, each one subtly shrinking the perceived space
- A yard that read as several small, disconnected areas rather than one cohesive space
The consistent flooring solution:
Why one material throughout makes a small space feel larger:
- Removes the visual boundaries created by multiple different surface materials meeting at odd lines
- A single continuous material lets the eye travel across the whole yard without interruption
- This is one of the most well-established small-space design principles, just as true outdoors as indoors
- Particularly effective in a small yard, where every material transition takes up proportionally more visual real estate
Choosing the unifying material:
Options to consider:
- Extending an existing concrete patio’s stain or color treatment across the full yard
- Replacing a mixed grass-and-gravel yard with a single consistent gravel or paver surface throughout
- Using the same paver or decking material for both a patio and any connecting pathway
Cost:
- Extending an existing material (varies by type): $8-20 per sq ft depending on material and labor
- A full yard resurfacing in a single consistent material: $1,500-5,000 for a typical small yard, depending on size and material choice
My consistent flooring: Replacing the mismatched grass patch and gravel strip with the same pea gravel used elsewhere in the yard, creating one continuous surface throughout, made the whole space read as noticeably larger and more intentional than the same square footage ever did divided into three separate materials.
Consistent Flooring Tips
Choose a material that works for every function the yard needs to serve:
Practical material selection:
- The single material chosen needs to reasonably support dining, lounging, and any planting areas within the same surface
- A durable, versatile choice like pavers or a quality gravel tends to work across more use cases than a highly specialized material
- This consideration prevents needing to reintroduce a second material later for a specific unmet need
- Think through the yard’s actual daily uses before finalizing the material choice
Use rugs and furniture, not additional materials, to create zone variation within the single surface:
Maintaining cohesion while still zoning:
- This pairs directly with the earlier zone-definition idea on this list, using rugs and lighting rather than new materials
- A single consistent floor material combined with rugs for zoning gets the best of both approaches
- This combination avoids reintroducing the visual fragmentation that multiple materials originally created
- Plan the flooring and the zoning strategy together rather than as separate, disconnected decisions
13. A Single Bold Focal Point Instead of Many Small Accents
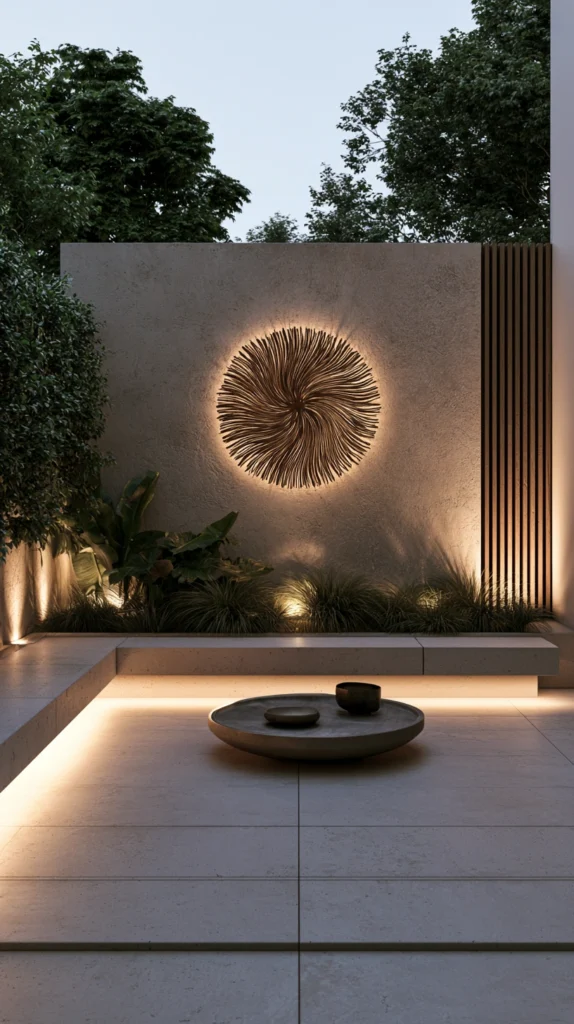
Choosing one striking, well-executed feature, whether a piece of art, a bold-colored wall, or a statement light fixture, rather than distributing decorating effort across many small accents.
My yard with too many small, competing details:
What I had:
- A scattering of small decorative items: a few garden ornaments, some string lights, several small signs
- No single feature that actually drew the eye or gave the space a clear identity
- A visually busy yard that, despite all the individual effort, never felt genuinely finished or intentional
The single focal point solution:
Why one bold choice outperforms many small ones in a tight space:
- A small yard has limited visual “room” for competing details, and too many small accents create clutter rather than charm
- One well-executed focal point gives the eye a clear place to land, similar to how the statement plant idea works
- Concentrating budget and effort on one feature typically produces a better result than spreading it thin
- Makes the space feel curated and intentional rather than randomly decorated
Choosing the right focal point:
Options to consider:
- A single bold-colored accent wall or fence section
- One striking piece of outdoor art or a sculptural element
- A statement light fixture positioned as the clear visual centerpiece
- The mirror, statement plant, or water feature described earlier on this list, if not already incorporated
Cost:
- Varies significantly by the specific focal point chosen, but budgeting $150-500 for one genuinely well-executed feature, rather than spreading that same amount across a dozen small items, delivers a noticeably stronger result
My single focal point: Removing most of the small scattered garden ornaments and instead painting one fence panel a bold terracotta, with a single striking metal wall sculpture mounted on it, gave the yard the clear visual identity that all those small individual accents combined had somehow never achieved.
Focal Point Tips
Resist the urge to add “just one more” small accent once the main focal point is in place:
Restraint principle:
- The temptation to keep adding small decorative touches can undermine an otherwise successful focal point strategy
- Once the main feature is installed and the space feels resolved, treat additional small purchases with real skepticism
- This restraint is genuinely difficult but is what preserves the clarity the single focal point approach is meant to achieve
- Live with the finished focal point for a few weeks before considering any further additions
Position the focal point where it’s visible from the yard’s main vantage point, typically the door or main seating area:
Placement for maximum impact:
- A focal point tucked into a rarely-viewed corner doesn’t deliver its intended effect
- Consider where people actually stand or sit most often, and orient the focal point toward that specific sightline
- This placement consideration matters as much as the feature choice itself
- Walk through the yard’s typical use pattern before finalizing exactly where the focal point goes
Choosing Your Small Backyard Projects
By Priority
Reclaim the most floor space:
- Vertical planters instead of ground-level pots (idea 1)
- A fold-down or foldable furniture system (idea 2)
- A fence-mounted storage and tool wall (idea 10)
Add the most perceived space:
- A wall-mounted mirror (idea 4)
- Curved or diagonal layout lines (idea 11)
- A single consistent flooring material (idea 12)
Add the most genuine function:
- A built-in corner bench with storage (idea 3)
- A narrow raised bed along the fence line (idea 6)
- Zone definition using rugs and lighting (idea 5)
By Effort Level
Lowest effort:
- A wall-mounted mirror (idea 4)
- A single bold focal point (idea 13)
- Zone definition using rugs and lighting (idea 5)
Medium effort:
- Vertical planters instead of ground-level pots (idea 1)
- A compact tabletop or wall water feature (idea 7)
- A fence-mounted storage and tool wall (idea 10)
- A statement tree or large specimen plant (idea 9)
Higher commitment:
- A built-in corner bench with storage (idea 3)
- A narrow raised bed along the fence line (idea 6)
- Multi-level deck or patio platforms (idea 8)
- A single consistent flooring material throughout (idea 12)
By Budget
Under $100:
- A wall-mounted mirror (idea 4)
- Zone definition using rugs and lighting (idea 5)
- A fence-mounted storage wall (idea 10)
$100-400:
- A fold-down furniture system (idea 2)
- A narrow raised bed along the fence line (idea 6)
- A compact water feature (idea 7)
- A statement tree or large plant (idea 9)
$400-1,500:
- A built-in corner bench with storage (idea 3)
- A single bold focal point, fully executed (idea 13)
- Multi-level patio platforms, smaller scale (idea 8)
$1,500+:
- A full consistent flooring material replacement (idea 12)
- A larger multi-level deck platform addition (idea 8)
Maintenance Through the Seasons
Spring:
- Reassess vertical planters and refresh soil and plantings for the new growing season
- Check fold-down table hardware and storage bench hinges after winter dormancy
Summer:
- Refill and clean any compact water feature regularly given its smaller water volume
- Monitor narrow raised beds for consistent watering, since shallow soil dries faster
Fall:
- Store foldable furniture and cushions before colder, wetter weather arrives
- Touch up any painted focal point surfaces showing wear before the season ends
Winter:
- Protect the statement tree or large specimen plant according to its specific cold tolerance
- Plan the next season’s small-space projects during the quieter winter months
My Complete Small Backyard Journey
What I built across two seasons:
Season one ($480):
- Vertical planter wall replacing floor-level pots
- Wall-mounted mirror
- Fold-down table and stackable chairs
- Learned that reclaiming floor space mattered more than any single decorative addition
Season two ($720):
- Built-in corner storage bench
- Narrow raised bed along the back fence
- A single bold focal point wall replacing scattered small ornaments
- Learned that one well-executed feature consistently outperformed several smaller, competing ones
Total investment: $1,200 across two seasons Most important lesson: In a small yard, what you remove or reorganize often matters as much as what you add Single highest-impact change across both seasons: The vertical planter wall, for the amount of floor space it reclaimed relative to its low cost
Getting Started This Weekend
Start by reclaiming space, not by adding more to it.
This weekend:
Step 1 — Move everything currently sitting on the ground up onto a wall or fence:
- Pots, tools, hoses, anything currently eating up floor space
- This single audit often reveals how much usable space was hiding under existing clutter
Step 2 — Add one mirror or reflective element:
- The fastest, lowest-effort way to test how much the perceived space can change
- Position it to reflect the yard’s best existing feature
Step 3 — Choose one zone to define more clearly with a rug or distinct lighting:
- Dining, lounging, or a single quiet corner
- No new furniture required, just a rug and a lighting choice
Step 4 — Pick one focal point and commit to it fully:
- Rather than several small decorative touches, choose one and execute it well
- This single choice often does more than a dozen smaller additions combined
My recommendation:
Start with a floor-space audit and the mirror:
- Both are fast, affordable, and immediately reveal how much of the “small yard” feeling was actually about clutter and flat, undifferentiated layout rather than true size
- Both work with the yard you already have, requiring no larger purchase to see the benefit
- This foundation makes every future addition build on a space that already feels more open
Stand at the yard’s main entry point once both changes are in place and notice how different the sense of scale feels before planning anything else.
Now go build the small backyard that finally feels like it’s using every single inch it actually has.
Quick Summary
The 13 small backyard ideas that make every inch count:
Reclaiming floor space:
- Vertical planters instead of ground-level pots (idea 1): the single highest floor-space return on this list
- A fold-down or foldable furniture system (idea 2): full function without permanent footprint
- A fence-mounted storage and tool wall (idea 10): organization without losing a single inch of ground
Expanding perceived space:
- A wall-mounted mirror (idea 4): one of the fastest, cheapest tricks available
- Curved or diagonal layout lines (idea 11): a subtle but genuinely effective visual trick
- A single consistent flooring material throughout (idea 12): removes the boundaries multiple materials create
Adding real function:
- A built-in corner bench with storage (idea 3): seating and storage solved together
- A narrow raised bed along the fence line (idea 6): real gardening space from otherwise dead area
- Zone definition using rugs and lighting (idea 5): multiple distinct spaces within one footprint
- Multi-level deck or patio platforms (idea 8): dimension without added square footage
Atmosphere and focal interest:
- A compact tabletop or wall water feature (idea 7): outsized ambiance from a tiny footprint
- A single statement tree or large specimen plant (idea 9): one anchor beats many scattered small plants
- A single bold focal point instead of many small accents (idea 13): curated beats cluttered every time
The universal small backyard rules:
Always:
- Use vertical space (walls, fences) as genuinely as floor space
- Choose one well-executed feature over several small competing ones
- Scale furniture specifically to the space’s actual dimensions
- Use rugs, lighting, and orientation to define zones without physical dividers
Never:
- Fill every available surface with small individual decorative items
- Force full-size furniture into a space built for something smaller
- Assume a small yard isn’t worth real design investment
- Mix too many different flooring or paving materials across a tight footprint
Common mistakes:
- Treating vertical space, walls and fences, as purely boundaries rather than usable surface
- Cluttering the ground with pots, tools, and furniture that could live on a wall instead
- Adding many small decorative accents instead of committing to one strong focal point
- Using straight, parallel layout lines that emphasize a yard’s narrow actual dimensions
- Waiting to invest in a small yard because it “doesn’t have much potential anyway”
Remember: a small backyard’s actual limitation is rarely its square footage, it’s usually how much of that footage is being used at all, vertical space and wall-mounted storage consistently deliver the highest return relative to cost, one well-executed focal point beats many scattered small accents every time, visual tricks like mirrors and diagonal lines genuinely change how spacious a yard feels, and the best small backyard transformation is the one that makes every single inch feel like it was placed there on purpose.