13 Fall Hammock and Lounge Area Ideas for Patios
Most hammocks get packed away the moment summer ends. A quick check of the forecast, a first cool night, and the hammock comes down — rolled up, stuffed into a storage bag, and placed in the garage alongside the pool floats and the ice cream maker until April.
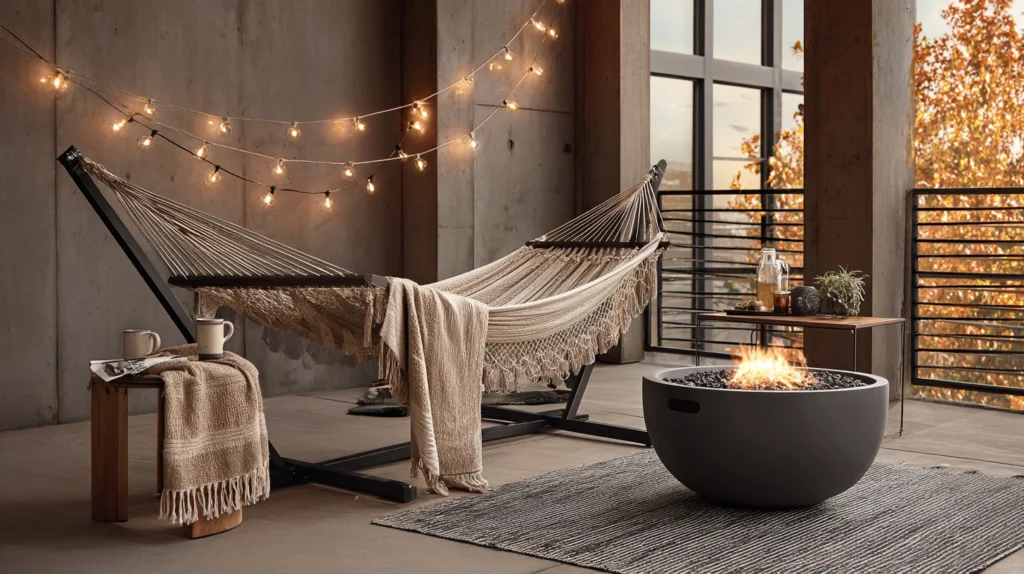
That instinct retires the hammock right when it becomes one of the more compelling places to be outdoors. A hammock on a mild fall afternoon, sheltered from a light wind with a blanket to hand, is a fundamentally different and arguably better experience than the same hammock at peak July heat. The problem isn’t the hammock. It’s that nobody set up a fall lounge area to put it in.
A fall patio lounge isn’t a summer one with the ice bucket taken away. It’s a different setup entirely — built around warmth retention rather than cooling, lower light rather than long days, and a small number of deliberate comfort layers that add up to an outdoor spot people actually want to stay in past five o’clock in October. Get those layers right, and the patio lounge becomes the spot that extends the outdoor season by two or three months past the point where most people stopped bothering.
Here are 13 ideas for building a fall patio lounge area that earns genuinely staying in.
Why Fall Hammock and Lounge Areas Play by Different Rules Than Summer
The rules are not the same for every season of outdoor lounging:
Summer Lounge Advantages:
- Long, warm evenings where the main design challenge is shade and cooling rather than warmth
- Minimal layering needed, since ambient temperature does most of the comfort work
- Long daylight means the lounge area works without any lighting plan until late in the evening
The summer lounge comparison: the season handles comfort, the furniture just needs to be there
Fall Lounge Advantages and Realities:
- The cool air that makes a hammock genuinely restorative rather than simply the least warm outdoor option
- Earlier darkness that arrives mid-afternoon and requires a deliberate lighting layer to keep the area usable
- A range of layering options — blankets, throws, a nearby heat source — that create genuine cozy infrastructure rather than just decor
The key insight:
- A summer patio lounge rewards minimal, breezy, low-effort setup
- A fall patio lounge rewards real warmth infrastructure and a layered approach to both comfort and light
- These are different outdoor living problems, not the same hammock simply left up a few more weeks
The Warmth and Light Reality
The most important planning consideration for a fall lounge area:
The temperature at the third hour:
- A fall afternoon can feel comfortably mild at three o’clock and genuinely cold by five
- Plan for the coldest expected hour of any anticipated lounge session, not the most comfortable one, since the coldest hour is the one that determines whether people stay or go inside
- Know this — it governs every heating, insulation, and blanket decision on this list
The “warmth first, style after” calculation:
- A hammock with a beautiful quilt nearby but no real heat source will be abandoned before the quilt gets much use
- A hammock beside a small fire bowl with a functional blanket will get used daily regardless of how little styling surrounds it
- Work from warmth outward — solve the temperature problem first, then layer the atmospheric touches on top of a lounge that’s already genuinely comfortable
Most fall lounge areas build in two stages:
- The comfort infrastructure — a heat source, a windbreak, real blanket storage — comes first, since it determines how late into the season the area is actually used
- The atmospheric and styling layers — string lights, cushions, seasonal touches — come second, once the functional comfort problem is already solved
1. The Hammock With a Weatherproof Hanging System (The Foundation That Determines Everything Else)
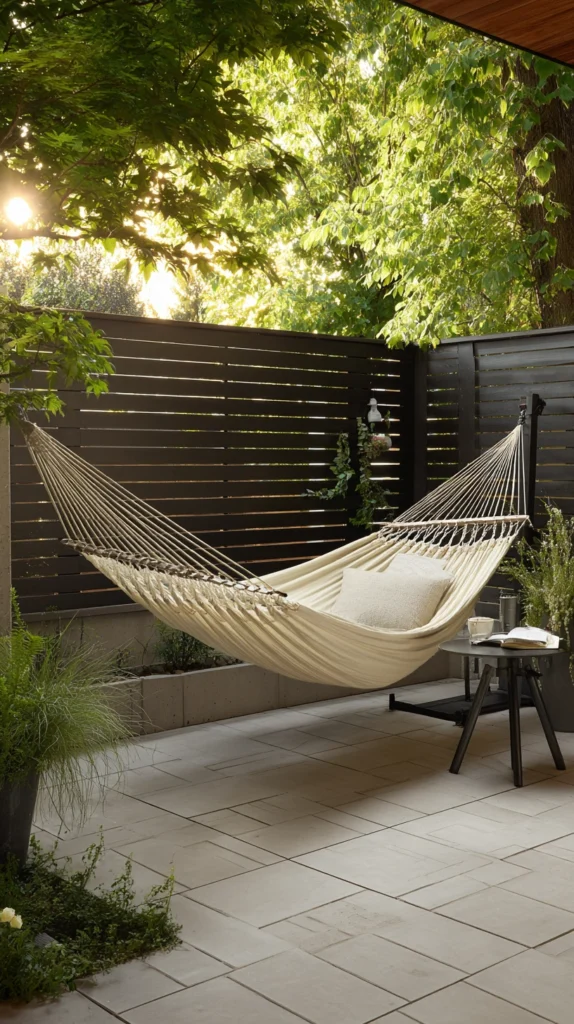
A hammock paired with a permanent or semi-permanent stand or hanging system, installed specifically for fall use — the foundation that determines how accessible and how pleasant the hammock actually is to use once the weather turns.
Why the hanging system matters more in fall than in summer
- The convenience-to-use barrier that fall creates: a hammock that has to be rehung from a loose knot between two trees every time someone wants to use it will get used far less often in fall, when the activation energy for going outside is already higher than in summer
- The stability a better system provides in windier fall conditions: fall’s breezes are more variable than summer’s, and a hammock on a secure hang system holds its position and comfort in light wind better than one on an improvised cord-and-carabiner setup
- The length-of-season extension a proper system allows: a semi-permanent stand or a pair of wall-mounted swivel hooks means the hammock can stay up through the whole fall season rather than being taken down and rehung repeatedly
The options
- A freestanding hammock stand, the most flexible option, usable on any patio surface without fixed mounting points
- Hammock wall hooks mounted to a patio structure or fence posts, for a more permanent installation that becomes part of the patio’s architecture
- A hammock chair hanging from a patio pergola, for a patio that doesn’t have two trees or posts in the right position
- A rope hammock with hardwood spreader bars, for more stability and easier entry and exit than a gathered-end camping hammock
The practical execution
- Position the hammock’s hang so the natural resting angle is approximately 30 degrees from horizontal, the standard for genuine comfort that most casual hammock hangs get wrong
- Confirm the hanging system can hold at least four to five times the intended user’s weight, since dynamic loading during entry and exit dramatically exceeds static resting weight
- Orient the hammock to face away from the prevailing wind direction where possible, since even a light crosswind felt along the full length of the body makes a hammock considerably less comfortable in fall temperatures
Cost breakdown
- Freestanding hammock stand: $80–200
- Wall-mounted swivel hooks, a pair: $20–50
- Quality rope or fabric hammock: $60–200
- Total: $80–400, depending on whether new hanging hardware is needed
The hammock hung on a system designed to stay up all season: the one piece of infrastructure every other idea on this list arranges itself around.
2. The Windbreak Screen or Privacy Panel (Turning a Breezy Patio Into a Sheltered Spot)
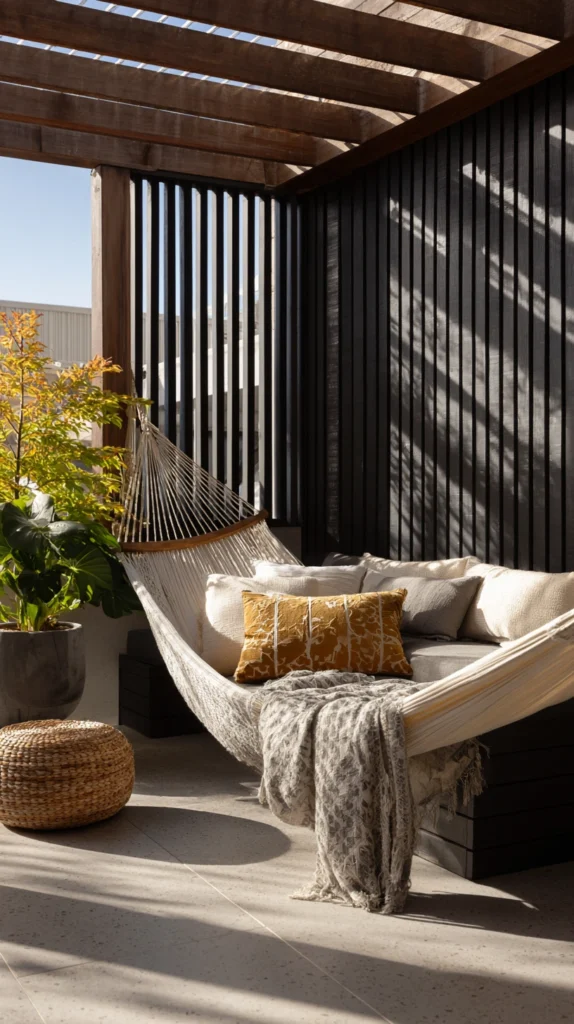
A freestanding screen, fence section, or planted hedge, positioned to block the prevailing wind direction behind and around the hammock and lounge seating — the addition that does more to extend fall outdoor comfort than any blanket.
Why wind protection matters more than most lounge area improvements
- The felt-temperature difference wind creates at fall air temperatures: a light breeze at 60°F feels meaningfully colder than still air at 55°F, making even moderate wind more disruptive to fall outdoor comfort than a comparable additional temperature drop in calm conditions
- The practical lounging difference shelter makes: a hammock or chair on a windless side of a screen can remain genuinely comfortable for an hour or more past the point where the same spot without shelter would become too cold to enjoy
- The privacy benefit that accompanies the wind-blocking function: a screen or planted hedge creates a more contained, intimate lounge area as a natural side effect of doing its primary job of blocking wind
The options
- A freestanding lattice or trellis panel, weighted with a planter base for stability without permanent installation
- An outdoor canvas or bamboo shade screen, lightweight and repositionable as the prevailing wind shifts through the season
- A planting of ornamental grasses or tall evergreen shrubs, for a living windbreak that improves over multiple seasons
- Stacking a small group of large container plants, using massed planters as a softer alternative to a hard screen panel
The practical execution
- Identify the prevailing wind direction for fall evenings specifically, since it can differ from summer’s dominant wind pattern depending on the local geography
- Position the screen upwind and slightly to the side of the lounging position, rather than directly behind it, so the protected zone it creates extends over the full length of a reclining hammock user
- Leave enough gap at the screen’s edges to avoid creating a wind tunnel effect, since a screen that’s too tightly sealed can actually accelerate wind at its sides
Cost breakdown
- Freestanding lattice or shade screen: $40–120
- Ornamental grasses or tall container plants: $60–150
- Total: $40–270
3. The Layered Blanket and Throw System (Warmth That Escalates With the Evening)
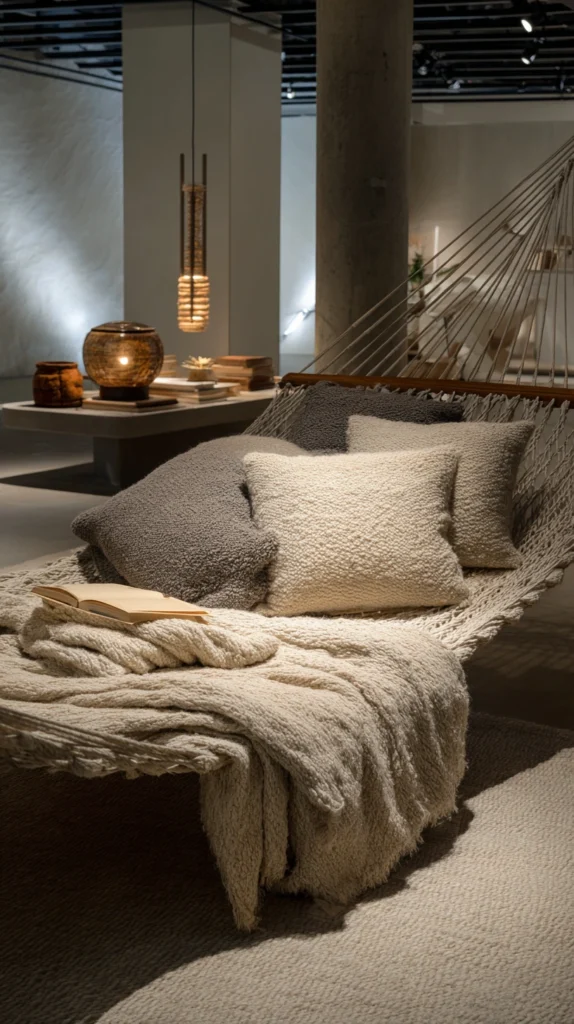
Multiple blankets staged at the lounge area in graduated weights — a lighter throw for the mild early afternoon, a heavier wool blanket for the cooler later hours — rather than a single one-size-fits-all approach.
Why graduated blanket layers work better than one heavier option
- The temperature arc a fall afternoon follows: most fall lounge sessions begin in tolerable warmth and end considerably colder, which means a blanket heavy enough for the end of the session is unnecessarily warm and physically cumbersome at its beginning
- The visual abundance a blanket station creates beyond pure function: a basket or ladder rack holding several folded blankets looks inviting and considered in a way that a single blanket draped over a chair does not
- The guest-accommodating function multiple blankets provide: if a lounge area occasionally hosts more than one person, a staged blanket station means no one is waiting for the only available wrap
The options
- A cotton or linen throw, the lightest layer for the early afternoon hours
- A fleece or midweight blanket, for the transitional late-afternoon period
- A thick wool or sherpa blanket, for the genuinely cold last hour of the lounge session or after dark
- All three staged in a large basket or on a small ladder rack near the hammock, so each weight is immediately accessible without going inside
The practical execution
- Choose materials that can handle outdoor humidity and an occasional damp evening without becoming unpleasant, since leaving blankets outside during a fall day means they’ll absorb any moisture in the air
- Store the weighted set in a weatherproof basket or a lidded bin nearby when not in active use, protecting them from unexpected rain rather than bringing them in after every use
- Wash the full set at the end of the season and store inside rather than leaving them outside through winter, since even moisture-tolerant materials deteriorate faster than expected through repeated wet-dry cycles over a full winter
Cost breakdown
- Lightweight cotton or linen throw: $20–40
- Mid-weight fleece or blanket: $25–45
- Heavy wool or sherpa blanket: $40–80
- Storage basket: $20–45
- Total: $105–210 for a full three-layer set with storage
4. The Fire Bowl or Small Fire Feature (The Warmth Source That Also Does Atmospheric Work)
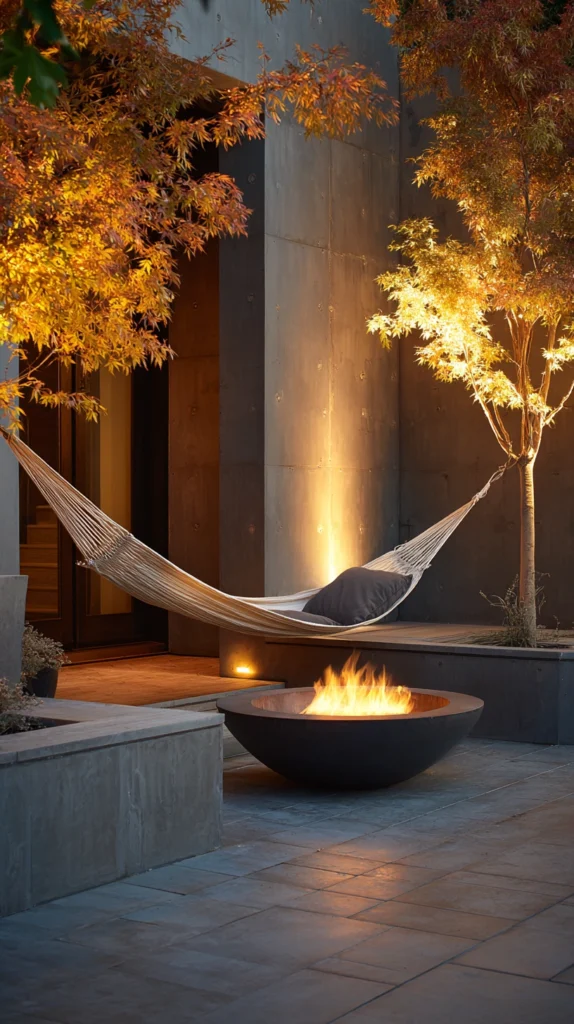
A compact fire bowl, chiminea, or tabletop fire feature, positioned within the lounge area’s radius — the single addition most responsible for genuinely extending a fall lounge season rather than simply suggesting it could be extended.
Why a fire feature specifically extends this spot’s use more than any other warmth solution
- The genuine radiant heat it provides at the lounge’s immediate scale: unlike a room where ambient heating raises the whole space’s temperature, an outdoor lounge depends on localized, directional warmth, and a fire bowl aimed toward the hammock or chair delivers exactly that
- The atmospheric quality fire provides that a heater cannot: the light, movement, and sound of a real flame creates an ambiance no electric or propane heater fully replicates, turning a lounge area from a place to sit warmly into a place someone actively wants to go
- The longer session duration it enables: outdoor lounge sessions that begin with the intention of staying “just for a few minutes” extend considerably when there’s a lit fire nearby, since the combination of warmth, light, and something to watch creates a natural reason to stay
The options
- A small steel fire bowl, the most accessible and most portable option for most patio sizes
- A chiminea, offering a more contained, directional flame with less spark risk than an open bowl
- A tabletop propane fire feature, for a patio where a wood-burning option isn’t appropriate
- A fire pit built into a nearby seating area, for a more permanent version of the same warmth-and-atmosphere combination
The practical execution
- Position the fire feature within 6–8 feet of the hammock, close enough for real warmth to reach a reclining user without being so close that sparks or heat create safety concerns
- Check local ordinances and any seasonal fire restrictions before committing to a wood-burning option as the area’s primary fall heat source
- Keep a small covered wood storage rack nearby, since running out of wood mid-session is the fastest way to end an otherwise extended lounge afternoon
Cost breakdown
- Small steel fire bowl: $50–120
- Chiminea: $80–200
- Tabletop propane fire feature: $60–150
- Total: $50–200
5. The String Light and Lantern Layer (Keeping the Lounge Area Usable After Early Sunset)
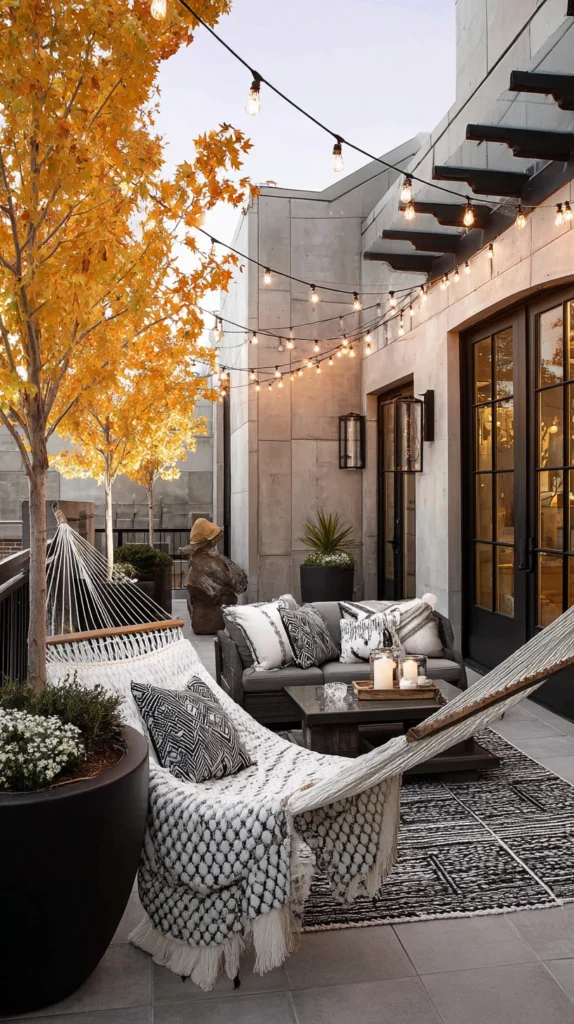
Warm white string lights strung overhead or along a nearby structure, paired with one or two lanterns placed beside the hammock and seating — the lighting layer that extends the lounge area’s usable hours past the point where fall’s early sunset would otherwise end them.
Why fall sunset makes this lighting layer more necessary than any other add-on
- The daylight-gone-by-six problem fall creates specifically: a lounge area with no lighting plan loses two or three of its most comfortable hours — the mild early evening, when the temperature is still reasonable but the sun is already down — simply because there’s nothing to see by
- The warm-glow quality that matches the lounge area’s purpose: string lights and lanterns produce a quality of light suited to slow, unhurried outdoor relaxing in a way that a functional overhead security light or a bright flood doesn’t
- The boundary-defining effect overhead lights create: string lights strung overhead mark the edges of the lounge area in the dark the same way a ceiling defines a room, giving the space a contained, intentional identity after sunset
The options
- Battery or solar-powered string lights, strung between the hammock’s anchor points or along a nearby fence or pergola
- A single battery-powered lantern, placed on a side table or ground spot beside the hammock
- A combination of string lights above and a flameless candle lantern at ground level, layering two heights of warm light
- Dimmable LED string lights on a smart plug, allowing the brightness to drop as the evening progresses without going entirely dark
The practical execution
- Position string lights to clearly illuminate the path to and from the hammock, not just the hammock itself, since navigating a dark yard to reach a lit hammock area defeats the purpose of the lighting
- Test the full lighting setup after dark before counting on it for an actual lounge session, since gaps in coverage are invisible during a daytime installation check
- Use outdoor-rated, weatherproof connections throughout, since this installation stays up through the variable weather of the full fall season
Cost breakdown
- Battery or solar string light set: $20–50
- Battery lantern: $15–30
- Total: $35–80
6. The Hammock Chair as an Alternative Seating Option (A More Socially Flexible Shape)
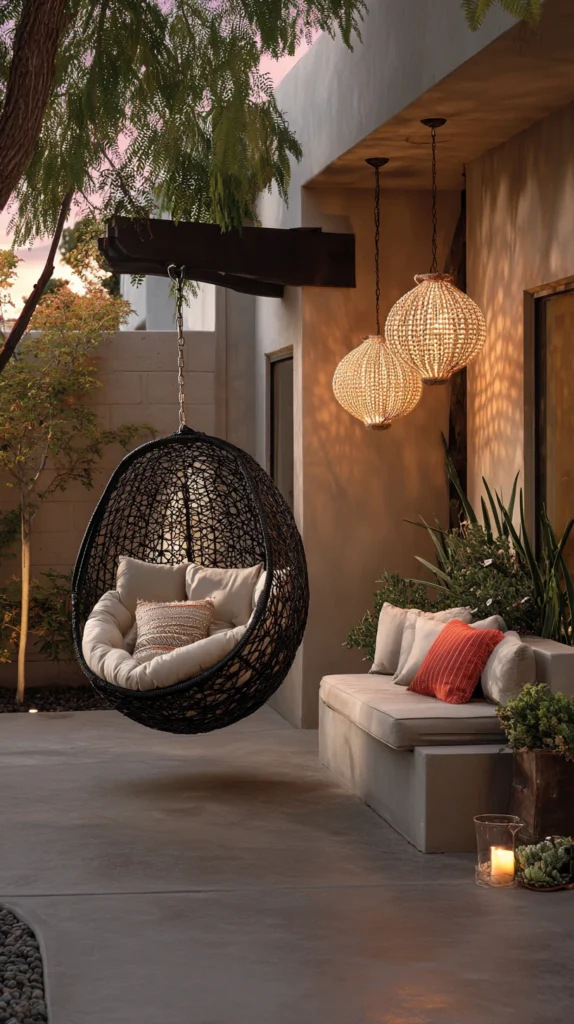
A hanging hammock chair, suspended from a pergola beam or a dedicated hanging stand, positioned near the main hammock as a second lounging option — the piece that makes the lounge area usable for two people simultaneously without requiring both to share the same reclining surface.
Why a chair-shape complement to a flat hammock makes the whole area more functional
- The two-person lounge problem most single hammocks create: two people rarely want to share a hammock simultaneously, and one person in a hammock with another seated in a standard patio chair creates a significant height and comfort asymmetry that makes conversation awkward
- The upright lounging posture a chair allows for activities a flat hammock doesn’t easily accommodate: reading, working on a laptop, eating, or talking at a table-height surface all work comfortably in a hanging chair in a way they don’t in a fully reclined hammock
- The compact footprint a hanging chair requires: a hammock chair suspends from a single point rather than two, requiring significantly less horizontal space than a full-length hammock, making it a practical addition to a smaller patio lounge footprint
The options
- A woven rope or cotton hammock chair, in a naturalistic material that reads as cohesive alongside a traditional rope hammock
- A macramé hanging chair, for more texture and visual interest in the lounge area’s overall styling
- A rigid rattan or wicker egg chair, for a more structured alternative to a fully suspended fabric chair
- A hanging papasan chair, for a wider, more nest-like seated option than a standard hammock chair provides
The practical execution
- Confirm the single mounting point for a hanging chair is rated for significantly more weight than the chair’s intended occupant, since the loading dynamics of a suspended chair are more dynamic than a static piece of furniture
- Position the chair close enough to the hammock to make conversation easy, but with enough clearance that the two pieces can swing freely without hitting each other
- Add a cushion or folded throw inside the chair for additional comfort and a small styling contribution
Cost breakdown
- Woven rope or cotton hammock chair: $40–120
- Rattan or wicker egg chair: $150–400
- Hanging hardware: $15–30
- Total: $55–430, depending on chair type
7. The Side Table and Drink Station (Somewhere to Set Things Without Getting Out)
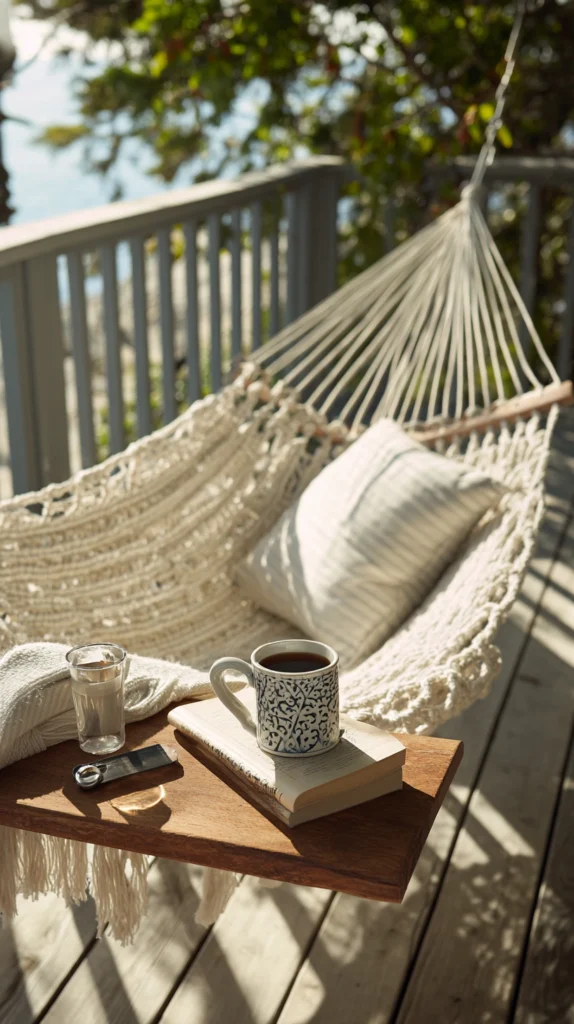
A small side table within reach of the hammock — close enough to set a drink on, pick up a book from, or rest a phone without leaving the hammock — paired with a nearby small drink station for refills without going inside.
Why a side table specifically extends how long someone stays in a hammock
- The activation-energy problem getting up creates: every time something needed is out of reach from a hammock, the user has to go through the significant physical effort of getting out, and each of those exits is an opportunity to simply not get back in
- The drink-and-book combination that defines most successful lounge sessions: a genuinely long hammock session almost always involves something to drink and something to read or listen to, and both of those things need somewhere to go at arm’s length
- The refill function a nearby drink station adds beyond the side table alone: a thermal carafe of coffee, cider, or tea within reach means a finished drink doesn’t require a trip inside, removing the most common reason a fall hammock session ends when it otherwise could have continued
The options
- A small teak or resin side table, weatherproof and at hammock-arm height when positioned beside the hanging point
- A wall-mounted fold-down shelf, for a patio where floor space is tight
- A simple wooden stool, often a lower-cost and more flexible alternative to a dedicated side table
- A small crate or upturned planter as a side table, for an improvised option that costs nothing additional
The practical execution
- Position the side table on the side the hammock user will face naturally, since a table on the wrong side of a resting position requires an awkward reach that defeats its purpose
- Choose a table height specifically appropriate to use from a reclining position, which is lower than a standard patio side table height suits
- Keep the table surface small enough not to accumulate so many things that it looks cluttered, since part of its value is remaining a clear, accessible surface throughout the lounge session
Cost breakdown
- Small weatherproof side table: $30–80
- Small thermal carafe and mugs: $25–50
- Total: $55–130
8. The Overhead Shade or Patio Umbrella (Sun and Wind Management in One Structure)
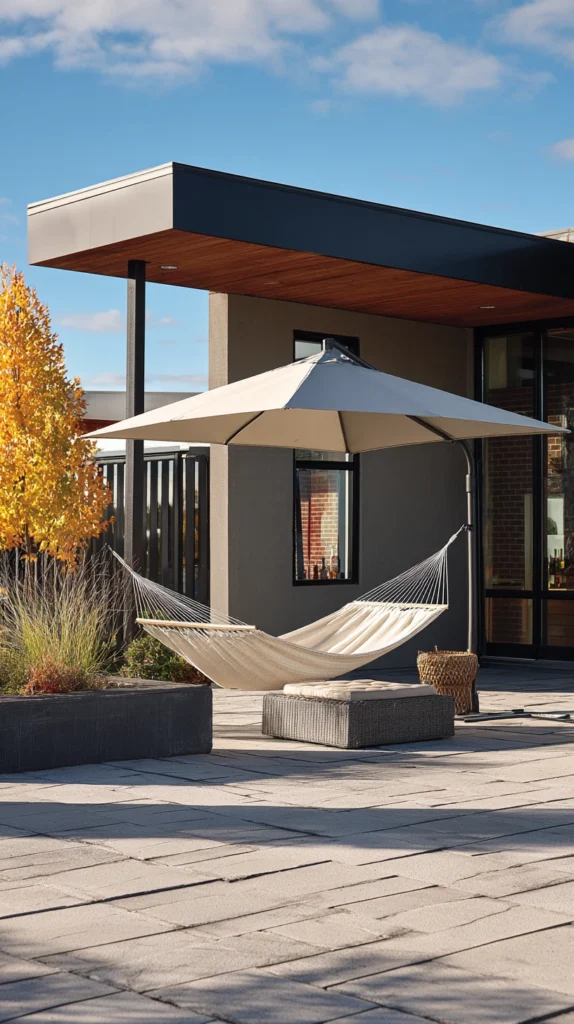
A patio umbrella or freestanding shade sail, positioned to shade the hammock from direct afternoon sun and to partially deflect wind from above — the structure that manages the lounge area’s most unpredictable fall comfort variables simultaneously.
Why overhead shade still matters in fall specifically
- The low-angle sun problem fall afternoons create: fall’s lower sun angle can produce more direct, angled glare than summer’s higher, more overhead sun, particularly in a hammock where a reclining user faces the sky rather than squinting at a vertical surface
- The partial wind deflection a canopy offers above the windbreak screen’s horizontal blocking: a shade sail or umbrella creates a partial overhead shelter that breaks up gusting air from above in a way a vertical screen alone doesn’t address
- The rain-interlude extension an umbrella specifically allows: a light drizzle that would otherwise end a lounge session immediately becomes something that can be waited out from under a patio umbrella, extending the area’s functional use into weather that would otherwise define the session’s end
The options
- A large offset cantilever umbrella, positioned to shade the hammock from the side rather than requiring a center pole in the middle of the lounge area
- A shade sail, stretched between three or four fixed points above the lounge area for a more architectural, permanent shading solution
- A simple beach or bistro umbrella in an adjustable base, the most portable and lowest-cost option
- An attached pergola canopy or retractable awning, for a patio with an existing pergola structure to mount it to
The practical execution
- Angle the umbrella or sail to block the specific direction from which afternoon sun enters the lounge area, which requires knowing the sun’s actual path at fall latitudes rather than assuming it’s the same as summer
- Confirm any freestanding umbrella base is weighted sufficiently for fall’s more variable wind conditions, since an umbrella that tips over in a gust creates a safety issue rather than solving a comfort one
- Close or take down any non-permanent shade structure before extended absences or predicted high-wind weather, since fall’s wind events are more significant than most summer weather
Cost breakdown
- Offset cantilever umbrella: $120–400
- Shade sail and hardware: $50–150
- Total: $50–400, depending on type
9. The Outdoor Rug and Defined Ground Layer (Making the Lounge Area Feel Like a Room)
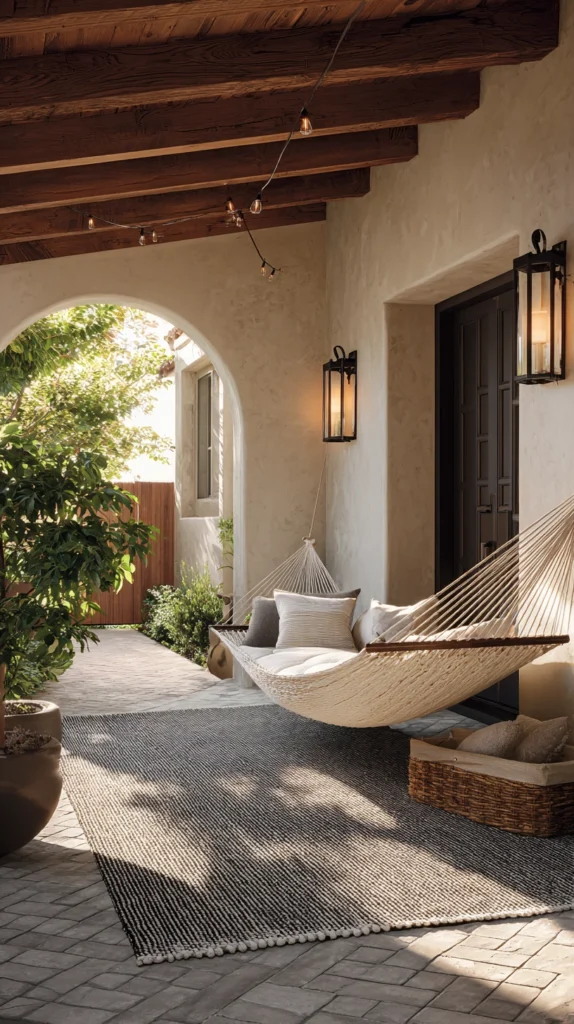
A weather-resistant outdoor rug, placed beneath the hammock and any adjacent seating, defining the lounge area as a specific zone within the larger patio or yard — the ground-level boundary that makes the whole area feel like a place rather than simply a spot.
Why a rug changes the experience of the whole lounge area
- The room-defining function it performs at ground level: like an indoor rug marking a seating area, an outdoor rug beneath the lounge area creates visible boundaries that distinguish this as a specific, designed space rather than a generic patch of patio where a hammock happens to be
- The softness underfoot that matters when getting in and out of a hammock: the moment of stepping out of a hammock onto bare, cold tile or concrete is a sensory shock that an outdoor rug noticeably softens, making the exit less abrupt
- The color and pattern layer it contributes to the lounge area’s overall styling: between a hammock, a fire bowl, and a few blankets, most fall lounge areas are neutral and textural, and a rug is often the most practical way to introduce a deliberate color note at a larger scale
The options
- A polypropylene outdoor rug, the most durable and most moisture-resistant option for full outdoor exposure
- A flatweave cotton rug rated for outdoor use, for a softer material choice on a covered patio
- A vintage-look or distressed printed rug, for more visual character than a solid or geometric alternative
- A round rug, for a softer shape contrast beneath a long, rectangular hammock and stand
The practical execution
- Choose a rug sized to extend slightly beyond all the furniture’s footprint — the hammock stand, the side table, any adjacent chairs — rather than a rug that only fits directly beneath the hammock itself
- Use rug grippers or stakes on grass or gravel surfaces, since outdoor rugs move considerably more than indoor ones during active use and in wind
- Roll and store the rug inside during extended wet weather or before a hard freeze, since even outdoor-rated rugs deteriorate faster with unnecessary weather exposure than needed
Cost breakdown
- Polypropylene outdoor rug, large: $60–150
- Total: $60–150
10. The Hammock Pillow and Cushion Layer (Comfort That Makes Staying Effortless)
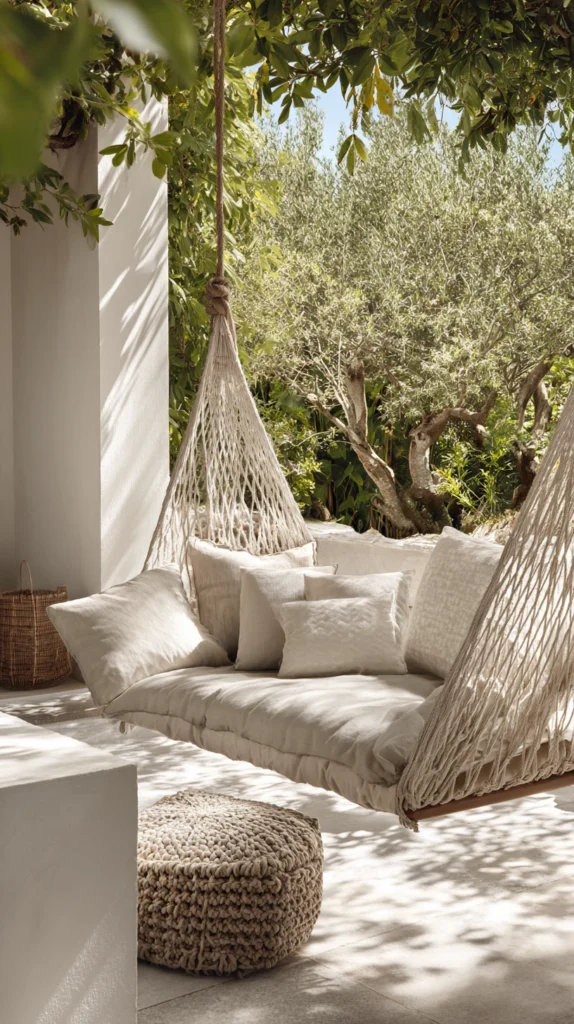
Outdoor cushions and pillows, placed inside or beside the hammock, adding the layer of physical comfort that turns a technically lounging experience into a genuinely restful one.
Why cushions and pillows belong in a fall hammock setup even more than a summer one
- The longer-session duration fall encourages: a mild fall afternoon invites hour-long lounge sessions in a way that peak summer heat discourages, and a longer session rewards the investment in physical comfort that a quick summer rest doesn’t require
- The warmth layer solid cushions add beneath and around the body: a cushion or bolster pillow in a hammock creates a small barrier between the body and the open weave of the hammock, retaining more body heat than the hammock mesh alone
- The styling contribution pillows make to the lounge area’s visual warmth: fall-appropriate cushions and pillows in rust, deep olive, or warm terra cotta do for the lounge area’s aesthetic what throw pillows do for an indoor reading nook — converting a functional surface into an inviting one
The options
- A long bolster cushion, running most of the hammock’s length for full-body support
- A pair of standard outdoor throw pillows, for head and back support in a more upright or partially reclined position
- A hammock-specific quilt or patterned throw, sized to fit inside a standard hammock rather than hanging over its edges
- A set of outdoor cushions that can serve both the hammock and the adjacent seating, buying one coordinated set rather than separate pieces for each surface
The practical execution
- Choose outdoor-rated cushion fabric specifically, since hammock cushions in full outdoor exposure will encounter morning dew, light rain, and considerable humidity through a full fall season
- Store cushions and pillows in a weatherproof outdoor storage box or bring them inside after each use if prolonged rain is expected, since outdoor cushion fill takes significantly longer to dry than outdoor cushion fabric
- Wash cushion covers at the end of the season before storage, both to remove any accumulated outdoor grime and to ensure they’re ready for immediate use at the start of the next
Cost breakdown
- Long bolster cushion, outdoor-rated: $30–60
- Throw pillows, outdoor-rated, a pair: $30–60
- Total: $60–120
11. The Seasonal Plant and Foliage Surrounding (Bringing the Autumn Garden Into the Lounge Space)
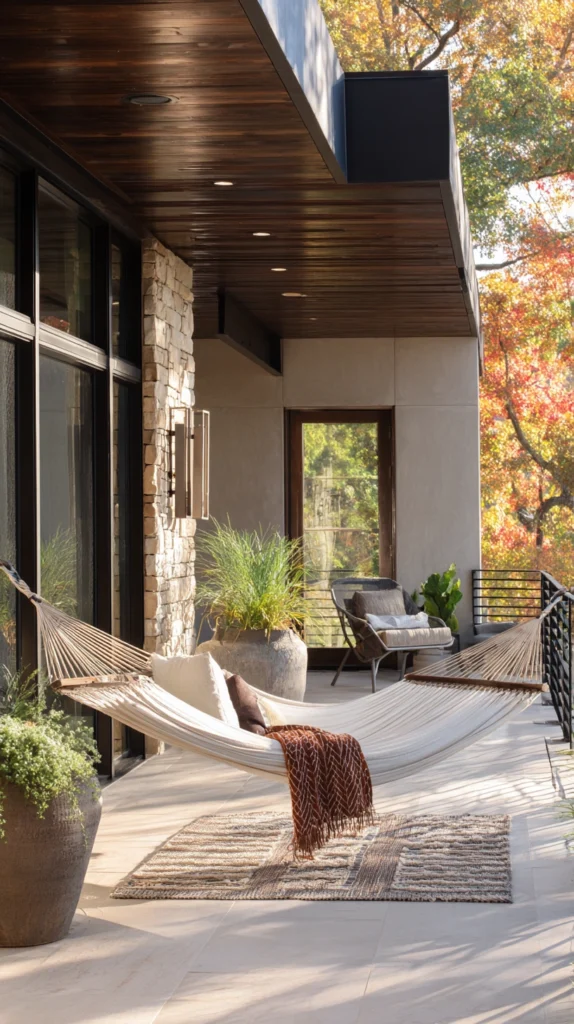
Potted mums, ornamental grasses, and fall foliage, arranged in groupings around the lounge area’s perimeter — the living layer that ties the lounge spot into its garden setting rather than leaving it as a piece of furniture in an otherwise empty patio.
Why surrounding greenery changes the experience of being in the lounge area
- The garden-embedded feeling it creates for a spot that might otherwise feel like furniture simply placed outdoors: a hammock lounge surrounded by living plants reads as part of the garden’s world rather than a piece of indoor furniture temporarily relocated outside
- The scent and texture dimension fall foliage specifically adds at close range: ornamental grasses catching the wind beside a hammock, mums releasing fragrance nearby, and the sound of foliage in a light breeze all contribute to an outdoor experience that no amount of styling inside the lounge area can replicate
- The color the season’s most available, most affordable plants contribute: fall mums and ornamental grasses available at any garden center in September and October are among the easiest, least expensive ways to introduce real, living color into an outdoor space
The options
- Mums in deep rust, burgundy, and gold, grouped in clusters at the lounge area’s corners
- Ornamental grasses in tall containers, placed upwind of the hammock so their movement is visible while reclining
- A small Japanese maple or other fall-color container tree, for a more substantial, longer-lived foliage investment
- A mix of potted herbs beside the side table, combining visual texture with the incidental aromatic benefit of brushing past rosemary or sage during entry and exit
The practical execution
- Group plants in odd numbers and at varied heights, the same composition principle used in any other fall display, rather than spacing them individually at equal intervals
- Water potted plants consistently given fall’s irregular rainfall, since a drought-stressed plant losing leaves early undercuts the lounge area’s intended living atmosphere
- Position plants where they enhance the lounge experience rather than impeding the path in or out of the hammock, since a flower pot that a person brushes against every time they exit is quickly moved rather than enjoyed
Cost breakdown
- Mums, 3–4 pots: $25–50
- Ornamental grasses, a pair: $30–60
- Total: $55–110
12. The Cozy Cover or Hammock Sleeve (The Accessory That Makes the Hammock Genuinely Season-Extending)
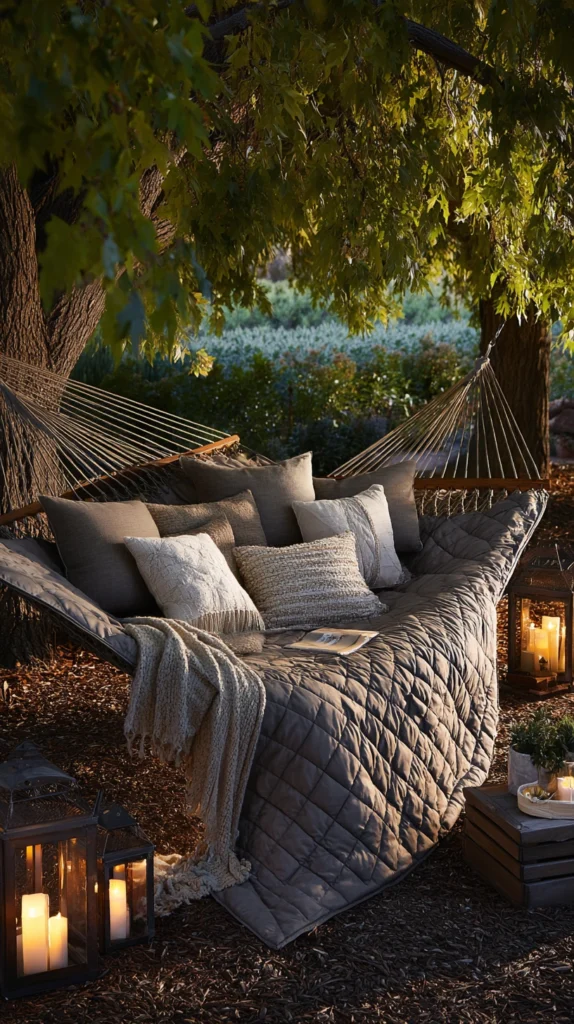
A dedicated hammock blanket, quilt, or full hammock sleeve — a cover that wraps around or inside the hammock rather than simply being placed on top — the specific accessory that makes genuinely cold fall days viable rather than just technically survivable.
Why this differs from the general blanket station in Idea #3
- The wrap-around coverage it provides: a blanket placed on top of a hammock leaves the user’s back, sides, and underneath exposed to the hammock mesh and whatever wind passes through it, while a sleeve or wrap that encloses the hammock provides coverage from every direction simultaneously
- The built-in windbreak effect at the body level: a hammock sleeve or wrap insulates the user from the mesh’s open weave itself, which acts as a wind channel in fall conditions in a way an enclosed mattress or ground pad doesn’t
- The genuine cold-weather viability it enables: a hammock sleeve with an appropriate temperature rating extends realistic hammock use into conditions that a blanket on top alone simply doesn’t cover, particularly in areas where fall evening temperatures drop into the forties
The options
- A thick flannel or wool hammock blanket, sized to wrap fully around the inside of a standard hammock
- A hammock underquilt, designed specifically to insulate from below where regular blankets leave the body exposed to the mesh
- A hammock gear sleeve or full cocoon cover, for the most comprehensive cold-weather hammock insulation available
- A simple large wool blanket, draped inside and tucked around the sides, as an improvised version of the same function without a purpose-built product
The practical execution
- Match the sleeve or underquilt’s temperature rating to the actual coldest temperatures expected during fall use, not just the average, since the most critical moment for insulation is the coldest hour of the longest session
- Choose a moisture-resistant outer shell on any hammock cover, since morning dew or a light drizzle will reach the hammock cover before being noticed by someone already inside
- Test the full setup on a moderately cool day before relying on it for genuine cold-weather use, since the difference between adequately warm and uncomfortably cold at forty degrees is smaller than it seems from inside a warm house
Cost breakdown
- Large flannel or wool hammock blanket: $40–80
- Hammock underquilt: $60–150
- Total: $40–150
13. The Named and Furnished Lounge Corner (Making the Space Feel Permanent, Not Incidental)
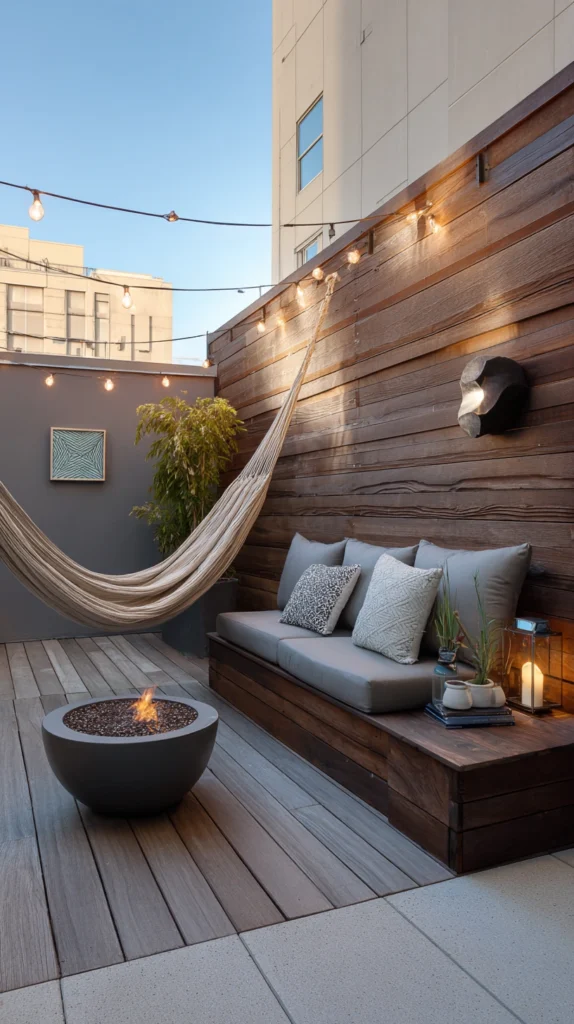
A small, deliberate finishing of the lounge area’s character — a name, a small piece of art, a single plant with a named variety marker, or a hanging sign — the detail that signals this spot was designed and belongs here, rather than having simply arrived on the patio one day and never been moved.
Why the finishing touch changes how the whole area gets used
- The ownership-of-place effect that naming or permanently styling a spot creates: a lounge area that has a clear identity — a favorite hammock corner, a styled reading spot with a specific lamp and a named plant beside it — gets used more deliberately than one that reads as provisional or temporary
- The maintenance behavior it encourages: a lounge area that feels like a finished, named place tends to be cared for between sessions, kept organized, and refreshed seasonally, while one that feels temporary tends to accumulate things that don’t belong there and gradually stop being used
- The conversation-starting quality a single distinctive detail provides: a small, unexpected touch in an outdoor lounge — a pressed fall leaf framed on the fence nearby, a small hand-lettered sign, a single ceramic pot with a named herb — is the kind of thing that gets noticed and remarked on, transforming a patio fixture into a small distinctive feature
The options
- A small hanging sign or plaque, mounted on the nearby fence or pergola, naming the lounge spot or simply marking it as a specific destination
- A piece of outdoor-safe art, hung or leaned near the hammock
- A single distinctive plant in a statement pot, given a specific place in the lounge area’s layout rather than being one of the general grouping from Idea #11
- A simple engraved or branded wood plank, as a low-cost but deliberately personal finishing touch
The practical execution
- Choose materials rated for full outdoor exposure, since a sign or art piece mounted near a hammock sees the same weather as the rest of the patio
- Keep the finish simple and appropriate to the lounge area’s general character, since a heavily styled sign in a rustic fall lounge area reads as incongruous rather than charming
- Install the finishing touch last, after all the functional and comfort decisions are already in place, since its entire job is to complete an area that already works rather than to compensate for one that doesn’t
Cost breakdown
- Small outdoor sign or plaque: $15–40
- Piece of outdoor-safe art: $20–80
- Total: $15–80
The small sign hanging on the fence beside the hammock, naming the corner or simply marking it as a place worth going: the last thing anyone adds to a fall lounge area, and the detail that makes it feel like it was always supposed to be there.
The Fall Hammock Lounge Roadmap
The work, sequenced:
Phase One (the comfort infrastructure):
- The hammock with a weatherproof hanging system (#1)
- The windbreak screen or privacy panel (#2)
- The fire bowl or small fire feature (#4)
Phase Two (the warmth and use-extension layer):
- The layered blanket and throw system (#3)
- The hammock pillow and cushion layer (#10)
- The cozy cover or hammock sleeve (#12)
Phase Three (the light, seating, and functional layer):
- The string light and lantern layer (#5)
- The hammock chair as an alternative seating option (#6)
- The side table and drink station (#7)
- The overhead shade or patio umbrella (#8)
Phase Four (the finishing and atmosphere layer):
- The outdoor rug and defined ground layer (#9)
- The seasonal plant and foliage surrounding (#11)
- The named and furnished lounge corner (#13)
Getting Started This Weekend
The immediate-impact lounge setup:
One afternoon, three changes:
- Confirm the hammock’s hang is still in place and set up the layered blanket station nearby (Ideas #1 and #3)
- Position a small fire bowl within comfortable reach of the hammock (Idea #4)
- Hang a string light set overhead and place a lantern on the ground nearby (Idea #5)
Total cost: $90–200. Time: about two hours. The lounge area will already be genuinely usable for a fall evening session by the time the work is done, with warmth, light, and access to additional blankets all solved.
The structural investment (the next big project):
The windbreak screen (Idea #2) is the single addition most likely to make the lounge area function into genuinely cooler fall temperatures than it otherwise would. A hammock beside a fire bowl is comfortable until the wind picks up; the same setup behind a windbreak remains comfortable through conditions that would make the exposed version untenable. Once the wind problem is solved, every other comfort layer on this list adds to a situation that’s already fundamentally manageable rather than fighting a condition that undermines them all.
What a properly set-up fall hammock lounge provides that an unused hammock in a storage bag can’t:
The extended season that doesn’t require special weather:
- A windbreak turning a breezy fall afternoon into a sheltered one
- A fire bowl extending the comfortable outdoor hour past sunset into genuine evening
- A hammock sleeve making temperatures viable that a blanket on top alone doesn’t cover
The daily invitation that makes the area actually get used:
- A permanent, easy hanging system removing the activation energy of setup
- A blanket station within arm’s reach eliminating the friction of going back inside
- A side table and drink station making two hours outside feel easy rather than effortful
The sense of a specific place that belongs to this season:
- A rug and defined ground layer making the corner feel like a room rather than a spot
- Fall mums and ornamental grasses connecting the lounge to the garden around it
- A small finishing touch — a sign, a piece of art — making the whole area feel named and permanent
A hammock packed away in September was never really retired from a season it had already finished. It was taken down from a season that still had weeks of its best hours left, because nobody had set up the conditions for it to stay up. The fire bowl lit beside it at five o’clock in October is the reason it stayed out. The blanket in the basket beside it is the reason someone didn’t go back inside an hour later. The windbreak behind it is the reason none of that stopped working when the wind picked up.