10 DIY Cheap Backyard Ideas That Look Surprisingly Expensive
My backyard used to look like exactly what it was: a rental-grade patio slab and whatever furniture had survived two moves.
I kept assuming a genuinely expensive-looking yard required an actual expensive budget. Then I started noticing that the backyards I actually admired weren’t necessarily the ones with the biggest price tags, they were the ones with a few smart, deliberate DIY choices that read as intentional rather than cheap.
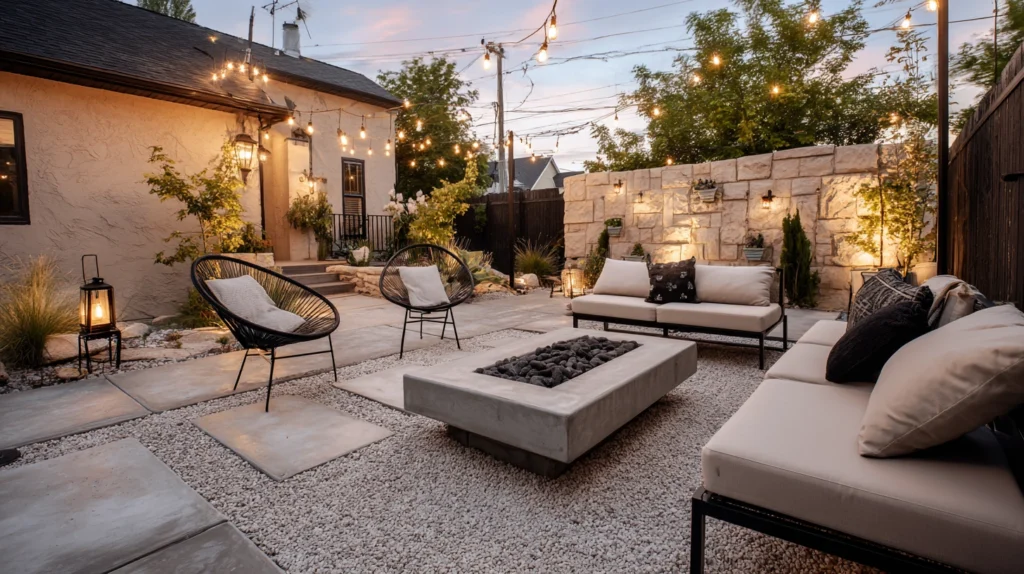
I started small. A can of concrete stain. A pallet turned into a vertical planter. A string of secondhand lanterns from an estate sale.
Within a single summer, that same forgettable patio slab became the spot neighbors asked about, assuming we’d hired someone to redo the whole thing.
Here are 10 DIY ideas that make any backyard look far more expensive than it actually cost.
Why Most DIY Backyards Look Cheap Instead of Charming
The common mistakes:
The mismatched materials approach:
- Combining several different budget materials with no unifying color or texture
- Every DIY element looking like a separate, disconnected project
- A yard that reads as “in progress” rather than intentionally finished
- No single material or color thread tying the individual projects together
The single-coat shortcut:
- Rushing paint, stain, or finish work with only one thin coat
- Visible brush strokes, uneven coverage, or missed spots left unaddressed
- Projects that look genuinely cheap specifically because the finishing step got skipped
- The difference between “looks handmade” and “looks unfinished” almost always comes down to this step
The scale mismatch:
- Small, timid DIY additions that don’t commit to the full visual impact
- One tiny planter or a single string light where the space actually needed more
- A backyard that reads as “someone started a project” rather than “someone finished a look”
- Under-scaling the effort relative to what the space actually needed
What a successful cheap-but-expensive-looking backyard does:
Commits fully to a small number of well-executed projects:
- A consistent color and material palette across every DIY element
- Proper prep and multiple coats on any paint or stain work
- Full commitment to scale, rather than one small gesture lost in a large space
- A yard built from a few well-finished projects rather than many rushed ones
My revelation: A backyard looks expensive the moment the DIY work is executed carefully, not the moment more money gets spent on it.
1. Stained or Painted Concrete Patio Floor
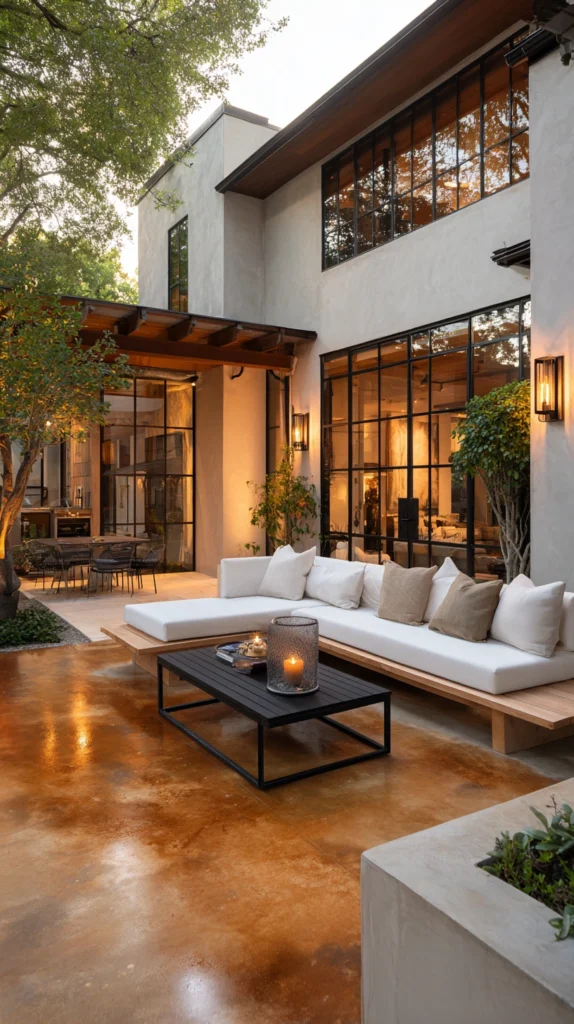
Applying a concrete stain or specialty concrete paint directly to an existing plain patio slab, transforming its color and finish without replacing the material underneath.
My dull gray concrete slab:
What I had:
- A perfectly functional but visually flat, plain gray concrete patio
- A surface that looked exactly like every other builder-grade slab on the street
- No budget for actual pavers or a full hardscape replacement
The concrete stain discovery:
Why this single project changes everything:
- Transforms the single largest visible surface in most backyards for a fraction of replacement cost
- Acid-based and water-based stains create a mottled, natural stone-like appearance
- Solid concrete paint offers a more uniform, saturated color option for a bolder look
- Immediately makes the existing hardscape look like a deliberate design choice rather than a default builder finish
Choosing the right finish:
Material and style options:
- Acid stain for a natural, variegated stone-like appearance in earth tones
- Water-based stain for a wider range of color options with a more consistent application
- Solid concrete paint for a bold, uniform color statement
- A stenciled pattern applied over the stain for an even more custom, tile-like appearance
Cost:
- Acid or water-based concrete stain (covers roughly 300-400 sq ft): $60-120
- Solid concrete paint (same coverage): $80-150
- Sealer (essential for durability): $30-60
My concrete floor: Applying a two-tone acid stain to the existing patio slab, at a total cost under $150, completely changed how the entire backyard read, and multiple neighbors assumed we’d had new pavers installed.
Concrete Stain Tips
Clean and etch the concrete thoroughly before applying any stain:
Prep matters most:
- Stain applied over dirt, sealer residue, or grease will absorb unevenly and look blotchy
- A concrete etching solution, or a simple pressure wash and degreaser combination, prepares the surface properly
- This prep step takes real time but is what determines whether the final result looks professional or patchy
- Skipping this step is the single most common reason DIY concrete staining projects look disappointing
Always seal the finished stain with a proper concrete sealer:
Durability requirement:
- Unsealed stain wears unevenly with foot traffic and weather exposure within a single season
- A quality sealer, reapplied every one to two years, protects the color and finish significantly
- This step is inexpensive relative to the stain itself but essential for a long-lasting result
- Skipping the sealer is the second most common reason this project fails to hold up over time
2. A Vertical Pallet Garden Privacy Screen
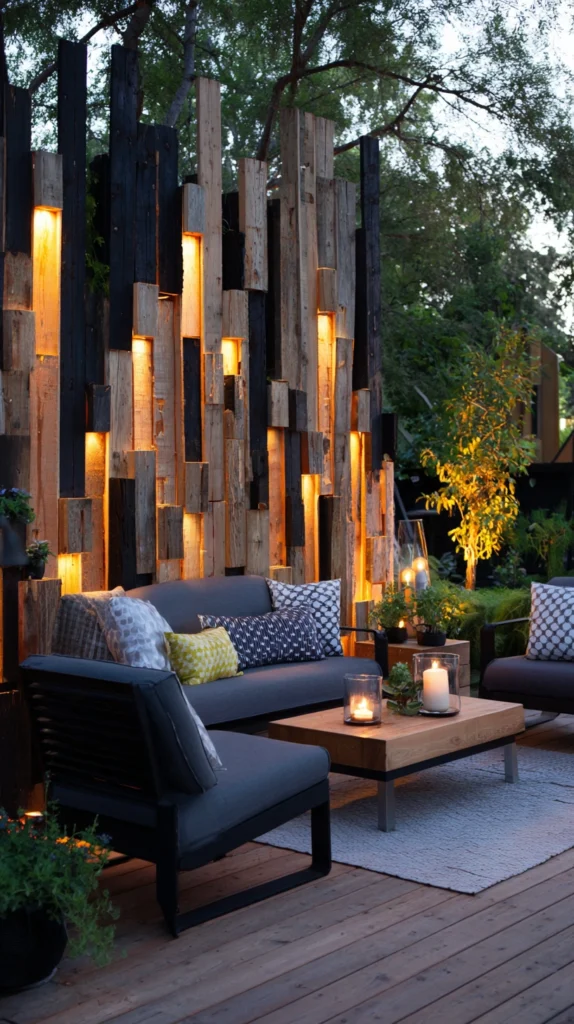
A wood pallet, stood upright and fitted with landscape fabric pockets, functioning as both a planting structure and a privacy screen.
My yard with no privacy and no vertical greenery:
What I had:
- A fully exposed backyard with sightlines directly into a neighboring yard
- No budget for a fence extension or a purchased privacy screen
- Limited ground space for additional planting beds
The pallet garden solution:
Why this project delivers such outsized visual return:
- Uses free or nearly free material (pallets are often given away by local businesses)
- Creates genuine privacy and lushness in the same vertical footprint
- Looks intentional and designed once filled in with plants, rather than obviously repurposed
- One of the most dramatic before-and-after transformations available at essentially no material cost
Building the pallet garden:
Construction steps:
- Source a heat-treated (stamped “HT,” not chemically treated) pallet from a local business
- Sand any rough edges and staple landscape fabric across the back and bottom of each slat gap
- Fill each fabric pocket with potting soil and trailing or compact plants
- Lean the pallet against an existing fence or prop it with simple angled supports
Styling for a finished, non-DIY look:
Making it look intentional:
- Stain or paint the pallet a single consistent color before planting
- Choose plants with a cohesive color palette rather than a random mix
- Position two or three pallets together for a fuller, more substantial screen
Cost:
- Pallet: often free
- Landscape fabric and staples: $10-15
- Potting soil and plants: $30-60
- Stain or paint: $15-25
My pallet garden: Painting two connected pallets a single sage green and filling them with trailing plants created a lush, intentional-looking privacy wall that guests consistently assume was a purchased vertical garden system.
Pallet Garden Tips
Only use heat-treated pallets, never chemically fumigated ones:
Safety requirement:
- Pallets stamped “MB” have been chemically treated and shouldn’t be used for anything involving plants or food
- Look specifically for the “HT” stamp indicating heat treatment, which is safe for this kind of project
- This distinction matters for both plant health and general safety around a space people use regularly
- When in doubt about a pallet’s treatment history, source a new one specifically labeled for this purpose
Choose trailing plants for the lower pockets and upright plants for the top:
Layout for fullness:
- Trailing plants like ivy or creeping jenny in lower pockets cascade downward, filling visual gaps
- More upright, compact plants in top pockets read as a cleaner finishing line at the structure’s peak
- This layout mimics how professionally designed vertical gardens are typically planted
- The result looks noticeably more considered than a random distribution of plant types
3. Spray-Painted Furniture and Planter Refresh
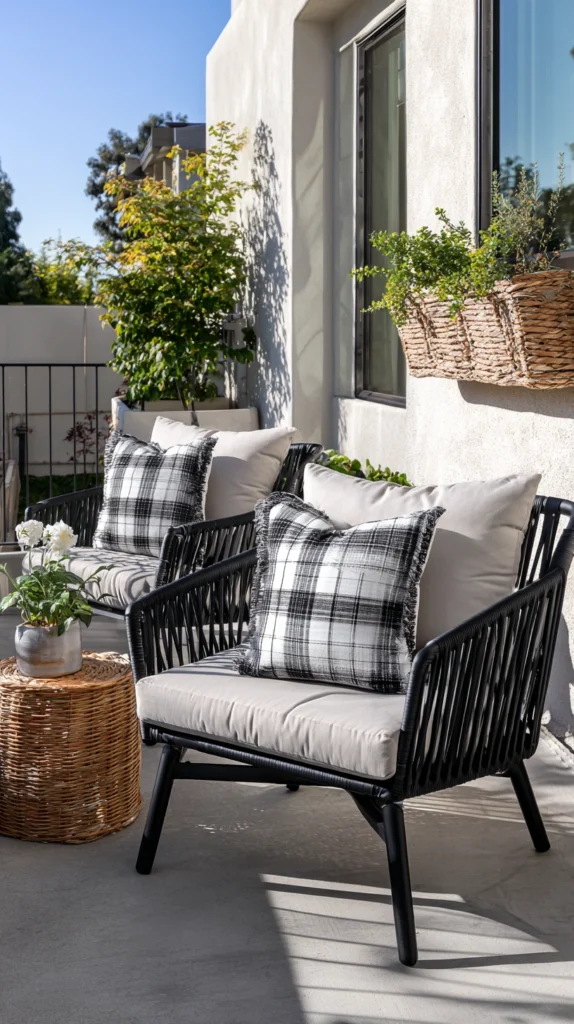
Using spray paint specifically rated for outdoor and metal or plastic surfaces to completely refresh tired, faded, or mismatched furniture and planters.
My collection of faded, mismatched outdoor pieces:
What I had:
- Several years of accumulated plastic planters, an aging metal chair, and a faded side table
- Nothing matching, everything showing visible sun fading and wear
- A yard that looked cluttered and neglected despite having plenty of usable furniture
The spray paint solution:
Why this project unifies a mismatched collection so effectively:
- Brings every piece into one cohesive color story for the cost of a few spray cans
- Modern outdoor-rated spray paints hold up genuinely well to sun and weather exposure
- Transforms plastic, metal, and even some wood surfaces with the same simple technique
- One of the fastest, cheapest ways to make an entire yard look newly furnished
Choosing colors and finishes:
Getting a cohesive result:
- Pick one or two colors maximum across the entire furniture collection
- Matte black is a particularly popular choice for unifying mismatched metal pieces
- Bold, saturated colors work well on plastic planters specifically, since the material’s shine can otherwise look cheap
- A textured or hammered-finish spray paint hides minor surface imperfections better than a standard gloss
Technique for a professional-looking finish:
Application steps:
- Clean and lightly sand any glossy surfaces before painting for better paint adhesion
- Apply several thin coats rather than one heavy coat, which prevents drips and uneven texture
- Work in a well-ventilated outdoor space away from wind, which can cause uneven overspray
Cost:
- Outdoor-rated spray paint (per can, covers roughly one small to medium piece): $6-10
- A full furniture and planter refresh (6-8 pieces): $40-70
My furniture refresh: Spray-painting an aging metal chair, three mismatched plastic planters, and a faded side table all in the same matte black completely unified what had been a visually chaotic collection, for less than $60 total.
Spray Paint Tips
Always use paint specifically labeled for outdoor or exterior use:
Product selection matters:
- Standard indoor spray paint fades and chips significantly faster when exposed to sun and rain
- Outdoor-rated formulas include UV protection and weather resistance built into the paint itself
- This distinction is worth the often minimal price difference for a result that actually lasts a full season or more
- Check the can’s label specifically for “outdoor,” “exterior,” or “UV-resistant” language before purchasing
Apply a clear protective topcoat over furniture that sees heavy daily use:
Extending durability:
- Chairs and tables handled frequently wear through paint faster than purely decorative planters
- A clear outdoor-rated topcoat adds an extra layer of protection against scuffs and fading
- This small additional step meaningfully extends how long the refreshed finish actually looks good
- Worth the modest additional cost specifically for pieces that get regular physical contact
4. A Faux Stone Veneer Accent Wall
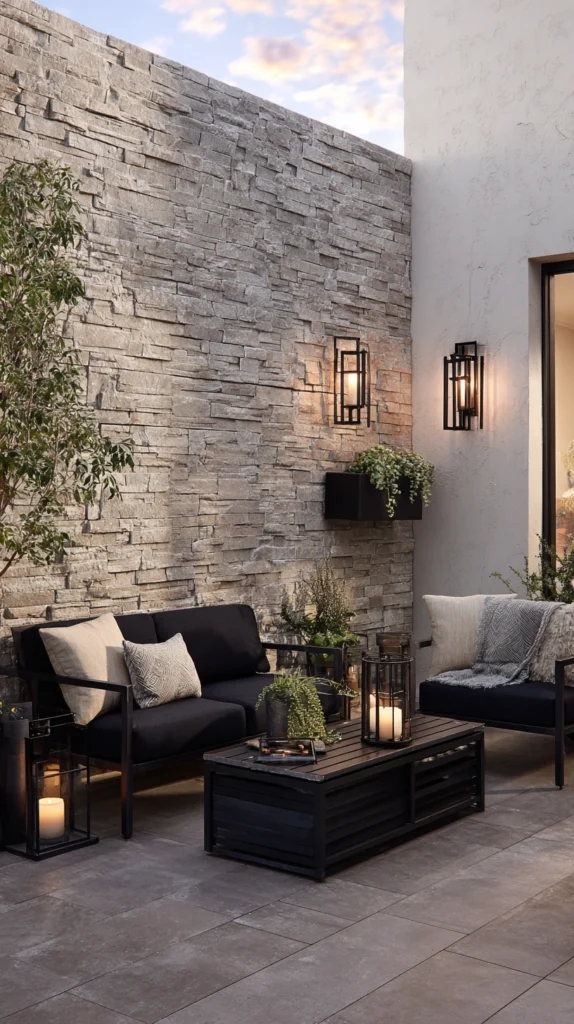
Lightweight, adhesive-backed faux stone panels applied to an existing plain wall, fence section, or planter box for an instant stone-like upgrade.
My plain, blank exterior wall:
What I had:
- A featureless stucco or wood wall running along one side of the patio
- No budget for genuine stone veneer, which requires significant material and labor cost
- A missed opportunity to add texture and visual interest to an otherwise flat surface
The faux stone solution:
Why lightweight veneer panels deliver such a convincing result:
- Modern faux stone panels are made from molded, textured polyurethane that closely mimics real stone
- Significantly lighter and easier to install than genuine stone veneer, often without mortar
- A fraction of the material and labor cost of real stone
- Delivers a surprisingly convincing textural and visual upgrade to an otherwise plain surface
Installation approach:
How the panels go up:
- Clean and prime the existing wall surface before installation
- Panels typically attach with construction adhesive and a few concealed screws for extra security
- Interlocking panel edges create a seamless look across a larger wall section
- Trim pieces finish the edges and corners for a polished, complete appearance
Where this works best:
Ideal applications:
- A small accent wall behind an outdoor kitchen or bar area
- Wrapping the base of an existing planter box or raised bed
- Facing the front of a plain concrete or cinder block wall
Cost:
- Faux stone veneer panels (per sq ft): $6-12
- A small 6×8 foot accent wall: $300-550 including adhesive and trim
My faux stone accent: Covering a plain cinder block wall behind the grill area with faux stone panels transformed what had been the least attractive part of the yard into a feature people genuinely compliment, at roughly a quarter of what real stone veneer would have cost.
Faux Stone Tips
Confirm the panels are rated for outdoor and UV exposure:
Material verification:
- Some faux stone products are designed primarily for interior accent walls and won’t hold up outdoors
- Check specifically for exterior and UV-rating language before purchasing
- This distinction prevents premature fading or warping within the first season of outdoor exposure
- A slightly higher-cost exterior-rated product is worth it over a cheaper interior-only option
Stagger the panel seams rather than lining them up in a grid:
Installation technique:
- Aligning every panel seam in the same spot across rows creates an obvious, repetitive grid pattern
- Staggering seams between rows, similar to brick-laying technique, mimics how real stone naturally varies
- This small technique significantly affects how convincing the finished wall looks up close
- Worth planning the layout on the ground before committing to final adhesive placement
5. A Gravel and Steel Ring Fire Pit
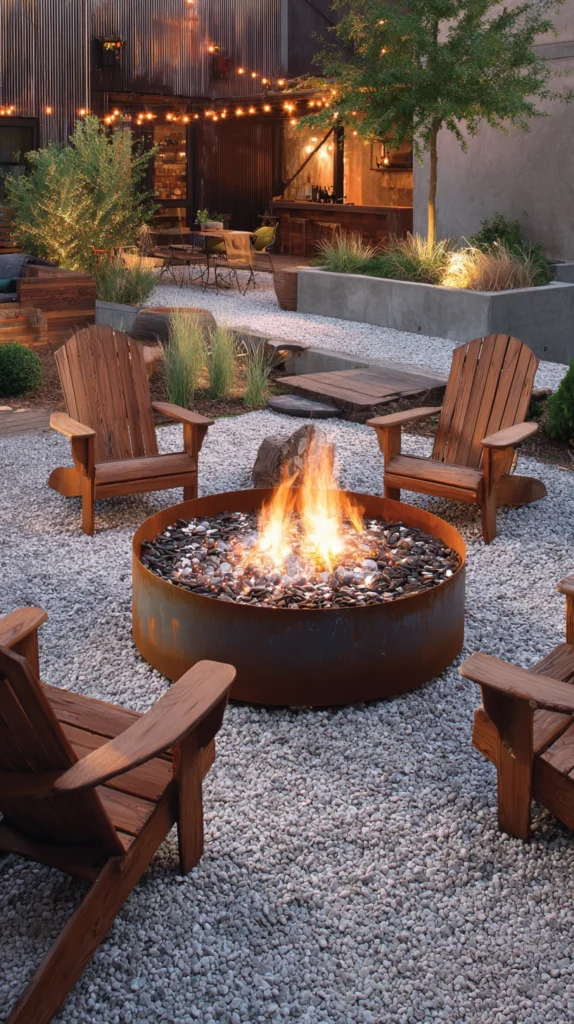
A simple in-ground fire pit built from a steel fire ring insert surrounded by a bed of gravel, rather than a purchased portable unit or a full masonry build.
My yard with nowhere to gather in the evening:
What I had:
- No fire feature at all, and portable fire pits at retail prices felt like an unnecessary expense
- A flat, unused corner of the yard with real potential as a gathering spot
- A desire for the ambiance of a fire feature without the cost of a built stone version
The gravel fire pit solution:
Why this build delivers a genuinely finished look for so little cost:
- A simple steel ring insert provides the same safety and containment as an expensive purchased fire pit
- Surrounding gravel creates a clean, defined edge without requiring poured concrete or masonry work
- Reads as an intentional, built-in feature rather than a portable unit sitting on the lawn
- One of the more dramatic evening-atmosphere upgrades available at this price point
Building the fire pit:
Construction steps:
- Dig a shallow circular area, roughly 36-42 inches in diameter and a few inches deep
- Install a steel fire ring insert, widely available at hardware and outdoor supply stores
- Surround the ring with a border of larger stones or pavers to define the edge
- Fill the remaining space with gravel, both inside and immediately around the ring
Adding seating around it:
Completing the space:
- A simple circle of Adirondack chairs or camp-style folding chairs around the pit
- Hay bales or large stumps as budget-friendly, seasonal seating alternatives
- Positioned away from overhanging branches and structures for safety clearance
Cost:
- Steel fire ring insert: $30-70
- Gravel (enough to fill and surround the pit): $30-60
- Border stones or pavers: $30-80
My gravel fire pit: Building this simple version in an unused corner of the yard, for under $150 total, created the single most-used gathering spot in the entire backyard, and it looks far more like a professionally installed feature than its actual cost would suggest.
Fire Pit Tips
Check local fire codes and any HOA restrictions before building:
Regulation check:
- Many areas have specific rules about open fire features, including required distances from structures
- Confirm your local requirements before investing time and material into this project
- This check prevents building something that ultimately can’t be used as intended
- A quick call to local code enforcement or a check of HOA documents clarifies this upfront
Choose a fire ring insert with a slightly larger diameter than you think you need:
Sizing consideration:
- A fire pit that feels too small once built limits how many people can comfortably gather around it
- Sizing up slightly during initial planning avoids needing to rebuild later
- This is one of the easier details to get right the first time with just a bit of extra planning
- Measure the intended seating arrangement before finalizing the ring size
6. Repurposed Crate and Pallet Wood Furniture
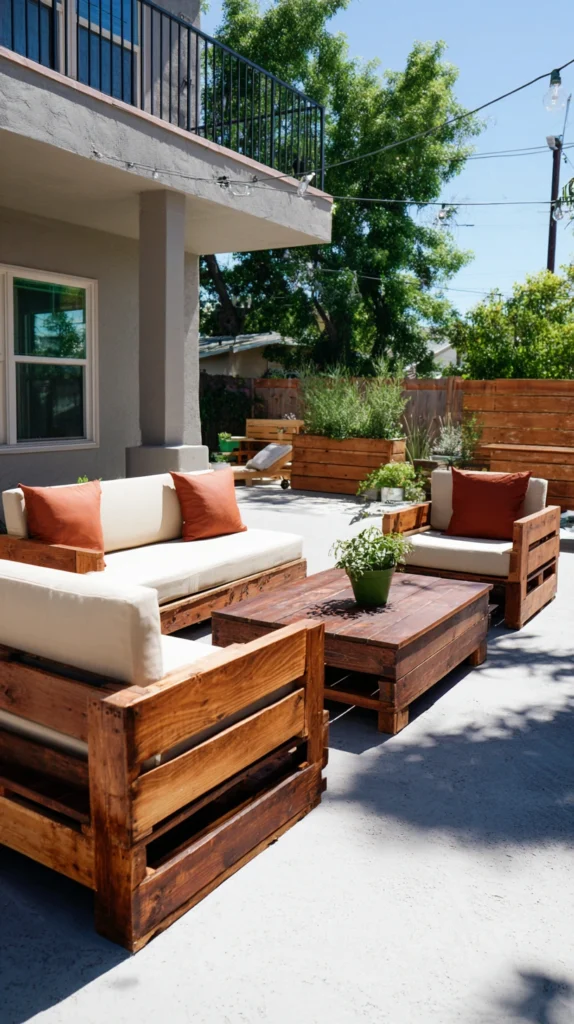
Wood shipping crates and pallet boards, disassembled and rebuilt into simple outdoor furniture like a coffee table, bench, or planter box.
My yard needing furniture with no furniture budget:
What I had:
- Bare patio space with no side table, bench, or additional seating
- A tight budget that made purchasing additional outdoor furniture difficult to justify
- Access to free pallets and crates through local businesses
The repurposed wood furniture solution:
Why this approach delivers genuinely good-looking results:
- Free or nearly free raw material, since pallets and crates are widely available for the taking
- Simple, clean-lined builds (a basic coffee table or bench) are achievable with basic tools
- A quality stain or paint finish elevates the material well beyond its humble origin
- Rustic, reclaimed-wood furniture is a genuinely popular, intentional design aesthetic, not just a budget compromise
Building basic pieces:
Simple project ideas:
- A coffee table using a single pallet, sanded smooth and fitted with simple hairpin or wood legs
- A bench built from stacked and secured crate boards
- A planter box constructed from a single disassembled crate
Finishing for a polished look:
The steps that matter most:
- Sand every visible surface thoroughly, removing splinters and rough spots
- Apply wood filler to any larger gaps or holes before staining
- Use a quality outdoor-rated stain or paint, applying multiple thin coats
- Add a clear protective topcoat for pieces that will see regular outdoor exposure
Cost:
- Pallets and crates: often free
- Sandpaper, wood filler, and basic hardware: $15-30
- Stain, paint, and topcoat: $25-50
My repurposed coffee table: Building a simple pallet coffee table with hairpin legs, sanded smooth and finished in a walnut stain, cost under $60 total in materials and became one of the most complimented pieces on the entire patio.
Repurposed Wood Tips
Invest real time in the sanding step specifically:
Where quality actually comes from:
- Rough, splintery wood is the single biggest giveaway of a rushed pallet or crate project
- Thorough sanding, working through progressively finer grits, is what separates “reclaimed chic” from “actually just a pallet”
- This step takes patience but requires no special skill or expensive tools
- Budget more time for sanding than for any other single step in the build
Choose a stain color that reads as intentional rather than raw:
Finish selection:
- A rich walnut, gray-wash, or deep espresso stain reads as a deliberate design choice
- Leaving wood completely unfinished or using a very light, inconsistent stain can look unfinished rather than rustic
- Testing the stain on a scrap piece first confirms the final color before committing to the full project
- This detail meaningfully affects whether the finished piece looks curated or accidental
7. A DIY Pea Gravel Patio Extension
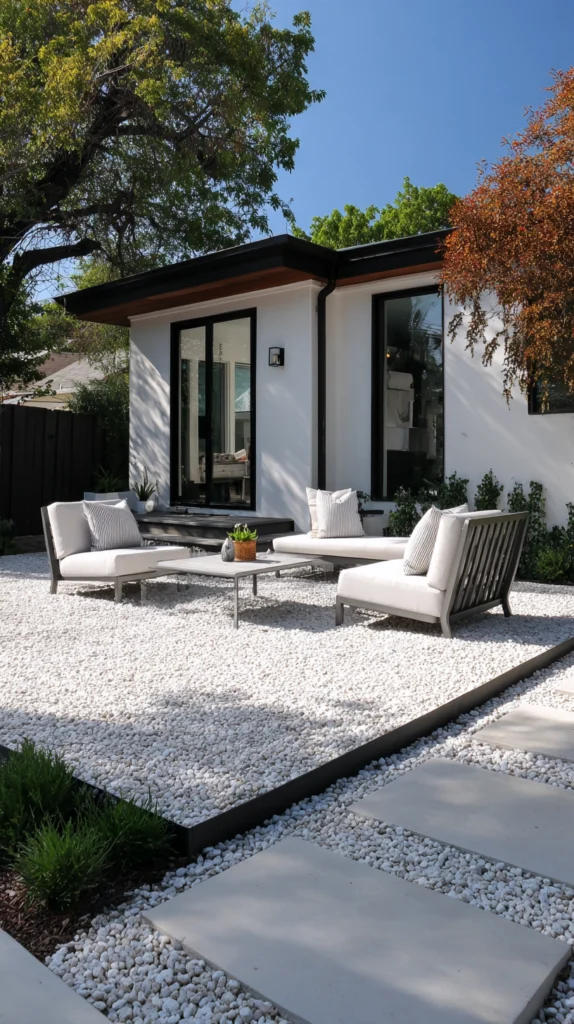
Extending an existing hard patio surface with a simple pea gravel area, defined by basic edging, creating additional usable outdoor space without pouring concrete.
My patio that felt too small for how we wanted to use it:
What I had:
- A modest concrete patio that felt cramped once furniture and a grill were added
- No budget for expanding the existing hardscape with additional poured concrete or pavers
- Unused lawn space directly adjacent to the patio that could serve as an extension
The pea gravel patio solution:
Why gravel delivers a genuinely finished look at low cost:
- One of the most affordable ground-cover materials available for creating usable outdoor space
- Provides good drainage and a clean, defined surface without any pouring or major excavation
- Reads as an intentional design choice, particularly popular in modern and Mediterranean-style landscaping
- A weekend-achievable DIY project for most homeowners with basic tools
Building the gravel extension:
Construction steps:
- Mark and excavate the desired area to a depth of roughly 3-4 inches
- Install steel, aluminum, or wood edging around the perimeter to contain the gravel
- Add a layer of landscape fabric to suppress weed growth from beneath
- Fill with pea gravel, raking to an even, level finish
Styling the finished space:
Completing the look:
- Position furniture or a fire pit directly on the new gravel area
- Add a few large stepping stones or pavers within the gravel for a defined walking path
- Incorporate potted plants along the gravel’s edge to soften the transition from the original patio
Cost:
- Pea gravel (per 100 sq ft at 3-4 inch depth): $60-120
- Edging material: $40-90
- Landscape fabric: $15-30
My gravel extension: Adding a 10×12 foot pea gravel section directly off the existing concrete patio, for about $200 total, effectively doubled the usable outdoor living space without the cost of pouring new concrete.
Pea Gravel Tips
Choose a smaller, rounder gravel size for comfortable underfoot use:
Material selection:
- Sharper, larger crushed gravel is less comfortable to walk on barefoot and less pleasant for furniture placement
- True pea gravel’s smaller, rounded stones are specifically better suited to a lounging or dining area
- This distinction matters significantly for how the finished space actually gets used
- Ask specifically for “pea gravel” rather than general landscaping gravel when purchasing
Install proper edging to prevent the gravel from migrating over time:
Long-term maintenance:
- Without contained edging, gravel gradually spreads into surrounding lawn or garden beds
- Steel or aluminum edging, secured with stakes, provides a clean, long-lasting boundary
- This upfront step prevents an ongoing maintenance headache and keeps the area looking crisp
- Worth the modest additional material cost compared to skipping edging entirely
8. Thrifted and Repurposed Lantern Lighting
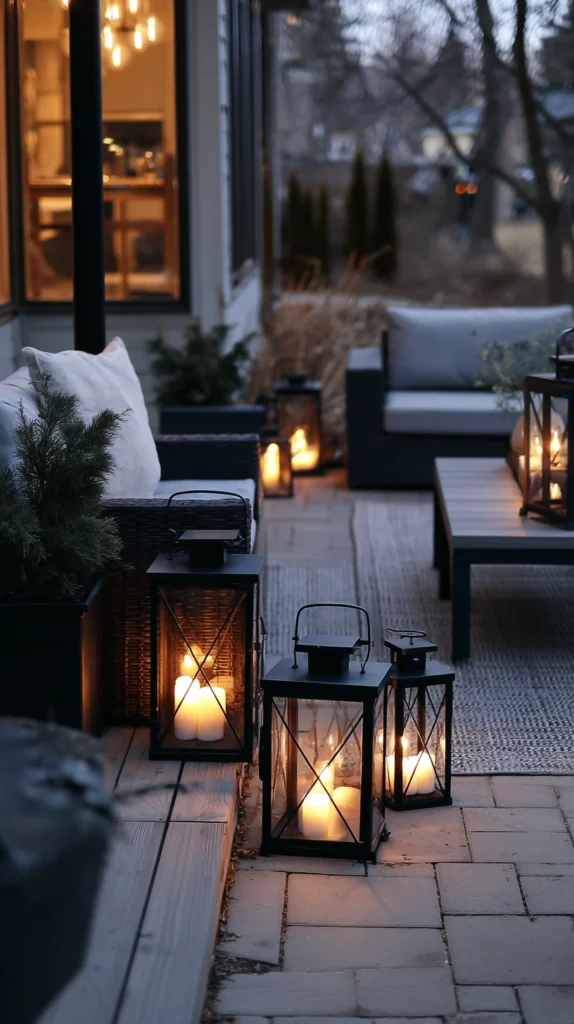
Secondhand lanterns, mason jars, or thrifted light fixtures repurposed as candle holders or converted into simple outdoor string light accents.
My yard with only a single harsh porch light:
What I had:
- One bright, unflattering porch light as the only source of evening illumination
- A desire for warmer, more layered lighting without the cost of a full landscape lighting install
- A local thrift store and estate sale circuit I hadn’t yet thought to shop for outdoor decor
The thrifted lighting solution:
Why secondhand fixtures deliver such a personal, elevated look:
- Vintage and secondhand lanterns often have more character and detail than new budget alternatives
- Mason jars, repurposed as hanging candle holders, cost next to nothing and look charming when grouped
- A mismatched but color-coordinated collection reads as intentionally curated rather than randomly assembled
- One of the lowest-cost ways to add genuine warmth and personality to evening outdoor lighting
Sourcing and adapting fixtures:
Where to find pieces:
- Thrift stores and estate sales for genuine vintage lanterns and candle holders
- Mason jars, either purchased new inexpensively or saved from regular household use
- Simple wire or twine for hanging jars and lanterns from a pergola, tree branch, or fence line
Styling for cohesion:
Making a mismatched collection work:
- Group items by a shared metal finish (all black, all brass) even if the actual shapes vary
- Use flameless LED candles inside any hanging or grouped lanterns for safety and convenience
- Vary hanging heights slightly for a more natural, collected look rather than a uniform row
Cost:
- Thrifted lanterns (per piece): $3-15
- Mason jars (if purchasing new): $1-3 each
- Wire, twine, or hooks for hanging: $10-20
- Flameless LED candles: $15-30 for a set
My thrifted lighting: Collecting eight mismatched lanterns and jars from a few thrift store visits, spray-painted a single black to unify them, and filled with flameless candles, cost under $50 total and completely transformed the evening feel of the patio.
Thrifted Lighting Tips
Unify a mismatched collection with a single coat of spray paint:
Cohesion technique:
- Secondhand pieces almost never arrive in matching finishes or colors
- A single unifying spray paint color across the whole collection solves this instantly
- This is the same principle used in the furniture refresh idea earlier in this list, applied specifically to lighting
- One of the most effective, low-cost tricks for making thrifted finds look like a deliberate, matched set
Use flameless candles for anything hung or placed near flammable materials:
Safety consideration:
- Real candles near dry foliage, pergola wood, or fabric present a genuine fire risk outdoors
- Quality flameless LED candles have improved significantly and read as convincingly realistic from a normal viewing distance
- This swap removes fire risk entirely while still delivering the same warm, flickering visual effect
- Worth the modest additional cost over real candles for peace of mind, especially around gathering areas
9. A Painted or Stenciled Concrete Walkway
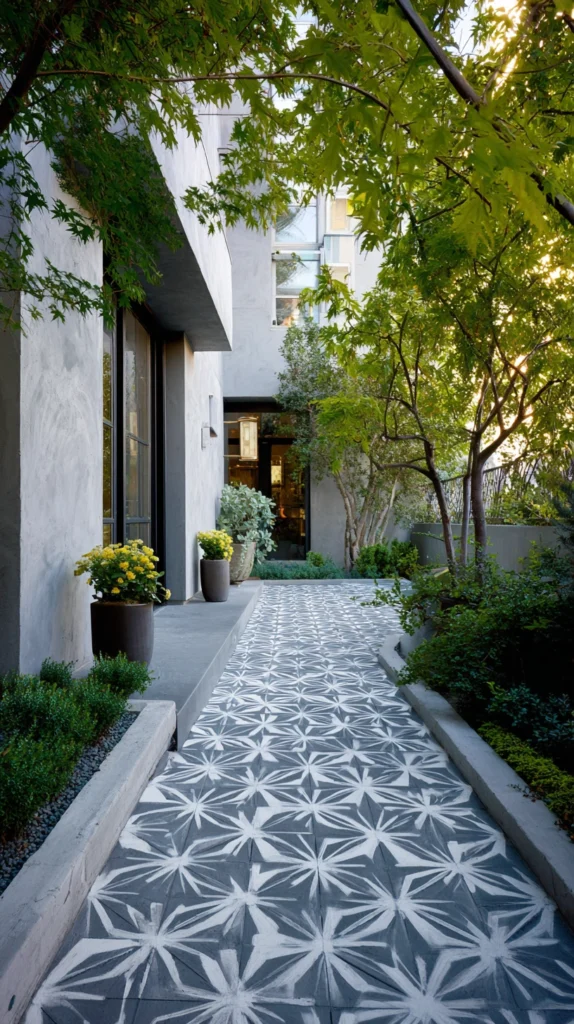
Adding a stenciled pattern or a simple painted border to an existing plain concrete walkway, mimicking the look of tile or patterned pavers.
My plain, utilitarian concrete walkway:
What I had:
- A basic poured concrete path connecting the driveway to the front or back door
- A purely functional surface with zero visual interest
- No budget for replacing it with actual patterned pavers or tile
The stenciled concrete solution:
Why this project transforms a purely functional element:
- A stenciled or painted pattern mimics the look of Moroccan or Talavera-style tile at a fraction of the cost
- Turns a purely utilitarian walkway into a genuine design feature
- Concrete-rated paint and stencils are widely available and require no specialized skills beyond patience
- One of the more surprising, high-impact transformations available for such a low material cost
Executing the project:
Steps for a clean result:
- Clean the concrete thoroughly and repair any cracks or major surface damage first
- Apply a base coat of concrete paint if changing the overall color, allowing full drying time
- Use a concrete stencil, either purchased or a simple repeating shape cut from cardboard or plastic sheeting
- Apply the pattern in a contrasting color, working in small sections and lifting the stencil carefully between repeats
Protecting the finished work:
Making it last:
- Apply a clear concrete sealer once the painted pattern is fully cured
- Reapply sealer every one to two years depending on foot traffic and weather exposure
Cost:
- Concrete paint (base coat, if needed): $30-60
- Stencil (reusable): $20-50
- Sealer: $25-45
My stenciled walkway: Applying a simple repeating diamond pattern in a contrasting terracotta and cream along the front walkway, for about $100 total, turned an entirely forgettable path into the first thing visitors comment on when they arrive.
Stenciled Concrete Tips
Test your stencil and paint combination on a small hidden section first:
Avoiding costly mistakes:
- Paint absorption and stencil bleed-through can vary significantly based on the specific concrete surface
- Testing on a small, less visible section (near a plant bed edge, for example) reveals any issues before committing to the full walkway
- This small extra step prevents having to redo a large, highly visible surface
- Worth the short delay for the confidence it provides before the full project begins
Work in manageable sections rather than attempting the entire walkway at once:
Practical execution:
- Stencil paint needs to be applied and lifted carefully while wet, which is difficult to manage across a large area at once
- Breaking the project into 3-4 foot sections keeps the process controlled and the pattern aligned correctly
- This approach also makes the project achievable across a few shorter work sessions rather than one exhausting day
- Planning section breaks at natural walkway seams helps disguise any minor alignment inconsistencies between sections
10. A Budget Hanging Bistro Light Canopy
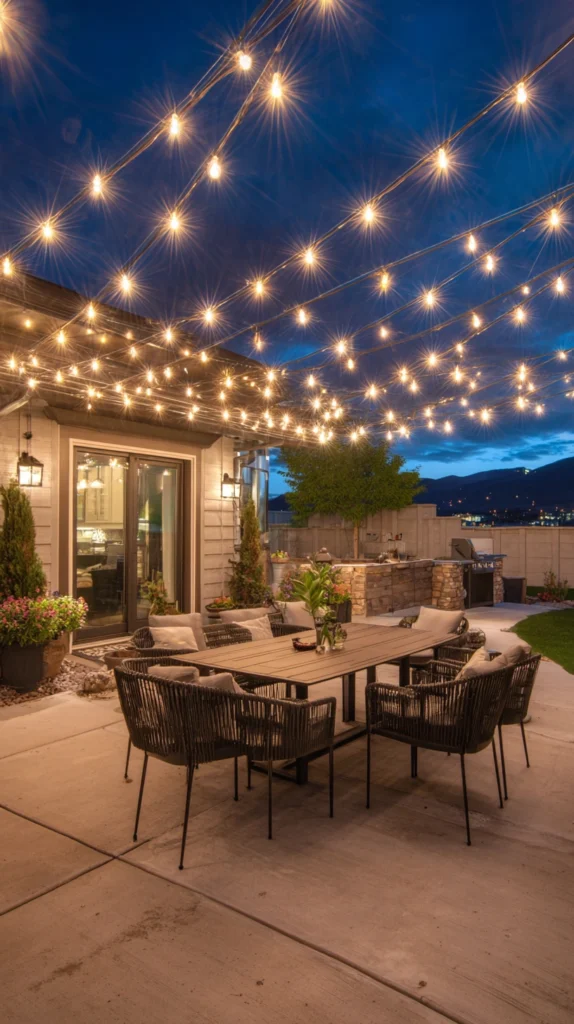
String lights combined with simple hanging planters strung overhead using inexpensive hooks and hardware, creating a full canopy effect without professional installation costs.
My yard missing that resort-like overhead glow:
What I had:
- A patio that felt exposed and flat, with nothing happening at eye level or above
- Admiration for the layered, glowing look of professionally designed outdoor spaces
- A budget that ruled out hiring an electrician or landscape lighting designer
The bistro light canopy solution:
Why this project delivers such an outsized atmospheric result:
- Requires no electrical work, since quality outdoor string lights plug into a standard exterior outlet
- Creates the same overhead visual layering used in high-end restaurant patios and professional landscape design
- Combining string lights with a few hanging planters adds both light and greenery in the same overhead plane
- One of the most consistently mentioned “how did you do this” projects among visiting guests
Planning and installing the canopy:
Steps for a proper installation:
- Map out anchor points, whether existing trees, a fence line, or simple screw hooks installed into a house eave
- Crisscross the string lights in a loose grid pattern rather than a single straight run
- Hang a few lightweight hanging planters at varying heights within the same overhead grid
- Secure all anchor points firmly, since wind and the weight of the lights and planters both need to be accounted for
Choosing quality materials on a budget:
What’s worth spending slightly more on:
- Outdoor-rated, weatherproof string lights specifically designed to handle rain and sun exposure
- A timer or smart plug so the lights turn on automatically each evening
- Lightweight plastic or resin hanging planters rather than heavier ceramic, reducing strain on the anchor points
Cost:
- String lights (100 feet, enough for a full canopy over a standard patio): $40-80
- Hanging planters (4-6, with plants): $60-120
- Hooks, hardware, and a timer: $20-40
My bistro canopy: Crisscrossing 150 feet of string lights across the patio, with four hanging planters woven into the same grid, cost under $200 total and remains the single addition most responsible for the “this feels like a restaurant patio” comments we get from guests.
Bistro Canopy Tips
Confirm anchor points can support the combined weight of lights and planters:
Structural safety:
- Wet hanging planters, in particular, are considerably heavier than they appear when dry
- Test each anchor point’s strength before fully loading the grid with both lights and plants
- A failed anchor point mid-season is both a safety issue and a frustrating project setback
- This check takes only a few minutes but prevents a much bigger problem later
Choose a consistent warm white bulb tone across the entire string light run:
Visual consistency:
- Mixing different bulb tones, even different runs of “warm white” from different manufacturers, can look disjointed
- Purchasing all string lights from the same product line ensures a consistent, cohesive glow across the canopy
- This detail matters more than people expect once the lights are actually on and compared side by side
- Worth checking bulb color temperature ratings match before purchasing multiple light strands
Choosing Your DIY Backyard Projects
By Priority
Highest visual impact for the effort:
- Stained or painted concrete patio floor (idea 1)
- Budget hanging bistro light canopy (idea 10)
- Thrifted and repurposed lantern lighting (idea 8)
Best for adding function and space:
- DIY pea gravel patio extension (idea 7)
- Gravel and steel ring fire pit (idea 5)
- Repurposed crate and pallet wood furniture (idea 6)
Best for texture and detail:
- Faux stone veneer accent wall (idea 4)
- Painted or stenciled concrete walkway (idea 9)
- Vertical pallet garden privacy screen (idea 2)
By Effort Level
Lowest effort:
- Thrifted and repurposed lantern lighting (idea 8)
- Spray-painted furniture and planter refresh (idea 3)
- Budget hanging bistro light canopy (idea 10)
Medium effort:
- Stained or painted concrete patio floor (idea 1)
- Vertical pallet garden privacy screen (idea 2)
- Painted or stenciled concrete walkway (idea 9)
Higher commitment:
- Gravel and steel ring fire pit (idea 5)
- DIY pea gravel patio extension (idea 7)
- Faux stone veneer accent wall (idea 4)
- Repurposed crate and pallet wood furniture (idea 6)
By Budget
Under $75:
- Spray-painted furniture and planter refresh (idea 3)
- Thrifted and repurposed lantern lighting (idea 8)
- Vertical pallet garden privacy screen (idea 2)
$75-200:
- Stained or painted concrete patio floor (idea 1)
- Painted or stenciled concrete walkway (idea 9)
- Gravel and steel ring fire pit (idea 5)
- Budget hanging bistro light canopy (idea 10)
$200-550:
- DIY pea gravel patio extension (idea 7)
- Faux stone veneer accent wall (idea 4)
- Repurposed crate and pallet wood furniture (idea 6, for multiple pieces)
Maintenance Through the Seasons
Spring:
- Reseal any stained or painted concrete surfaces ahead of the heavier-use season
- Inspect pallet and crate furniture for any winter warping or loosened joints
Summer:
- Rinse gravel areas periodically to keep them looking fresh and free of debris
- Check string light and lantern hardware for continued secure anchoring
Fall:
- Bring flameless candles and any battery-powered lighting indoors before winter weather
- Touch up any spray-painted furniture showing early signs of wear before storing for the season
Winter:
- Store repurposed wood furniture in a covered area if possible to extend its lifespan
- Plan the next season’s projects during the slower winter months
My Complete Cheap-Looking-Expensive Backyard Journey
What I built across two summers:
Summer one ($410):
- Stained concrete patio floor
- Spray-painted furniture refresh
- Thrifted lantern lighting collection
- Learned that finishing quality mattered more than material cost across every single project
Summer two ($540):
- Gravel and steel ring fire pit
- Vertical pallet garden privacy screen
- Budget hanging bistro light canopy
- Learned that combining several small, well-executed projects created a bigger transformation than any single purchase could have
Total investment: $950 across two summers Most important lesson: A few carefully finished DIY projects beat many rushed ones, every time Single highest-impact change across both summers: The stained concrete floor, for completely changing the character of the largest visible surface in the yard at the lowest cost per square foot of any project on the list
Getting Started This Weekend
Start with one finished project, not five half-finished ones.
This weekend:
Step 1 — Choose the single largest flat surface in your yard:
- Usually the patio or a walkway, and usually the least expensive thing to transform relative to its visual impact
- This is almost always the highest-return starting project on this entire list
Step 2 — Do a real cleaning and prep pass before any paint or stain:
- This step alone often reveals how much better the space could look with minimal additional work
- Skipping prep is the single most common reason DIY finishing projects disappoint
Step 3 — Unify your existing furniture with a single spray paint color:
- The fastest, cheapest way to make a mismatched collection look intentional
- Requires only a few cans of paint and an afternoon
Step 4 — Add one lighting element before dark and actually sit outside to see it:
- Even simple string lights or a few thrifted lanterns immediately shift the evening atmosphere
- This small addition often reveals exactly which other projects would have the most impact next
My recommendation:
Start with the concrete stain and a furniture refresh:
- Both are genuinely achievable in a single weekend with basic tools
- Both dramatically change the yard’s overall visual cohesion for very little cost
- This foundation makes every future project build on a yard that already looks far more intentional
Step back and look at the finished patio floor and furniture together before planning anything else, since this combination alone often delivers most of the “wait, how much did this cost?” reaction from guests.
Now go build the backyard that looks like it cost five times what it actually did.
Quick Summary
The 10 DIY cheap backyard ideas that look expensive:
Surface transformations:
- Stained or painted concrete patio floor (idea 1): the highest-return project on this entire list
- DIY pea gravel patio extension (idea 7): usable space without pouring concrete
- Painted or stenciled concrete walkway (idea 9): a forgettable path turned into a feature
Furniture and structure:
- Spray-painted furniture and planter refresh (idea 3): unifies a mismatched collection for pocket change
- Repurposed crate and pallet wood furniture (idea 6): genuinely good-looking pieces from free material
- Vertical pallet garden privacy screen (idea 2): privacy and lushness in one build
- Faux stone veneer accent wall (idea 4): a convincing texture upgrade at a fraction of real stone’s cost
Atmosphere and lighting:
- Gravel and steel ring fire pit (idea 5): the most-used gathering spot for the lowest build cost
- Thrifted and repurposed lantern lighting (idea 8): character and warmth from secondhand finds
- Budget hanging bistro light canopy (idea 10): resort-level overhead glow with zero electrical work
The universal cheap-but-expensive-looking rules:
Always:
- Prep surfaces thoroughly before any paint, stain, or finish work
- Unify mismatched pieces with a single consistent color or material
- Commit fully to the scale a project actually needs rather than under-doing it
- Choose outdoor-rated materials specifically, even when the cheaper indoor version is tempting
Never:
- Skip the sealing or protective topcoat step to save a small amount of money
- Mix too many different colors, finishes, or materials across the same space
- Rush the sanding, cleaning, or prep step that most affects the final look
- Assume expensive materials are required before a project can look genuinely finished
Common mistakes:
- Treating DIY projects as separate, disconnected efforts instead of one cohesive plan
- Under-scaling a project so it reads as a small gesture rather than a finished look
- Skipping proper sealing or protective finishing, leading to fast-looking wear
- Mixing secondhand and thrifted finds without any unifying color or finish
- Waiting to start until a bigger renovation budget exists instead of tackling one well-executed project now
Remember: careful execution matters more than material cost on every single project in this list, a single unifying color or finish instantly makes mismatched or secondhand pieces look intentional, the largest flat surface in the yard is almost always the highest-return place to start, proper prep and sealing determine whether a cheap project looks expensive for one season or for many, and the best cheap backyard transformation is the one finished carefully enough that nobody can guess what it actually cost.