14 Genius Backyard Movie Party Ideas You Need to See
Our first backyard movie night was a laptop propped on a cooler, everyone squinting at an 11-inch screen from lawn chairs, and the whole thing over in twenty minutes because nobody could actually see anything.
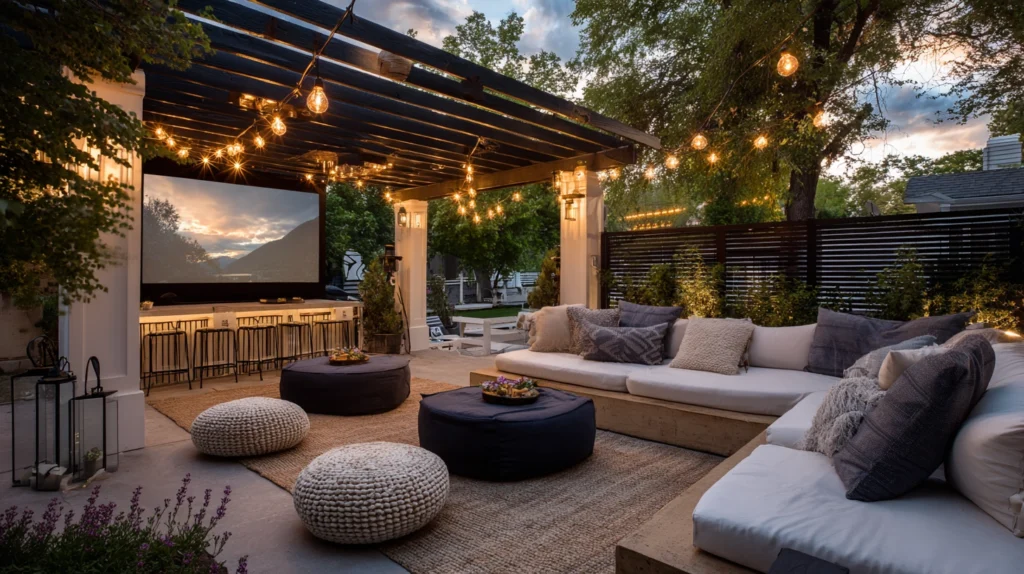
I kept assuming a real backyard movie night needed either a professional projector setup or a hired event company, that there wasn’t much middle ground between “laptop on a cooler” and “genuinely elaborate production.” Then I started paying attention to what actually made other people’s backyard movie nights feel like an event rather than an experiment, and it turned out to be a handful of specific, learnable choices, not a huge budget.
I started small. A proper white sheet stretched taut instead of a lumpy bedsheet draped over a fence. A cheap projector paired with a speaker that actually got moved outside instead of relying on the projector’s built-in sound. Blankets and floor cushions arranged deliberately instead of whatever lawn chairs happened to be nearby.
Within one summer, that same backyard went from a twenty-minute experiment nobody wanted to repeat to the thing our whole street started asking to be invited to.
Here are 14 ideas that turn a backyard movie night from a squinting laptop screen into a genuine event people actually look forward to.
Why Most Backyard Movie Nights Fall Flat
The common mistakes:
The improvised screen approach:
- A wrinkled bedsheet, a garage door, or a laptop screen pressed into service without any real planning
- Poor image quality that undermines the whole point of watching a movie together
- A setup that looks and feels like an afterthought rather than an actual event
- The screen is the single most visible element, and skimping here undercuts everything else
The sound-as-an-afterthought habit:
- Relying on a projector’s tiny built-in speaker, or no dedicated audio setup at all
- Dialogue and music that get lost the moment there’s any ambient outdoor noise
- A visual setup that looks great but delivers a genuinely disappointing viewing experience
- Sound is half of what makes a movie work, and it’s the piece most commonly skipped or under-planned
The forgotten comfort and logistics:
- No real seating plan beyond whatever chairs happen to already be in the yard
- No plan for bugs, temperature drops, or the actual length of a full movie
- A setup that looks good for the first twenty minutes and becomes uncomfortable well before the credits roll
- Comfort determines whether people actually stay for the whole film or quietly drift back inside
What a successful backyard movie night does:
Treats the screen, sound, and comfort as equally important:
- A genuinely flat, bright, well-positioned screen
- Real outdoor-capable speakers, not a phone or a projector’s built-in audio
- Deliberate seating and blanket planning built around an actual two-hour runtime
- A setup considered as a full experience, not just “we have a projector now”
My revelation: A backyard movie night becomes a genuine event the moment the screen, the sound, and the comfort are all treated as equally essential, not just the projector itself.
1. A Proper Inflatable or Stretched Screen
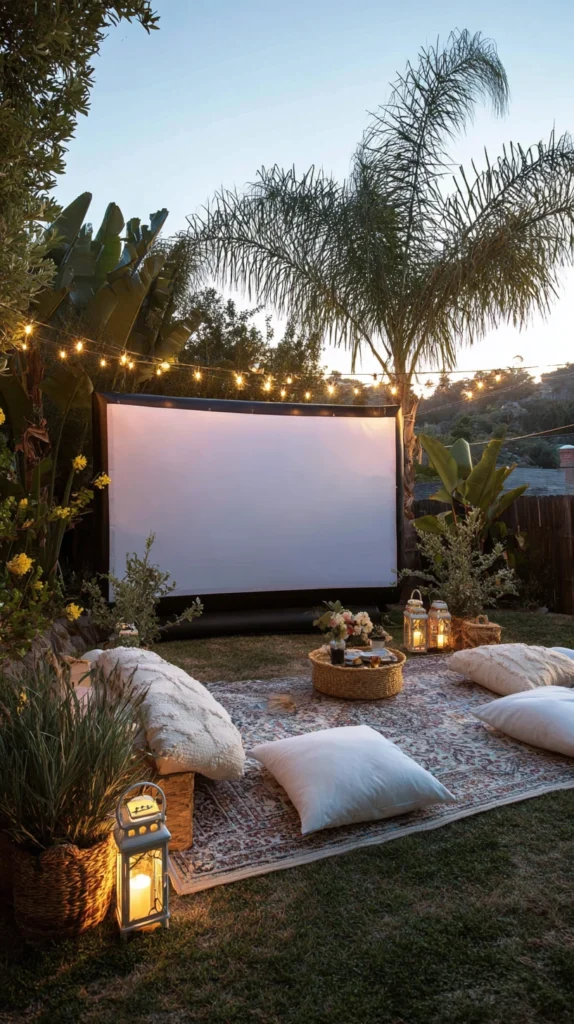
An inflatable projector screen, or a plain white sheet stretched drum-tight across a simple PVC frame, replacing a wrinkled bedsheet or a bare wall.
My wrinkled bedsheet that ruined every projection:
What I had:
- A bedsheet pinned haphazardly to the fence, full of wrinkles and sagging in the middle
- Every projected image distorted by the uneven, rippling surface
- A setup that looked more like a failed craft project than an actual movie screen
The proper screen discovery:
Why a genuinely flat surface changes the entire viewing experience:
- Wrinkles and sag in an improvised screen distort the picture far more than most people expect before trying it
- An inflatable screen, or a sheet stretched drum-tight on a frame, delivers a genuinely flat, undistorted image
- This single change often has more visible impact on picture quality than upgrading the projector itself
- The screen is the most visually prominent element of the whole setup, making it worth getting right first
Choosing the right screen:
Options by budget and permanence:
- An inflatable outdoor movie screen, self-supporting and requiring no additional frame
- A plain white cotton or specialty screen fabric sheet, stretched taut across a simple PVC pipe frame
- A dedicated fold-up projector screen on a stand, for a smaller, more portable setup
Cost:
- Inflatable outdoor screen: $150-400
- DIY PVC frame with screen fabric: $40-90
- Portable fold-up screen: $60-150
My proper screen: Building a simple PVC frame and stretching a specialty white screen fabric across it, rather than continuing to fight with the wrinkled bedsheet, made a bigger visible difference to the picture quality than any other single change made that entire summer.
Screen Setup Tips
Position the screen facing away from any streetlights or bright ambient light sources:
Placement for picture quality:
- Ambient light hitting the screen from behind or the side washes out contrast and color significantly
- Orient the screen so the viewing side faces away from streetlights, porch lights, or any other bright fixed light source
- This consideration matters as much as the screen material itself for actual picture quality
- Walk the yard at the planned viewing time to check for unexpected light sources before finalizing screen placement
Stretch the screen fabric as tight as possible, using the frame’s full tension capacity:
Tensioning technique:
- Even a small amount of sag or looseness reintroduces the same distortion problem an improvised bedsheet has
- Pull the fabric taut from all sides when attaching it to the frame, checking for any remaining slack
- This detail is what separates a genuinely flat viewing surface from one that only looks flat from a distance
- Recheck tension before each use, since fabric can loosen slightly with repeated setup and storage
2. A Dedicated Outdoor Speaker Instead of Built-In Audio
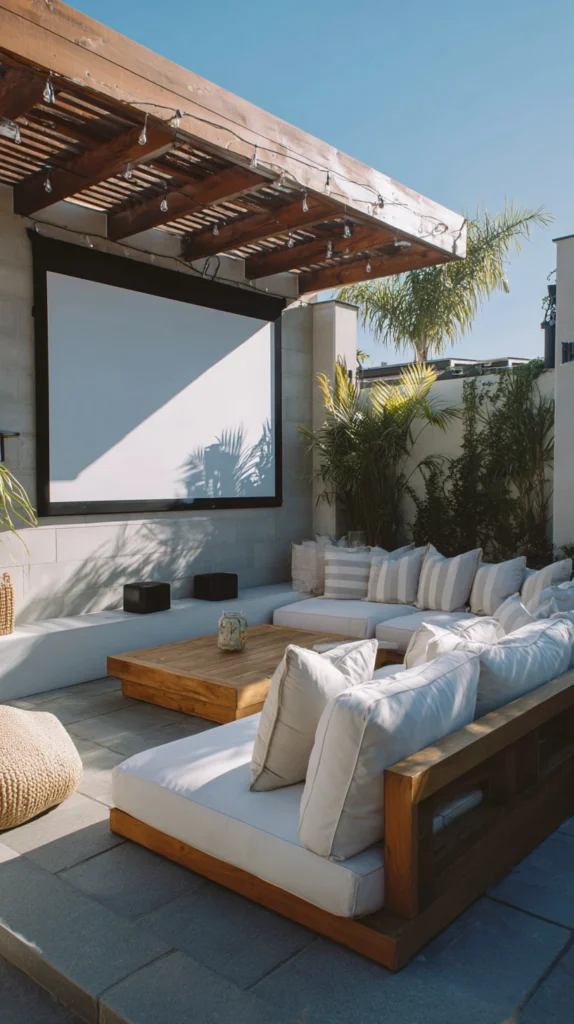
A portable outdoor-rated Bluetooth speaker, or a small speaker pair, replacing a projector’s built-in speaker or a laptop’s audio output.
My movie night nobody could actually hear:
What I had:
- A projector’s tiny built-in speaker as the only sound source
- Dialogue that became inaudible the moment any wind, distant traffic, or general yard noise picked up
- A visually decent setup completely undermined by genuinely poor sound quality
The dedicated speaker solution:
Why sound quality matters as much as the picture, if not more:
- A projector’s built-in speaker is almost universally an afterthought feature, not designed for genuine outdoor movie use
- A real outdoor-rated Bluetooth speaker delivers dramatically better volume, clarity, and bass than any built-in option
- Solves the single most common complaint about backyard movie nights, not being able to hear the dialogue clearly
- One of the highest-return upgrades available relative to its cost, given how much it affects the actual experience
Choosing the right speaker setup:
Options by scale:
- A single, quality portable outdoor Bluetooth speaker for a smaller, more intimate gathering
- A pair of speakers positioned on either side of the screen for wider stereo coverage across a larger seating area
- A speaker specifically rated for outdoor use, water-resistant and weather-tolerant, rather than an indoor speaker brought outside
Cost:
- A single quality outdoor Bluetooth speaker: $60-150
- A pair of coordinated outdoor speakers: $150-350
My speaker upgrade: Replacing the projector’s built-in speaker with a single quality outdoor Bluetooth speaker, positioned just below the screen, solved the audibility problem completely, and it remains the single change guests specifically comment on compared to the very first attempt at this whole idea.
Outdoor Speaker Tips
Position the speaker close to the screen so sound direction matches the visual source:
Audio-visual alignment:
- Sound coming from a noticeably different direction than the screen creates a subtle but real disconnect during viewing
- Placing the speaker directly below or beside the screen keeps sound and image feeling properly connected
- This matters more than people initially expect, particularly for dialogue-heavy scenes
- Test the setup from the actual seating area, not just standing next to the equipment, before finalizing placement
Test the full audio setup at actual movie volume before guests arrive:
Pre-event verification:
- Bluetooth connections, volume levels, and any audio lag between picture and sound are much easier to troubleshoot before the event starts
- Run a short test clip at the actual planned volume, from the actual seating distance, ahead of time
- This test reveals any issues, whether connectivity, volume, or sync, while there’s still time to fix them
- Skipping this step is one of the more common reasons a movie night gets off to a frustrating, delayed start
3. A Blanket Fort or Floor Cushion Lounge Zone
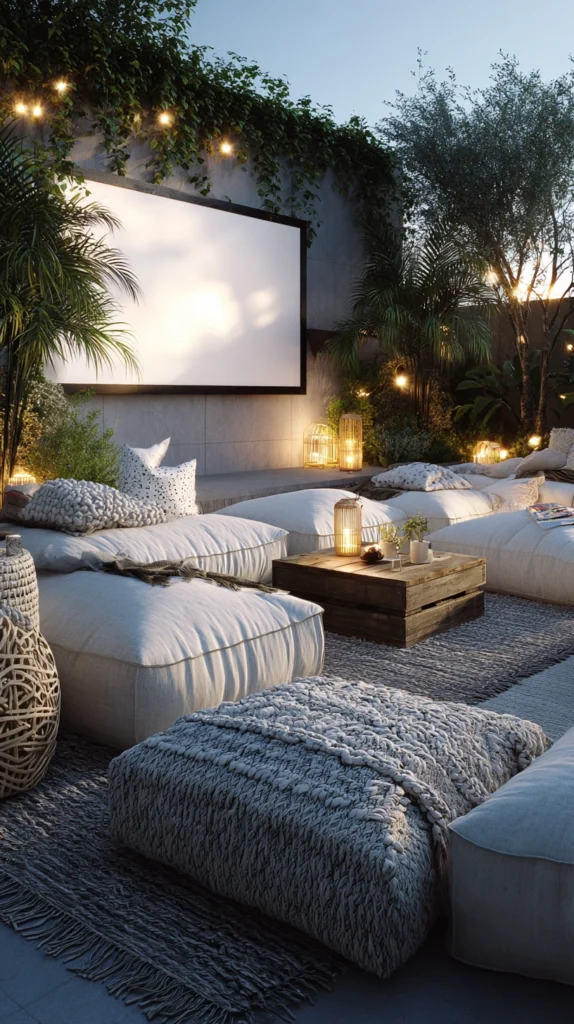
A dedicated ground-level seating area built from layered blankets, floor cushions, and pillows, replacing standard lawn chairs as the primary seating.
My uncomfortable lawn chairs that nobody wanted to sit through a full movie in:
What I had:
- A collection of standard folding lawn chairs, functional but genuinely uncomfortable for a full two-hour movie
- Guests shifting positions constantly or quietly leaving partway through
- A missed opportunity for the cozy, blanket-fort atmosphere that makes an outdoor movie night feel genuinely special
The blanket and cushion lounge solution:
Why ground-level, layered seating suits a movie night specifically:
- A movie is a genuinely long sit, and comfort directly determines whether people actually stay through the whole thing
- Layered blankets and floor cushions create the cozy, communal atmosphere central to what makes outdoor movie nights feel like an event rather than just watching TV outside
- Ground-level seating also naturally accommodates more people in the same footprint than individual chairs would
- One of the more significant comfort upgrades available, addressing the single biggest reason people don’t make it through a full film
Building the lounge zone:
Setup components:
- A large tarp or outdoor rug as the base layer, protecting against ground moisture and cold
- Several layers of blankets on top, providing both cushioning and warmth
- Large floor cushions and pillows scattered throughout for back support and additional comfort
- Positioned at an appropriate viewing distance and angle relative to the screen
Cost:
- A large tarp or ground cover: $20-40
- Blankets (if not already on hand): $15-30 each
- Floor cushions and pillows: $25-60 each
My blanket lounge zone: Replacing the lawn chairs with a tarp base, several layered blankets, and a scattering of floor cushions completely changed how long people actually stayed engaged with the movie, and it’s become genuinely difficult to get anyone to leave before the credits finish rolling now.
Blanket Lounge Tips
Always use a moisture barrier beneath the blankets, even on a seemingly dry evening:
Ground moisture protection:
- Grass retains moisture that can seep upward into blankets even without visible rain or obvious dampness
- A tarp or dedicated ground cover beneath the blanket layers prevents this from becoming an uncomfortable surprise partway through the movie
- This step is easy to skip but meaningfully affects comfort over a full two-hour sitting
- Check the tarp’s placement and coverage extends beyond where guests will actually be seated or lying down
Position the lounge zone at the correct viewing distance for the specific screen size being used:
Distance and angle planning:
- Sitting too close to a larger screen strains the neck and eyes over a full movie’s length
- A general guideline is positioning the farthest edge of seating at roughly 1.5 to 2 times the screen’s diagonal measurement
- This consideration matters more for a genuinely large inflatable screen than a smaller portable one
- Test the actual viewing angle and distance from various points in the planned lounge zone before finalizing layout
4. Warm, Dimmable String Lights for Ambiance Without Screen Glare
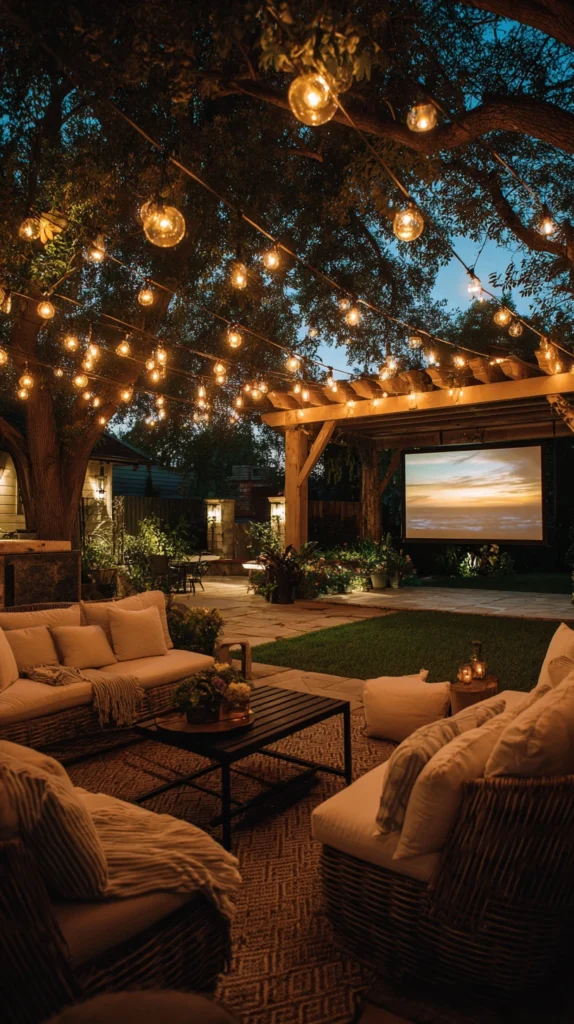
String lights on a dimmer, or positioned specifically away from the screen’s direct line of sight, providing enough ambient light for movement without washing out the picture.
My string lights that competed directly with the projected image:
What I had:
- String lights strung directly across the viewing area, bright enough to noticeably wash out the projected picture
- A choice between total darkness, making it hard to move around safely, or lights bright enough to hurt the picture quality
- No real solution beyond turning lights fully on or fully off
The dimmable ambient lighting solution:
Why this specific lighting approach solves a genuine tension:
- Some ambient light is genuinely necessary for guests to move safely to the snack table or restroom during the film
- Full lighting directly competes with and washes out the projected image, undermining the whole point of a proper screen setup
- A dimmer, or careful positioning away from the screen’s direct sightline, solves both needs simultaneously
- One of the more overlooked but genuinely practical upgrades for an actually functional movie night setup
Setting up the lighting:
Practical approach:
- String lights on a dimmer switch or a smart plug with brightness control, set low enough not to interfere with the screen
- Positioned around the seating area’s perimeter or overhead, rather than anywhere in the screen’s direct sightline
- Warm white bulbs specifically, which read as less visually distracting than cooler, bluer light tones
Cost:
- Dimmable outdoor string lights: $30-60
- A compatible dimmer switch or smart plug: $15-30
My dimmable lighting: Positioning string lights around the seating area’s perimeter, on a simple dimmer, meant guests could still see well enough to move around safely without the lights competing with or washing out the actual movie, solving a problem the very first, all-or-nothing lighting attempt never addressed.
Dimmable Lighting Tips
Test the actual picture quality with the lights at your planned dim setting, not just visually estimated:
Verification before the event:
- What looks like a reasonably dim light level to the eye can still meaningfully affect a projected image’s contrast
- Project a test clip with the lights at the planned dim level and assess the actual picture quality
- This test prevents an unpleasant surprise once the real event starts and guests are already seated
- Adjust the dimmer level based on this test rather than assuming a general “low” setting is dim enough
Keep a few battery-powered path lights available for the walk to and from the seating area specifically:
Additional safety lighting:
- Even with good ambient string lighting, the specific path to a restroom or snack table may need more direct illumination
- Simple battery or solar path lights along this specific route add safety without affecting the main viewing area’s lighting
- This targeted approach solves the practical safety need without compromising the broader ambient lighting balance
- A relatively small additional cost that prevents a stumble in the dark from becoming the evening’s most memorable moment
5. A DIY Concession Stand With a Real Menu
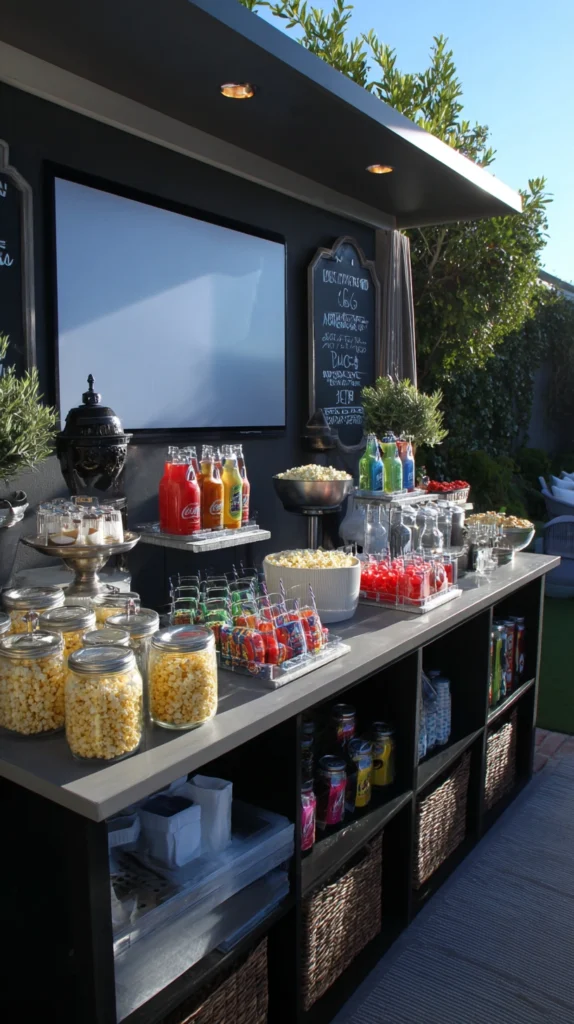
A small dedicated table or cart styled as a concession stand, offering a simple, defined snack and drink menu rather than a scattered spread.
My snacks scattered across a single random table:
What I had:
- A random assortment of snacks and drinks placed on whatever table happened to be nearby
- No real sense of occasion or intentional presentation around the food, despite putting real effort into the screen and seating
- A missed opportunity to extend the “real movie theater” feeling beyond just the screen itself
The concession stand solution:
Why a defined concession setup adds genuine event atmosphere:
- A styled stand with a simple menu instantly signals “this is a real event,” not just snacks left out on a table
- Concentrating food and drinks in one clearly defined spot keeps the rest of the space, particularly the seating area, tidier
- Simple signage and presentation cost very little but meaningfully change how the whole gathering feels
- One of the more fun, low-cost ways to extend the movie theater experience beyond just the film itself
Building the stand:
Setup and styling:
- A small table or rolling cart, styled with a simple sign listing 3-5 specific snack and drink options
- Classic movie theater snacks: popcorn, candy, soda, and perhaps one themed treat matching the specific film
- Small popcorn boxes or bags, even simple ones, add genuine presentation value over a plain bowl
Cost:
- Concession stand snacks and supplies: $30-60 depending on group size
- Small popcorn boxes or bags (set of 20-25): $10-15
- A simple sign or menu board: $10-20
My concession stand: Setting up a small folding table as a proper concession stand, with a hand-lettered menu sign and individual popcorn bags instead of one shared bowl, gave the whole evening a genuine sense of occasion that the previous scattered snack table never quite achieved.
Concession Stand Tips
Keep the menu genuinely simple, 3-5 items maximum, rather than trying to offer everything:
Menu restraint:
- A concession stand with too many options starts to feel like a buffet rather than a themed, intentional experience
- Choosing a focused handful of classic options keeps both the styling and the actual logistics manageable
- This restraint mirrors how real concession stands operate, which is part of why it successfully evokes that feeling
- Save more elaborate food options for a separate area if a fuller meal is also part of the evening’s plan
Prepare and portion snacks before guests arrive rather than during the event:
Pre-event preparation:
- Popping popcorn and portioning snacks into individual containers takes real time that’s better spent before the movie starts
- Doing this prep work in advance means the host can actually enjoy the movie rather than managing snacks throughout
- This small planning shift significantly improves the host’s own experience of their own event
- Build this prep time into the overall event timeline rather than treating it as a during-event task
6. A Cozy Throw Blanket and Poncho Station
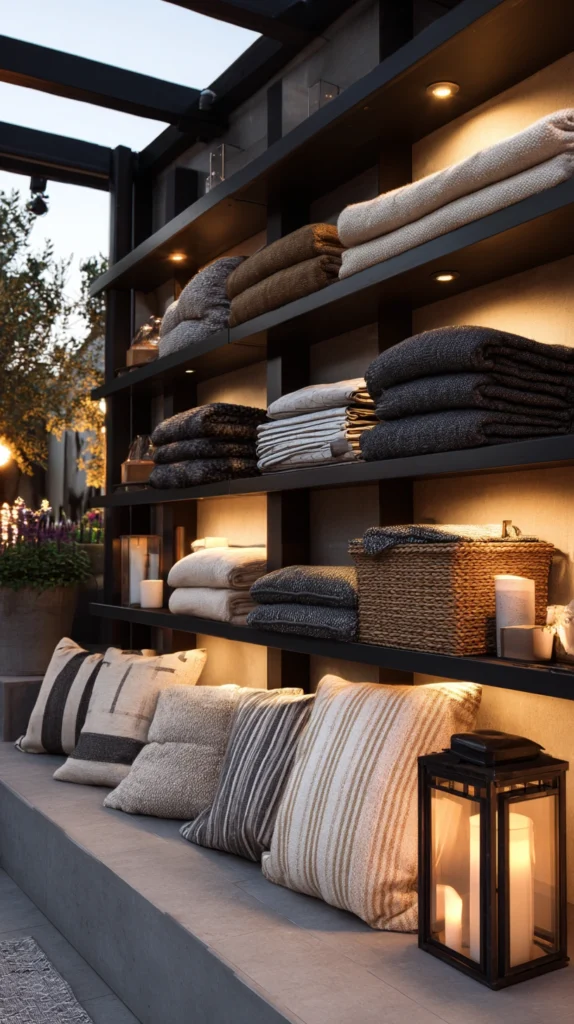
A dedicated basket or station stocked with extra throw blankets and lightweight ponchos, available for guests as evening temperatures drop.
My guests getting cold with no backup plan:
What I had:
- No extra layers or blankets available beyond what individual guests happened to bring themselves
- Evening temperature drops that regularly cut movie nights short as people got cold and left early
- A missed opportunity to plan for a genuinely predictable seasonal reality
The blanket and poncho station solution:
Why proactively planning for temperature drops keeps guests through the whole film:
- Evening temperatures reliably drop during any outdoor gathering that runs into full darkness, regardless of season
- Having extra layers genuinely available, rather than assuming everyone will bring their own, removes a common reason people leave early
- A small, thoughtful touch that meaningfully affects how long guests actually stay comfortable and engaged
- One of the lowest-cost, highest-consideration additions available for extending a movie night’s actual usable length
Setting up the station:
Practical approach:
- A basket or large bin near the seating area, stocked with several extra throw blankets
- Lightweight, packable ponchos in case of unexpected light rain or dew
- Positioned somewhere easily accessible without needing to interrupt the movie to search for it
Cost:
- Extra throw blankets (per blanket): $12-25
- Packable ponchos (set of several): $15-25
My blanket station: Setting out a large basket of extra throw blankets right at the edge of the seating area meant guests could simply grab one as temperatures dropped rather than deciding to head home early, and movie nights have consistently run their full length ever since making this small addition.
Blanket Station Tips
Choose easily washable blanket materials given how much handling and outdoor use they’ll see:
Material practicality:
- Shared blankets used across multiple guests and multiple events need to be genuinely easy to clean between uses
- A washable fleece or cotton blend holds up better to this kind of repeated communal use than a more delicate material
- This consideration matters more for a shared station than for personal blankets individual guests bring themselves
- Wash blankets promptly after each use to keep the station genuinely appealing for the next gathering
Position the blanket station where it’s visible and accessible without requiring guests to ask:
Accessibility consideration:
- Guests are often hesitant to ask a host directly for a blanket, even when they’re cold
- A visibly available basket, positioned where it’s naturally noticed, removes this social friction entirely
- This small placement detail significantly affects whether the station actually gets used as intended
- A simple sign inviting guests to help themselves reinforces that the blankets are genuinely meant to be used
7. Proactive Bug and Mosquito Control
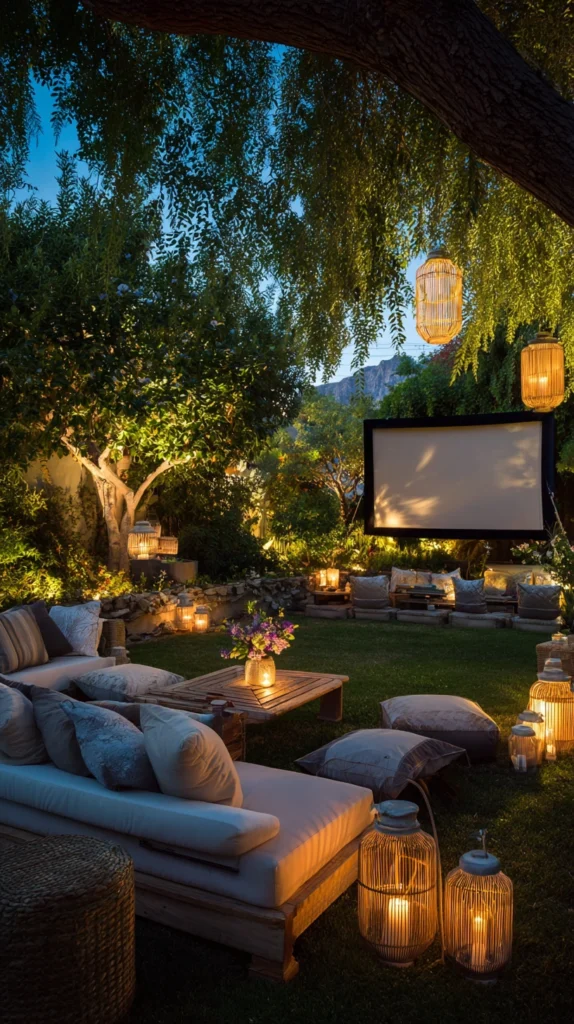
Citronella candles, a bug net perimeter, or a portable bug-repelling device, addressing insects proactively rather than reactively during the event.
My movie night that became a mosquito buffet:
What I had:
- No specific bug control plan beyond hoping the evening wouldn’t be too bad
- Movie nights repeatedly cut short or made genuinely miserable by mosquitoes once darkness fully set in
- A recurring problem significant enough that it discouraged planning future outdoor movie nights at all
The proactive bug control solution:
Why addressing this specific issue directly is essential, not optional:
- Mosquitoes and other insects become dramatically more active at dusk and into full darkness, exactly when a movie night is happening
- A proactive plan, rather than reactive swatting, is what actually keeps guests comfortable enough to stay through a full film
- This single issue is genuinely capable of ending an otherwise well-planned movie night early if left unaddressed
- One of the most practically essential items on this entire list, regardless of how well everything else is executed
Building the bug control plan:
Layered approach:
- Citronella candles or torches positioned around the seating area’s perimeter
- A portable propane-powered bug-repelling device for more significant mosquito pressure
- A freestanding bug net canopy over the seating area for the most complete protection in particularly bad conditions
- Personal repellent available as a backup layer for anyone still bothered despite the broader measures
Cost:
- Citronella candles or torches (set of several): $20-40
- A portable propane bug-repelling device: $40-80
- A freestanding bug net canopy: $80-200
My bug control setup: Combining citronella torches around the perimeter with a portable propane bug-repelling device solved a problem significant enough that it had previously been the single biggest threat to actually finishing any backyard movie night, and guests now comment on how comfortable the evening feels rather than swatting at bugs the whole time.
Bug Control Tips
Layer multiple bug control methods rather than relying on a single approach:
Layered defense principle:
- No single method, citronella alone, a bug zapper alone, is typically sufficient on its own in genuinely mosquito-heavy conditions
- Combining several methods, ambient repelling devices plus perimeter candles plus personal repellent as backup, provides more reliable protection
- This layered approach mirrors how professional outdoor event planners typically address the same challenge
- Assess your specific yard’s typical bug pressure and adjust the combination of methods accordingly
Set up bug control measures well before dusk, not once insects are already active:
Timing for effectiveness:
- Many bug control methods work best when given time to establish before insects become fully active
- Light citronella candles and start any propane devices at least 30-45 minutes before the event’s actual start time
- This proactive timing is significantly more effective than reactive measures started once mosquitoes are already a problem
- Build this setup time into the overall event preparation timeline
8. A Personalized Movie Ticket and Photo Backdrop
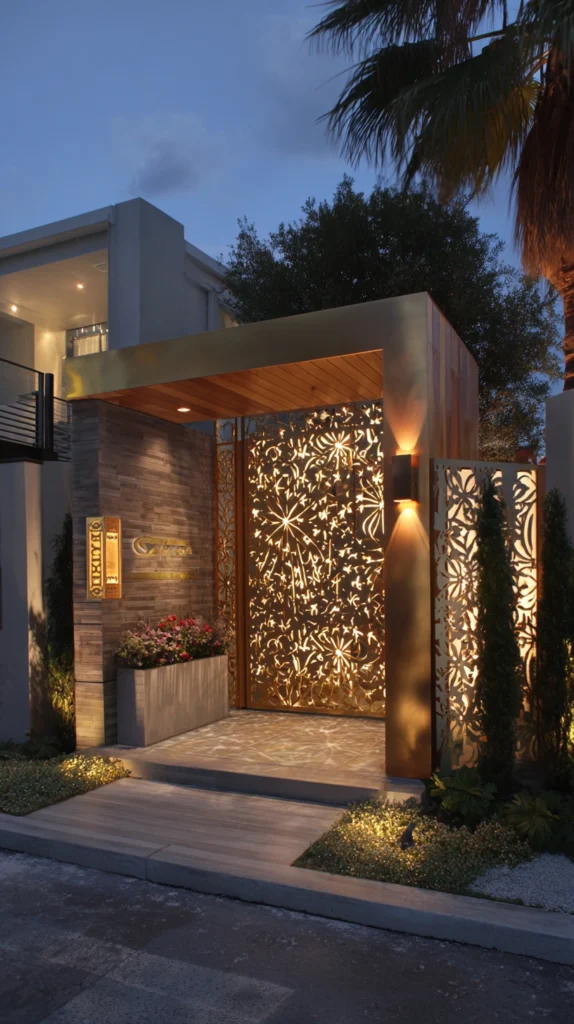
Custom-printed movie tickets for guests, paired with a simple photo backdrop area, extending the movie theater experience into a small, personal touch.
My event with no clear sense of arrival or occasion:
What I had:
- Guests simply arriving and finding a seat, with no particular moment marking the start of the “event” itself
- A missed opportunity for a small, memorable detail that guests specifically remember afterward
- A desire for the evening to feel like a genuine occasion rather than just an informal backyard hangout
The ticket and photo backdrop solution:
Why these small touches add genuine memorability for relatively little effort:
- A custom ticket, however simple, creates a clear sense of arrival and occasion that a casual gathering lacks
- A photo backdrop gives guests a natural moment to mark and remember the specific evening
- Both details cost relatively little but consistently rank among what guests specifically mention afterward
- Extends the movie theater theme beyond just the screen and snacks into the overall guest experience
Setting up the details:
Simple execution:
- Design and print simple tickets listing the movie title, date, and a small custom detail, easily done with basic design software or a template
- A small backdrop, whether a simple fabric backdrop or string lights arranged behind a designated photo spot
- Positioned near the entry or concession stand, giving guests a natural stopping point upon arrival
Cost:
- Printed tickets (for a group of 10-20): $10-20
- A simple photo backdrop setup: $20-50
My ticket and photo setup: Printing simple custom tickets with the movie title and handing them out at the door, plus a small string-light backdrop near the concession stand, gave the evening a clear sense of occasion, and the printed tickets specifically became something a few guests kept as a small keepsake afterward.
Ticket and Backdrop Tips
Choose a photo backdrop location with good lighting, separate from the darkened viewing area:
Lighting consideration for photos:
- The main viewing area is intentionally kept dim, which doesn’t photograph well
- Position the backdrop somewhere with its own dedicated lighting, near the concession stand or entry, separate from the screen’s dim zone
- This distinction ensures the backdrop photos actually turn out well rather than being an afterthought in poor lighting
- Test the photo spot’s lighting at the actual event time before finalizing its location
Keep ticket design simple and quick to produce rather than an elaborate design project:
Practical execution:
- A basic template with the movie title, date, and a simple border achieves the intended effect without requiring significant design time
- Free online design tools offer straightforward templates that can be customized in a few minutes
- This detail should remain a small, fun touch rather than becoming its own significant project
- Print on cardstock rather than standard paper for a slightly more substantial, ticket-like feel
9. A Full Popcorn Bar With Toppings
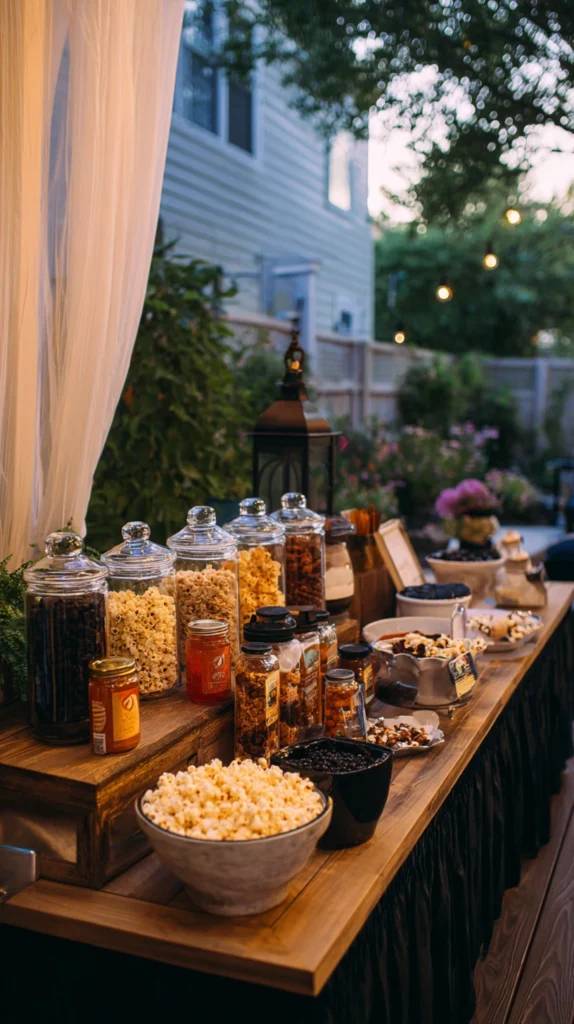
A popcorn station with a base popcorn supply and a range of toppings, letting guests customize their own bag or bowl.
My single bowl of plain popcorn:
What I had:
- One large bowl of plain, unsalted popcorn set out with the other snacks
- A missed opportunity for a more interactive, genuinely fun food element that guests could engage with directly
- No real differentiation from just any other snack on the table
The popcorn bar solution:
Why a customizable popcorn station adds genuine interactive fun:
- Letting guests build their own custom popcorn mix is inherently more engaging than a single static bowl
- A range of sweet and savory toppings accommodates different preferences within one shared setup
- Extends the classic movie theater snack into something that feels more like a genuine activity than a passive offering
- One of the more consistently popular individual elements across different backyard movie night styles
Building the popcorn bar:
Setup and toppings:
- A large base supply of plain popped popcorn, kept warm if possible
- A range of toppings: melted butter, various seasoned salts, caramel drizzle, chocolate chips, and a savory option like nutritional yeast or parmesan
- Small bags or bowls for guests to fill, plus small spoons or shakers for each topping option
Cost:
- Popcorn and toppings for a full bar: $25-50 depending on group size and variety of toppings offered
My popcorn bar: Setting up a full topping bar with five different options, from classic butter and salt to a caramel and sea salt combination, turned the previously plain popcorn bowl into one of the most actively enjoyed parts of the whole pre-movie setup, with guests genuinely comparing their custom mixes.
Popcorn Bar Tips
Keep popcorn warm using a slow cooker set to low or a warming tray if available:
Temperature maintenance:
- Popcorn that’s gone cold and slightly stale by the time guests actually serve themselves is noticeably less appealing
- A slow cooker on the warm setting, left uncovered to maintain some crispness, keeps the base supply appealing throughout the event
- This small equipment addition meaningfully improves the popcorn bar’s overall quality over the course of a longer evening
- Pop popcorn in smaller batches throughout the event if warming equipment isn’t available, rather than one large batch that sits out
Offer both sweet and savory topping options to accommodate different preferences:
Variety consideration:
- A topping bar limited to only sweet or only savory options misses a significant portion of likely guest preferences
- Include at least one option from each category, a classic butter and salt alongside something like caramel or chocolate
- This balance ensures the station genuinely works for the full range of people attending
- Label each topping clearly, since guests are less likely to try something they can’t immediately identify
10. Weather-Ready Backup Planning
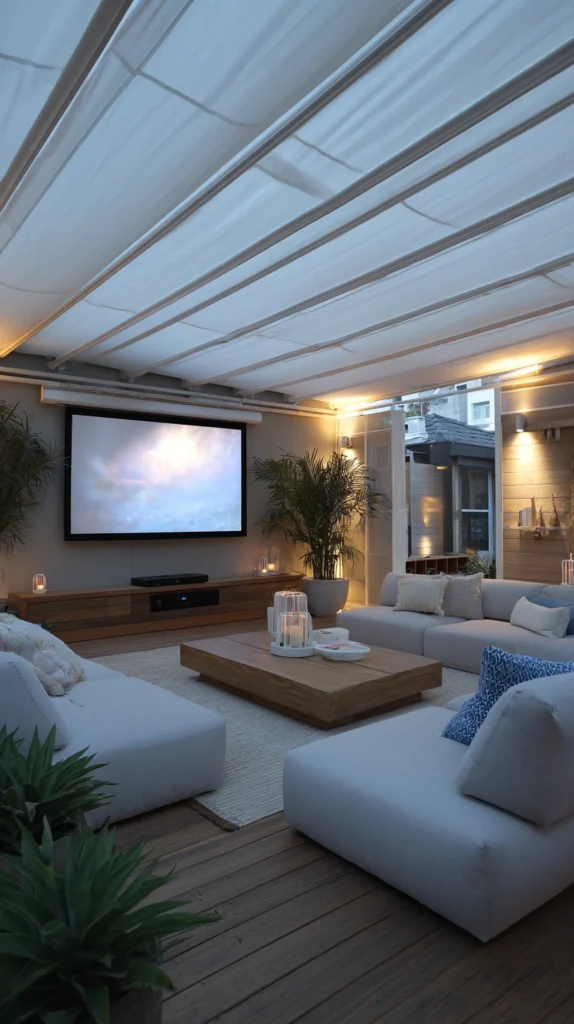
A clear contingency plan, whether an indoor backup location or covered outdoor space, established before the event rather than improvised if weather turns.
My movie night that got completely derailed by unexpected rain:
What I had:
- No actual backup plan beyond hoping the weather forecast held
- An event that had to be cancelled entirely, with guests already arriving, when unexpected rain moved in
- A frustrating, avoidable situation that a bit of advance planning could have prevented
The weather backup solution:
Why having a genuine contingency plan matters more than most people initially assume:
- Weather forecasts, particularly for a specific evening several days out, are genuinely unreliable at the level of precision an outdoor event needs
- A real backup plan, established in advance, prevents the event from simply being cancelled at the last minute
- Guests already committed to and looking forward to the evening deserve a plan beyond “we’ll just call it off”
- One of the more overlooked planning elements, since it only matters on the occasions when it’s actually needed, but genuinely matters a great deal then
Building the backup plan:
Contingency options:
- A covered patio or garage space where the same projector and screen setup can be relocated
- A simple tarp canopy specifically rated to keep the electronics protected during light rain, if a full relocation isn’t practical
- An indoor backup location, a living room or finished basement, as the most complete contingency for genuinely bad weather
- Communicating the backup plan to guests in advance, rather than only figuring it out in the moment
Cost:
- A tarp canopy specifically for equipment protection: $30-60
- This is largely a planning exercise rather than a significant additional expense
My weather backup plan: Identifying the garage as a genuine backup location, and testing the same projector and screen setup there in advance, meant that when rain did eventually threaten a planned movie night, the whole event simply relocated smoothly rather than getting cancelled altogether.
Weather Backup Tips
Test your backup location’s actual setup before you need it, not during an actual weather emergency:
Advance testing:
- A backup space that seems obviously workable in theory may reveal unexpected problems, poor projection distance, echo, insufficient seating, once actually tested
- Run a full test setup in the backup location well before any specific event, confirming it genuinely works as a contingency
- This test prevents discovering a problem with the backup plan at the exact moment it’s actually needed
- Treat this test with the same seriousness as testing the primary outdoor setup
Communicate the backup plan to guests as part of the initial invitation, not as a last-minute scramble:
Clear advance communication:
- Guests appreciate knowing there’s a plan in place, even if it’s never actually needed
- A simple note on the invitation, “if weather doesn’t cooperate, we’ll move things to the garage,” sets clear expectations upfront
- This small communication step prevents confusion or frustration if the backup plan does end up being used
- Update guests promptly if the backup plan is actually being activated for a specific event, rather than leaving them uncertain
11. A Portable Heater for Cool-Weather Screenings
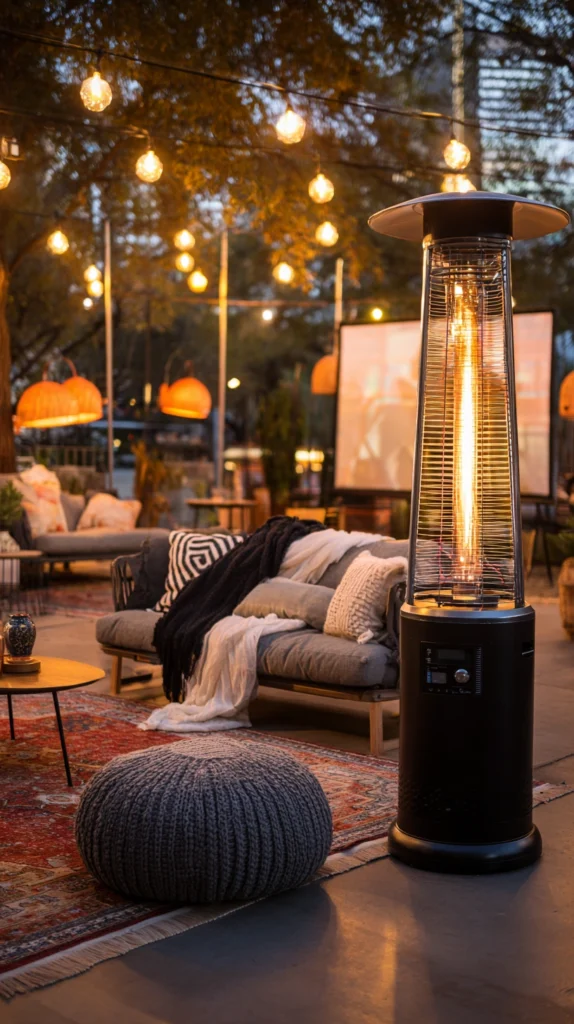
A portable propane or electric outdoor heater, extending the backyard movie night season into cooler spring and fall evenings.
My movie season that ended the moment it got cold:
What I had:
- Backyard movie nights limited to only the warmest summer months
- A genuine desire to extend the activity into the cooler shoulder seasons, when evenings can still be pleasant earlier on
- No heating solution making those cooler evenings comfortable enough for a full two-hour sit
The portable heater solution:
Why this addition genuinely extends the whole activity’s usable season:
- A quality outdoor heater makes a meaningful difference in comfort during cooler spring and fall evenings specifically
- Extends backyard movie nights from a purely peak-summer activity into a much longer stretch of the year
- Works alongside the blanket station described earlier for a combined approach to managing temperature drops
- One of the more significant investments on this list, but one that meaningfully expands how often the whole setup actually gets used
Choosing the right heater:
Options by scale and fuel type:
- A propane patio heater for genuine warmth output across a larger seating area
- A smaller electric infrared heater for a more contained seating zone or where an open flame isn’t practical
- Positioned safely at the edge of the seating area, with adequate clearance from blankets and other flammable materials
Cost:
- A quality propane patio heater: $150-350
- A smaller electric infrared heater: $80-200
My portable heater: Adding a propane patio heater at the edge of the blanket lounge area extended the movie night season by a genuine six to eight weeks on either end of summer, and it’s become one of the better investments made across the whole project relative to how much additional use it enabled.
Portable Heater Tips
Maintain proper clearance between the heater and any blankets, cushions, or other flammable material:
Safety spacing:
- The same blankets and cushions that make the seating area cozy also represent a genuine fire risk positioned too close to a heat source
- Follow the specific heater’s manufacturer clearance recommendations strictly, rather than estimating based on how warm it feels
- This is a safety consideration worth taking seriously, not an area to compromise for the sake of a tighter, cozier layout
- Position the heater where it can warm the general area without any single item sitting dangerously close
Choose a heater with a genuine safety shutoff feature, particularly for one that will be used around children:
Product safety consideration:
- Quality outdoor heaters typically include a tip-over shutoff or a similar automatic safety feature
- This feature matters significantly more in a backyard movie night context, where the heater is positioned among seating and general movement
- Confirm this feature specifically when purchasing, rather than assuming it’s standard across all heater products
- This is a reasonable area to prioritize a slightly higher-cost, better-reviewed product over the cheapest available option
12. Themed Decor Matching the Featured Film
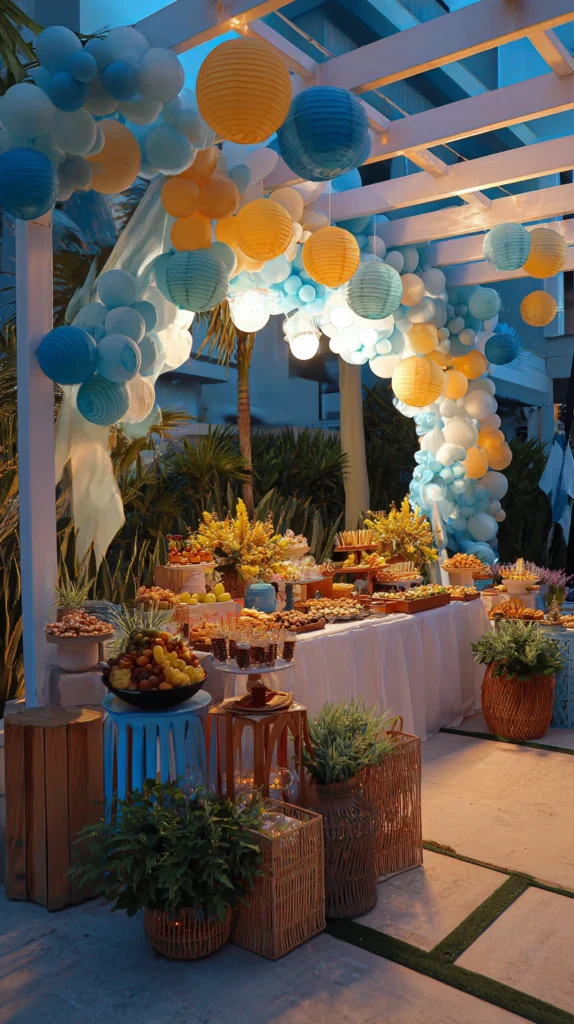
Simple decorative touches, colors, small props, or a themed snack, chosen specifically to match whatever movie is being screened that particular evening.
My identical setup regardless of what movie was actually playing:
What I had:
- The exact same generic setup every single movie night, regardless of whether the film was a holiday classic, a summer blockbuster, or a family animated feature
- A missed opportunity to add a bit of extra fun and occasion specific to each individual screening
- Guests who couldn’t necessarily tell from the setup itself what the evening’s specific theme or film even was
The themed decor solution:
Why matching decor to the specific film adds genuine extra enjoyment:
- A few small, film-specific touches signal thought and effort well beyond the baseline setup
- Turns a recurring activity into a series of genuinely distinct individual events, rather than the same experience repeated
- Doesn’t require significant additional cost, since small color and prop choices go a long way
- One of the more creative, genuinely fun elements to plan for each specific screening
Applying the theme:
Simple execution ideas:
- Color-coordinated string lights, pillows, or table linens matching the film’s specific palette or mood
- A themed snack or drink specifically referencing something from the movie
- Small props or a simple sign referencing the film, positioned near the concession stand or entry
Cost:
- Varies significantly by theme, but budgeting $20-50 for small themed touches per screening is generally sufficient
My themed decor approach: For a tropical-set film, swapping in a few colorful leis and a fruity themed drink at the concession stand took less than twenty minutes to set up but genuinely changed how the whole evening felt compared to the standard, unthemed setup used for other screenings.
Themed Decor Tips
Choose one or two themed elements rather than attempting a full thematic overhaul each time:
Effort and impact balance:
- A full themed redesign for every single screening quickly becomes unsustainable as a recurring activity
- Selecting just one or two impactful details, a specific drink, a color accent, delivers meaningful extra enjoyment without excessive effort
- This restraint keeps the themed element a fun addition rather than a barrier to hosting movie nights regularly
- Save more elaborate theming for occasional special screenings rather than every single event
Involve guests in guessing or contributing to the theme as part of the fun:
Interactive engagement:
- Keeping the specific film a surprise until arrival, with guests guessing based on the themed decor, adds an extra layer of engagement
- Alternatively, inviting guests to contribute their own small themed item adds a collaborative element to the planning
- This interactive approach extends the fun beyond just the visual decor itself
- Consider this option specifically for larger or more regular movie night gatherings where guests know the format well
13. A Two-Tier Schedule for Kids and Adults
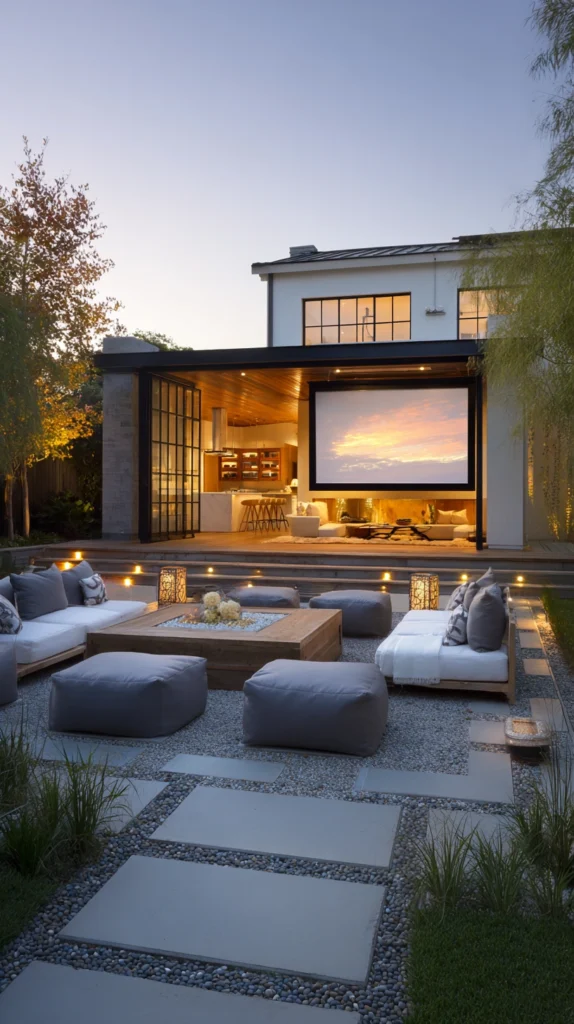
An earlier, family-friendly screening followed by a later screening more suited to adult audiences, accommodating a full range of ages across one evening.
My single screening that didn’t work for the whole guest list:
What I had:
- One movie selection for the whole evening, which meant either excluding younger kids from something more mature or boring adult guests with something too juvenile
- Genuine tension around movie selection that limited who could actually be invited to any given screening
- A missed opportunity to host a genuinely inclusive event across a wider age range
The two-tier schedule solution:
Why splitting the evening into two screenings solves a genuine scheduling tension:
- An earlier, family-friendly film lets younger kids participate in the full experience before an appropriate bedtime
- A later screening, after kids have gone home or gone to sleep, allows for more mature content suited to an adult audience
- This structure accommodates a genuinely wider guest list than trying to find a single film that works for everyone
- One of the more practical planning solutions available for a backyard movie night hosting a mixed-age group
Structuring the schedule:
Practical timing approach:
- An earlier screening starting at dusk, running a family-friendly film with a reasonable runtime for younger attendees
- A break between screenings for kids to head home or inside, and for hosts to reset snacks and seating
- A later screening starting once younger guests have departed, allowing for different content and a more relaxed adult atmosphere
Cost:
- No significant additional cost beyond potentially a second round of concession stand supplies for the later screening
My two-tier schedule: Running an early family movie starting right at dusk, then a second, more adult-oriented film after most younger kids had headed home, meant the whole extended friend group could actually be invited to the same overall evening, rather than needing to choose between hosting a kids’ event or an adults’ event.
Two-Tier Schedule Tips
Communicate the two-screening structure clearly on the invitation so guests can plan accordingly:
Clear advance expectations:
- Guests need to know in advance whether they’re expected for the earlier family screening, the later one, or both
- Clearly stating start times and the general nature of each screening on the invitation prevents confusion
- This clarity also helps guests with younger kids plan their own evening logistics around the two-part structure
- A simple, clearly worded invitation prevents the kind of mid-event confusion that can undermine an otherwise well-planned schedule
Build in a genuine reset period between the two screenings, not an immediate back-to-back transition:
Practical transition planning:
- A brief break allows time to refresh snacks, adjust seating, and let the earlier group depart without feeling rushed
- This reset period also gives remaining hosts and guests a moment to settle in before the second screening begins
- Fifteen to twenty minutes is typically sufficient for this transition without creating too long a gap
- Use this time productively, restocking the concession stand and adjusting lighting for the specific tone of the second film
14. A Simple Post-Movie Wind-Down Zone
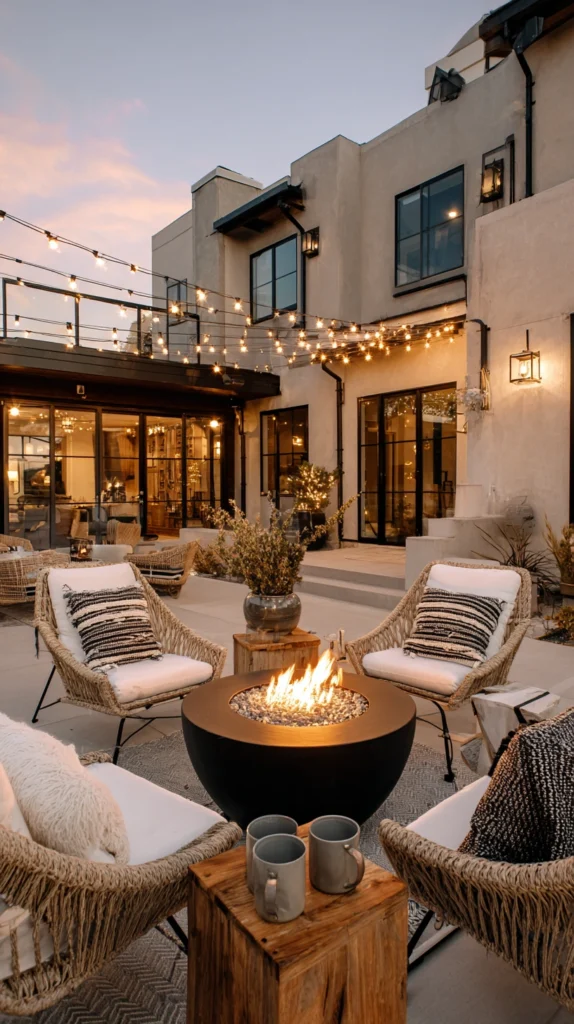
A designated, low-key gathering spot for continued conversation after the movie ends, rather than the evening abruptly concluding the moment the credits roll.
My guests leaving immediately once the movie ended:
What I had:
- An evening that essentially ended the second the credits started, with guests immediately packing up and heading out
- A missed opportunity for the kind of lingering, extended socializing that makes a gathering feel genuinely successful
- No specific space or prompt encouraging people to stay a bit longer after the main event concluded
The wind-down zone solution:
Why a dedicated post-movie space extends the evening naturally:
- A specific, comfortable spot separate from the main viewing area gives guests an easy, low-pressure reason to linger
- Continued conversation after a shared movie experience is often when some of the best parts of a gathering actually happen
- This doesn’t require significant additional setup, often just repositioning some of the same furniture and lighting already in use
- One of the simpler but genuinely valuable additions for turning a movie screening into a fuller, more satisfying social evening
Setting up the wind-down zone:
Simple transition approach:
- Brighten the string lighting slightly once the movie ends, shifting the space’s mood from “viewing” to “socializing”
- Reposition a few chairs or cushions into a more conversation-friendly circular arrangement, distinct from the forward-facing movie seating
- Offer a final round of a warm drink, coffee, tea, or hot cider, as a natural prompt for guests to settle in for continued conversation
Cost:
- Minimal additional cost, primarily reusing lighting and seating already part of the evening’s setup
My wind-down zone: Simply brightening the string lights and pulling a few chairs into a loose circle once the credits started rolling, then offering a round of hot cider, turned what used to be an abrupt end to the evening into consistently the best part of the whole gathering, with guests regularly staying another hour or more just talking.
Wind-Down Zone Tips
Have this transition planned and ready to execute quickly right as the movie ends:
Smooth transition execution:
- A slow, fumbling transition after the movie ends can lose the momentum needed to actually keep guests engaged and lingering
- Know in advance exactly what needs to happen, lights up, chairs repositioned, drinks ready, and move through it efficiently
- This preparation ensures the wind-down zone feels like a natural continuation rather than an awkward afterthought
- Consider recruiting a co-host or family member specifically to help execute this transition smoothly while you’re occupied elsewhere
Keep the wind-down offering genuinely simple rather than a whole second event:
Appropriate scope:
- This zone is meant to extend the evening naturally, not become an entirely separate, effort-intensive second event
- One simple warm drink option and a comfortable place to sit is typically sufficient to achieve the intended effect
- Over-investing in this final phase can lead to host burnout that undermines enjoyment of what should be the evening’s relaxed conclusion
- Match the effort here to genuinely sustainable levels for a gathering you intend to host again in the future
Choosing Your Backyard Movie Night Projects
By Priority
Get the fundamentals right first:
- A proper inflatable or stretched screen (idea 1)
- A dedicated outdoor speaker (idea 2)
- Proactive bug and mosquito control (idea 7)
Build genuine comfort:
- A blanket fort or floor cushion lounge zone (idea 3)
- A cozy throw blanket and poncho station (idea 6)
- A portable heater for cool-weather screenings (idea 11)
Add event atmosphere and fun:
- A DIY concession stand (idea 5)
- A full popcorn bar with toppings (idea 9)
- Themed decor matching the featured film (idea 12)
By Effort Level
Lowest effort:
- Warm, dimmable string lights (idea 4)
- A cozy throw blanket station (idea 6)
- Themed decor, small touches (idea 12)
Medium effort:
- A dedicated outdoor speaker (idea 2)
- A DIY concession stand (idea 5)
- A full popcorn bar (idea 9)
- A personalized ticket and photo backdrop (idea 8)
Higher commitment:
- A proper inflatable or stretched screen (idea 1)
- A blanket fort or floor cushion lounge zone (idea 3)
- Proactive bug control, full setup (idea 7)
- A portable heater (idea 11)
- Weather-ready backup planning (idea 10)
By Budget
Under $75:
- Warm, dimmable string lights (idea 4)
- A cozy throw blanket station (idea 6)
- A personalized ticket and photo backdrop (idea 8)
- A full popcorn bar (idea 9)
$75-250:
- A dedicated outdoor speaker (idea 2)
- A blanket fort or floor cushion lounge zone (idea 3)
- A DIY concession stand (idea 5)
- Proactive bug control (idea 7)
$250+:
- A proper inflatable screen (idea 1)
- A portable heater (idea 11)
Maintenance Through the Season
Before each screening:
- Test the projector, screen, and speaker setup fully, including audio sync, before guests arrive
- Set up bug control measures at least 30-45 minutes ahead of the planned start time
Mid-season:
- Wash shared blankets and cushion covers regularly given repeated communal use
- Check the weather forecast a few days out and confirm the backup plan is ready if needed
End of season:
- Store the screen, speaker, and any electronics properly to protect them for the following year
- Note which specific elements guests responded to most for planning next season’s screenings
My Complete Backyard Movie Night Journey
What I built across two summers:
Summer one ($340):
- A proper stretched-fabric screen on a PVC frame
- A dedicated outdoor Bluetooth speaker
- Basic citronella bug control
- Learned that screen and sound quality mattered more to the actual experience than any other single factor
Summer two ($520):
- The full blanket fort and floor cushion lounge zone
- A propane patio heater extending the season into cooler months
- A DIY concession stand with a popcorn bar
- Learned that comfort and genuine event atmosphere were what turned repeat guests into people actively asking when the next screening was happening
Total investment: $860 across two summers Most important lesson: Screen and sound quality solve the “can we actually watch this” problem, but comfort and atmosphere are what make people want to come back Single highest-impact change across both summers: The dedicated outdoor speaker, since it solved the single most common complaint from that very first, forgettable laptop-on-a-cooler attempt
Getting Started This Weekend
Start with the screen and sound, not the extras.
This weekend:
Step 1 — Build or buy a proper flat screen surface:
- Even a simple PVC frame and stretched sheet delivers a dramatically better picture than an improvised bedsheet
- This single change often has the most visible impact of anything on this entire list
Step 2 — Add a dedicated outdoor speaker:
- Solves the single most common complaint about backyard movie nights
- Test it at actual movie volume from the actual seating distance before the real event
Step 3 — Set up basic bug control:
- Citronella candles or a portable device, positioned and lit well before dusk
- One of the few items on this list capable of ending an otherwise great evening early if skipped
Step 4 — Layer in blankets and floor cushions for real seating comfort:
- Comfort determines whether people stay through the whole film
- This doesn’t require a full furniture purchase, just intentional arrangement of what’s already on hand
My recommendation:
Start with the screen and the speaker:
- Both are achievable in a single weekend and directly address the two things most likely to derail an outdoor movie night
- Both matter more to the actual experience than any of the more atmospheric extras on this list
- This foundation makes every future addition, snacks, lighting, theming, build on a setup that already actually works
Watch one full movie start to finish with just these two changes in place before adding anything else, and notice how much more watchable the whole experience already is.
Now go build the backyard movie night people actually ask to be invited back to.
Quick Summary
The 14 genius backyard movie party ideas:
Getting the fundamentals right:
- A proper inflatable or stretched screen (idea 1): the single biggest visible quality improvement available
- A dedicated outdoor speaker (idea 2): solves the most common backyard movie night complaint
- Proactive bug and mosquito control (idea 7): essential, not optional, for actually finishing the film
Building genuine comfort:
- A blanket fort or floor cushion lounge zone (idea 3): comfort that keeps people through the whole runtime
- Warm, dimmable string lights (idea 4): ambient safety without washing out the picture
- A cozy throw blanket and poncho station (idea 6): a small touch that extends how long guests stay comfortable
- A portable heater for cool-weather screenings (idea 11): extends the whole activity’s usable season
Event atmosphere and fun:
- A DIY concession stand with a real menu (idea 5): genuine movie theater occasion
- A personalized movie ticket and photo backdrop (idea 8): small, memorable arrival details
- A full popcorn bar with toppings (idea 9): interactive, customizable classic snack
- Themed decor matching the featured film (idea 12): turns repeated events into distinct occasions
Practical planning:
- Weather-ready backup planning (idea 10): prevents a last-minute cancellation
- A two-tier schedule for kids and adults (idea 13): accommodates a genuinely wider guest list
- A simple post-movie wind-down zone (idea 14): extends the evening’s best social moments
The universal backyard movie night rules:
Always:
- Prioritize a genuinely flat screen and real outdoor speaker before any other addition
- Set up bug control proactively, well before dusk, not reactively once it’s already a problem
- Plan for temperature drops and full-runtime comfort, not just the first twenty minutes
- Have a genuine weather backup plan tested in advance, not improvised in the moment
Never:
- Rely on a projector’s built-in speaker or a laptop’s audio as the primary sound source
- Use a wrinkled, improvised bedsheet and expect genuinely good picture quality
- Skip bug control and assume the evening will simply be fine
- Assume a weather forecast several days out is reliable enough to skip contingency planning
Common mistakes:
- Treating the projector as the only piece of equipment that matters, while sound and screen quality get overlooked
- Under-planning for comfort across an actual two-hour runtime, not just the first act of a movie
- Skipping bug control until it’s already become a problem partway through the evening
- Ending the event the instant the credits roll instead of building in a natural wind-down transition
- Never testing the full audio-visual setup in advance, discovering problems only once guests have already arrived
Remember: screen and sound quality solve the basic “can we actually watch this” problem, but comfort and atmosphere are what make people want to come back for the next one, bug control and weather backup planning are not optional extras, they’re essential to actually finishing the event, layering blankets, lighting, and seating with real intention matters as much as the technology itself, and the best backyard movie night is the one where nobody’s first thought afterward is about anything that went wrong.